


前言:本文操作是在 CentOS-7 下执行的,不确定在其他 Linux 发布版是否能同样正常执行。
1、检查前置依赖组件
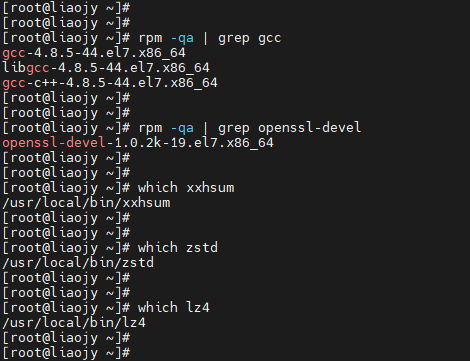
在安装 rsync 之前,需要确认已安装了相关依赖组件: gcc 、openssl-devel 、xxhash 、zstd 、lz4 。
rpm -qa | grep gcc
rpm -qa | grep openssl-devel
which xxhsum
which zstd
which lz4
相关前置依赖组件的具体离线安装方法请参考:
2、查询rsync当前版本号
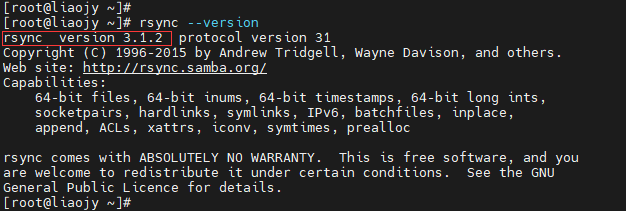
rsync --version
3、下载新版本安装包
官网下载地址:https://rsync.samba.org/
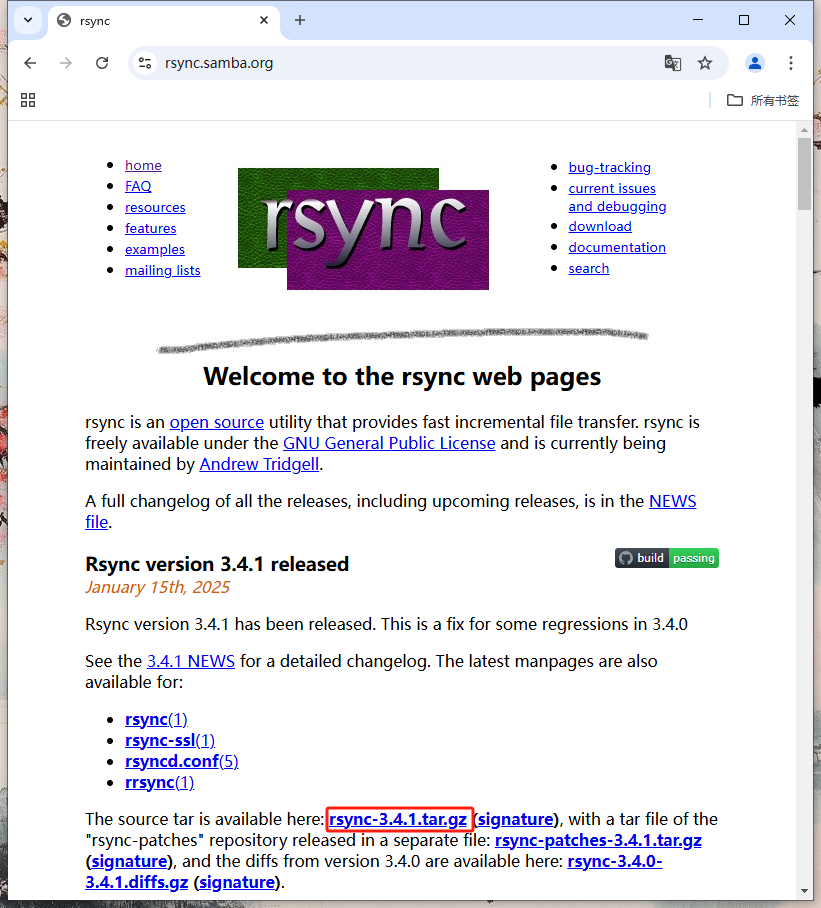
本示例安装包的直接下载地址为:https://download.samba.org/pub/rsync/src/rsync-3.4.1.tar.gz
4、上传安装包到服务器
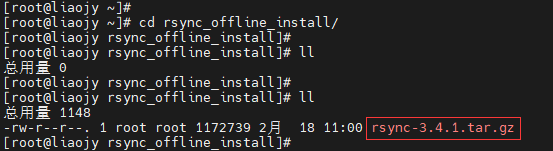
5、解压rsync安装包

tar -zxvf 新版本安装包名称
6、配置rsync
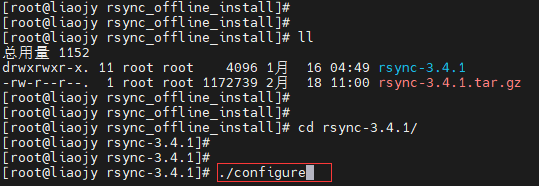
cd 新版本安装包解压目录
./configure
注意:如果没有先安装第一节提到的相关前置依赖组件,那么在配置 rsync 时可能会失败:
Configure found the following issues:
- Failed to find openssl/md4.h and openssl/md5.h for openssl crypto lib support.
- Failed to find xxhash.h for xxhash checksum support.
- Failed to find zstd.h for zstd compression support.
- Failed to find lz4.h for lz4 compression support.
See the INSTALL file for hints on how to install the missing libraries and/or
how to generate (or fetch) manpages:
https://github.com/RsyncProject/rsync/blob/master/INSTALL.md
To disable one or more features, the relevant configure options are:
--disable-openssl
--disable-xxhash
--disable-zstd
--disable-lz4
configure.sh: error: Aborting configure run

7、修改rsync类型字节数

vi config.status
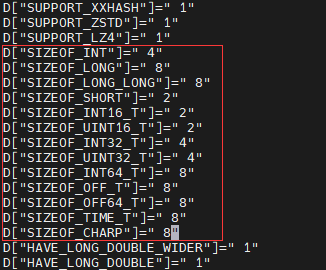
经过配置后,在 config.status 文件中,上述 rsync 类型字节数的值可能为 0 ,需要修改为合适的值(见上图)。
D["SIZEOF_INT"]=" 4"
D["SIZEOF_LONG"]=" 8"
D["SIZEOF_LONG_LONG"]=" 8"
D["SIZEOF_SHORT"]=" 2"
D["SIZEOF_INT16_T"]=" 2"
D["SIZEOF_UINT16_T"]=" 2"
D["SIZEOF_INT32_T"]=" 4"
D["SIZEOF_UINT32_T"]=" 4"
D["SIZEOF_INT64_T"]=" 8"
D["SIZEOF_OFF_T"]=" 8"
D["SIZEOF_OFF64_T"]=" 8"
D["SIZEOF_TIME_T"]=" 8"
D["SIZEOF_CHARP"]=" 8"
8、编译rsync

make
注意:如果没有执行第七节的修改 rsync 类型字节数操作,那么在编译 rsync 时可能会失败:
gawk -f ./daemon-parm.awk ./daemon-parm.txt
gawk -f ./mkproto.awk ./*.c ./lib/compat.c daemon-parm.h
In file included from ./rounding.c:20:0:
./rsync.h:614:3: 错误:#error Could not find a 32-bit integer variable
# error Could not find a 32-bit integer variable
^
./rsync.h:683:2: 错误:未知的类型名‘int32’
int32 size, entries;
^
./rsync.h:684:9: 错误:expected ‘:’, ‘,’, ‘;’, ‘}’ or ‘attribute’ before ‘node_size’
uint32 node_size;
^
./rsync.h:690:2: 错误:未知的类型名‘int32’
int32 key;
^
./rsync.h:774:3: 错误:#error Character pointers are not 4 or 8 bytes.
# error Character pointers are not 4 or 8 bytes.
^
./rsync.h:787:2: 错误:未知的类型名‘int32’
int32 num;
.........................
.........................
^
./proto.h:316:28: 错误:未知的类型名‘int32’
void see_token(char *data, int32 toklen);
^
./proto.h:369:8: 错误:expected ‘=’, ‘,’, ‘;’, ‘asm’ or ‘attribute’ before ‘fuzzy_distance’
uint32 fuzzy_distance(const char *s1, unsigned len1, const char *s2, unsigned len2, uint32 upperlimit);
^
./rounding.c: 在函数‘main’中:
./rounding.c:35:13: 警告:变量‘test_array’被设定但未被使用 [-Wunused-but-set-variable]
static int test_array[1 - 2 * (ACTUAL_SIZE != EXPECTED_SIZE)];
^
Failed to create rounding.h!
make: *** [rounding.h] 错误 1

9、安装rsync
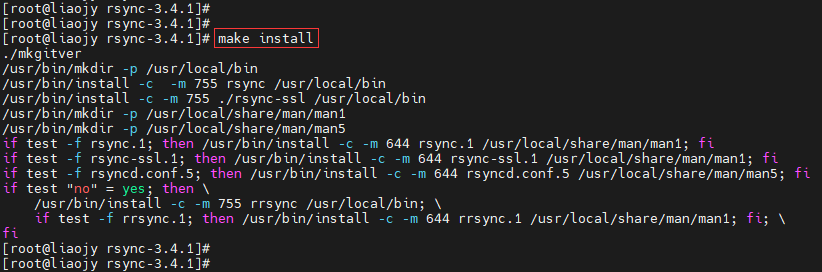
make install
10、查询rsync升级后的版本号
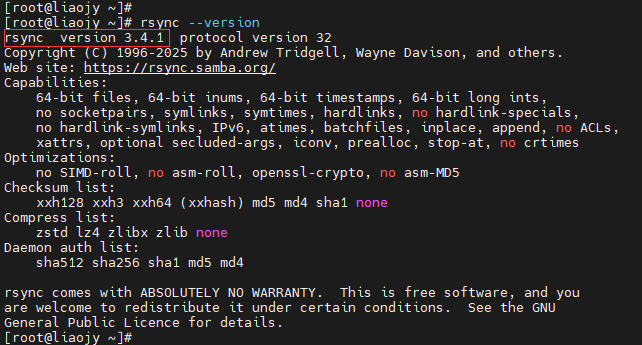
rsync --version
提示:完成升级后,新版本号需要退出重新登录访问才能查询到,否则查到的是旧版本号。
本文参考
【1】【Rsync缓冲区溢出与信息泄露漏洞(CVE-2024-12084/CVE-2024-12085)通告】【绿盟科技】【2025-01-16】
【2】【Rsync 缓冲区溢出漏洞(CVE-2024-12084)】【启明星辰】【2025-01-17】
【3】【liuxiao】【64位centos上rsync源码编译时报错未知类型int32】【CSDN】【2022-01-22】
【4】【qqliuxiaoran】【build fail on ky10 arm】【github】【2023-02-10】
【5】【CentOS 升级RSync:轻松实现版本升级,解锁数据同步新效能!】【云原生实践】【2025-01-21】
原创作者: Javaer1995 转载于: https://www.cnblogs.com/Javaer1995/p/18703059


 3486
3486

 被折叠的 条评论
为什么被折叠?
被折叠的 条评论
为什么被折叠?
 到【灌水乐园】发言


