


首先就是下载需要导入的模板文件,一共3个文件。下载地址:
3个download的就是了。
第一步,导入模板
import templates
<?xml:namespace prefix = o ns = "urn:schemas-microsoft-com:office:office" />
Import Template from Local File-浏览
先导入
cacti_graph_template_interface_status.xml
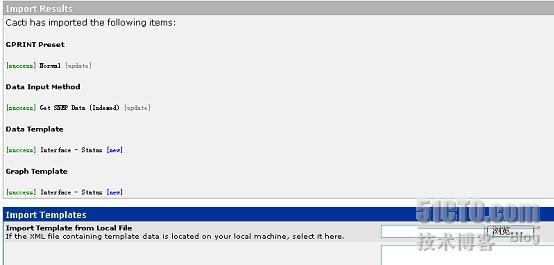
再导入
cacti_data_template_interface_status.xml
显示: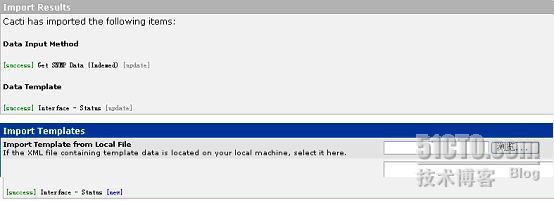
第三个导入
cacti_data_query_snmp_interface_statistics.xml
显示: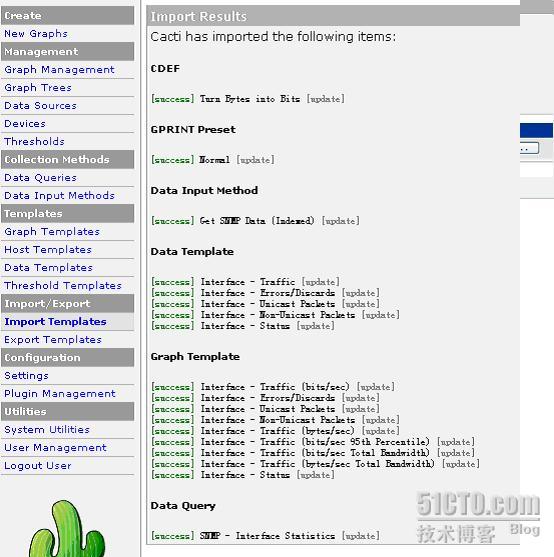
然后
save
第二步, Threshold Templates 的建立
点击 Add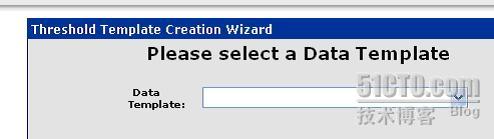
选择数据模板 和数据源模板
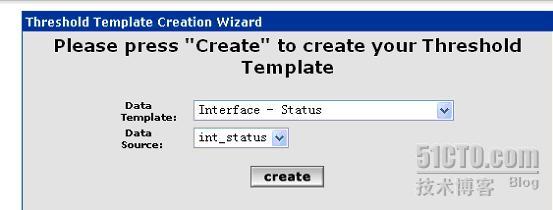
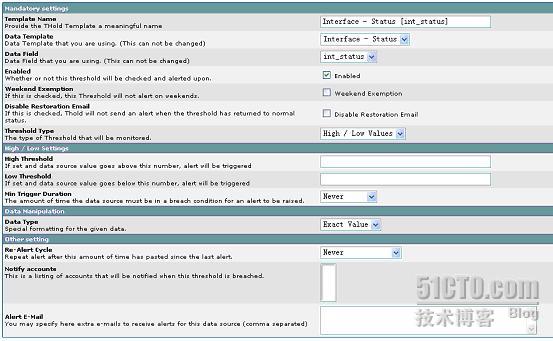
产生一个模板,
其中有一些值可以指定,其实这里的设置不起作用,在后面的
thold
设置的时候才是真正起作用的地方。所以直接
save
就可以了。
第三步,
devices-> create graph
选中需要监控的端口,最下面注意选择:

下来是选择颜色,无所谓。
Create
后,将产生一个端口状态的
graph
了。
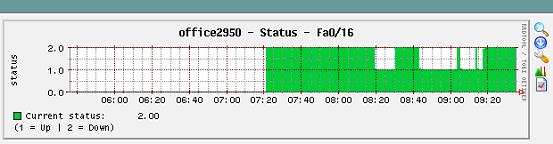
第四步,建立 thresholds
选择host、graph、data source后, 产生

high threshold
指定为
1
,而当端口
down
后,
value
置为
2
,所以能实现端口
down
后发出报警
email
。
配置信息的解释:
re-alert cycle
指定循环报警的时间间隔,最小是
1
分钟。
Extra alert email
指定发送到的警报邮箱。

到这里就完成了!
测试发现反应还是很及时的,基本上不到2分钟就能收到警报了!
转载于:https://blog.51cto.com/lionnle/137142


 1万+
1万+


 被折叠的 条评论
为什么被折叠?
被折叠的 条评论
为什么被折叠?
 到【灌水乐园】发言


