


二
.
基本安装和配置
<?xml:namespace prefix = o ns = "urn:schemas-microsoft-com:office:office" />
最后达到如下的功能
监控机自身的信息,包括主机信息以及对外提供的服务
被监控机对外提供的服务
如下所有的操作都在监控机192.168.0.111上进行
1.安装nagios主程序
解压缩
tar -zxvf nagios-2.9.tar.gz
cd nagios-2.9
编译,指定安装目录为/usr/local/nagios
./configure --prefix=/usr/local/nagios
输出如下信息
|
*** Configuration summary for nagios 2.9 04-10-2007 ***:
General Options:
-------------------------
Nagios executable: nagios
Nagios user/group: nagios,nagios
Command user/group: nagios,nagios
Embedded Perl: no
Event Broker: yes
Install ${prefix}: /usr/local/nagios
Lock file: ${prefix}/var/nagios.lock
Init directory: /etc/rc.d/init.d
Host OS: linux-gnu
Web Interface Options:
------------------------
HTML URL: [url]http://localhost/nagios/[/url]
Traceroute (used by WAP): /usr/sbin/traceroute
Review the options above for accuracy. If they look okay,
type 'make all' to compile the main program and CGIs.
|
make all
输出如下信息
|
*** Compile finished ***
If the main program and CGIs compiled without any errors, you
can continue with installing Nagios as follows (type 'make'
without any arguments for a list of all possible options):
make install
-
This installs the main program, CGIs, and HTML files
使用make install
来安装主程序,CGI
和HTML
文件
make install-init
-
This installs the init script in /etc/rc.d/init.d
使用make install-init
在/etc/rc.d/init.d
安装启动脚本
make install-commandmode
- This installs and configures permissions on the
directory for holding the external command file
使用make install-commandmode
来配置目录权限
make install-config
- This installs *SAMPLE* config files in /usr/local/nagios/etc
You'll have to modify these sample files before you can
use Nagios. Read the HTML documentation for more info
on doing this. Pay particular attention to the docs on
object configuration files, as they determine what/how
things get monitored!
使用make install-commandmode
来安装示例配置文件,
安装的路径是/usr/local/nagios/etc.
*** Support Notes *******************************************
If you have questions about configuring or running Nagios,
please make sure that you:
- Look at the sample config files
- Read the HTML documentation
- Read the FAQs online at [url]http://www.nagios.org/faqs[/url]
before you post a question to one of the mailing lists.
Also make sure to include pertinent information that could
help others help you. This might include:
- What version of Nagios you are using
- What version of the plugins you are using
- Relevant snippets from your config files
- Relevant error messages from the Nagios log file
For more information on obtaining support for Nagios, visit:
*************************************************************
Enjoy.
|
很多人都不注意安装过程中的输出信息,直到make install出错了才到处找人求救,而实际上输出的内容包含很多有价值的信息,例如安装路径,版本,每一步做什么,接下来的步骤等.尤其是输出的最后一屏信息,我个人建议好好的读一下.例如上面就列出了很多有价值的信息,我们只需要按照他说的做就行了.
安装
make install
输出如下错误
|
cd ./base && make install
make[1]: Entering directory `/home/yahoon/nagios/nagios-2.9/base'
make install-basic
make[2]: Entering directory `/home/yahoon/nagios/nagios-2.9/base'
/usr/bin/install -c -m 775 -o nagios -g nagios -d /usr/local/nagios/bin
/usr/bin/install
:
invalid user `nagios'
非法用户nagios
make[2]: *** [install-basic] Error 1
make[2]: Leaving directory `/home/yahoon/nagios/nagios-2.9/base'
make[1]: *** [install] Error 2
make[1]: Leaving directory `/home/yahoon/nagios/nagios-2.9/base'
make: *** [install] Error 2
|
按照文档说明增加用户,修改权限
[root@localhost nagios-2.9]# useradd nagios
[root@localhost nagios-2.9]# mkdir /usr/local/nagios
[root@localhost nagios-2.9]# chown nagios.nagios /usr/local/nagios
查看目录权限
[root@localhost nagios-2.9]# ll /usr/local
drwxr-sr-x 2 nagios nagios 4096 Jul 10 11:14 nagios
看到nagios目录的权限已经被正确修改了
重新执行make install输出信息如下
|
*** Main program, CGIs and HTML files installed ***
You can continue with installing Nagios as follows (type 'make'
without any arguments for a list of all possible options):
make install-init
- This installs the init script in /etc/rc.d/init.d
make install-commandmode
- This installs and configures permissions on the
directory for holding the external command file
make install-config
- This installs *SAMPLE* config files in /usr/local/nagios/etc
You'll have to modify these sample files before you can
use Nagios. Read the HTML documentation for more info
on doing this. Pay particular attention to the docs on
object configuration files, as they determine what/how
things get monitored!
make[1]: Leaving directory `/home/yahoon/nagios/nagios-2.9'
|
执行如下命令来安装脚本
make install-init
执行
make install-commandmode
输出信息如下
|
/usr/bin/install -c -m 775 -o nagios -g nagios -d /usr/local/nagios/var/rw
chmod g+s /usr/local/nagios/var/rw
*** External command directory configured ***
You can continue with installing Nagios as follows (type 'make'
without any arguments for a list of all possible options):
make install-config
- This installs *SAMPLE* config files in /usr/local/nagios/etc
You'll have to modify these sample files before you can
use Nagios. Read the HTML documentation for more info
on doing this. Pay particular attention to the docs on
object configuration files, as they determine what/how
things get monitored!
|
执行
make install-config
输出信息如下
|
/usr/bin/install -c -m 775 -o nagios -g nagios -d /usr/local/nagios/etc
/usr/bin/install -c -m 664 -o nagios -g nagios sample-config/nagios.cfg /usr/local/nagios/etc/nagios.cfg-sample
/usr/bin/install -c -m 664 -o nagios -g nagios sample-config/cgi.cfg /usr/local/nagios/etc/cgi.cfg-sample
/usr/bin/install -c -m 660 -o nagios -g nagios sample-config/resource.cfg /usr/local/nagios/etc/resource.cfg-sample
/usr/bin/install -c -m 664 -o nagios -g nagios sample-config/template-object/localhost.cfg /usr/local/nagios/etc/localhost.cfg-sample
/usr/bin/install -c -m 664 -o nagios -g nagios sample-config/template-object/commands.cfg /usr/local/nagios/etc/commands.cfg-sample
*** Sample config file installed ***
Remember, these are *SAMPLE* config files. You'll need to read
the documentation for more information on how to actually define
services, hosts, etc. to fit your particular needs.
If you have questions about configuring Nagios properly, please:
- Look at the sample config files
- Read the HTML documentation
- Read the FAQs online at [url]http://www.nagios.org/faqs[/url]
*BEFORE* you post a question to one of the mailing lists.
|
验证程序是否被正确安装。切换目录到安装路径(这里是/usr/local/nagios),看是否存在 etc、bin、 sbin、 share、 var这五个目录,如果存在则可以表明程序被正确的安装到系统了。后表是五个目录功能的简要说明:
|
bin
|
Nagios
执行程序所在目录,
nagios
文件即为主程序
|
|
etc
|
Nagios
配置文件位置,初始安装完后,只有几个
*.cfg-sample
文件
|
|
sbin
|
Nagios Cgi
文件所在目录,也就是执行外部命令所需文件所在的目录
|
|
Share
|
Nagios
网页文件所在的目录
|
|
Var
|
Nagios
日志文件、
spid
等文件所在的目录
|
|
var/archives
|
Empty directory for the archived logs
|
|
var/rw
|
Empty directory for the external command file
|
2.安装插件
解压缩
tar -zxvf nagios-plugins-1.4.9.tar.gz
cd nagios-plugins-1.4.9
编译,指定路径为之前nagios的安装路径
./configure --prefix=/usr/local/nagios/
make
安装
make install
ls /usr/local/nagios/libexec/
会显示安装的插件文件,即所有的插件都安装在libexec这个目录下
将apache的运行用户加到nagios组里面
从httpd.conf中过滤出当前的apache运行用户
grep ^User /usr/local/apache2/conf/httpd.conf
我的是vpopmail,下面将这个用户加入nagios组
usermod -G nagios vpopmail
3.修改apache配置
修改apache的配置文件,增加nagios的目录,并且访问此目录需要进行身份验证
vi /usr/local/apache2/conf/httpd.conf,在最后增加如下内容
|
#setting for nagios 20070707
ScriptAlias /nagios/cgi-bin /usr/local/nagios/sbin
<Directory "/usr/local/nagios/sbin">
Options ExecCGI
AllowOverride None
Order allow,deny
Allow from all
AuthName "Nagios Access"
AuthType Basic
AuthUserFile /usr/local/nagios/etc/htpasswd
//
用于此目录访问身份验证的文件
Require valid-user
</Directory>
Alias /nagios /usr/local/nagios/share
<Directory "/usr/local/nagios/share">
Options None
AllowOverride None
Order allow,deny
Allow from all
AuthName "Nagios Access"
AuthType Basic
AuthUserFile /usr/local/nagios/etc/htpasswd
//
用于此目录访问身份验证的文件
Require valid-user
</Directory>
|
增加验证用户
也就是通过web访问nagios的时候,必须要用这个用户登陆.在这里我们增加用户test:密码为12345
[root@localhost conf]# /usr/local/apache2/bin/htpasswd -c /usr/local/nagios/etc/htpasswd test
New password: (输入12345)
Re-type new password: (再输入一次密码)
Adding password for user test
查看认证文件的内容
[root@localhost conf]# less /usr/local/nagios/etc/htpasswd
test:OmWGEsBnoGpIc 前半部分是用户名test,后面是加密后的密码
到这里nagios的安装也就基本完成了,你可以通过web来访问了.
[url]http://192.168.0.111/nagios[/url]
会弹出对话框要求输入用户名密码
<?xml:namespace prefix = v ns = "urn:schemas-microsoft-com:vml" />
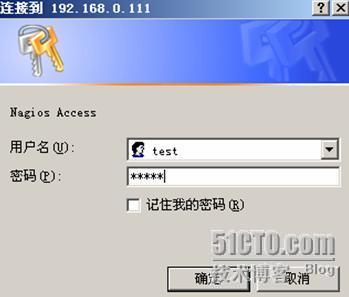 输入test,密码12345,就可以进入nagios的主页面了
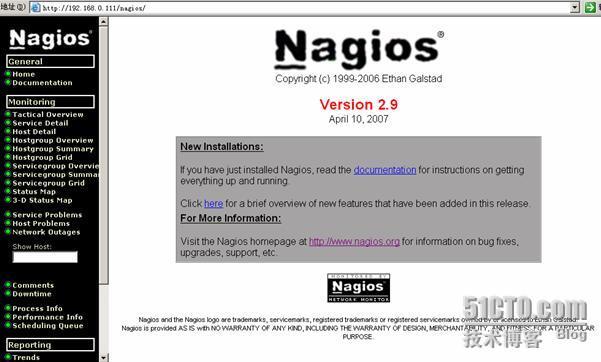 但是可以发现什么也点不开,因为nagios还没启动呢!下面的工作就是修改配置文件,增加要监控的主机和服务.
敬请期待
nagios
全攻略
(
二
)----
基本安装和配置
(下
)
转载于:https://blog.51cto.com/sookk8/94063


 248
248


 被折叠的 条评论
为什么被折叠?
被折叠的 条评论
为什么被折叠?
 到【灌水乐园】发言


