


整合基础说明
spring 是一个开放源代码的设计层面框架,他解决的是业务逻辑层和其他各层的松耦合问题,因此它将面向接口的编程思想贯穿整个系统应用。Spring是于2003 年兴起的一个轻量级的Java 开发框架,由Rod Johnson创建。简单来说,Spring是一个分层的JavaSE/EEfull-stack(一站式) 轻量级开源框架。
Spring MVC属于SpringFrameWork的后续产品,已经融合在Spring Web Flow里面。Spring 框架提供了构建 Web 应用程序的全功能 MVC 模块。使用 Spring 可插入的 MVC 架构,从而在使用Spring进行WEB开发时,可以选择使用Spring的SpringMVC框架或集成其他MVC开发框架。
MyBatis 是一款优秀的持久层框架,它支持定制化 SQL、存储过程以及高级映射。MyBatis 避免了几乎所有的 JDBC 代码和手动设置参数以及获取结果集。MyBatis 可以使用简单的 XML 或注解来配置和映射原生信息,将接口和 Java 的 POJOs(Plain Old Java Objects,普通的 Java对象)映射成数据库中的记录。
好了不废话了,直接开始入门程序吧,jar包下载,mysql数据库语句下载
首先看看创建目录

然后开始进行编码整合了。
1.在po包中创建一个Items.java
package cn.my.ssm.po;

import java.util.Date;

public class Items {
    private Integer id;

    private String name;

    private Float price;

    private String pic;

    private Date createtime;

    private String detail;

    public Integer getId() {
        return id;
    }

    public void setId(Integer id) {
        this.id = id;
    }

    public String getName() {
        return name;
    }

    public void setName(String name) {
        this.name = name == null ? null : name.trim();
    }

    public Float getPrice() {
        return price;
    }

    public void setPrice(Float price) {
        this.price = price;
    }

    public String getPic() {
        return pic;
    }

    public void setPic(String pic) {
        this.pic = pic == null ? null : pic.trim();
    }

    public Date getCreatetime() {
        return createtime;
    }

    public void setCreatetime(Date createtime) {
        this.createtime = createtime;
    }

    public String getDetail() {
        return detail;
    }

    public void setDetail(String detail) {
        this.detail = detail == null ? null : detail.trim();
    }

    @Override
    public String toString() {
        return "Items [id=" + id + ", name=" + name + ", price=" + price + ", pic=" + pic + ", createtime=" + createtime
                + ", detail=" + detail + "]";
    }
}
2.在mapper包中创建一个ItemMapper.java
package cn.my.ssm.mapper;

import cn.my.ssm.po.Items;

public interface ItemsMapper {

List<Items> selectFind(Items items);
}
3.在sqlmap包中创建一个Items.xml映射文件,mybatis的映射配置我就不多说了,不太清楚的可以看看前面章节mybatis入门程序
<?xml version="1.0" encoding="UTF-8"?>
<!DOCTYPE mapper
PUBLIC "-//mybatis.org//DTD Mapper 3.0//EN"
"http://mybatis.org/dtd/mybatis-3-mapper.dtd">


<!-- 为了分辨多个mybatis的映射文件同名问题所以使用接口包名作为空间 -->
<mapper namespace="cn.my.ssm.mapper.ItemsMapper">

    <sql id="items_where">
        <if test="items != null">
            <if test="items.name != null and items.name != ''">
                and name like '%${items.name}%'
            </if>
        </if>
    </sql>

    <select id="selectFind" parameterType="cn.my.ssm.po.ItemsQueryVo" resultType="cn.my.ssm.po.Items">
        SELECT * FROM items
        <where>
            <include refid="items_where"></include>
        </where>
    </select>
</mapper>
4.在mybatis包中创建一个SqlMapConfig.xml文件
<?xml version="1.0" encoding="UTF-8" ?>
<!DOCTYPE configuration
PUBLIC "-//mybatis.org//DTD Config 3.0//EN"
"http://mybatis.org/dtd/mybatis-3-config.dtd">

<configuration>
    <mappers>
        <mapper resource="sqlmap/Items.xml"/>
    </mappers>
</configuration>
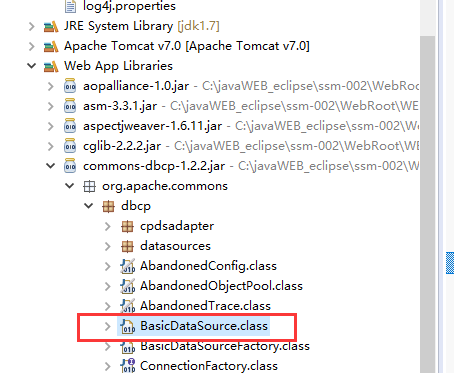
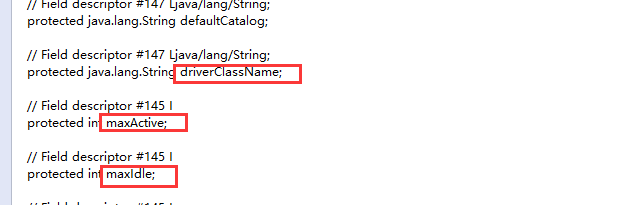
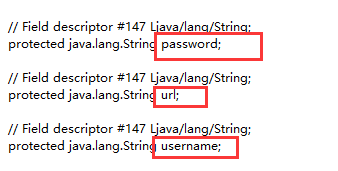
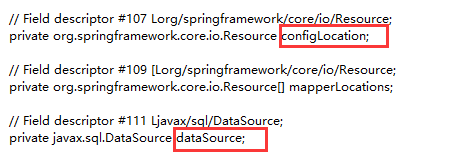
5.配置数据源我记不住单词,都是直接找jar,然后双击点开找到该类中的属性
5.1.配置数据源
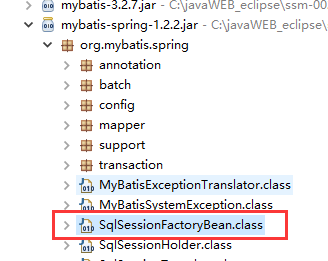
5.2配置sqlsessionfactory工厂,同样的操作
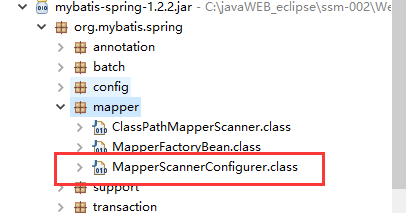
5.3.配置映射mapper接口

5.4spring配置
<?xml version="1.0" encoding="UTF-8"?>
<beans xmlns="http://www.springframework.org/schema/beans"
    xmlns:xsi="http://www.w3.org/2001/XMLSchema-instance" xmlns:mvc="http://www.springframework.org/schema/mvc"
    xmlns:context="http://www.springframework.org/schema/context"
    xmlns:aop="http://www.springframework.org/schema/aop" xmlns:tx="http://www.springframework.org/schema/tx"
    xsi:schemaLocation="http://www.springframework.org/schema/beans
        http://www.springframework.org/schema/beans/spring-beans-3.2.xsd
        http://www.springframework.org/schema/mvc
        http://www.springframework.org/schema/mvc/spring-mvc-3.2.xsd
        http://www.springframework.org/schema/context
        http://www.springframework.org/schema/context/spring-context-3.2.xsd
        http://www.springframework.org/schema/aop
        http://www.springframework.org/schema/aop/spring-aop-3.2.xsd
        http://www.springframework.org/schema/tx
        http://www.springframework.org/schema/tx/spring-tx-3.2.xsd ">
        <!-- 读取数据源连接配置文件 -->
        <context:property-placeholder location="classpath:db.properties"/>

        <!-- 1.配置dataSource数据源,我用的是commons-dbcp-1.2.2.jar连接 -->
        <bean id="dataSource" class="org.apache.commons.dbcp.BasicDataSource">
            <property name="driverClassName" value="${jdbc.driver}"></property>
            <property name="url" value="${jdbc.url}"></property>
            <property name="username" value="${jdbc.username}"></property>
            <property name="password" value="${jdbc.password}"></property>
            <property name="maxActive" value="30"></property>
            <property name="maxIdle" value="5"></property>
        </bean>

        <!-- 2.配置工厂SqlSessionFactory -->
        <bean id="sqlSessionFactory" class="org.mybatis.spring.SqlSessionFactoryBean">
            <property name="configLocation" value="classpath:mybatis/SqlMapConfig.xml"></property>
            <property name="dataSource" ref="dataSource"></property>
        </bean>

        <!-- 3.配置映射mapper接口 -->
        <bean class="org.mybatis.spring.mapper.MapperScannerConfigurer">
        <!-- 这里我们使用组件扫描 -->
        <property name="basePackage" value="cn.my.ssm.mapper"></property>
        <!-- 注意这里一定要使用sqlSessionFactoryBeanName不能使用sqlSessionFactory属性,
        要不然读取不到数据源的db.properties文件 -->
            <property name="sqlSessionFactoryBeanName" value="sqlSessionFactory"></property>
        </bean>
</beans>
首先看看spring和mybatis是否整合成功
package cn.my.ssm.test;

import java.util.List;

import org.junit.Before;
import org.junit.Test;
import org.springframework.context.ApplicationContext;
import org.springframework.context.support.ClassPathXmlApplicationContext;

import cn.my.ssm.mapper.ItemsMapper;
import cn.my.ssm.po.Items;

public class TestItem {

    ApplicationContext context;
    @Before
    public void setUp(){
        context = new ClassPathXmlApplicationContext("classpath:spring/applicationContext-dao.xml");

    }
    @Test
    public void testFindById() throws Exception{
        ItemsMapper userMapper = (ItemsMapper) context.getBean("itemsMapper");
        List<Items> list = userMapper.selectFind(null);
        System.out.println(list);
    }
}
运行结果
[Items [id=1, name=台式机, price=3000.0, pic=null, createtime=Tue Oct 03 23:22:36 CST 2017, detail=该电脑质量非常好!!!!111], Items [id=2, name=笔记本, price=7000.0, pic=null, createtime=Tue Oct 03 23:23:06 CST 2017, detail=笔记本性能好,质量好!!!!!], Items [id=3, name=背包, price=1200.0, pic=null, createtime=Tue Oct 03 23:23:21 CST 2017, detail=名牌背包,容量大质量好!!!!]]
以上就动态代理整合, 如果大家有疑问的可以加群号581591235或者留言。或者加微信群


 1171
1171


 被折叠的 条评论
为什么被折叠?
被折叠的 条评论
为什么被折叠?
 到【灌水乐园】发言


