


springBoot整合mybatis、jsp
Spring Boot的主要优点:
1: 为所有Spring开发者更快的入门;
2: 开箱即用,提供各种默认配置来简化项目配置;
3: 内嵌式容器简化Web项目;
4: 没有冗余代码生成和XML配置的要求
本项目使用到的工具:
- 开发工具:Intellij IDEA 2018.1.4
- springboot:2.0.1.RELEASE
- jdk:1.8.0_40
- maven:3.3.9
开始搭建:
项目创建
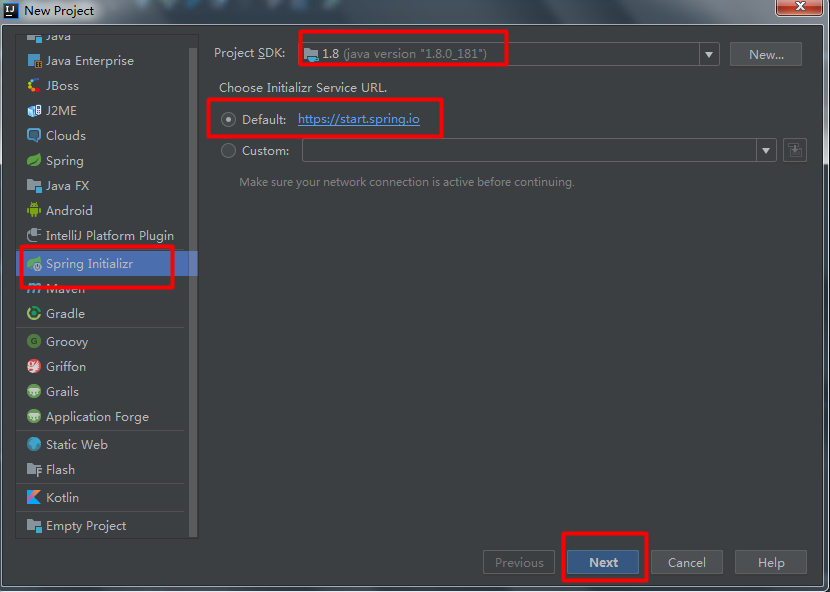
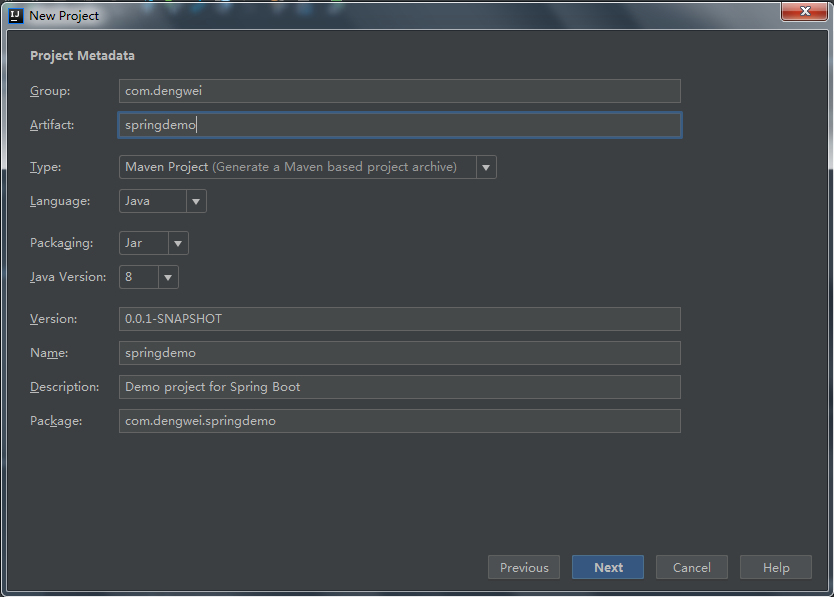
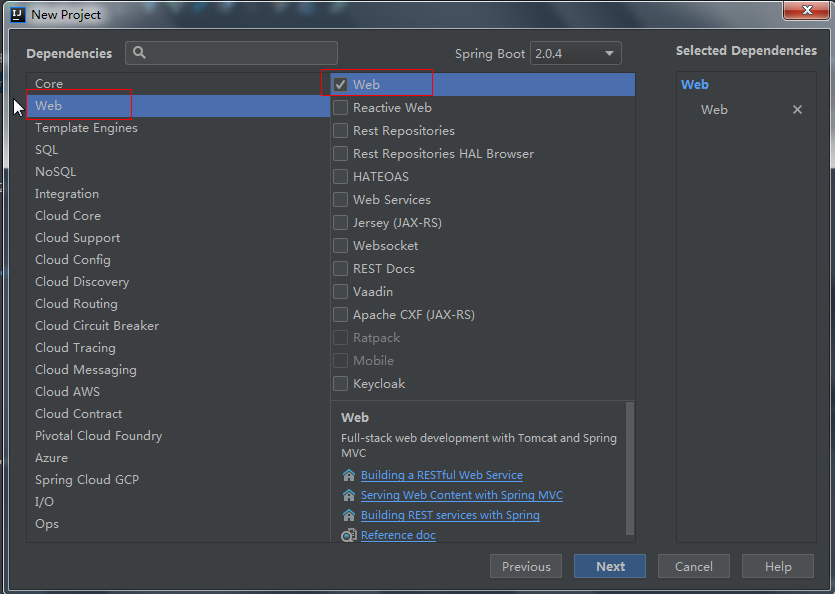
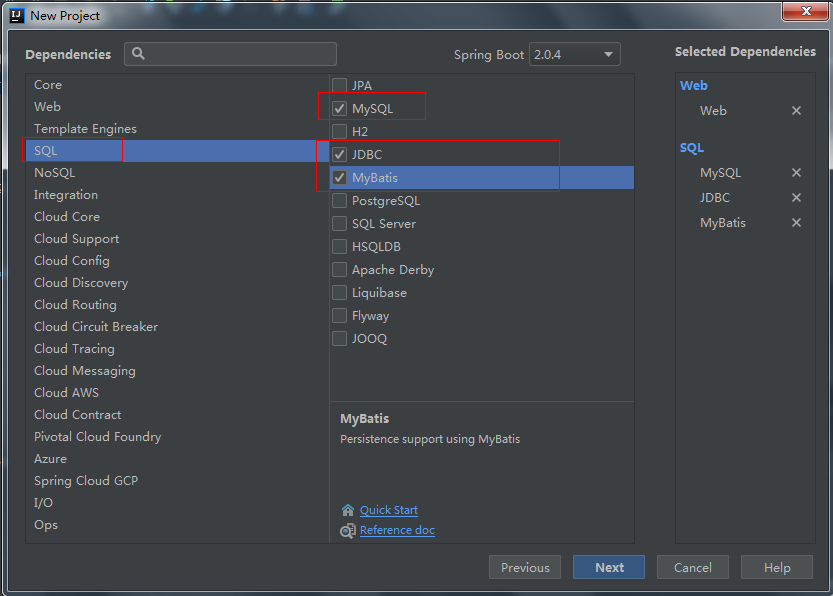
finish即可。
建好后的 项目结构:

pom.xml:
 1 <?xml version="1.0" encoding="UTF-8"?>
 2 <project xmlns="http://maven.apache.org/POM/4.0.0" xmlns:xsi="http://www.w3.org/2001/XMLSchema-instance"
 3          xsi:schemaLocation="http://maven.apache.org/POM/4.0.0 http://maven.apache.org/xsd/maven-4.0.0.xsd">
 4     <modelVersion>4.0.0</modelVersion>
 5
 6     <groupId>com.dengwei</groupId>
 7     <artifactId>springdemo</artifactId>
 8     <version>0.0.1-SNAPSHOT</version>
 9     <packaging>jar</packaging>
10
11     <name>springdemo</name>
12     <description>Demo project for Spring Boot</description>
13
14     <parent>
15         <groupId>org.springframework.boot</groupId>
16         <artifactId>spring-boot-starter-parent</artifactId>
17         <version>2.0.1.RELEASE</version>
18         <relativePath/> <!-- lookup parent from repository -->
19     </parent>
20
21     <properties>
22         <project.build.sourceEncoding>UTF-8</project.build.sourceEncoding>
23         <project.reporting.outputEncoding>UTF-8</project.reporting.outputEncoding>
24         <java.version>1.8</java.version>
25     </properties>
26
27     <dependencies>
28         <dependency>
29             <groupId>org.springframework.boot</groupId>
30             <artifactId>spring-boot-starter-jdbc</artifactId>
31         </dependency>
32         <dependency>
33             <groupId>org.springframework.boot</groupId>
34             <artifactId>spring-boot-starter-web</artifactId>
35         </dependency>
36         <dependency>
37             <groupId>org.mybatis.spring.boot</groupId>
38             <artifactId>mybatis-spring-boot-starter</artifactId>
39             <version>1.3.2</version>
40         </dependency>
41
42         <dependency>
43             <groupId>mysql</groupId>
44             <artifactId>mysql-connector-java</artifactId>
45             <scope>runtime</scope>
46         </dependency>
47         <dependency>
48             <groupId>org.springframework.boot</groupId>
49             <artifactId>spring-boot-starter-test</artifactId>
50             <scope>test</scope>
51         </dependency>
52
53         <!--springBoot整合jsp-->
54         <dependency>
55             <groupId>org.springframework.boot</groupId>
56             <artifactId>spring-boot-starter-tomcat</artifactId>
57         </dependency>
58         <dependency>
59             <groupId>org.apache.tomcat.embed</groupId>
60             <artifactId>tomcat-embed-jasper</artifactId>
61         </dependency>
62     </dependencies>
63
64     <build>
65         <plugins>
66             <plugin>
67                 <groupId>org.springframework.boot</groupId>
68                 <artifactId>spring-boot-maven-plugin</artifactId>
69             </plugin>
70         </plugins>
71     </build>
72
73
74 </project>
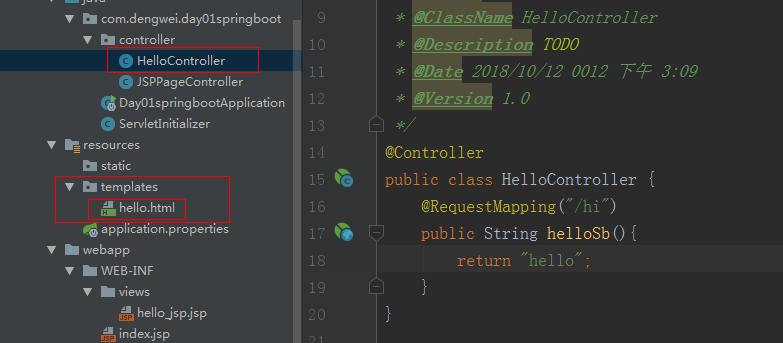
我们先建一个controller层,写一个简单的类访问一下:
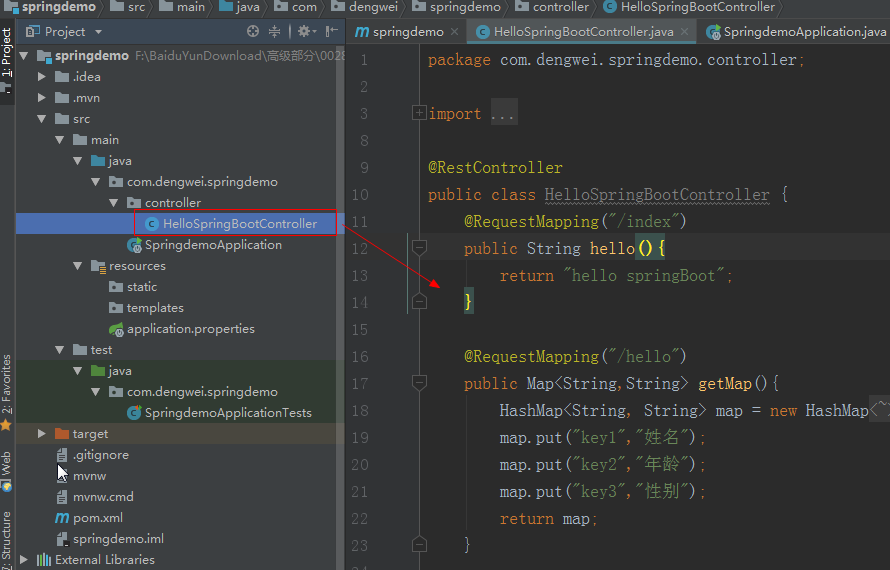
HelloSpringBootController:
 1 package com.dengwei.springdemo.controller;
 2
 3 import org.springframework.web.bind.annotation.RequestMapping;
 4 import org.springframework.web.bind.annotation.RestController;
 5
 6 import java.util.HashMap;
 7 import java.util.Map;
 8
 9 @RestController
10 public class HelloSpringBootController {
11     @RequestMapping("/index")
12     public String hello(){
13         return "hello springBoot";
14     }
15
16     @RequestMapping("/hello")
17     public Map<String,String> getMap(){
18         HashMap<String, String> map = new HashMap<String,String>();
19         map.put("key1","姓名");
20         map.put("key2","年龄");
21         map.put("key3","性别");
22         return map;
23     }
24
25 }
下面我们启动一下:
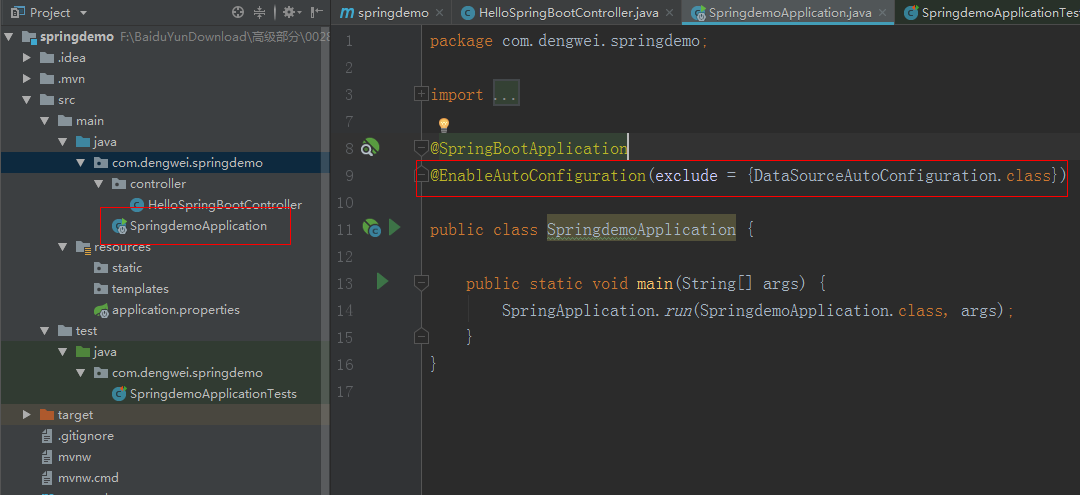
每一个springBoot项目中都有一个XXXAplication类,这个类就是springBoot的启动类。
注意:因为我们前面添加了数据库相关的依赖,但是我们还没有具体配置,如果直接运行的话会报错:
***************************
APPLICATION FAILED TO START
***************************
Description:
Failed to auto-configure a DataSource: 'spring.datasource.url' is not specified and no embedded datasource could be auto-configured.
Reason: Failed to determine a suitable driver class
Action:
Consider the following:
If you want an embedded database (H2, HSQL or Derby), please put it on the classpath.
If you have database settings to be loaded from a particular profile you may need to activate it (no profiles are currently active).
解决:
在@EnableAutoConfiguretion中添加 exclude= {DataSourceAutoConfiguration.class},排除此类的autoconfig。启动以后就可以正常运行。
好的,启动没问题,我们下面正式进入mybatis与jsp的整合:
建model层:
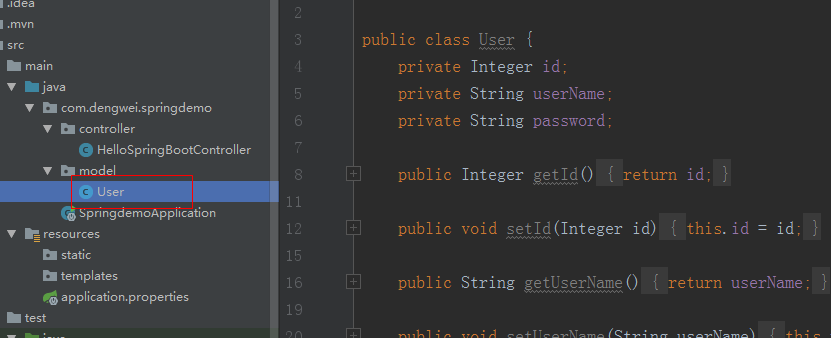


 1 package com.dengwei.springdemo.model;
 2
 3 public class User {
 4     private Integer id;
 5     private String userName;
 6     private String password;
 7
 8     public Integer getId() {
 9         return id;
10     }
11
12     public void setId(Integer id) {
13         this.id = id;
14     }
15
16     public String getUserName() {
17         return userName;
18     }
19
20     public void setUserName(String userName) {
21         this.userName = userName;
22     }
23
24     public String getPassword() {
25         return password;
26     }
27
28     public void setPassword(String password) {
29         this.password = password;
30     }
31
32     @Override
33     public String toString() {
34         return "User{" +
35                 "id=" + id +
36                 ", userName='" + userName + '\'' +
37                 ", password='" + password + '\'' +
38                 '}';
39     }
40 }
2:建mapper层:
注意:我们这里的sql语句是通过注解的形式和接口写在一起的,也可以通过xml的形式配置,可以见另外一篇博客:
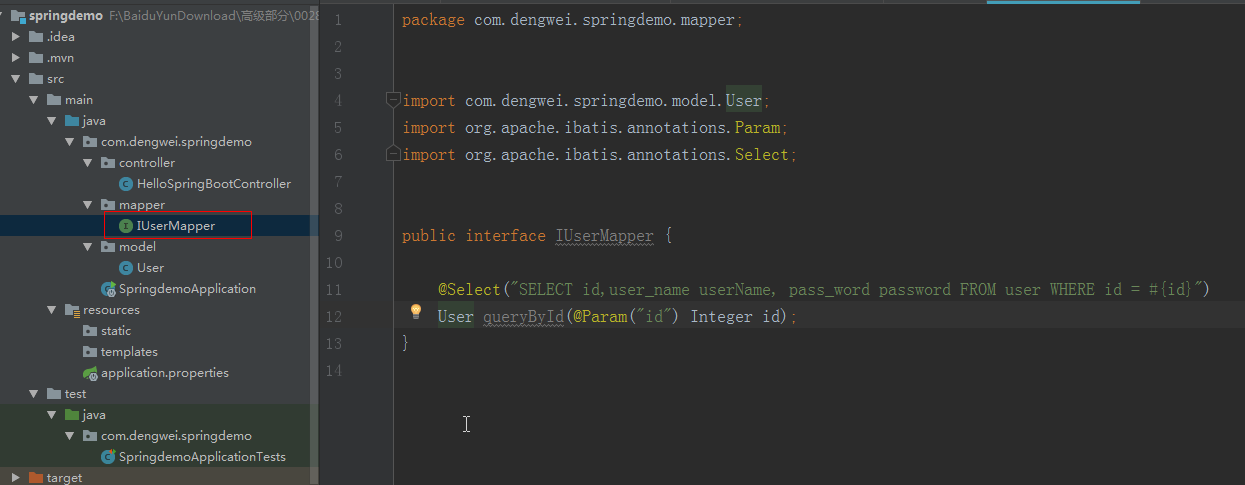
 1 package com.dengwei.springdemo.mapper;
 2
 3
 4 import com.dengwei.springdemo.model.User;
 5 import org.apache.ibatis.annotations.Param;
 6 import org.apache.ibatis.annotations.Select;
 7
 8
 9 public interface IUserMapper {
10
11     @Select("SELECT id,user_name userName, pass_word password FROM user WHERE id = #{id}")
12     User queryById(@Param("id") Integer id);
13 }
3:建Service层:
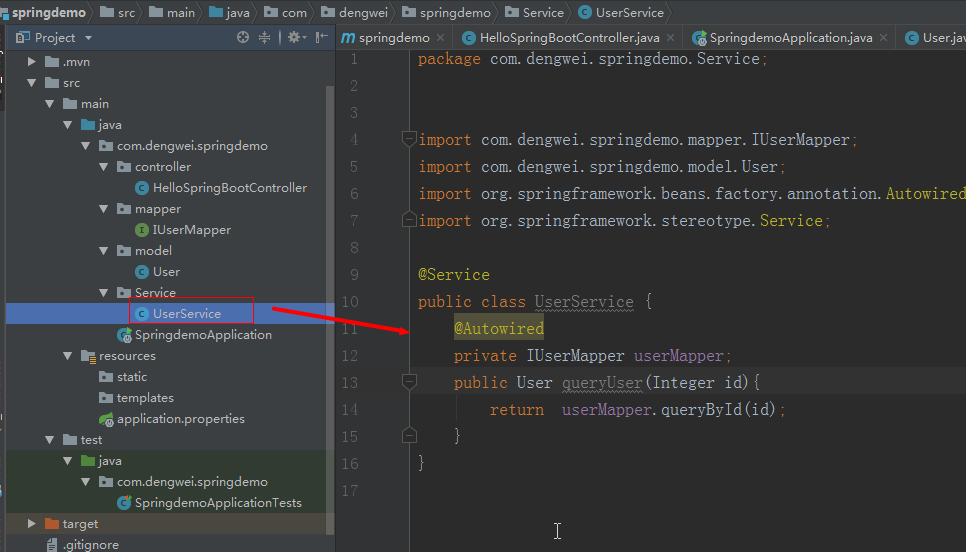
 1 package com.dengwei.springdemo.Service;
 2
 3
 4 import com.dengwei.springdemo.mapper.IUserMapper;
 5 import com.dengwei.springdemo.model.User;
 6 import org.springframework.beans.factory.annotation.Autowired;
 7 import org.springframework.stereotype.Service;
 8
 9 @Service
10 public class UserService {
11     @Autowired
12     private IUserMapper userMapper;
13     public User queryUser(Integer id){
14         return  userMapper.queryById(id);
15     }
16 }
4:控制层访问:
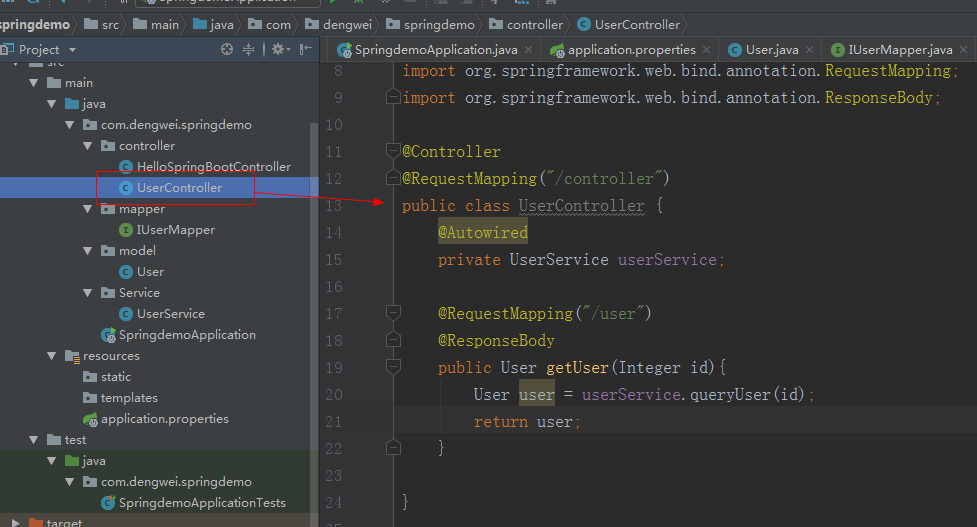
 1 package com.dengwei.springdemo.controller;
 2
 3
 4 import com.dengwei.springdemo.Service.UserService;
 5 import com.dengwei.springdemo.model.User;
 6 import org.springframework.beans.factory.annotation.Autowired;
 7 import org.springframework.stereotype.Controller;
 8 import org.springframework.web.bind.annotation.RequestMapping;
 9 import org.springframework.web.bind.annotation.ResponseBody;
10
11 @Controller
12 @RequestMapping("/controller")
13 public class UserController {
14     @Autowired
15     private UserService userService;
16
17     @RequestMapping("/user")
18     @ResponseBody
19     public User getUser(Integer id){
20         User user = userService.queryUser(id);
21         return user;
22     }
23
24 }
数据库连接配置文件:
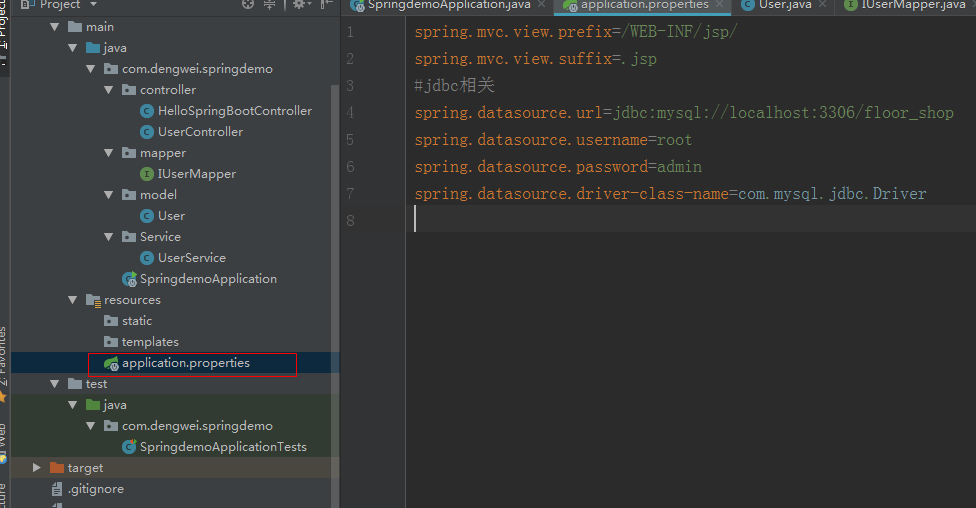
1 spring.mvc.view.prefix=/WEB-INF/jsp/
2 spring.mvc.view.suffix=.jsp
3 #jdbc相关
4 spring.datasource.url=jdbc:mysql://localhost:3306/floor_shop
5 spring.datasource.username=root
6 spring.datasource.password=admin
7 spring.datasource.driver-class-name=com.mysql.jdbc.Driver
启动springBoot:
注意:前面我们排除了对数据库相关的自动配置,现在我们配置了数据库实体配置,所以把之前的排除要删掉,并且多添加@MapperScan("mapper映射文件的地址")
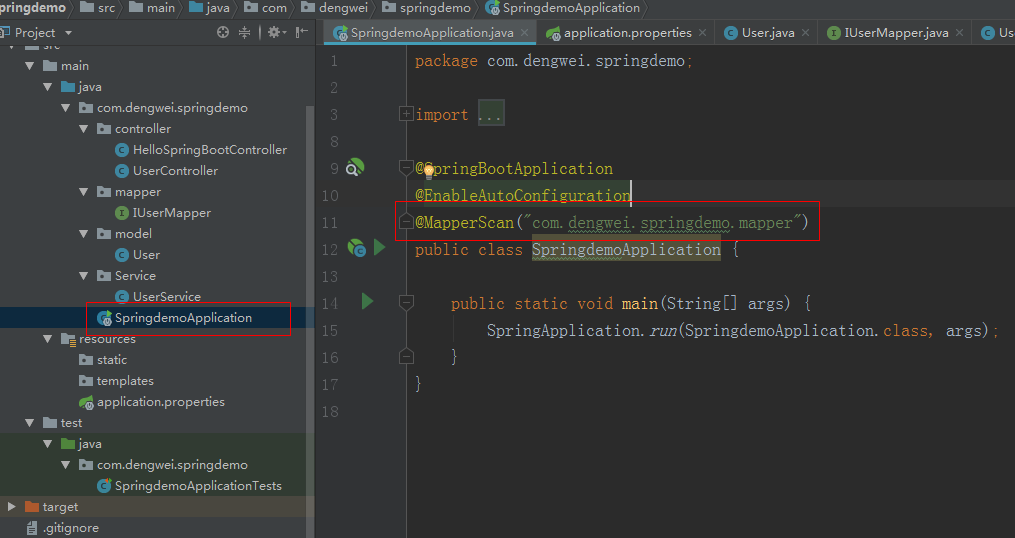
 1 package com.dengwei.springdemo;
 2
 3 import org.mybatis.spring.annotation.MapperScan;
 4 import org.springframework.boot.SpringApplication;
 5 import org.springframework.boot.autoconfigure.EnableAutoConfiguration;
 6 import org.springframework.boot.autoconfigure.SpringBootApplication;
 7 import org.springframework.boot.autoconfigure.jdbc.DataSourceAutoConfiguration;
 8
 9 @SpringBootApplication
10 @EnableAutoConfiguration
11 @MapperScan("com.dengwei.springdemo.mapper")
12 public class SpringdemoApplication {
13
14     public static void main(String[] args) {
15         SpringApplication.run(SpringdemoApplication.class, args);
16     }
17 }
好的直接启动即可。上面我们简单实现了数据库的查询,增删改就自己取写一写吧。
下面我们看看springBoot整合jsp:
1、在原来的依赖中添加依赖:
 <!--对jsp访问的支持-->
        <dependency>
            <groupId>org.apache.tomcat.embed</groupId>
            <artifactId>tomcat-embed-jasper</artifactId>
        </dependency>
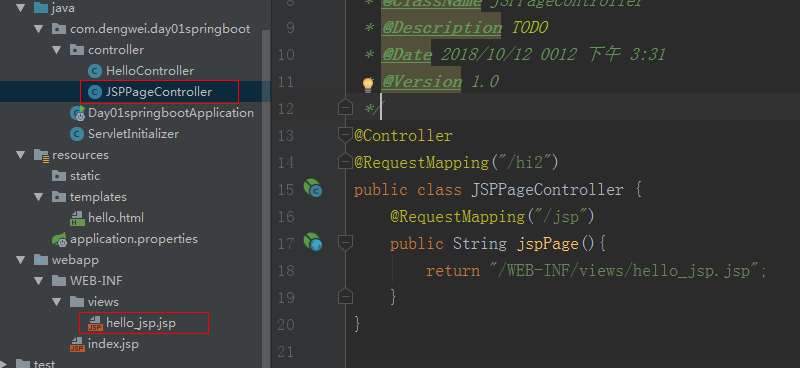
2、跳转页面:
springBoot整合thymeleaf:
 <!--模板引擎thmeleaf对HTML的支持-->
        <dependency>
            <groupId>org.springframework.boot</groupId>
            <artifactId>spring-boot-starter-thymeleaf</artifactId>
        </dependency>
跳转页面:
不用加前后缀,可以直接跳转页面:
关于thymeleaf的基础使用参考:
https://www.jianshu.com/p/6953671d4645
在我们第一次新建的HelloSpringBootController中 新建一个helloJsp()方法,注意:我们之前用的注解是@RestController ,这个注解相当于@Controller + @ResponseBody
表示标注的类或则方法返回的都是json格式的,而我们这次需要访问jsp页面所以需要换成@Controller注解。在需要的返回json格式的方法上添加@ResponseBody,而不是整个类的所有方法都返回json格式。

下面我们看一下springBoot中的全局异常捕获:
异常捕获的核心标签:@ControllerAdvice + @ExceptionHandler(RuntimeException.class)
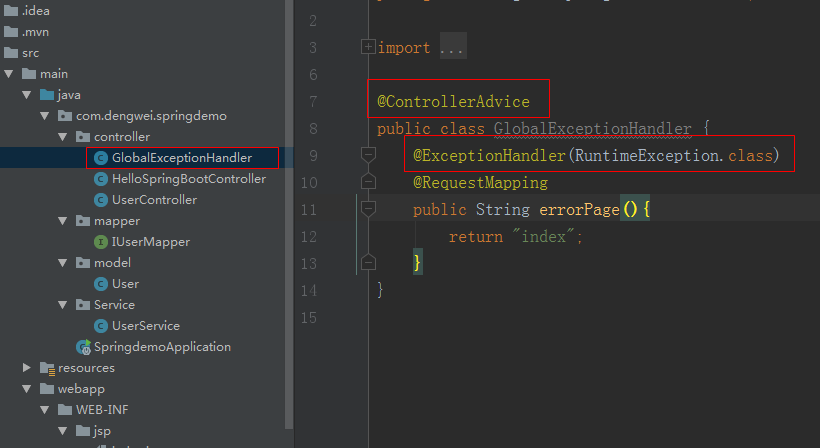
 1 package com.dengwei.springdemo.controller;
 2
 3 import org.springframework.web.bind.annotation.ControllerAdvice;
 4 import org.springframework.web.bind.annotation.ExceptionHandler;
 5 import org.springframework.web.bind.annotation.RequestMapping;
 6
 7 @ControllerAdvice
 8 public class GlobalExceptionHandler {
 9     @ExceptionHandler(RuntimeException.class)
10     @RequestMapping
11     public String errorPage(){
12         return "index";
13     }
14 }
好了,就先到这儿吧!


 6904
6904


 被折叠的 条评论
为什么被折叠?
被折叠的 条评论
为什么被折叠?
 到【灌水乐园】发言


