


最终的效果:


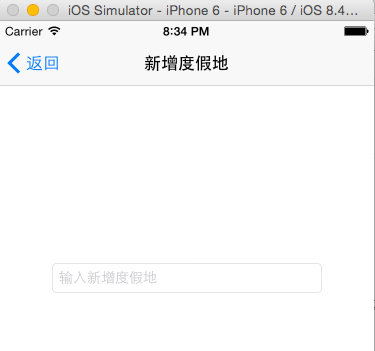
<1>第一个场景:

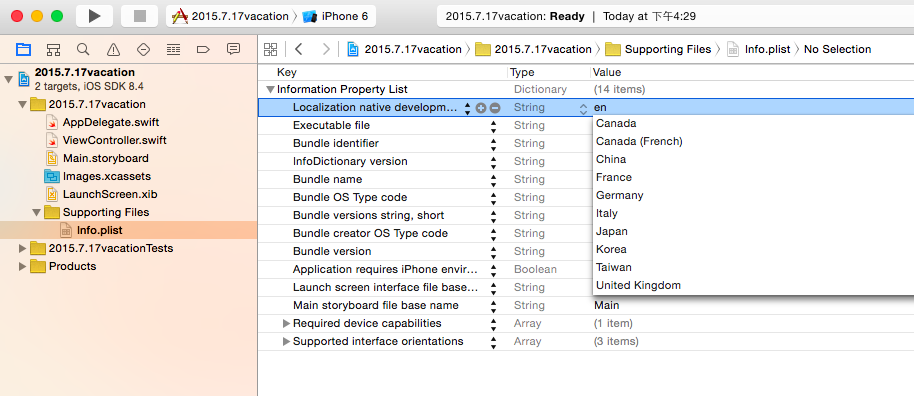
1.本地化 界面简体中文化
Supporting Files - info.plist
Localization native development region 本地的编程的地区

选择China,这样的话,用到系统的UI组件,就会变成中文的样式。
2.文本框占位符
属性:Placeholder
另外需要积累的是:Clear Button

Appears while editing :当你输入的时候会出现这个(清除)按钮
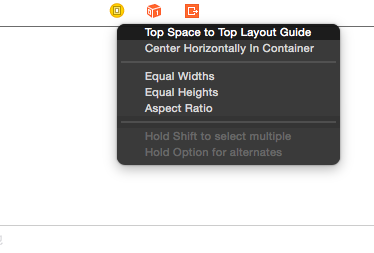
3.自动布局
添加文本框顶部,左侧和右侧间距约束
距离左边的:

距离顶部的:
距离右边的:

距离底部的:

<2>第二个场景:

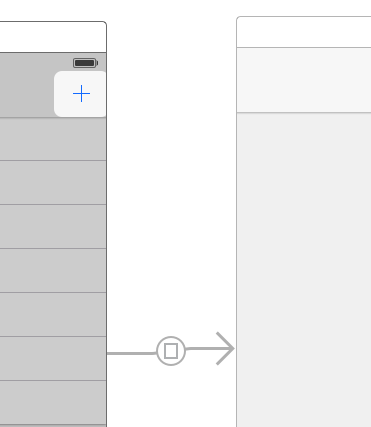
1.从控件库中添加Table View Controller之后,因为要打开app第一个界面就是度假清单的列表,所以要:
 选择这个is initial view controller(初始场景控制器),然后就会出现剪头的位置在Table View Controller之前:
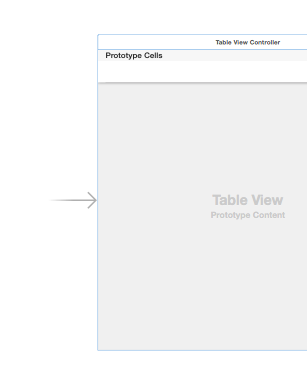 这样调换场景秩序完成。
<其实也可以直接拖拽那个剪头到你想要作为开头场景的视图控制器之前,可以试试看>
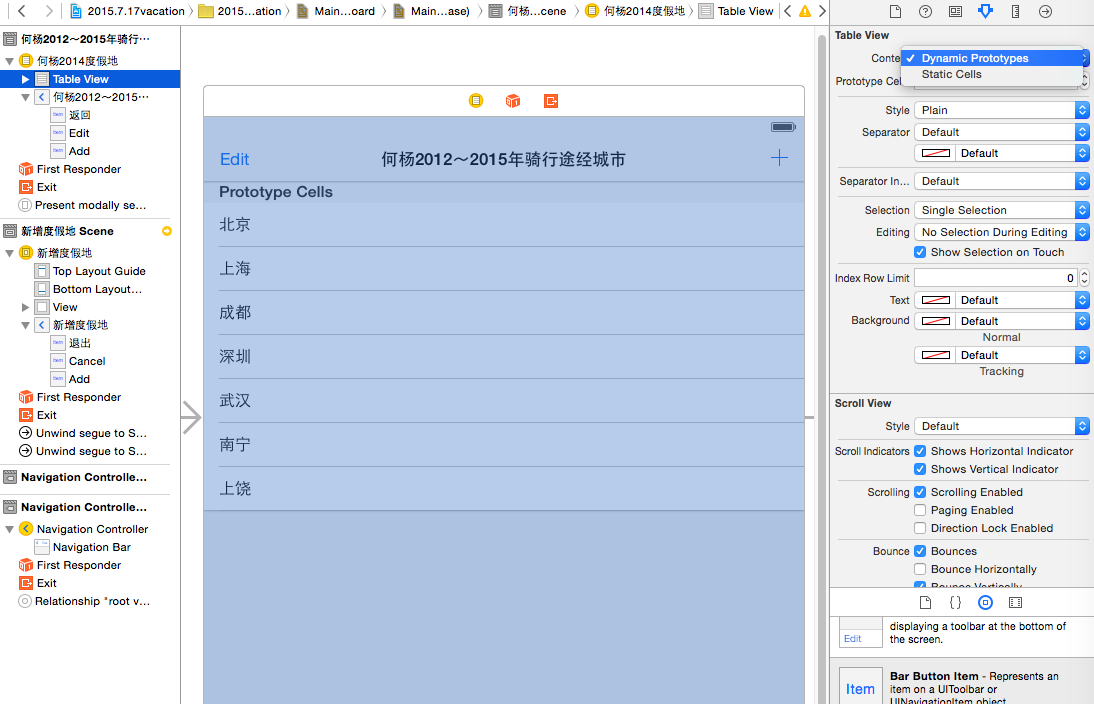
2.静态数据
设置表格视图属性内容-静态单元格样式-基本(带标签)
 Dynamic Prototypes(动态)就是在程序代码中 设置表格有哪些内容。Static Cells静态。
然后选中Table View Cell然后在属性中找到stye改成Basic基本样式:

然后双击界面显示的title,可以输入文字,比如“北京”,然后如果要复制列表,就按着option,然后选择一个列表框,拖拽复制一个列表。
<3>场景间的转场-过渡(segue)
然后双击导航条,可以输入文字:

找到这个Bar Button item组件,略看英文就知道,这个组件可以添加到导航条上使用: 然后拖拽到导航条上:
然后选择style,选中add,item就会显示 + 的符号:

先来运行一下看看:

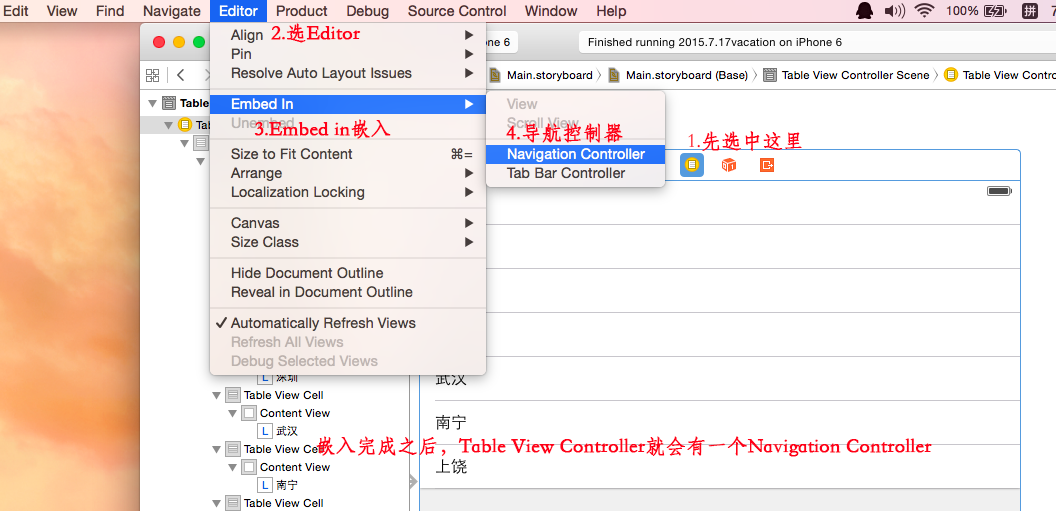
同样的为第一次做的界面视图(通过设置场景秩序已经不是第一个开启的界面了:)增加一个导航条:

然后是为按钮添加事件:
 (deprecated是废弃的意思,这里两个废弃的是之前ios7的功能)
在这里我们选择show,因为show是堆栈,可以返回的,为了显示出返回按钮,要把,第二个显示的新增度假地视图的上面的两个按钮删除,然后选中这个第一个度假地列表的视图上的导航条,然后在右边属性的back button后面添加:退出 (或者返回两字),也就是说这里的back button的作用对象是选中的导航条,而不是在选中的导航条上添加back button作用的按钮组件。

然后运行,点击+之后就会出现(这里我后面改成"返回"了):
然后,我们把第二个视图按钮添加回到导航条上,编辑和添加作用的两个按钮,然后重新为第一个导航条上的添加按钮重新设置事件:
 选中:persent modally,然后注意剪头上的图标变化成简单的正方体了:
然后运行操作的时候,就会发现第二个视图是从下往上出现的。好了,视图转场我们先到这里。
<4>定制视图控制器

添加一个类来自定义定制视图控制器:


将第二个视图(新增度假地)绑定到这个自定义的类:

然后同样的为第一个表格控制器绑定一个类:


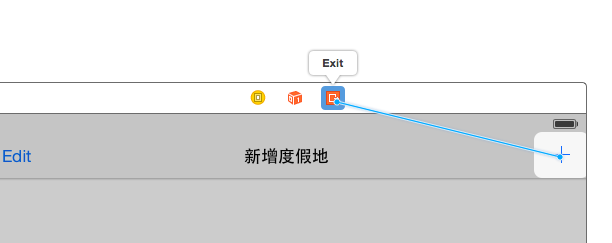
<5>反向过渡

在VacationListTableViewController.swift添加一个反向事件:

注意:上面注释的地方就有一样的部分,如果不记得具体怎么写,可以参考或者拷贝。
然后回到viewcontroller:
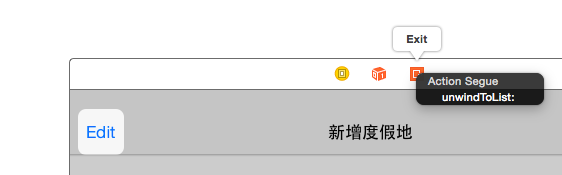 然后就可以绑定到前面写的方法了。
同样的,为右边add按钮也添加绑定到那个方法:
这样做的目的就是实现:当我们按取消就退出这个页面到前面一个页面,或者按add按钮也能退出到前面一个页面。从而实现了取消当前新增业务或者完成当前新增业务的同时都能回到前面一个页面的逻辑。
这样就完成了一个反向过渡。
<6>完整界面
将第一个列表界面的table view选中,然后将之间静态模式改为动态模式,这样就可以通过代码来操作列表。
<7>实现(implement)使用设计模式
目标-操作(windows里叫 事件-驱动)
接下来我们设计MVC中的C,也就是数据存储结构的设计。


1 import Foundation
2
3 class Vacation {
4     //两个属性
5     var place = ""
6     var visited = false
7 }
1 import UIKit
2
3 class VacationListTableViewController: UITableViewController {
4
5 //度假地数组
6 var vacationList = [Vacation]()
7
8 func loadInitData(){
9 addVacetion("南昌")
10 addVacetion("鹰潭")
11 addVacetion("婺源")
12 addVacetion("上饶")
13 addVacetion("赣州")
14 }
15 func addVacetion(place:String){
16 let vac = Vacation()
17 vac.place = place
18 vacationList.append(vac)
19 }
20
21 override func viewDidLoad() {
22 super.viewDidLoad()
23
24 //6.载入的时候能够引用自身的组件
25 self.navigationItem.leftBarButtonItem = self.editButtonItem()
26
27 //1.思考一下,应用程序的流程中的最开始,一运行是不是就要加载要显示的数据,这个数据来源可以是网络,也可以是本地磁盘,也可以是自定义数据的类中(model)
28 loadInitData()
29
30 // Uncomment the following line to preserve selection between presentations
31 // self.clearsSelectionOnViewWillAppear = false
32
33 // Uncomment the following line to display an Edit button in the navigation bar for this view controller.
34 // self.navigationItem.rightBarButtonItem = self.editButtonItem()
35 }
36 //7.设置表格编辑时的动画
37 override func setEditing(editing: Bool, animated: Bool) {
38 super.setEditing(editing, animated: true)
39 tableView.setEditing(editing, animated: true)
40 }
41 //8.
42 override func tableView(tableView: UITableView, commitEditingStyle editingStyle: UITableViewCellEditingStyle, forRowAtIndexPath indexPath: NSIndexPath) {
43 if editingStyle == UITableViewCellEditingStyle.Delete{
44 //删除度假数组所在行
45 vacationList.removeAtIndex(indexPath.row)
46 //删除单元格所在行
47 tableView.deleteRowsAtIndexPaths([indexPath], withRowAnimation: UITableViewRowAnimation.Top)
48 }
49 }
50 override func didReceiveMemoryWarning() {
51 super.didReceiveMemoryWarning()
52 // Dispose of any resources that can be recreated.
53 }
54
55 // MARK: - Table view data source
56 //******************************表格的部分数**********************************************//
57 override func numberOfSectionsInTableView(tableView: UITableView) -> Int {
58 // #warning Potentially incomplete method implementation.
59 // Return the number of sections.
60 //2.返回表格的数量,这里表格有一个部分,我就return 1
61 return 1
62 }
63 //******************************表格的部分数**********************************************//
64 override func tableView(tableView: UITableView, numberOfRowsInSection section: Int) -> Int {
65 // #warning Incomplete method implementation.
66 // Return the number of rows in the section.3.返回的是表格的行数,这里就是我们使用的数组的长度
67 return vacationList.count
68 }
69
70
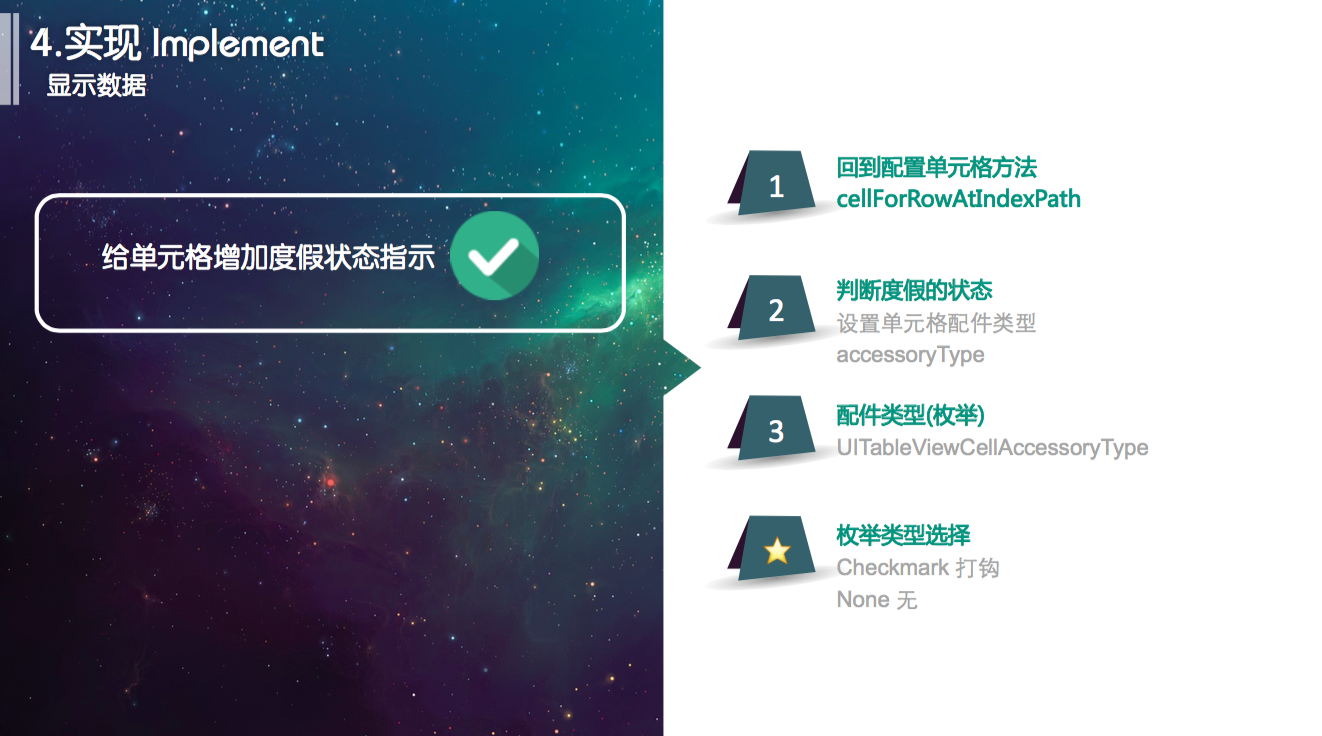
71 override func tableView(tableView: UITableView, cellForRowAtIndexPath indexPath: NSIndexPath) -> UITableViewCell {
72 let cell = tableView.dequeueReusableCellWithIdentifier("PCell", forIndexPath: indexPath) as! UITableViewCell//4.这里加载的是单元格的样式,这里呢我们就用已有的单元格的样式
73 let v = vacationList[indexPath.row]
74 // Configure the cell...
75 cell.textLabel?.text = v.place
76
77 if v.visited {
78 cell.accessoryType = UITableViewCellAccessoryType.Checkmark//☑️
79 }else{
80 cell.accessoryType = UITableViewCellAccessoryType.None
81 }
82
83 return cell
84 }
85 //添加的方法
86 override func tableView(tableView: UITableView, didSelectRowAtIndexPath indexPath: NSIndexPath) {
87 //5.这里的方法就是按下单元格的一行,就会执行的方法
88 // let v1 = vacationList[indexPath.row]
89 // v1.visited = !v1.visited
90 setVisited(indexPath.row)
91
92 //这里要显示勾选和未勾选的状态
93 tableView.deselectRowAtIndexPath(indexPath, animated: false)
94 tableView.reloadData()//重新加载数据
95 }
96 func setVisited(n:Int){
97 let v = vacationList[n]
98 v.visited = !v.visited
99 println(v.place+"\(v.visited)")
100 }
101 /*
102 // Override to support conditional editing of the table view.
103 override func tableView(tableView: UITableView, canEditRowAtIndexPath indexPath: NSIndexPath) -> Bool {
104 // Return NO if you do not want the specified item to be editable.
105 return true
106 }
107 */
108
109 /*
110 // Override to support editing the table view.
111 override func tableView(tableView: UITableView, commitEditingStyle editingStyle: UITableViewCellEditingStyle, forRowAtIndexPath indexPath: NSIndexPath) {
112 if editingStyle == .Delete {
113 // Delete the row from the data source
114 tableView.deleteRowsAtIndexPaths([indexPath], withRowAnimation: .Fade)
115 } else if editingStyle == .Insert {
116 // Create a new instance of the appropriate class, insert it into the array, and add a new row to the table view
117 }
118 }
119 */
120
121 /*
122 // Override to support rearranging the table view.
123 override func tableView(tableView: UITableView, moveRowAtIndexPath fromIndexPath: NSIndexPath, toIndexPath: NSIndexPath) {
124
125 }
126 */
127
128 /*
129 // Override to support conditional rearranging of the table view.
130 override func tableView(tableView: UITableView, canMoveRowAtIndexPath indexPath: NSIndexPath) -> Bool {
131 // Return NO if you do not want the item to be re-orderable.
132 return true
133 }
134 */
135
136 /*
137 // MARK: - Navigation
138
139 // In a storyboard-based application, you will often want to do a little preparation before navigation
140 override func prepareForSegue(segue: UIStoryboardSegue, sender: AnyObject?) {
141 // Get the new view controller using [segue destinationViewController].
142 // Pass the selected object to the new view controller.
143 }
144 */
145 @IBAction func unwindToList(segue: UIStoryboardSegue){
146 //这个方法就是视图退回到这个方法所属的视图的时候,就会执行的方法
147 //然后我们通过这个方法获取退回视图的前一个视图的内容
148 let source = segue.sourceViewController as! AddVacationViewController
149 let v1 = source.vacation
150 println(v1.place)
151 if v1.place != "" {
152 vacationList.append(v1)
153 }
154 println(vacationList)
155 //然后要刷新表格,但是表格会自动刷新
156 // loadInitData()
157 tableView.reloadData()
158 }
159
160 }
 1 import UIKit
 2
 3 class AddVacationViewController: UIViewController {
 4     @IBOutlet weak var textField: UITextField!
 5
 6     @IBOutlet weak var doneButton: UIBarButtonItem!
 7     //1.初始化
 8     var vacation = Vacation()
 9
10
11     override func viewDidLoad() {
12         super.viewDidLoad()
13
14         // Do any additional setup after loading the view.
15     }
16
17     override func didReceiveMemoryWarning() {
18         super.didReceiveMemoryWarning()
19         // Dispose of any resources that can be recreated.
20     }
21
22     // MARK: - Navigation
23
24     // In a storyboard-based application, you will often want to do a little preparation before navigation
25     override func prepareForSegue(segue: UIStoryboardSegue, sender: AnyObject?) {
26         // Get the new view controller using segue.destinationViewController.
27         // Pass the selected object to the new view controller.过渡前的准备
28         if sender as! NSObject == doneButton{
29             if (!textField.text.isEmpty) {
30
31                 vacation.place = textField.text
32                 println(vacation.place)
33             }
34         }
35     }
36 }


 371
371


 被折叠的 条评论
为什么被折叠?
被折叠的 条评论
为什么被折叠?
 到【灌水乐园】发言


