


前言:AVPlayer是用于管理媒体资产的播放和定时控制器对象它提供了控制播放器的有运输行为的接口,如它可以在媒体的时限内播放,暂停,和改变播放的速度,并有定位各个动态点的能力。可以使用AVPlayer来播放本地和远程的视频媒体文件,如QuickTime影片和MP3音频文件,以及视听媒体使用HTTP流媒体直播服务。
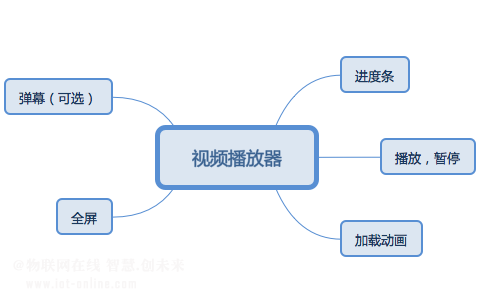
一个普通播放器的组成
苹果在视频播放方面提供了多个框架供我们选择使用。分别为:
基于mediaPlayer类库的MPMediaPlayerController(iOS9后遭到废弃,被AVPlayerViewController所替代)
基于AVFounditon类库的AVPlayer
基于AVKit类库的AVPlayerViewController(iOS8后才可使用)
正文
AVPlayer与MPMediaPlayerController比较:
AVplayer有比较灵活,当然,也需要你去自定义构建UI。还有一大优势,例如其扩展的AVQueuePlayer,可以实现视频无缝队列播放、多视频同时播放、视频转换、编解码等功能。
MPMediaPlayerController实际上是基于AVPlayer的简单UI封装,对于一般的播放要求,几行代码就可实现,省心省事。
因为MPMediaPlayerController是对AVPlayer进行的单例封装,所以不能进行多视频播放。
播放器Demo(全屏)已实现功能点:
push到播放器页面,横屏显示。
单机隐藏or显示上方标题栏与下方操作栏。
呼出右侧设置栏。
视频播放操作与进度条设置。
在屏幕上左右拖动,进行视频快进与快退。
在屏幕左侧上下拖动,进行亮度调整。
在屏幕右侧上下拖动,进行音量调整。
想到但是暂未实现的功能点:(大多为优化或与业务相关)
屏幕或进度条拖动快进操作时,添加提示框进行快进时间的实时提示。
用户无操作两三秒之后自动隐藏上下View。
视频清晰度调整按钮。(更换视频源)
操作加锁按钮。(加锁后未进行解锁操作之前不可进行操作)
弹幕相关。
用户允许横屏状态下,横屏竖屏自动进行页面切换与动画效果等。
网络视频的缓存、下载等。
软硬解码模式切换等。
笔者Demo选择使用了AVPlayer进行视频播放器的构建。由于UI的代码实现,加上略蛋疼的逻辑代码,播放器页面的代码量达到400多行,之后有时间的话会再进行优化。这里只贴出部分代码,想要查看或借鉴完整Demo,可以到本人github去下载。
使用AVPlayer构建播放器
1.导入头文件
#import<AVFoundation/AVFoundation.h>
2.其实没什么可说的,很简单,先初始化AVPlayer,然后添加到AVPlayerLayer,最后将其添加到视图的layer层。
#pragma mark - Demo中此视图的属性
#define TopViewHeight 55
#define BottomViewHeight 72
#define mainWidth [UIScreen mainScreen].bounds.size.width
#define mainHeight [UIScreen mainScreen].bounds.size.height
//上层建筑@property(nonatomic,strong)UIView*topView;
@property(nonatomic,strong)UIButton*backBtn;
@property(nonatomic,strong)UILabel*titleLabel;
@property(nonatomic,strong)UIButton*settingsBtn;
@property(nonatomic,strong)UIView*bottomView;
@property(nonatomic,strong)UIButton*playBtn;
@property(nonatomic,strong)UILabel*textLabel;
@property(nonatomic,assign)BOOLisPlay;
@property(nonatomic,strong)UISlider*movieProgressSlider;//进度条@property(nonatomic,assign)CGFloatProgressBeginToMove;
@property(nonatomic,assign)CGFloattotalMovieDuration;//视频总时间@property(nonatomic,strong)AVPlayer*player;
@property(nonatomic,strong)UIView*settingsView;
@property(nonatomic,strong)UIView*rightView;
@property(nonatomic,strong)UIButton*setTestBtn;
//touch evens
@property(nonatomic,assign)BOOLisShowView;
@property(nonatomic,assign)BOOLisSettingsViewShow;
@property(nonatomic,assign)BOOLisSlideOrClick;
@property(nonatomic,strong)UISlider*volumeViewSlider;
@property(nonatomic,assign)floatsystemVolume;//系统音量值@property(nonatomic,assign)floatsystemBrightness;//系统亮度@property(nonatomic,assign)CGPointstartPoint;//起始位置坐标@property(nonatomic,assign)BOOLisTouchBeganLeft;//起始位置方向@property(nonatomic,copy)NSString*isSlideDirection;//滑动方向@property(nonatomic,assign)floatstartProgress;//起始进度条
#pragma mark - 播放器
- (void)createAvPlayer{
//设置静音状态也可播放声音
AVAudioSession*audioSession = [AVAudioSessionsharedInstance];
[audioSession setCategory:AVAudioSessionCategoryPlaybackerror:nil];
CGRectplayerFrame =CGRectMake(0,0,self.view.layer.bounds.size.height,self.view.layer.bounds.size.width);AVURLAsset *asset = [AVURLAssetassetWithURL: _url];
Float64 duration = CMTimeGetSeconds(asset.duration);
//获取视频总时长
_totalMovieDuration = duration;
AVPlayerItem*playerItem = [AVPlayerItemplayer ItemWithAsset: asset];
_player = [[AVPlayer alloc]initWithPlayerItem:playerItem];
AVPlayerLayer *playerLayer = [AVPlayerLayer playerLayerWithPlayer:_player]; playerLayer.frame = playerFrame;
playerLayer.videoGravity =AVLayerVideoGravityResizeAspect;
[self.view.layer addSublayer:playerLayer];
//需要设置自动播放的直接play即可
//[_player play];
}
屏幕单击手势与视频快进
屏幕单击
1.符合条件的情况下(手指按下后离开屏幕,并且没有拖动)通过BOOL值判断,隐藏或显示上下View
- (void)touchesEnded:(NSSet*)touches withEvent:(UIEvent*)event{
CGPointpoint = [[touches anyObject] locationInView:self.view];
if(_isShowView) {
//上下View为显示状态,此时点击上下View直接return
if((point.y>CGRectGetMinY(self.topView.frame)&&point.yCGRectGetMinY(self.bottomView.frame))) {
return
}
_isShowView =NO;
[UIView animateWithDuration:0.5 animations:^{
_topView.alpha =0;
_bottomView.alpha =0;
}];
}else{
_isShowView =YES;
[UIView animateWithDuration:0.5 animations:^{
_topView.alpha =1;
_bottomView.alpha =1;
}];
}
}
2.右侧View显示的状态下,点击屏幕左半空白区域,隐藏右侧View
if(_isSettingsViewShow) {
if(point.x>CGRectGetMinX(_rightView.frame)&&point.x< CGRectGetMaxX(_rightView.frame)) {
return;
}
_settingsView.alpha =0;
_isSettingsViewShow= NO;
}
拖动快进
1.计算后得出拖动方向为横向拖动。
CGPoint location = [[touches anyObject] locationInView:self.view];
CGFloatchangeY = location.y - _startPoint.y;
CGFloat changeX = location.x - _startPoint.x;
if(fabs(changeX) > fabs(changeY)){
_isSlideDirection =@"横向";//设置为横向
}else if(fabs(changeY)>fabs(changeX)){
_isSlideDirection =@"纵向";//设置为纵向
}else{
_isSlideOrClick =NO;
NSLog(@"不在五行中。");
}
2.根据手指按下与离开屏幕后,横向位移的坐标值,对视频播放进度进行刷新。
if(_isSlideOrClick) {
_isSlideDirection =@"";
_isSlideOrClick =NO;
CGFloatchangeY = point.y - _startPoint.y;
CGFloatchangeX = point.x - _startPoint.x;
//如果位置改变 刷新进度条
if(fabs(changeX) > fabs(changeY)){
[selfscrubberIsScrolling];
}
return;
}
//拖动进度条
-(void)scrubberIsScrolling{
//计算出拖动的当前秒数(总长*当前百分比)
NSInteger dragedSeconds = floorf(_totalMovieDuration * _movieProgressSlider.value);
CMTime newCMTime =CMTimeMake(dragedSeconds,1);
[_player seekToTime:newCMTime completionHandler:^(BOOLfinished) {
[_player play];
[_playBtn setTitle:@"暂停"forState:UIControlStateNormal];
}];
}
MPMediaPlayerController与AVPlayerViewController的使用介绍
MPMediaPlayerController与AVPlayerViewController,两者都是基于AVPlayer的简单UI封装,如果只是需要简单的视频播放功能,可以使用这两个类快速的构建视频播放器。
MPMediaPlayerController
1.导入头文件
#import<MediaPlayer/MediaPlayer.h>
2.初始化mp,几行代码既可以实现。
@property(nonatomic,strong)MPMoviePlayerController *mp;
NSURL*url1 = [[NSBundle mainBundle]URLForResource:@"chenyifaer"withExtension:@"mp4"];
_mp = [[MPMoviePlayerController alloc] initWithContentURL:url1];
_mp.controlStyle =MPMovieControlStyleNone;
_mp.view.frame = CGRectMake(0,0,self.view.layer.bounds.size.height,self.view.layer.bounds.size.width);[self.view addSubview:_mp.view];
[_mp play];
controlStyle属性有三个值:
MPMovieControlStyleNone, //无控制
MPMovieControlStyleEmbedded, //有全屏按钮与控制
MPMovieControlStyleFullscreen, // 默认全屏,有退出和控制
当然还有一些其他属性,有需要可以自行进行设置。
AVPlayerViewController
1.导入框架与头文件
#import<AVKit/AVKit.h>
2.初始化AVPlayerViewController,创建一个AVPlayer添加上。然后将其添加到视图上,再将View添加到self.View上,然后play即可
NSURL*url1 = [[NSBundle mainBundle]URLForResource:@"chenyifaer"withExtension:@"mp4"];
AVPlayer* player = [AVPlayer playerWithURL:url1];
AVPlayerViewController *playerController = [[AVPlayerViewControlleralloc]init];
playerController.player = player;
[self addChildViewController:playerController];
[self.view addSubview:playerController.view];
playerController.view.frame =CGRectMake(0,0,self.view.layer.bounds.size.height,self.view.layer.bounds.size.width);[player play];
同样几行代码,即可实现。
音量调整
1.导入头文件
#import<MediaPlayer/MediaPlayer.h>
2.借助MPVolumeView类来获取到其音量进度条,进而进行音量获取与控制
@property(nonatomic,strong)UISlider*movieProgressSlider;//进度条MPVolumeView*volumeView = [[MPVolumeViewalloc] init];
_volumeViewSlider =nil;
for(UIView*view in [volumeView subviews]){
if([view.class.description isEqualToString:@"MPVolumeSlider"]){ _volumeViewSlider = (UISlider*)view;
break;
}
3.触摸屏幕时,记录手指按下的位置、获取按下时系统的音量(实现touchesBegan方法)
- (void)touchesBegan:(NSSet *)touches withEvent:(UIEvent *)event{ _startProgress = _movieProgressSlider.value;
}
4.手指在规定行为下(手指按下位置为视图右半区,且纵向滑动)持续滑动时,动态改变系统音量(实现touchesMoved方法)
//手指持续滑动,此方法会持续调用
- (void)touchesMoved:(NSSet *)toucheswithEvent:(UIEvent *)event{
CGPoint location = [[touches anyObject]locationInView:self.view];
intindex = location.y - _startPoint.y;if(index>0){ [_volumeViewSlidersetValue:_systemVolume - (abs(index)/10*0.05)animated:YES]; [_volumeViewSlidersendActionsForControlEvents:UIControlEventTouchUpInside]; }else{
[_volumeViewSlidersetValue:_systemVolume + (abs(index)/10*0.05)animated:YES]; [_volumeViewSlidersendActionsForControlEvents:UIControlEventTouchUpInside]; }
}
亮度调整
1.触摸屏幕时,记录手指按下的位置、按下时屏幕的亮度(实现touchesBegan方法)
2.手指在规定行为下(手指按下位置为视图左半区,且纵向滑动)持续滑动时,不断动态处理(实现touchesMoved方法)
3.改变屏幕亮度:[UIScreen mainScreen].brightness = X (0~1);
//手指持续滑动,此方法会持续调用
- (void)touchesMoved:(NSSet *)touches withEvent:(UIEvent *)event{ CGPointlocation= [[touches anyObject] locationInView:self.view];
int index= location.y - _startPoint.y;
if(index>0){
[UIScreen mainScreen].brightness = _systemBrightness -abs(index)/10*0.01;
}else{
_movieProgressSlider.value = _startProgress -abs(index)/10*0.008;
}
}
屏幕旋转
1.设置应用支持横屏(默认支持)。
2.在根视图中设置默认竖屏(Nav、TabBar、VC基类)
- (BOOL)shouldAutorotate{returnNO;}- (UIInterfaceOrientationMask)supportedInterfaceOrientations{
returnUIInterfaceOrientationMaskPortrait;
}
3.在需要横屏的VC中重写下列方法即可
//允许横屏旋转
- (BOOL)shouldAutorotate{returnYES;
}
//支持左右旋转
-(UIInterfaceOrientationMask)supportedInterfaceOrientations{
return UIInterfaceOrientationMaskLandscapeRight|UIInterfaceOrientationMaskLandscapeLeft;
}//默认为右旋转
-(UIInterfaceOrientation)preferredInterfaceOrientationForPresentation{
returnUIInterfaceOrientationLandscapeRight;
}
参考:
1.http://www.techotopia.com/index.php/iOS8AVPlayerAndPlayerViewController
2.http://stackoverflow.com/questions/8146942/avplayer-and-mpmovieplayercontroller-differences


 1690
1690


 被折叠的 条评论
为什么被折叠?
被折叠的 条评论
为什么被折叠?
 到【灌水乐园】发言


