


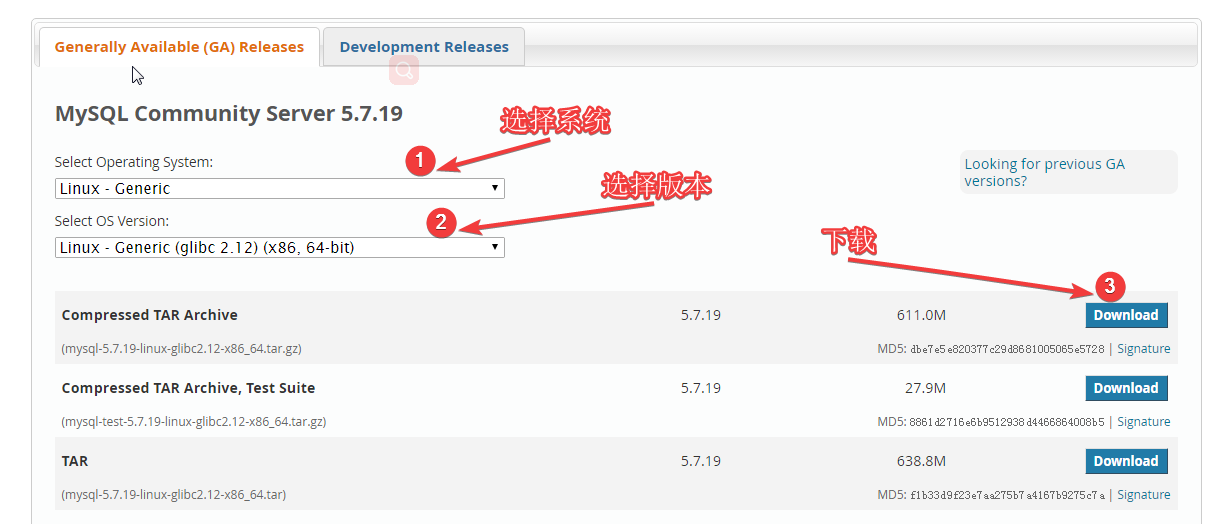
1.下载 mysql : https://dev.mysql.com/downloads/mysql/
1)卸载自带的mysql :rpm -qa | grep mysql
[root@CentOS-00 mysql]# rpm -qa|grep mysql
mysql-libs-5.1.73-8.el6_8.x86_64
卸载 :rpm -e mysql-libs-5.1.73-8.el6_8.x86_64
可以根据情况选择本地下载后上传或直接在服务器上下载。
2. 新建用户 : groupadd mysql
useradd -g mysql mysql 或 useradd mysql -g mysql
3. 解压安装包 :tar -zxvf mysql-5.7.19-linux-glibc2.12-x86_64.tar.gz
4.移动解压目录的文件到 /home/mysql 下 : mv mysql-5.7.19-linux-glibc2.12-x86_64/* /home/mysql
5.在 /home/mysql 下新建 data 文件夹 :cd /home/mysql
mkdir data
分配权限
[root@localhost mysql]# chown -R mysql .
[root@localhost mysql]# chgrp -R mysql .
6.初始化数据库 : cd /home/mysql
./bin/mysqld --user=mysql --basedir=/home/mysql --datadir=/home/mysql/data --initialize
[root@localhost mysql]# ./bin/mysqld --user=mysql --basedir=/home/mysql --datadir=/home/mysql/data --initialize
2017-09-21T02:39:31.713493Z 0 [Warning] TIMESTAMP with implicit DEFAULT value is deprecated. Please use --explicit_defaults_for_timestamp server option (see documentation for more details).
2017-09-21T02:39:31.904795Z 0 [Warning] InnoDB: New log files created, LSN=45790
2017-09-21T02:39:31.957355Z 0 [Warning] InnoDB: Creating foreign key constraint system tables.
2017-09-21T02:39:32.032556Z 0 [Warning] No existing UUID has been found, so we assume that this is the first time that this server has been started. Generating a new UUID: 18f80097-9e76-11e7-a888-000c29ea840a.
2017-09-21T02:39:32.035932Z 0 [Warning] Gtid table is not ready to be used. Table 'mysql.gtid_executed' cannot be opened.
2017-09-21T02:39:32.038439Z 1 [Note] A temporary password is generated for root@localhost: IbA)UFUje0n9
附: Ubuntu:初始化数据库是报错几解决
root@sunday-VirtualBox:/usr/local/mariadb# ./bin/mysqld --user=mysql --basedir=/usr/local/mariadb/ --datadir=/usr/local/mariadb/data/ --initialize
./bin/mysqld: error while loading shared libraries: libaio.so.1: cannot open shared object file: No such file or directory
root@sunday-VirtualBox:/usr/local/mariadb# apt-get install libaio-dev
记下临时密码
7.检测弄否启动: ./support-files/mysql.server start 出现如下错误。
[root@localhost mysql]# ./support-files/mysql.server start
./support-files/mysql.server: line 239: my_print_defaults: command not found
./support-files/mysql.server: line 259: cd: /usr/local/mysql: 没有那个文件或目录
Starting MySQL ERROR! Couldn't find MySQL server (/usr/local/mysql/bin/mysqld_safe)
[root@localhost mysql]# cd support-files/
修改 support-files/mysql.server : vi mysql.server
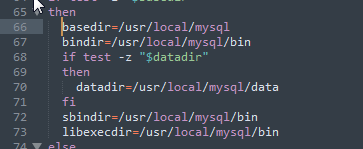
将 /usr/local 改成 /home 即存放mysql的目录
再次检查能否启动: ./support-files/mysql.server start 成功
[root@localhost mysql]# ./support-files/mysql.server start
Starting MySQL.Logging to '/home/mysql/data/localhost.localdomain.err'.
 SUCCESS!
[root@localhost mysql]# ps -ef|grep mysql
root       5962      1  0 19:51 pts/0    00:00:00 /bin/sh /home/mysql/bin/mysqld_safe --datadir=/home/mysql/data --pid-file=/home/mysql/data/localhost.localdomain.pid
mysql      6047   5962  1 19:51 pts/0    00:00:00 /home/mysql/bin/mysqld --basedir=/home/mysql --datadir=/home/mysql/data --plugin-dir=/home/mysql/lib/plugin --user=mysql --log-error=localhost.localdomain.err --pid-file=/home/mysql/data/localhost.localdomain.pid
root       6078   4414  0 19:52 pts/0    00:00:00 grep mysql
8. 登录测试 : ./bin/mysql -uroot -p 密码就是刚才记下的密码,出现如下信息则登录成功
[root@localhost mysql]# ./bin/mysql -uroot -p
Enter password:
Welcome to the MySQL monitor.  Commands end with ; or \g.
Your MySQL connection id is 3
Server version: 5.7.19

Copyright (c) 2000, 2017, Oracle and/or its affiliates. All rights reserved.

Oracle is a registered trademark of Oracle Corporation and/or its
affiliates. Other names may be trademarks of their respective
owners.

Type 'help;' or '\h' for help. Type '\c' to clear the current input statement.

mysql>
9.修改密码 :set password=password('123456');
mysql> set password=password('123456');
Query OK, 0 rows affected, 1 warning (0.00 sec)
10.设定远程登录mysql。在Linux下为了安全,默认是不允许mysql本机以外的机器访问mysql数据库服务,因此需要重新授权root。方便远程访问。
mysql> use mysql
Reading table information for completion of table and column names
You can turn off this feature to get a quicker startup with -A

Database changed
mysql> select Host,User from user
    -> ;
+-----------+---------------+
| Host      | User          |
+-----------+---------------+
| localhost | mysql.session |
| localhost | mysql.sys     |
| localhost | root          |
+-----------+---------------+
3 rows in set (0.00 sec)

mysql> GRANT ALL PRIVILEGES ON *.* TO root@'%' identified by '123456';
Query OK, 0 rows affected, 1 warning (0.00 sec)

mysql> flush privileges;
Query OK, 0 rows affected (0.00 sec)
11.如果防火墙开着可以关闭 : service iptables stop
或者开放3306端口
12.配置mysql服务开机启动: cp /home/mysql/support-files/mysql.server /etc/init.d/mysqld
增加执行权限 : chmod 755 /etc/init.d/mysqld
检查自启动项列表中没有mysqld这个,如果没有就添加mysqld:chkconfig --list mysqld
chkconfig --add mysqld
[root@localhost mysql]# chmod 755 /etc/init.d/mysqld
[root@localhost mysql]# chkconfig --list mysqld
mysqld 服务支持 chkconfig,但它在任何级别中都没有被引用(运行“chkconfig --add mysqld”)
[root@localhost mysql]# chkconfig --add mysqld
[root@localhost mysql]# chkconfig --list mysqld
mysqld          0:关闭  1:关闭  2:启用  3:启用  4:启用  5:启用  6:关闭
设置MySQL在345等级自动启动: chkconfig --level 345 mysqld on
或 : chkconfig mysqld on
13. mysql服务的启动/重启/停止/状态
service mysqld start/service mysqld restart/service mysqld stop/service mysqld status


 被折叠的 条评论
为什么被折叠?
被折叠的 条评论
为什么被折叠?
 到【灌水乐园】发言


