


本编接着上篇后端基于Netty服务器的websocket服务 ,做一个前端的简单展示
顺便学习一下前端的知识点,关于js的websocket通信方式和http请求也差不多,看下面:
var socket = new WebSocket("ws://[ip地址]:[端口]");
ws:// 部分是一个协议,比如http://,https:// 都很类似 ; ip,端口什么的就不说了
包含以下函数: onopen() , onmessage() , onerror() , onclose() , Socket.send() , Socket.close()
- onopen 建立连接时触发
- onmessage 服务端向客户端发送消息,接收到消息时触发
- onerror 错误时触发
- onclose 关闭连接时触发
- send 主动发送消息给后端,比如回车发消息
- close 主动关闭socket连接,比如关闭聊天窗口,退出游戏等
看上去像websocket请求的生命周期,前端和后端的通道Channel差不多的生命周期
函数也不多,理解了作用就可以直接上手操作了,使用vue-cli搭建vue进行测试,很快,并搭配了element-ui构建ui界面
vue页面代码如下:
<template>
  <div id="page">
    <div>
      发送消息:
      <el-input size="medium" style="width:300px" v-model="input_msg" placeholder="发送消息"></el-input>
      <el-button size="medium" @click="send(input_msg)">发送</el-button>
    </div>

    <div>
      接收消息:
      <el-input size="medium" type="textarea" style="width:376px" :rows="2" v-model="get_msg" placeholder="接收消息"></el-input>
    </div>

    <div>
      <el-button size="medium" @click="out()">退出</el-button>
    </div>
  </div>
</template>

<script>
  export default {
    data() {
      return {
        input_msg: "",
        get_msg: "",
        my_socket: null
      };
    },
    created() { //页面加载时,初始化websocket
      this.initWebsocket()
    },
    destroyed() { //离开时,销毁websocket
      this.out()
    },
    methods: {
      initWebsocket() {
        const ws = "ws://localhost:8081/ws"
        this.my_socket = new WebSocket(ws);
        this.my_socket.onopen = this.ws_onopen;
        this.my_socket.onerror = this.ws_onerror;

        this.my_socket.onmessage = this.ws_onmessage;
        this.my_socket.onclose = this.ws_onclose;
      },
      ws_onopen() {
        console.log("连接服务器 成功...")
      },
      ws_onerror() {
        console.log("连接服务器 错误...")
      },
      ws_onmessage(e) {
        console.log("接收消息: " + e.data)
        if(this.get_msg) {
          this.get_msg = this.get_msg + "\n" + e.data
        } else {
          this.get_msg = e.data
        }
      },
      ws_onclose() {
        console.log("连接服务器 关闭...")
      },
      send(sendmsg) {
        console.log("发送信息 >>>>" + sendmsg);
        this.my_socket.send(sendmsg);
      },
      out() {
        console.log("主动退出");
        this.my_socket.close();
      }
    }
  };
</script>

<style>
</style>
结合上一篇 后端 ,都启动,简单的页面 测试展示 , 开两个客户端:
第一个客户端:
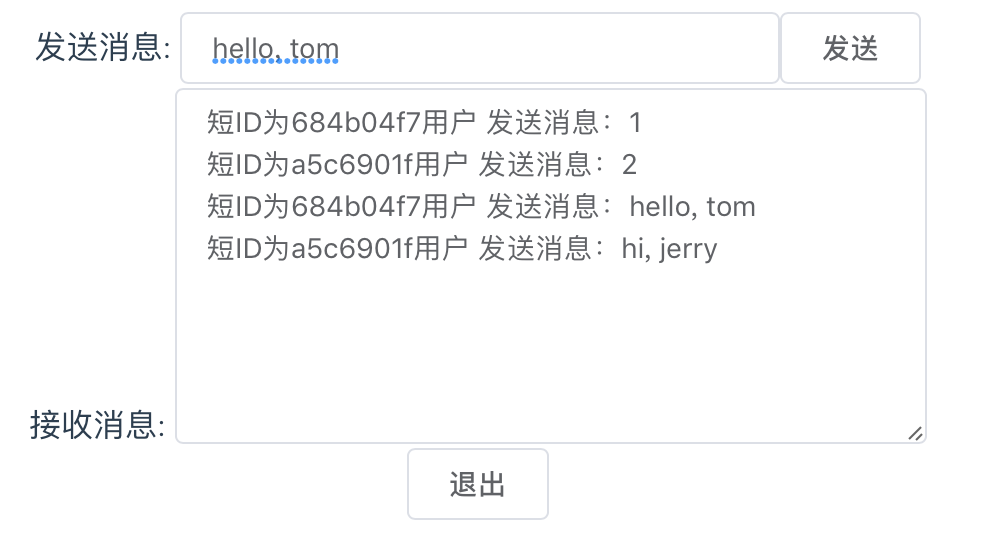
第二个客户端:

发送消息,接收消息都OK的
注意: ws://localhost:8081/ws 最后这个ws是后端定义的路由,不一定是我这边的ws


 3908
3908

 被折叠的 条评论
为什么被折叠?
被折叠的 条评论
为什么被折叠?
 到【灌水乐园】发言


