


配置OSPF认证
实验目的
掌握配置OSPF的明文认证与密文认证
实验步骤
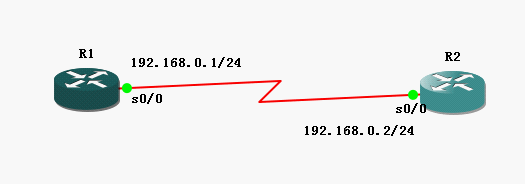
1. R1的预配置:
| Router> Router>en Router#config t Enter configuration commands, one per line. End with CNTL/Z. Router(config)#no ip domain-lookup Router(config)#host R1 R1(config)#line console 0 R1(config-line)#no exec-timeout R1(config-line)#loggin synchronous R1(config-line)#exit R1(config)#interface s0/0 R1(config-if)#ip address 192.168.0.1 255.255.255.0 R1(config-if)#no shut R1(config-if)#exit R1(config)# |
2. R2的预配置
| Router> Router>en Router#config t Enter configuration commands, one per line. End with CNTL/Z. Router(config)#no ip domain-lookup Router(config)#host R2 R2(config)#line console 0 R2(config-line)#no exec-timeout R2(config-line)#loggin synchronous R2(config-line)#exit R2(config)#interface s0/0 R2(config-if)#ip address 192.168.0.2 255.255.255.0 R2(config-if)#no shut R2(config-if)#exit R2(config)# |
3. 配置R1使用ospf明文认证
| R1(config)# R1(config)#router ospf 100 R1(config-router)#network 192.168.0.1 0.0.0.0 area 0 R1(config-router)#area 0 authentication //配置在Area 0下的所有接口使用明文认证 R1(config-router)#exit R1(config)#interface s0/0 R1(config-if)#ip ospf authentication-key cisco //配置R1的S0/0接口为OSPF明文认证,密码为 cisco R1(config-if)#end |
4. 配置R2使用ospf明文认证
| R2(config)# R2(config)#router ospf 100 R2(config-router)#network 192.168.0.2 0.0.0.0 area 0 R2(config-router)#area 0 authentication //配置在Area 0下的所有接口使用明文认证 R2(config-router)#exit R2(config)#interface s0/0 R2(config-if)#ip ospf authentication-key cisco //配置R2的S0/0接口为OSPF明文认证,密码为 cisco R2(config-if)#end |
5. 查看邻居是否建立
| R1#show ip ospf neighbor
Neighbor ID Pri State Dead Time Address Interface 192.168.0.2 0 FULL/ - 00:00:34 192.168.0.2 Serial0/0 R1# |
6. 配置R1使用ospf密文认证
| R1#config t Enter configuration commands, one per line. End with CNTL/Z. R1(config)#interface s0/0 R1(config-if)#ip ospf authentication message-digest R1(config-if)#ip ospf message-digest-key 1 md5 cisco *Mar 1 00:25:50.639: %OSPF-5-ADJCHG: Process 100, Nbr 192.168.0.2 on Serial0/0 from FULL to DOWN, Neighbor Down: Dead timer expired //因为此时R1使用密文认证,而R2还使用明文认证,所以会出现认证失败,无法建立邻居关系的情况 R1(config-if)#ip ospf message-digest-key 1 md5 cisco R1(config-if)#end R1# |
7. 配置R2使用ospf密文认证
| R2#config t Enter configuration commands, one per line. End with CNTL/Z. R2(config)#interface s0/0 R2(config-if)#ip ospf authentication message-digest R2(config-if)#ip ospf message-digest-key 1 md5 cisco R2(config-if)#end R2# *Mar 1 00:26:38.631: %SYS-5-CONFIG_I: Configured from console by console R2# *Mar 1 00:26:41.287: %OSPF-5-ADJCHG: Process 100, Nbr 192.168.0.1 on Serial0/0 from LOADING to FULL, Loading Done //由于R1和R2都是使用了密文认证,所以认证成功,邻居关系建立 |
8. 查看邻居关系是否建立
| R1#show ip ospf neighbor
Neighbor ID Pri State Dead Time Address Interface 192.168.0.2 0 FULL/ - 00:00:32 192.168.0.2 Serial0/0 R1#
R2#show ip ospf neighbor
Neighbor ID Pri State Dead Time Address Interface 192.168.0.1 0 FULL/ - 00:00:35 192.168.0.1 Serial0/0 R2# |
转载于:https://blog.51cto.com/mxn19871215/465843


 967
967


 被折叠的 条评论
为什么被折叠?
被折叠的 条评论
为什么被折叠?
 到【灌水乐园】发言


