


转载请注明出处:http://blog.csdn.net/qq_26525215
本文源自【大学之旅_谙忆的博客】
分析
Spring的事件(Application Event)为Bean与Bean之间的消息通信提供了支持。
当一个Bean处理完一个任务之后,希望另一个Bean知道并能做出相应的处理,这时我们就需要让另外一个Bean监听当前Bean所发送的事件。
Spring的事件需要遵循如下流程:
1、自定义事件,集成ApplicationEvent。
2、定义事件监听器,实现ApplicationListener
3、使用容器发布容器
进行本示例的演示,需要先配置好Maven和Spring哦、
见:
【Spring】基于IntelliJ IDEA搭建Maven
下面直接上示例吧。
示例
自定义事件
package cn.hncu.p2_5_2ApplicationEvent;

import org.springframework.context.ApplicationEvent;

/**
 * Created with IntelliJ IDEA.
 * User: 陈浩翔.
 * Date: 2016/11/15.
 * Time: 下午 8:39.
 * Explain:自定义事件
 */
public class DemoEvent extends ApplicationEvent{
    private static final long serialVersionUID = 1L;
    private String msg;

    public DemoEvent(Object source,String msg) {
        super(source);
        this.msg=msg;
        System.out.println(this.getClass()+",构造方法");
    }

    public String getMsg() {
        return msg;
    }

    public void setMsg(String msg) {
        this.msg = msg;
    }
}
事件监听器
package cn.hncu.p2_5_2ApplicationEvent;

import org.springframework.context.ApplicationListener;
import org.springframework.stereotype.Component;

/**
 * Created with IntelliJ IDEA.
 * User: 陈浩翔.
 * Date: 2016/11/15.
 * Time: 下午 8:50.
 * Explain:事件监听器
 */
@Component
public class DemoListener implements ApplicationListener<DemoEvent> {//实现ApplicationListener接口,并指定监听的事件类型
    @Override
    public void onApplicationEvent(DemoEvent demoEvent) {//使用onApplicationEvent方法对消息进行接受处理
        String msg = demoEvent.getMsg();
        System.out.println(this.getClass()+"监听到了bean-demoPublisher发布的消息:"+msg);
    }
}
事件发布类
package cn.hncu.p2_5_2ApplicationEvent;

import org.springframework.beans.factory.annotation.Autowired;
import org.springframework.context.ApplicationContext;
import org.springframework.stereotype.Component;

/**
 * Created with IntelliJ IDEA.
 * User: 陈浩翔.
 * Date: 2016/11/15.
 * Time: 下午 10:39.
 * Explain:事件发布类
 */
@Component
public class DemoPublisher {
    @Autowired
    ApplicationContext applicationContext;//注入ApplicationContext用来发布事件

    public void publish(String msg){
        DemoEvent demoEvent = new DemoEvent(this,msg);
        applicationContext.publishEvent(demoEvent);//在这里的时候,会去运行DemoListener中的onApplicationEvent方法
        System.out.println("消息:"+demoEvent.getMsg());
        //使用ApplicationContext的publishEvent方法来发布
    }

}
配置类
package cn.hncu.p2_5_2ApplicationEvent;

import org.springframework.context.annotation.ComponentScan;
import org.springframework.context.annotation.Configuration;

/**
 * Created with IntelliJ IDEA.
 * User: 陈浩翔.
 * Date: 2016/11/15.
 * Time: 下午 10:46.
 * Explain:配置类
 */
@Configuration
@ComponentScan("cn.hncu.p2_5_2ApplicationEvent")
public class EventConfig {
}
运行类
package cn.hncu.p2_5_2ApplicationEvent;

import org.springframework.context.annotation.AnnotationConfigApplicationContext;

/**
 * Created with IntelliJ IDEA.
 * User: 陈浩翔.
 * Date: 2016/11/15.
 * Time: 下午 10:47.
 * Explain:运行类
 */
public class Main {
    public static void main(String[] args) {
        AnnotationConfigApplicationContext context = new AnnotationConfigApplicationContext(EventConfig.class);
        DemoPublisher demoPublisher = context.getBean(DemoPublisher.class);
        demoPublisher.publish("hello 你好...");
        context.close();
    }
}
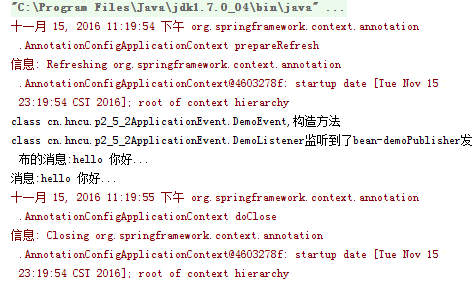
运行结果
转载请注明出处:http://blog.csdn.net/qq_26525215
本文源自【大学之旅_谙忆的博客】


 被折叠的 条评论
为什么被折叠?
被折叠的 条评论
为什么被折叠?
 到【灌水乐园】发言


