Kendo的数据源支持本地数据源(JavaScript对象数组),或者远程数据源(XML, JSON, JSONP),支持CRUD操作(创建,读取,更新和删除操作),并支持排序,分页,过滤,分组和集合等。
准备开始
下面创建一个本地数据源。
| 1 2 3 4 5 6 7 8 9 10 11 12 | var movies = [ {
title: “Star Wars: A New Hope”,
year: 1977
}, {
title: “Star Wars: The Empire Strikes Back”,
year: 1980
}, {
title: “Star Wars: Return of the Jedi”,
year: 1983
}
];
var localDataSource = new kendo.data.DataSource({data: movies});
|
创建一个远程数据源 (Twitter)
| 1 2 3 4 5 6 7 8 9 10 11 12 13 14 15 16 17 18 19 20 21 | var dataSource = new kendo.data.DataSource({
transport: {
read: {
// the remote service url
url: “http://search.twitter.com/search.json”,
// JSONP is required for cross-domain AJAX
dataType: “jsonp”,
// additional parameters sent to the remote service
data: {
q: “html5″
}
}
},
// describe the result format
schema: {
// the data which the data source will be bound to is in the “results” field
data: “results”
}
});
|
绑定数据源到UI组件
Kendo UI组件很多都支持数据绑定 ,UI组件绑定的数据源可以在配置UI组件时设置,或是多个UI组件共享同一个数据源。创建UI组件时设置DataSource属性:
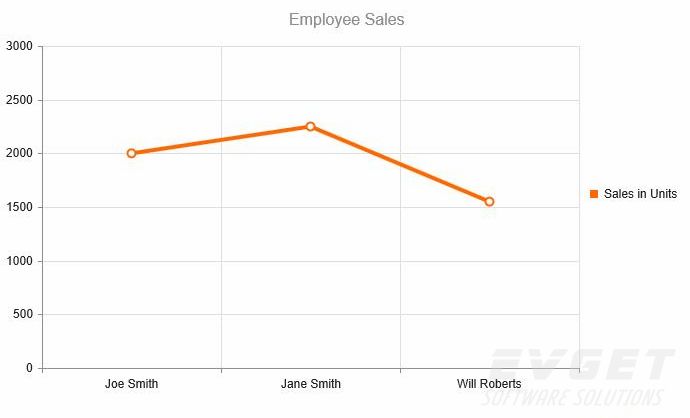
| 1 2 3 4 5 6 7 8 9 10 11 12 13 14 15 16 17 18 19 20 21 22 23 24 25 26 27 28 | $(“#chart”).kendoChart({
title: {
text: “Employee Sales”
},
dataSource: new kendo.data.DataSource({
data: [
{
employee: “Joe Smith”,
sales: 2000
},
{
employee: “Jane Smith”,
sales: 2250
},
{
employee: “Will Roberts”,
sales: 1550
}]
}),
series: [{
type: “line”,
field: “sales”,
name: “Sales in Units”
}],
categoryAxis: {
field: “employee”
}
});
|
使用共享的远程数据源:
| 1 2 3 4 5 6 7 8 9 10 11 12 13 14 15 16 17 18 19 20 21 22 23 24 25 26 27 28 29 30 31 32 33 34 35 36 37 | var sharableDataSource = new kendo.data.DataSource({
transport: {
read: {
url: “data-service.json”,
dataType: “json”
}
}
});
// Bind two UI widgets to same DataSource
$(“#chart”).kendoChart({
title: {
text: “Employee Sales”
},
dataSource: sharableDataSource,
series: [{
field: “sales”,
name: “Sales in Units”
}],
categoryAxis: {
field: “employee”
}
});
$(“#grid”).kendoGrid({
dataSource: sharableDataSource,
columns: [
{
field: “employee”,
title: “Employee”
},
{
field: “sales”,
title: “Sales”,
template: ‘#= kendo.toString(sales, “N0″) #’
}]
});
|
这个例子使用了模板 template,模板的用法参见后面的文章。
本文转载自Kendo UI中文网


 247
247


 被折叠的 条评论
为什么被折叠?
被折叠的 条评论
为什么被折叠?
 到【灌水乐园】发言


