


2009
年
11
月
17
日
使用心得
一
,首先用光盘安装Hyper-v,安装完成后,为了方便后面的管理,要在hyper-v本地,把几个基本的内容要设置一下,如:
1、加域(默认在workgroup工作组,如是实验,不加域,跳过此步)<?xml:namespace prefix = o ns = "urn:schemas-microsoft-com:office:office" />
2、更改计算机名(提示需重启,可先不重启待全部设置完成后再重启)
3、添加本地管理员账户(及密码)
4、开启远程管理(及子选项下相关服务)
5、开启程桌面(及子选项下相关服务)
6、给hyper-v主机配IP地址及子网掩码、网关等。(如不需要,可以不配DNS等信息)
7、关闭防火墙命令如下:(默认情况打开的,可以在另一窗口“4”,“4”中查看)
a、在CMD窗口内输入 netsh 回车
b、Firewall 回车
c、Set opmode disable 回车
d、可以返回到另一管理窗口,输入“4”再输入“4”(查看防火墙,此时应该是“OFF”)
提示确定后,完成禁用防火墙的功能。当然通过命令net stop mpssvc 也可以,(但有时,可能对通过Hyper-v控制台远程管理Hyper-V Server 2008还是阻挡的。)
二、hyper-v主机安装配置完成后,接下来就需要在做管理控制的主机上做一些相关的配置,主要配置如下:
1、打开cmd窗口,进到自己下面所调用的脚本文件所保存的位置。
2、cscript //h:cscript(调用脚本)
2、cmdkey /add:hyper-v(主机名) /user:hyper-v(主机名)\administrator(前面所添加的本地管理员账户) /pass:456-abc(前面所添加的本地管理员账户密码)
3、hvremote /AnonDCOM:grant(添加凭证及授权)
4、编辑hosts文件 把hyper-v和相应IP地址做对应(即添加hyper-v的A记录:windows\system32\drivers\etc\hosts,碰到不能写入后不能保存的时候,要开权限或夺权限。)
三、做完上面的工作后,应该可以正常连接到hyper服务器了,下面就可以创建虚机进行实战了,当然创建可以直接建虚机,也可以先建VHD,再创建虚机,本人偏向于后者。如果一切顺利,当然最好。但本人,在建虚机的时候有问题了,只要建虚机或VHD均报错,报错内容如下图1:(前面相信比我还熟了,后面血和泪的教训,本文的重点就在这里了)
<?xml:namespace prefix = v ns = "urn:schemas-microsoft-com:vml" /> 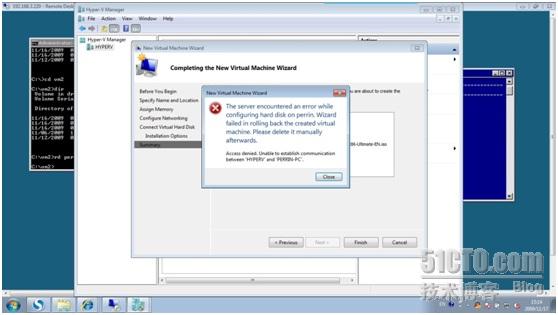
图1
此时如果再次创建虚机或VHD则会弹出下面的错误,如图2:
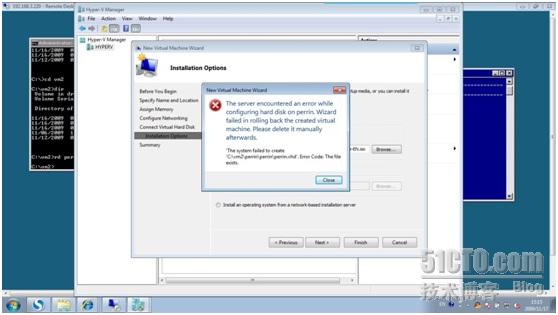 图2
图2
报错内容即:“Access denied. Unable to establish communication between ‘Client’ and ‘Server’”
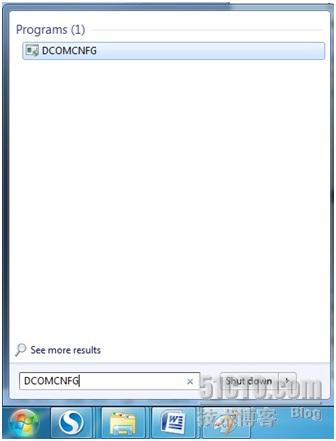
I was trying to connect from my laptop to our virtual host via the Hyper-V management tools, I kept getting "Access denied. Unable to establish communication between Client and Server".
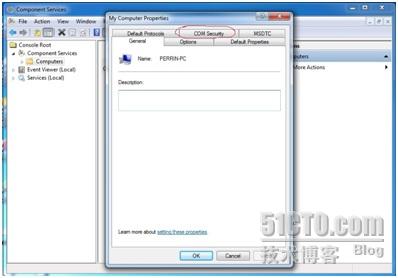
1、You can do this by typing: ”DCOMCNFG” in the run-command in Windows.
2、 Browse trough to: “Component Services > Computers > My Computer”.

3、 Open Properties for “My Computer” and select the COM Security tab.
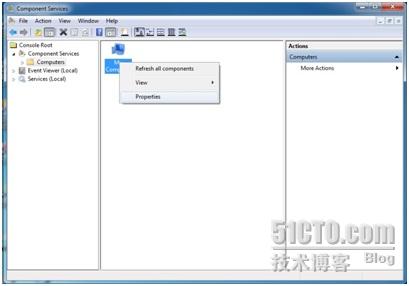
4、In “Access Permissions” area click the “Edit Limits”-button.
5、Select the “Anonymous Logon”-group and make sure the “Remote Access” is set to Allowed.
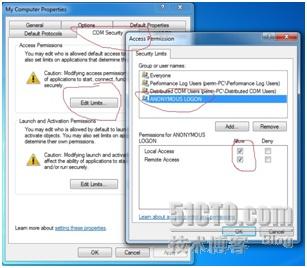
Now you client tools should connect successfully to the servers Hyper-V management.
转载于:https://blog.51cto.com/linzi198400/228433


 3178
3178

 被折叠的 条评论
为什么被折叠?
被折叠的 条评论
为什么被折叠?
 到【灌水乐园】发言


