Quartz2D
1.基本图形绘制有三大类
- 线
- 长方形
- 圆与扇形
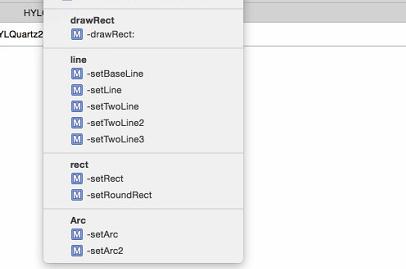
- 以上三种进行代码分类,如图:
2.针对三类解释(解释在代码中)
#pragma mark - line
//线的基本画法步骤
-(void) setBaseLine{
//1.获取视图上下文
CGContextRef contextRef=UIGraphicsGetCurrentContext();
//2.拼接路径
//2.1设置绘制点
CGPoint startP=CGPointMake(10, 10);
CGPoint endP=CGPointMake(100, 100);
//2.2创建路径
CGMutablePathRef path=CGPathCreateMutable();
CGPathMoveToPoint(path, NULL, startP.x, startP.y);
CGPathAddLineToPoint(path, NULL, endP.x, endP.y);
//3.将路径添加到上下文
CGContextAddPath(contextRef, path);
//4.将上下文渲染到视图上
CGContextStrokePath(contextRef);
}
//线的基本画法步骤2UIBezierPath(封装了setBaseLine的一些步骤)
-(void) setLine{
//拼接路径
//设置绘制点
CGPoint startP=CGPointMake(10, 10);
CGPoint endP=CGPointMake(100, 100);
//创建路径
UIBezierPath *path=[UIBezierPath bezierPath];
[path moveToPoint:startP];
[path addLineToPoint:endP];

//绘制路径
[path stroke];

}
//画连在一起的折线
-(void) setTwoLine{
//1.获取视图上下文
CGContextRef contextRef=UIGraphicsGetCurrentContext();
//2.拼接路径
//2.1设置绘制点
CGPoint startP=CGPointMake(10, 10);
CGPoint endP=CGPointMake(100, 100);
CGPoint endP2=CGPointMake(200, 120);
//2.2创建路径
UIBezierPath *path=[UIBezierPath bezierPath];
[path moveToPoint:startP];
[path addLineToPoint:endP];
[path addLineToPoint:endP2];
//3.将路径添加到上下文
CGContextAddPath(contextRef, path.CGPath);
//4.将上下文渲染到视图上
CGContextStrokePath(contextRef);
}
//画两条不连在一起的线,并设置线的颜色等等
-(void) setTwoLine2{
//1.获取视图上下文
CGContextRef contextRef=UIGraphicsGetCurrentContext();
//2.拼接路径
//2.1设置绘制点
CGPoint startP=CGPointMake(10, 10);
CGPoint endP=CGPointMake(100, 100);
CGPoint startP2=CGPointMake(110, 110);
CGPoint endP2=CGPointMake(200, 120);
//2.2创建路径
UIBezierPath *path=[UIBezierPath bezierPath];
[path moveToPoint:startP];
[path addLineToPoint:endP];


UIBezierPath *path2=[UIBezierPath bezierPath];
[path2 moveToPoint:startP2];
[path2 addLineToPoint:endP2];
//3.将路径添加到上下文
CGContextAddPath(contextRef, path.CGPath);
CGContextAddPath(contextRef, path2.CGPath);

//在渲染之前做一些基本设置
CGContextSetLineWidth(contextRef, 8);
CGContextSetLineCap(contextRef, kCGLineCapRound);
[[UIColor redColor] set];

//4.将上下文渲染到视图上
CGContextStrokePath(contextRef);
}
//设置两条线的颜色等不同的写法
-(void) setTwoLine3{
//2.拼接路径
//2.1设置绘制点
CGPoint startP=CGPointMake(10, 10);
CGPoint endP=CGPointMake(100, 100);
CGPoint startP2=CGPointMake(110, 110);
CGPoint endP2=CGPointMake(200, 120);
//2.2创建路径
UIBezierPath *path=[UIBezierPath bezierPath];
[path moveToPoint:startP];
[path addLineToPoint:endP];
[[UIColor redColor]set];
[path stroke];

UIBezierPath *path2=[UIBezierPath bezierPath];
[path2 moveToPoint:startP2];
[path2 addLineToPoint:endP2];
[[UIColor blackColor]set];
[path2 stroke];
}
        ```
* 长方形

```objc

#pragma mark - rect
-(void) setRect{
    UIBezierPath *path=[UIBezierPath bezierPathWithRect:CGRectMake(50, 50, 100, 100)];
    [path stroke];
}

-(void) setRoundRect{
    UIBezierPath *path=[UIBezierPath bezierPathWithRoundedRect:CGRectMake(50, 50, 100, 100) cornerRadius:50];
    [path stroke];
}
#pragma mark - Arc
//画一完整的圆,fill与stroke的区别
-(void) setArc{
    // 圆弧
    // Center:圆心
    // startAngle:弧度
    // clockwise:YES:顺时针 NO:逆时针
    UIBezierPath *path=[UIBezierPath bezierPathWithArcCenter:CGPointMake(100, 100) radius:50 startAngle:0 endAngle:M_PI_2 *4  clockwise:YES];
    //[path stroke];
    [path fill];
}
//完整的扇形,fill会自动封闭路径,stroke不会,需要手动设置
-(void) setArc2{
    UIBezierPath *path=[UIBezierPath bezierPathWithArcCenter:CGPointMake(100, 100) radius:50 startAngle:0 endAngle:M_2_PI clockwise:NO];
    [path addLineToPoint:CGPointMake(100, 100)];
    //[path fill];

    [path closePath];
    [path stroke];
}
3.详细源代码


 1489
1489

 被折叠的 条评论
为什么被折叠?
被折叠的 条评论
为什么被折叠?
 到【灌水乐园】发言


