


一、前言
由于session占用内存过大,会造成服务器负担,并且基于高并发环境,需要进行负载均衡以及前后端分离,所以在本机进行了基于nginx+多tomcat+redis分布式web应用的session共享配置测试。另外,项目里有一个小需求,就是一个账户只能登陆一个客户端,将session存储到noSql中,对session进行校验拦截既能实现该需求,也能减少服务器压力,使tomcat无状态,即使单机tomcat宕机,也不会影响服务的正常运行。
基本架构:
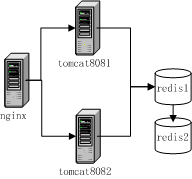 redis可做集群配置。
二、测试环境
| os | win7 64 |
| nginx | nginx-1.10.2 |
| tomcat | apache-tomcat-7.0.75-windows-x64 |
| jdk | jdk1.7_64 |
| redis | redis2.8 |
注:redis和nginx最好还是要在linux上使用,win7只是用来测试!后续有时间会将linux的测试结果总结出来!
jdk环境配置,在此不赘述!
redis安装,略!官方下载地址:http://redis.io/download,不过官方没有64位的Windows下的可执行程序,目前有个开源的托管在github上, 地址:https://github.com/ServiceStack/redis-windows 点击这个地方,下载文件并解压到自己的电脑目录下。
安装教程可参考 https://my.oschina.net/swchenml/blog/809791
在此安利一个redis桌面管理工具:redis desktop manager https://redisdesktop.com/download
三、tomcat配置
所需jar包

jar包下载地址:https://pan.baidu.com/s/1i53HLfJ
下载最新的tomcat7: http://tomcat.apache.org/download-70.cgi

解压至文件夹,准备两个tomcat。
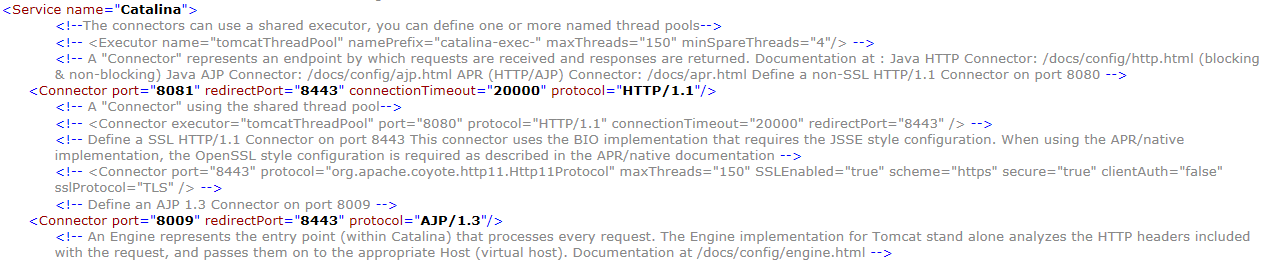
1、修改tomcat111 conf\server.xml 端口号 为8081 其他端口默认
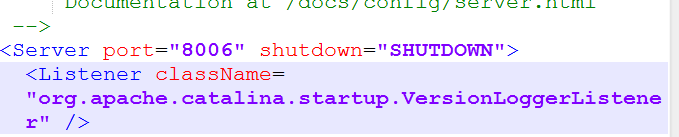
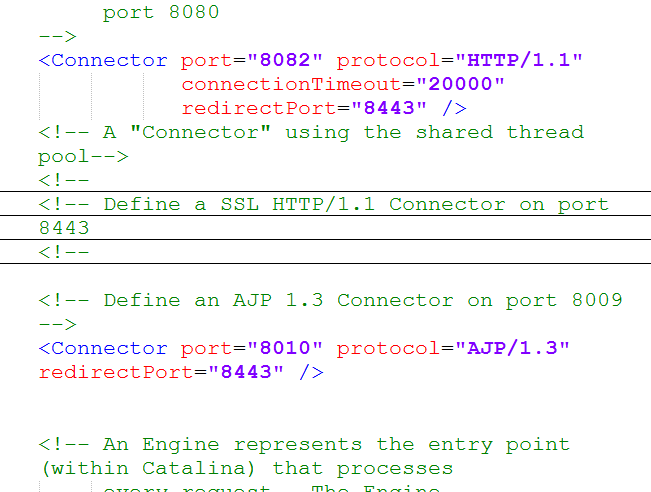
2、为避免tomcat222冲突 修改conf\server.xml
server port="8006"和port="8082" 以及AJP port="8010"
各自启动tomcat,测试是否正常运行。如若还是冲突,请为每个tomcat设置不同的jdk运行环境。
3、将上面所有的Jar包分别拷到两个Tomcat7安装目录下面的Lib目录下
4、在两个Tomcat 的conf/context.xml 文件里分别增加如下内容(或者在server.xml的context块中添加)
<Valve className="com.orangefunction.tomcat.redissessions.RedisSessionHandlerValve" />
      <Manager className="com.orangefunction.tomcat.redissessions.RedisSessionManager"
           host="localhost"
           port="6379"
           database="0"
           maxInactiveInterval="60" />
6379是redis默认的对外访问端口号,maxInactiveInterval是session有效时间,单位s。
四、编写测试war包
eclipse编译好分别放置到两个tomcat的部署目录下
<%@ page language="java" contentType="text/html; charset=UTF-8"
pageEncoding="UTF-8"%>
<%@ page import="java.io.*,java.util.*" %>
<%
// 获取session创建时间
Date createTime = new Date(session.getCreationTime());
// 获取最后访问页面的时间
Date lastAccessTime = new Date(session.getLastAccessedTime());
String title = "Tomcat1";
Integer visitCount = new Integer(0);
String visitCountKey = new String("visitCount");
String userIDKey = new String("userID");
String userID = new String("ABCD");
// 检测网页是否由新的访问用户
if (session.isNew()){
title = "Tomcat1";
session.setAttribute(userIDKey, userID);
session.setAttribute(visitCountKey, visitCount);
} else {
visitCount = (Integer)session.getAttribute(visitCountKey);
visitCount += 1;
userID = (String)session.getAttribute(userIDKey);
session.setAttribute(visitCountKey, visitCount);
}
%>
<html>
<head>
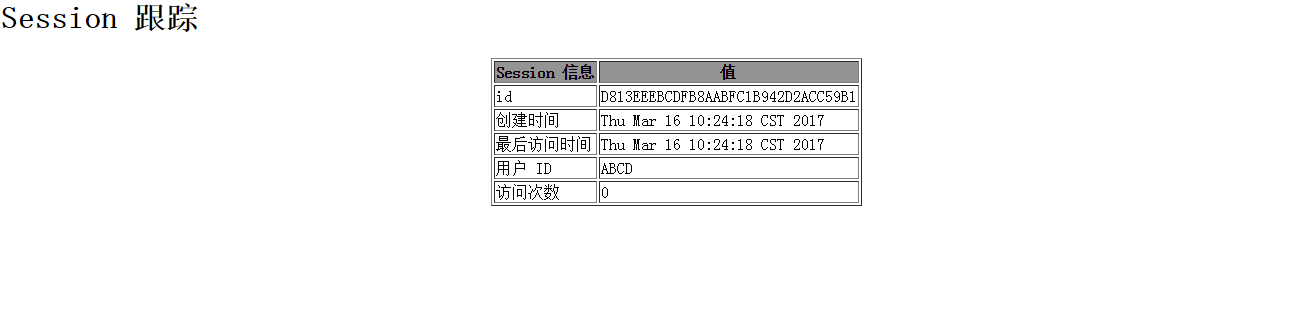
<title>Session 跟踪</title>
</head>
<body>
<h1>Session 跟踪</h1>
<table border="1" align="center">
<tr bgcolor="#949494">
<th>Session 信息</th>
<th>值</th>
</tr>
<tr>
<td>id</td>
<td><% out.print( session.getId()); %></td>
</tr>
<tr>
<td>创建时间</td>
<td><% out.print(createTime); %></td>
</tr>
<tr>
<td>最后访问时间</td>
<td><% out.print(lastAccessTime); %></td>
</tr>
<tr>
<td>用户 ID</td>
<td><% out.print(userID); %></td>
</tr>
<tr>
<td>访问次数</td>
<td><% out.print(visitCount); %></td>
</tr>
</table>
</body>
</html>分别启动tomcat,各自访问不同端口号项目,可看到页面已经生成seesion,两个端口的值不相同。
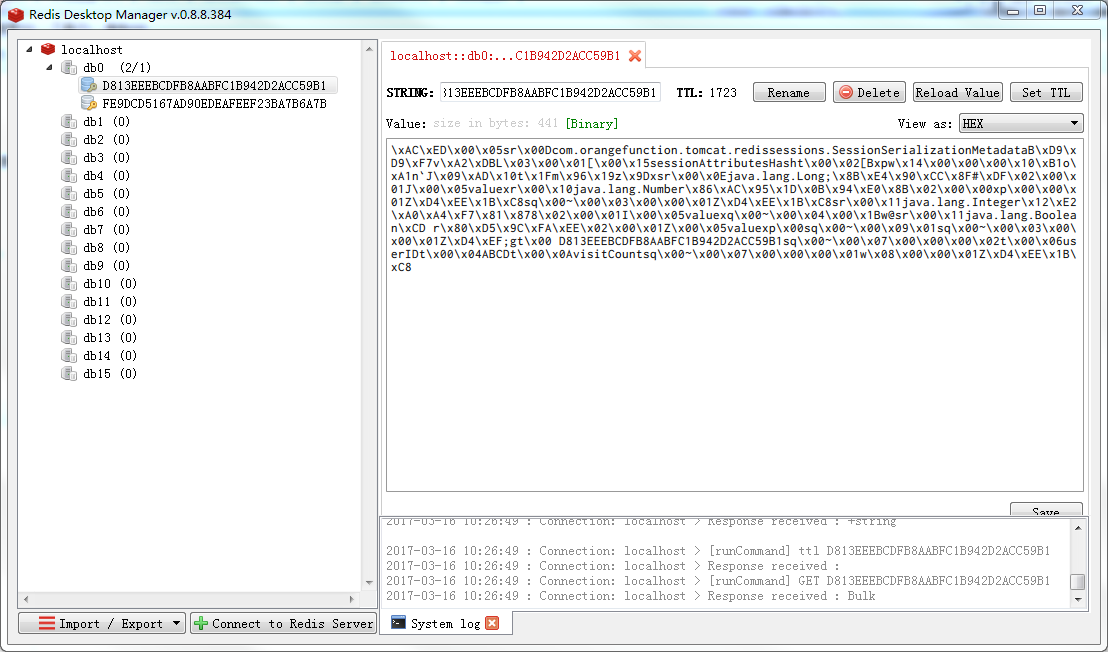
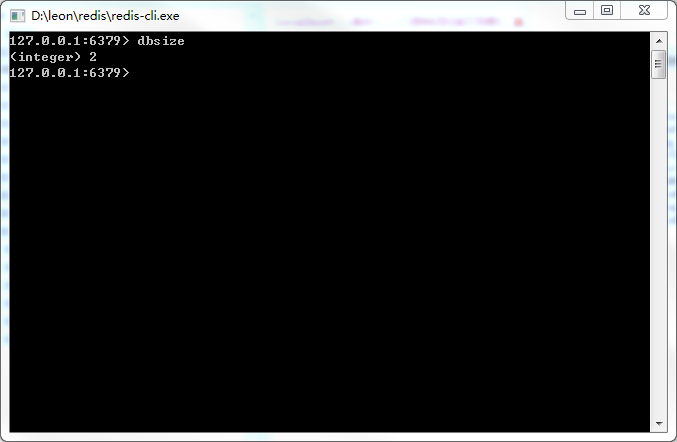
查看redis,发现session已成功存储到redis
五、nginx集群配置
nginx的安装教程:https://my.oschina.net/swchenml/blog/808392
tomcat session manager 配置
修改D:\items\server\nginx-1.10.2\conf\nginx.conf ,启用 upstream 负载均衡 tomcat Cluster,默认使用轮询方式。
在#gzip on;后添加
upstream tomcat  {
        server localhost:8081;
        server localhost:8082;
        ip_hash;
    }
修改
server {
        listen       80;
        server_name  localhost;

        #charset koi8-r;

        #access_log  logs/host.access.log  main;

        location / {
            #root   html;
            index  index.jsp index.html index.htm;
            add_header Cache-Control 'no-store';
			 client_max_body_size 100m;

			 proxy_set_header Host $http_host;

			 proxy_set_header X-Real-IP $remote_addr;

			 proxy_set_header X-Forwarded-For $proxy_add_x_forwarded_for;

			# proxy_cache Z;

			 proxy_cache_valid 200 1m;

			 proxy_pass   http://tomcat;
}重启nginx: net start/stop nginx
六、测试
访问:http://localhost/testSession/ 发现session进行了共享
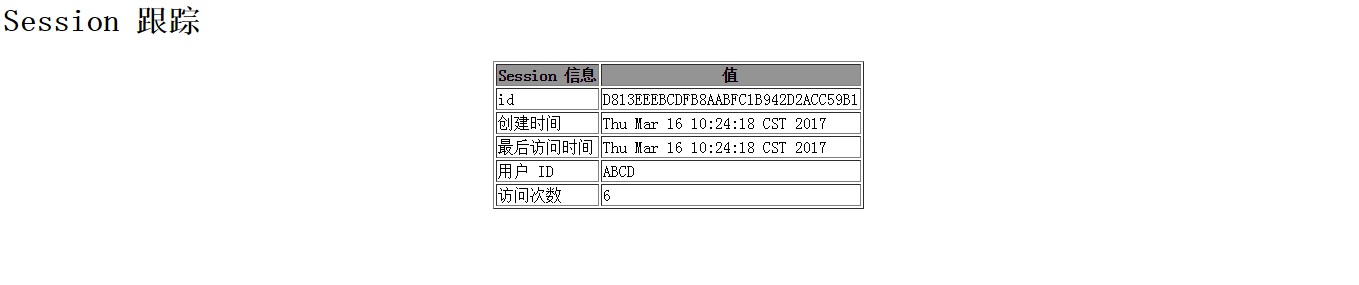
ok!
参考资料:http://www.cnblogs.com/weixiaole/p/4431679.html


 581
581

 被折叠的 条评论
为什么被折叠?
被折叠的 条评论
为什么被折叠?
 到【灌水乐园】发言


