


这一节,主要聊Acceptor。
主要功能是:接收请求,创建socket连接,并且分配给Processor处理。
/**
 * Thread that accepts and configures new connections. There is one of these per endpoint.
 */
private[kafka] class Acceptor(val endPoint: EndPoint,
                              val sendBufferSize: Int,
                              val recvBufferSize: Int,
                              brokerId: Int,
                              processors: Array[Processor],
                              connectionQuotas: ConnectionQuotas) extends AbstractServerThread(connectionQuotas) with KafkaMetricsGroup {

  private val nioSelector = NSelector.open()//注册监听socket的Selector对象!!!
  val serverChannel = openServerSocket(endPoint.host, endPoint.port)//监听套接字!!!

  this.synchronized {//启动其管辖的Processor线程
    processors.foreach { processor =>
      Utils.newThread(s"kafka-network-thread-$brokerId-${endPoint.listenerName}-${endPoint.securityProtocol}-${processor.id}",
        processor, false).start()
    }
  }
接下来,它的run方法是Acceptor的核心逻辑,我们看看具体实现:
 /**
   * Accept loop that checks for new connection attempts
   */
  def run() {
    serverChannel.register(nioSelector, SelectionKey.OP_ACCEPT)//注册ACCEPT事件
    startupComplete()
    try {
      var currentProcessor = 0
      while (isRunning) {
        try {
          val ready = nioSelector.select(500)//最多等待500毫秒的时间,看是否有socket过来!
          if (ready > 0) {
            val keys = nioSelector.selectedKeys()
            val iter = keys.iterator()
            while (iter.hasNext && isRunning) {
              try {
                val key = iter.next
                iter.remove()
                if (key.isAcceptable)
                  accept(key, processors(currentProcessor))
                else
                  throw new IllegalStateException("Unrecognized key state for acceptor thread.")

                // round robin to the next processor thread
                currentProcessor = (currentProcessor + 1) % processors.length//看来也是采用轮询的方案
              } catch {
                case e: Throwable => error("Error while accepting connection", e)
              }
            }
          }
        }
小贴士:
我们类比下Thrift的方案
 /**
   * A round robin load balancer for choosing selector threads for new
   * connections.
   */
  protected static class SelectorThreadLoadBalancer {
    private final Collection<? extends SelectorThread> threads;
    private Iterator<? extends SelectorThread> nextThreadIterator;

    public <T extends SelectorThread> SelectorThreadLoadBalancer(Collection<T> threads) {
      if (threads.isEmpty()) {
        throw new IllegalArgumentException("At least one selector thread is required");
      }
      this.threads = Collections.unmodifiableList(new ArrayList<T>(threads));
      nextThreadIterator = this.threads.iterator();
    }

    public SelectorThread nextThread() {
      // Choose a selector thread (round robin)
      if (!nextThreadIterator.hasNext()) {
        nextThreadIterator = threads.iterator();
      }
      return nextThreadIterator.next();
    }
  }
}
一旦到了最后,就回绕到第1个
可见,殊途同归,不解释!
接下来,重点就是accept函数
  /*
   * Accept a new connection
   */
  def accept(key: SelectionKey, processor: Processor) {
为了顺利进来,我们先打个断点如下:
stop in kafka.network.SocketServer$Acceptor.accept
stop in kafka.network.SocketServer$Acceptor.run
stop at kafka.network.SocketServer:335
stop at kafka.network.SocketServer:265
/*
* Accept a new connection
*/
def accept(key: SelectionKey, processor: Processor) {
val serverSocketChannel = key.channel().asInstanceOf[ServerSocketChannel]
val socketChannel = serverSocketChannel.accept()//调用accept函数获取 socket句柄
try {
connectionQuotas.inc(socketChannel.socket().getInetAddress)
socketChannel.configureBlocking(false)
socketChannel.socket().setTcpNoDelay(true)
socketChannel.socket().setKeepAlive(true)
if (sendBufferSize != Selectable.USE_DEFAULT_BUFFER_SIZE)
socketChannel.socket().setSendBufferSize(sendBufferSize)
debug("Accepted connection from %s on %s and assigned it to processor %d, sendBufferSize [actual|requested]: [%d|%d] recvBufferSize [actual|requested]: [%d|%d]"
.format(socketChannel.socket.getRemoteSocketAddress, socketChannel.socket.getLocalSocketAddress, processor.id,
socketChannel.socket.getSendBufferSize, sendBufferSize,
socketChannel.socket.getReceiveBufferSize, recvBufferSize))
processor.accept(socketChannel)//交给Processor处理,这个已经是通过轮询选中的
} catch {
case e: TooManyConnectionsException =>
info("Rejected connection from %s, address already has the configured maximum of %d connections.".format(e.ip, e.count))
close(socketChannel)
}
}我们看Processor怎么处理的
/**
   * Queue up a new connection for reading
   */
  def accept(socketChannel: SocketChannel) {
    newConnections.add(socketChannel)
    wakeup()
  }
这个newConnections是个什么?
private val newConnections = new ConcurrentLinkedQueue[SocketChannel]()是1个队列,恩,类比下Thrift怎么玩的
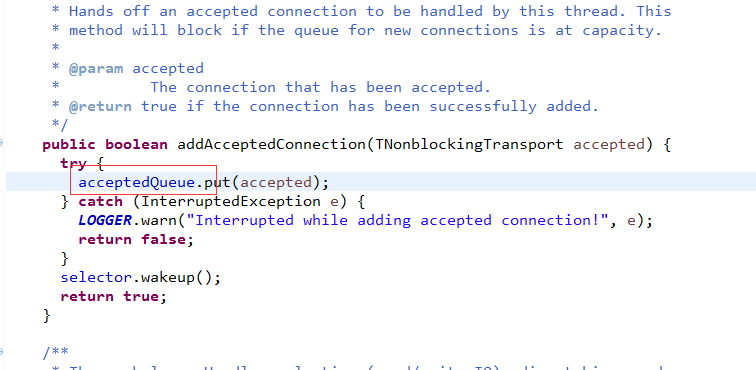
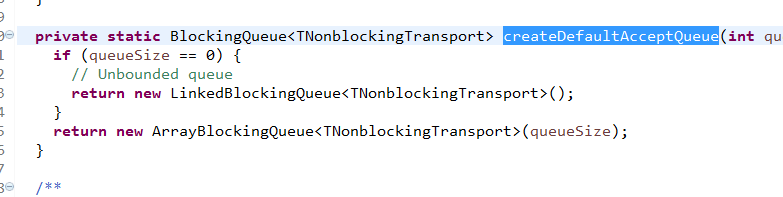
看到了吧,套路都一样。。。
那么, 这个新的连接是怎么被Processor处理的呢?
看代码
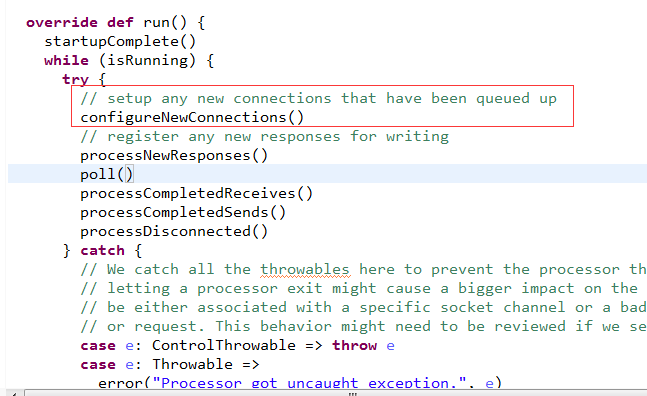
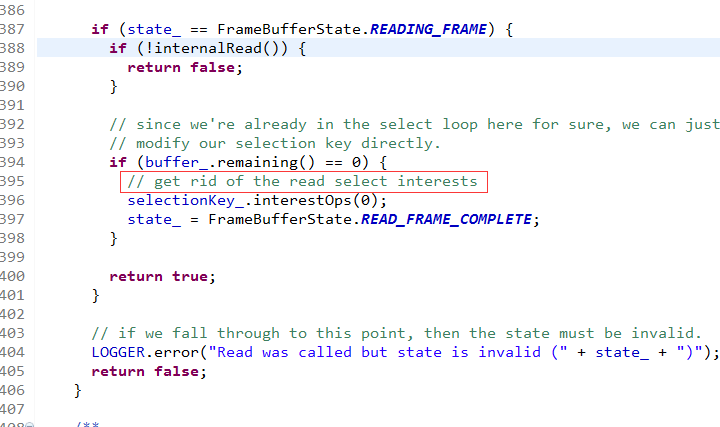
奥秘就在这里,我们再看看Thrift的玩法
真的没啥可说的,就这么回事吧
好,回到Kafka,我们知道Processor主要完成读取请求和写回响应。
Processor不参与具体的业务逻辑操作。
通过acceptor.accept创建的socket,通过processor.accept传给processor处理,
/**
   * Register any new connections that have been queued up
   */
  private def configureNewConnections() {
    while (!newConnections.isEmpty) {
      val channel = newConnections.poll()
      try {
        debug(s"Processor $id listening to new connection from ${channel.socket.getRemoteSocketAddress}")
        val localHost = channel.socket().getLocalAddress.getHostAddress
        val localPort = channel.socket().getLocalPort
        val remoteHost = channel.socket().getInetAddress.getHostAddress
        val remotePort = channel.socket().getPort
        val connectionId = ConnectionId(localHost, localPort, remoteHost, remotePort).toString
        selector.register(connectionId, channel)//注册读事件
      } catch {
        // We explicitly catch all non fatal exceptions and close the socket to avoid a socket leak. The other
        // throwables will be caught in processor and logged as uncaught exceptions.
        case NonFatal(e) =>
          val remoteAddress = channel.getRemoteAddress
          // need to close the channel here to avoid a socket leak.
          close(channel)
          error(s"Processor $id closed connection from $remoteAddress", e)
      }
    }
  }
到这里,就注册了读事件,然后看Processor怎么处理读事件的!
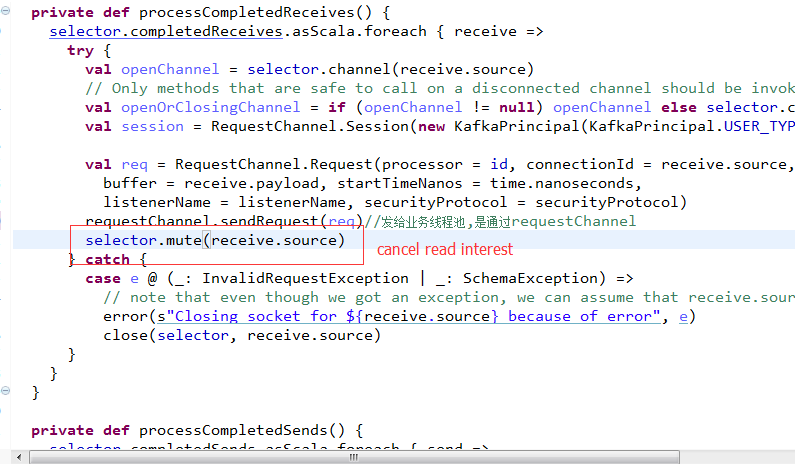
private def processCompletedReceives() {
selector.completedReceives.asScala.foreach { receive =>
try {
val openChannel = selector.channel(receive.source)
// Only methods that are safe to call on a disconnected channel should be invoked on 'openOrClosingChannel'.
val openOrClosingChannel = if (openChannel != null) openChannel else selector.closingChannel(receive.source)
val session = RequestChannel.Session(new KafkaPrincipal(KafkaPrincipal.USER_TYPE, openOrClosingChannel.principal.getName), openOrClosingChannel.socketAddress)
val req = RequestChannel.Request(processor = id, connectionId = receive.source, session = session,
buffer = receive.payload, startTimeNanos = time.nanoseconds,
listenerName = listenerName, securityProtocol = securityProtocol)
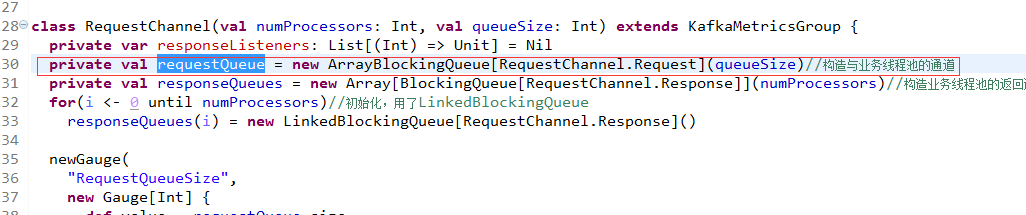
requestChannel.sendRequest(req)//发给业务线程池,是通过requestChannel
selector.mute(receive.source)
} catch {
case e @ (_: InvalidRequestException | _: SchemaException) =>
// note that even though we got an exception, we can assume that receive.source is valid. Issues with constructing a valid receive object were handled earlier
error(s"Closing socket for ${receive.source} because of error", e)
close(selector, receive.source)
}
}
} /** Send a request to be handled, potentially blocking until there is room in the queue for the request */
def sendRequest(request: RequestChannel.Request) {
requestQueue.put(request)
}可见,把请求放入了队列,跟Thrift一模一样的
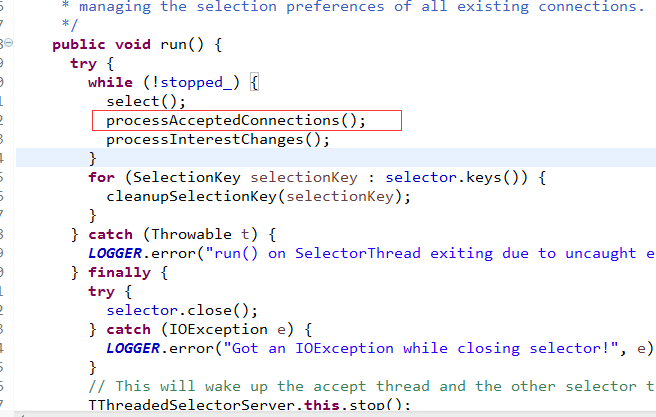
接下来,看这个队列如何被业务线程获取拿任务处理的!
在此之前,有1个细节
这个跟Thrift完全是一模一样啊
手法如出一辙。
回到kafka的代码,既然请求已经放到一个队列里了,那么就看业务线程如何处理了,下一节讲这个


 341
341


 被折叠的 条评论
为什么被折叠?
被折叠的 条评论
为什么被折叠?
 到【灌水乐园】发言


