


CAS (6) —— Nginx代理模式下浏览器访问CAS服务器网络顺序图详解
tomcat版本: tomcat-8.0.29
jdk版本: jdk1.8.0_65
nginx版本: nginx-1.9.8
cas版本: cas4.1.2
cas-client-3.4.1
参考来源:
https://github.com/Jasig/java-cas-client
以下的示例采用我博客的另外两篇文章中搭建好的测试环境举例
CAS (1) —— Mac下配置CAS到Tomcat(服务端)
CAS (2) —— Mac下配置CAS到Tomcat(客户端)
CAS (3) —— Mac下配置CAS客户端经代理访问Tomcat CAS
Mac为nginx安装nginx-sticky-module
【高可用HA】Nginx (1) —— Mac下配置Nginx Http负载均衡(Load Balancer)之101实例
Nginx (2) —— Mac下配置Apache Httpd的Https/SSL (待出)
目标架构
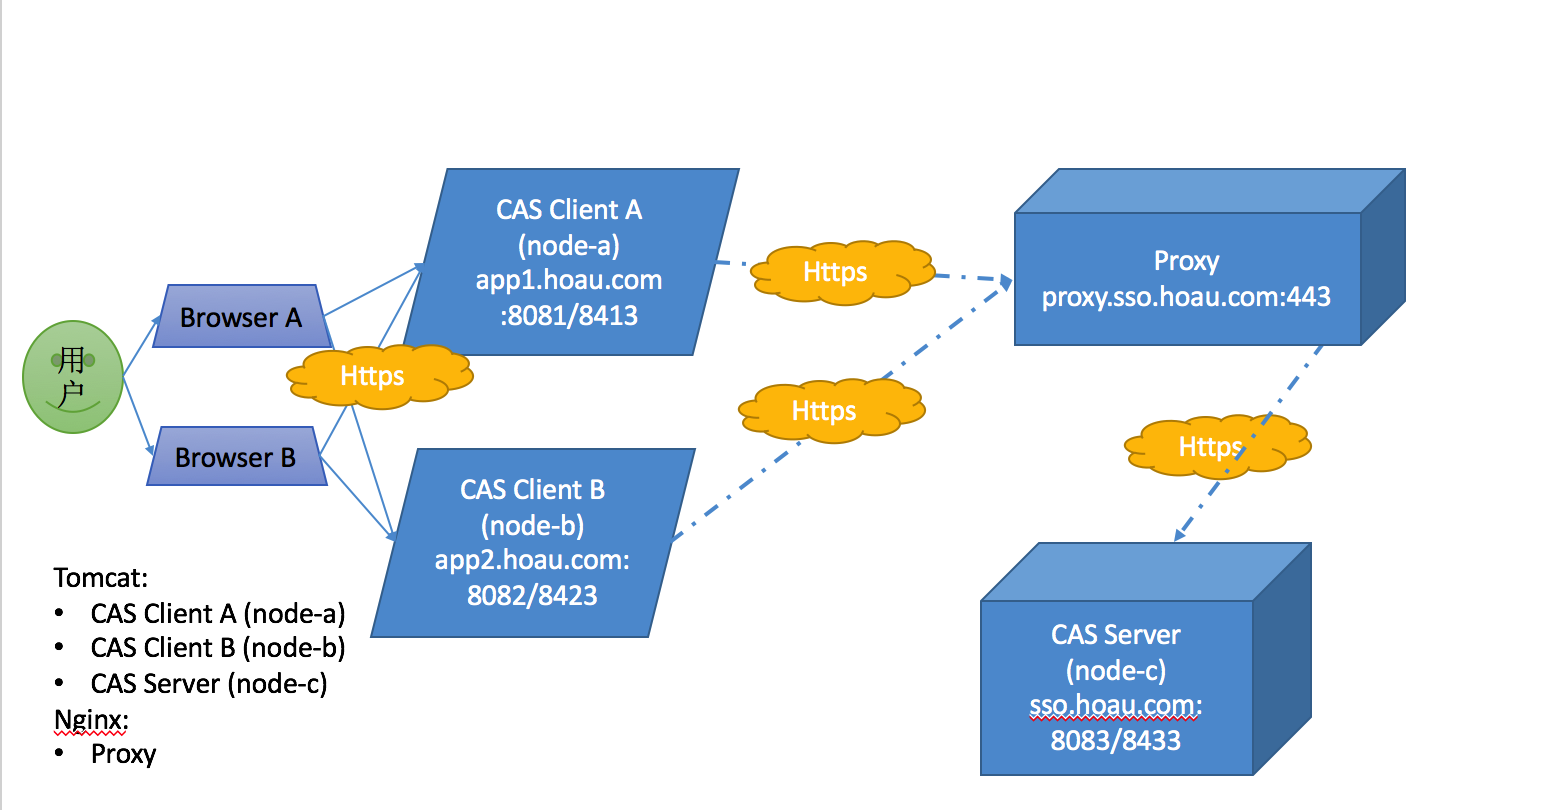
此代理非彼代理
在CAS官方网站上给出了一个“Proxy Web Flow Diagram”:
顺序图:(来源于http://jasig.github.io/cas/4.0.x/protocol/CAS-Protocol.html)
这个方案主要适用一种场景:
有两个应用App1和App2,它们都是受Cas Server保护的,即请求它们时都需要通过Cas Server的认证。现需要在App1中通过Http请求访问App2,显然该请求将会被App2配置的Cas的AuthenticationFilter拦截并转向Cas Server,Cas Server将引导用户进行登录认证,这样我们也就不能真正的访问到App2了。针对这种应用场景,Cas也提供了对应的支持。通过Proxy访问其它Cas应用
无论是用中文关键字在“度娘”,还是用英文关键字再“谷哥”上搜索,多数文章都是描述上面这样一个场景。
而我这里介绍的“代理”,并非是上述场景——依靠代理去验证ticket,“代理”在此的角色是:
- 只做分发反向代理(未来的负载均衡器)
* 注意:所以说“此代理非彼代理”
准备
要搭建上面这个环境会相对复杂,我们需要参照之前的文章准备以下必备的组件或环境:
CAS (5) —— Nginx代理模式下浏览器访问CAS服务器配置详解
测试
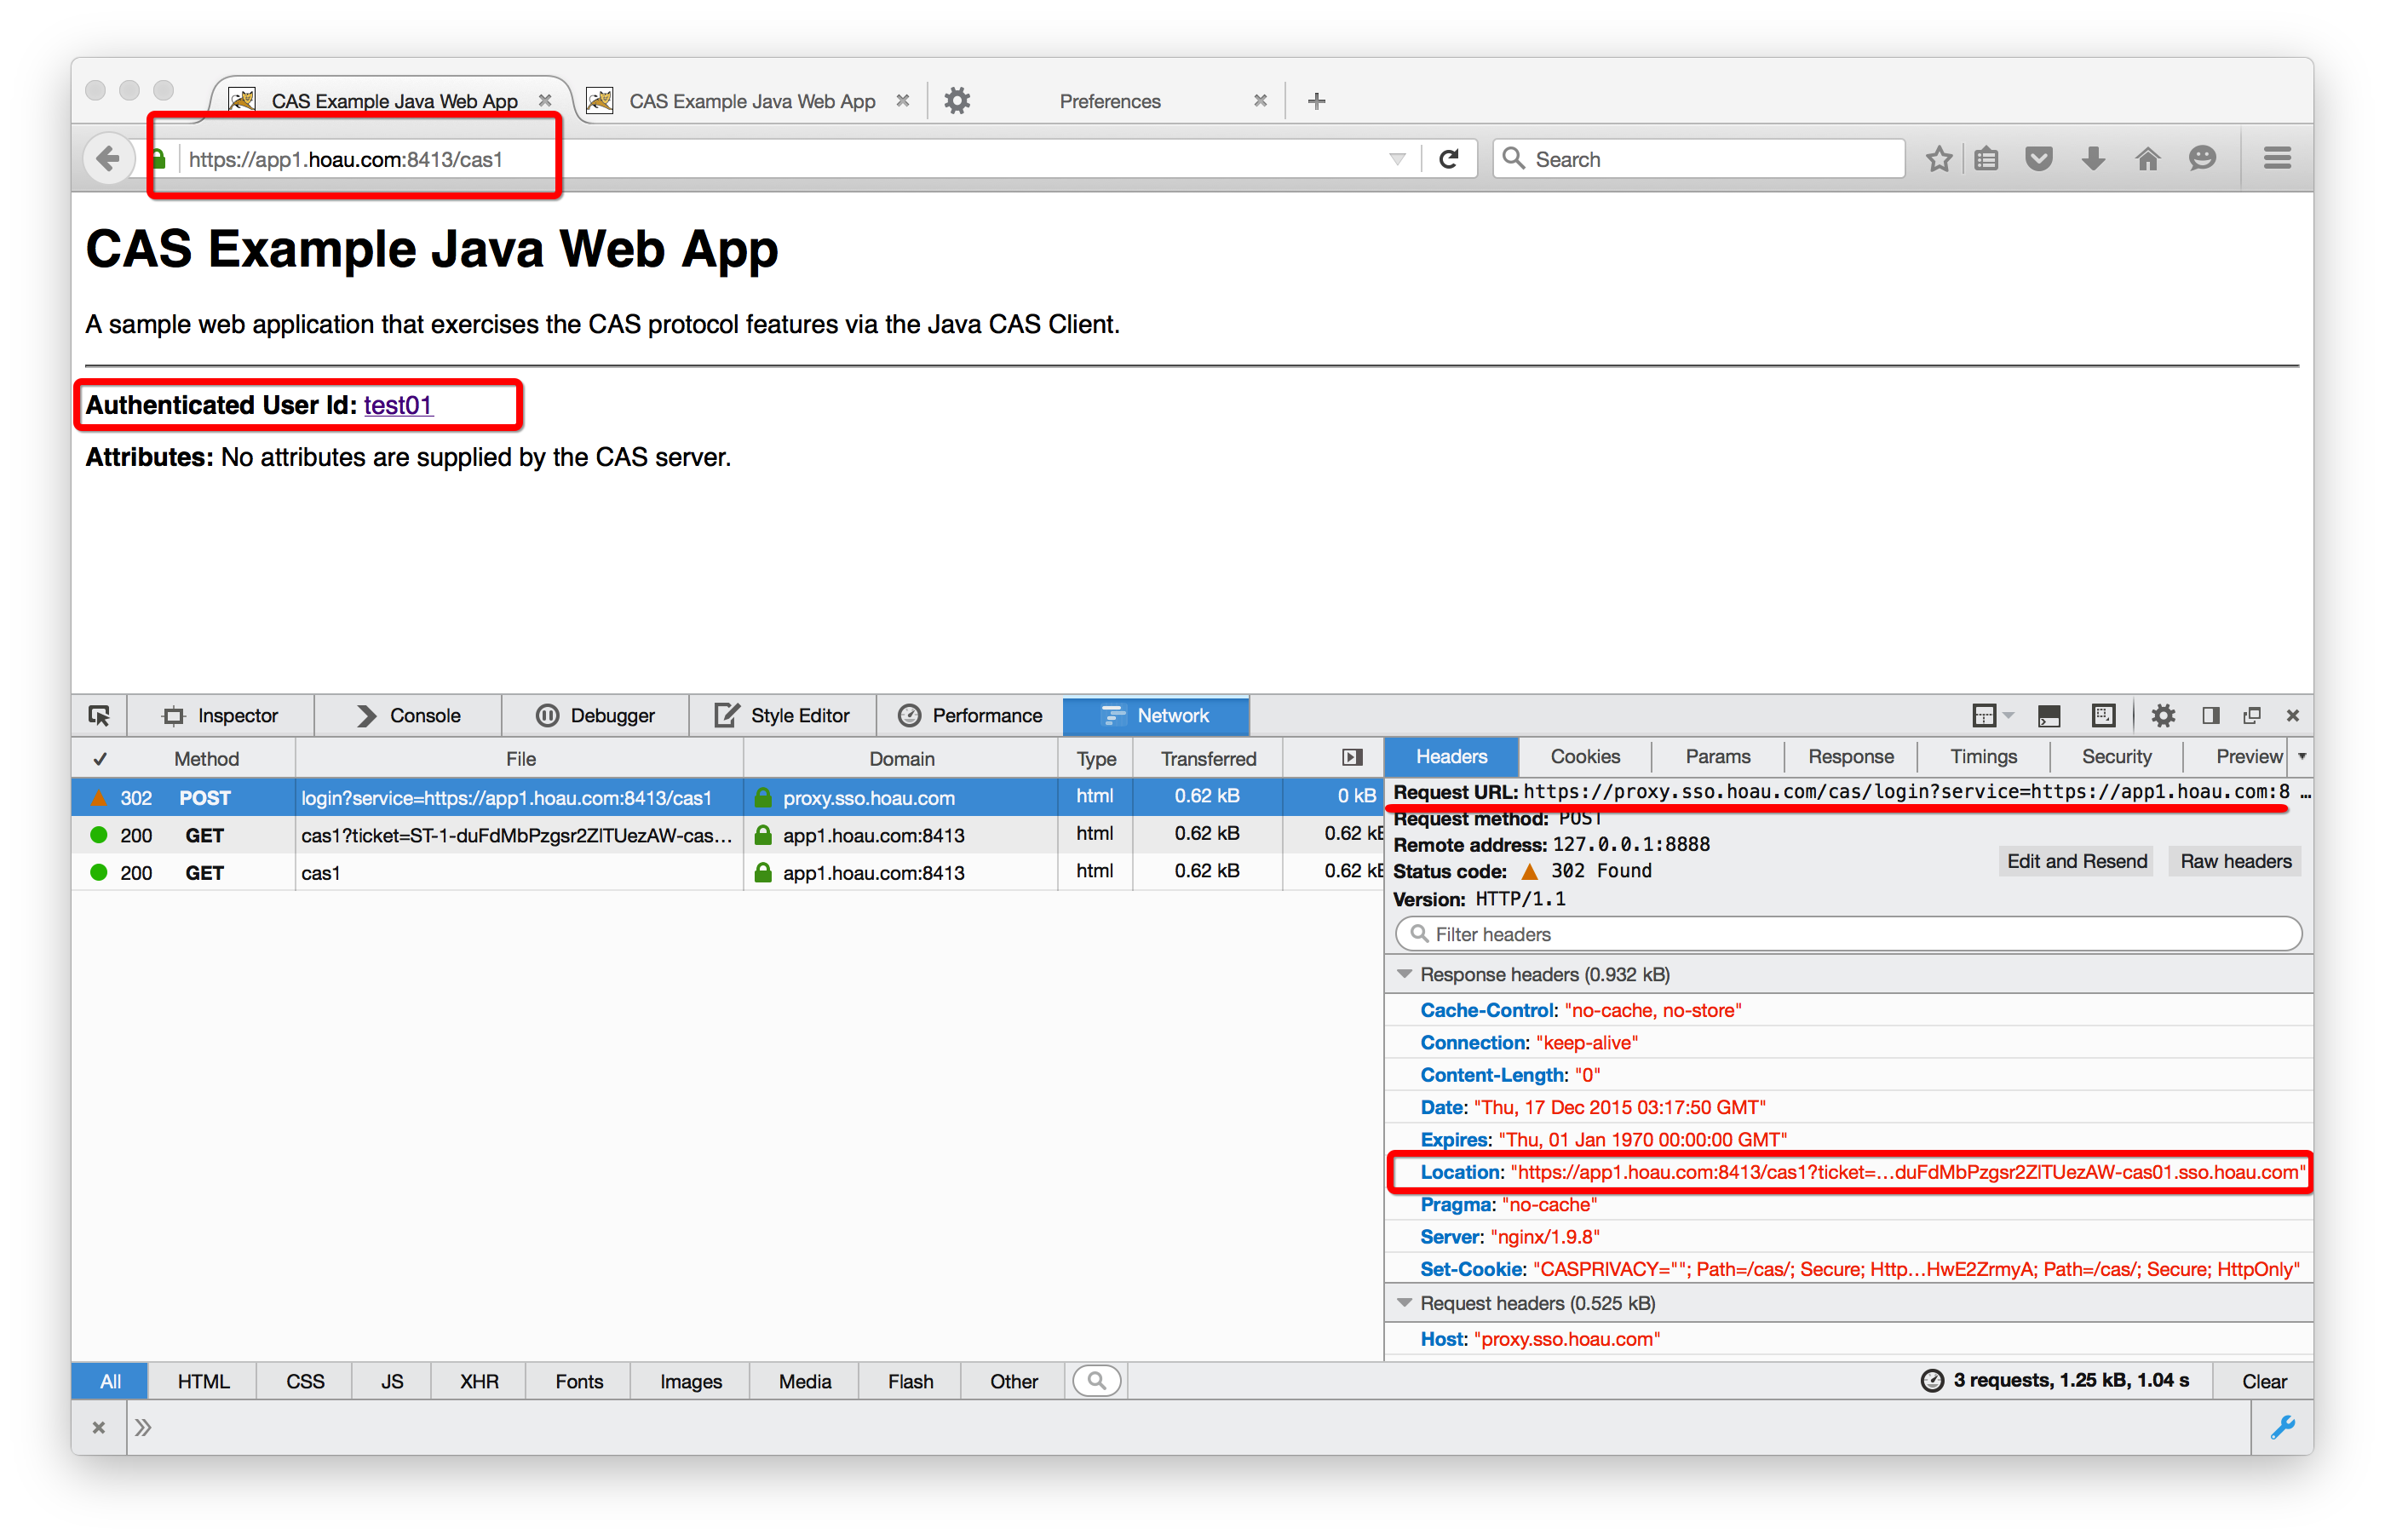
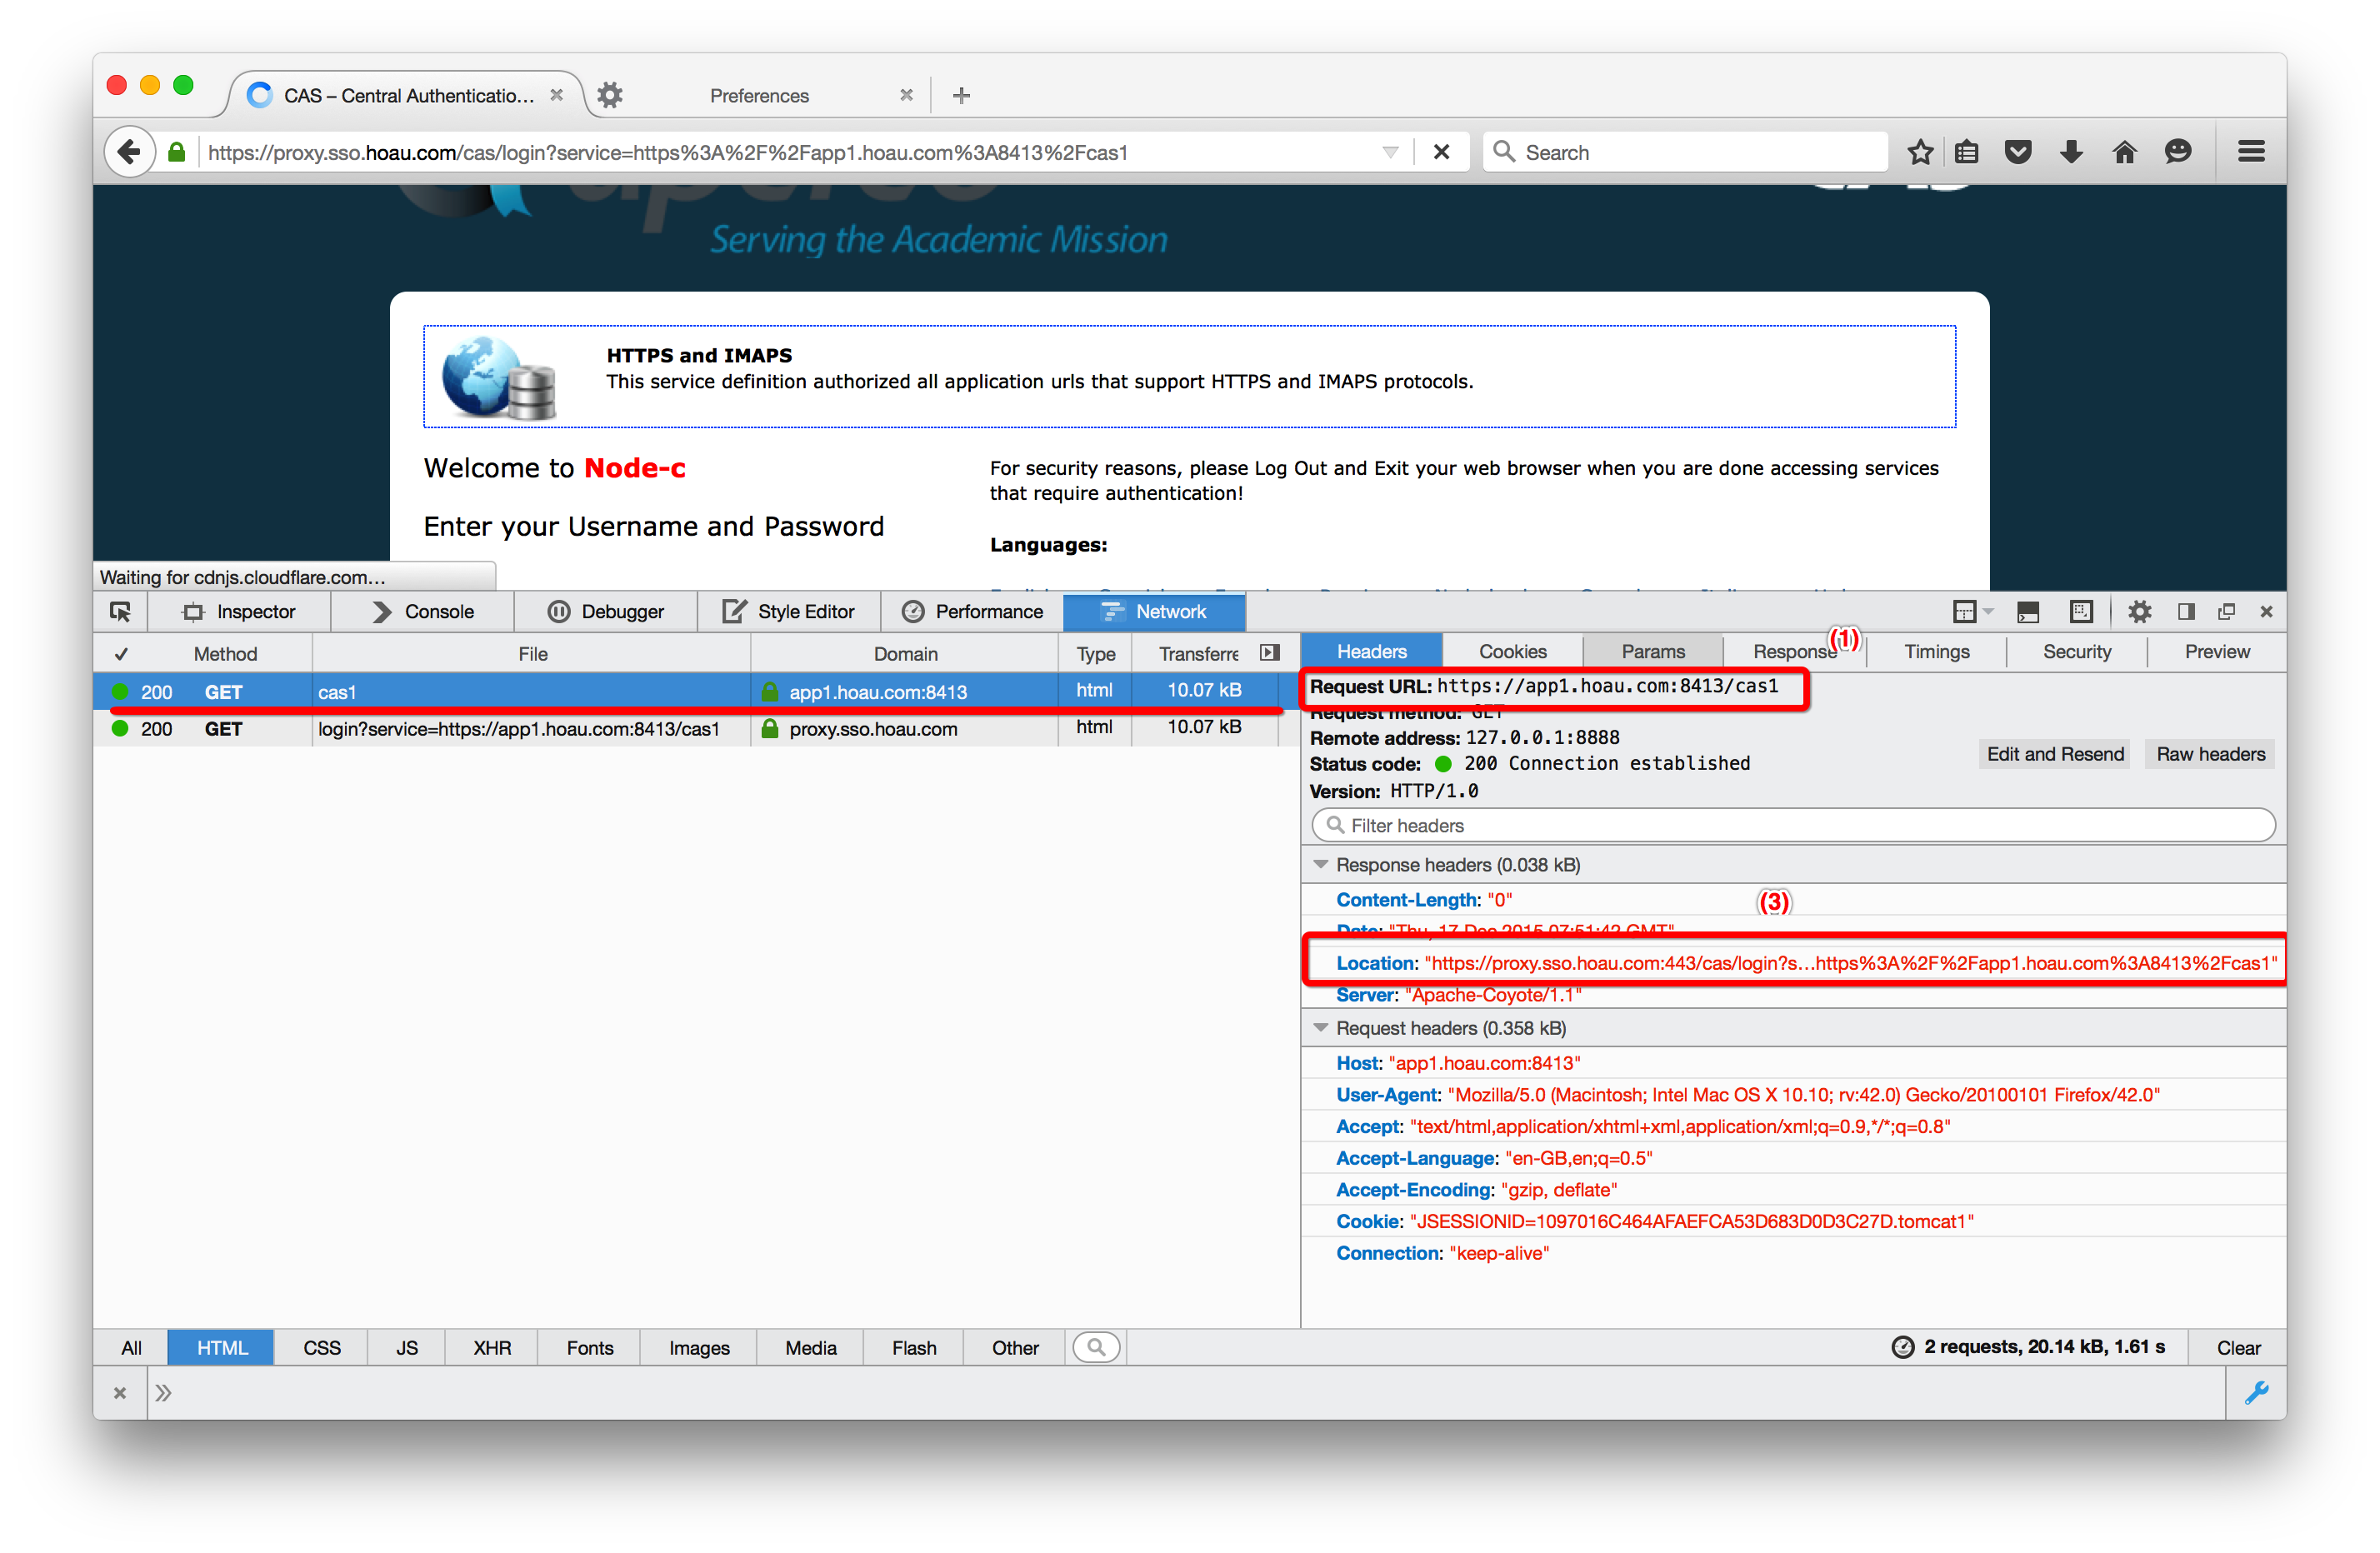
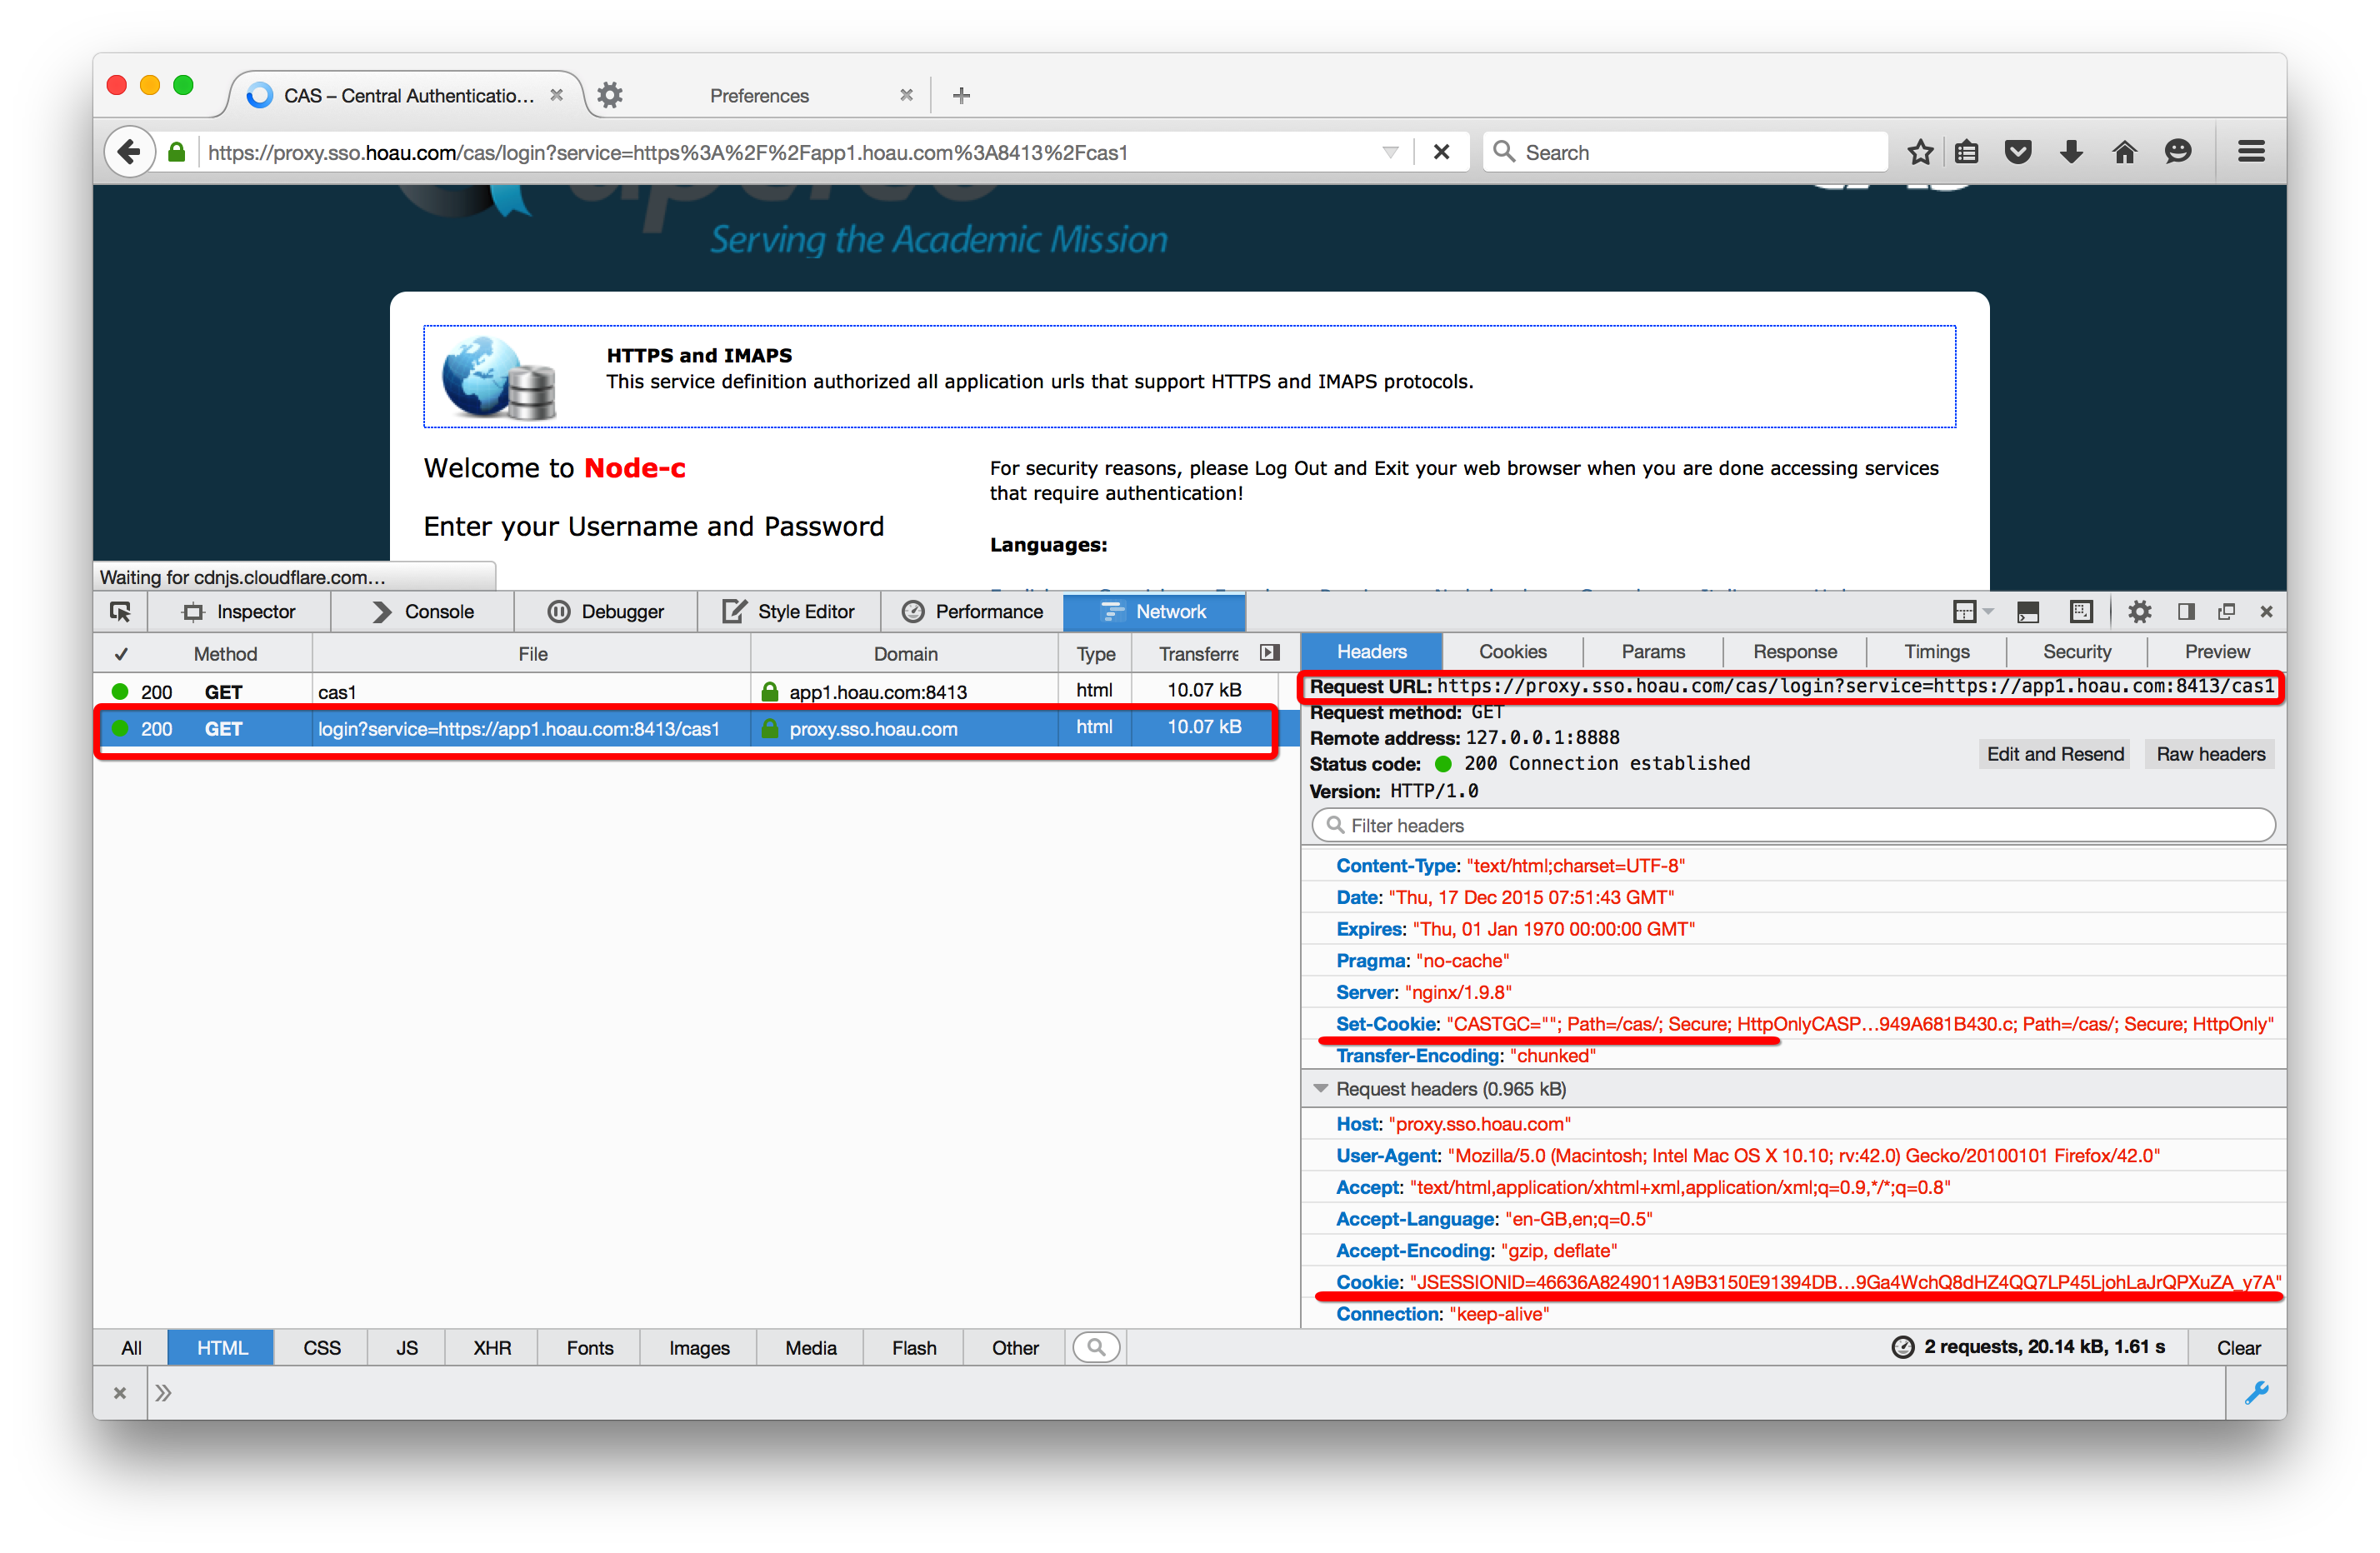
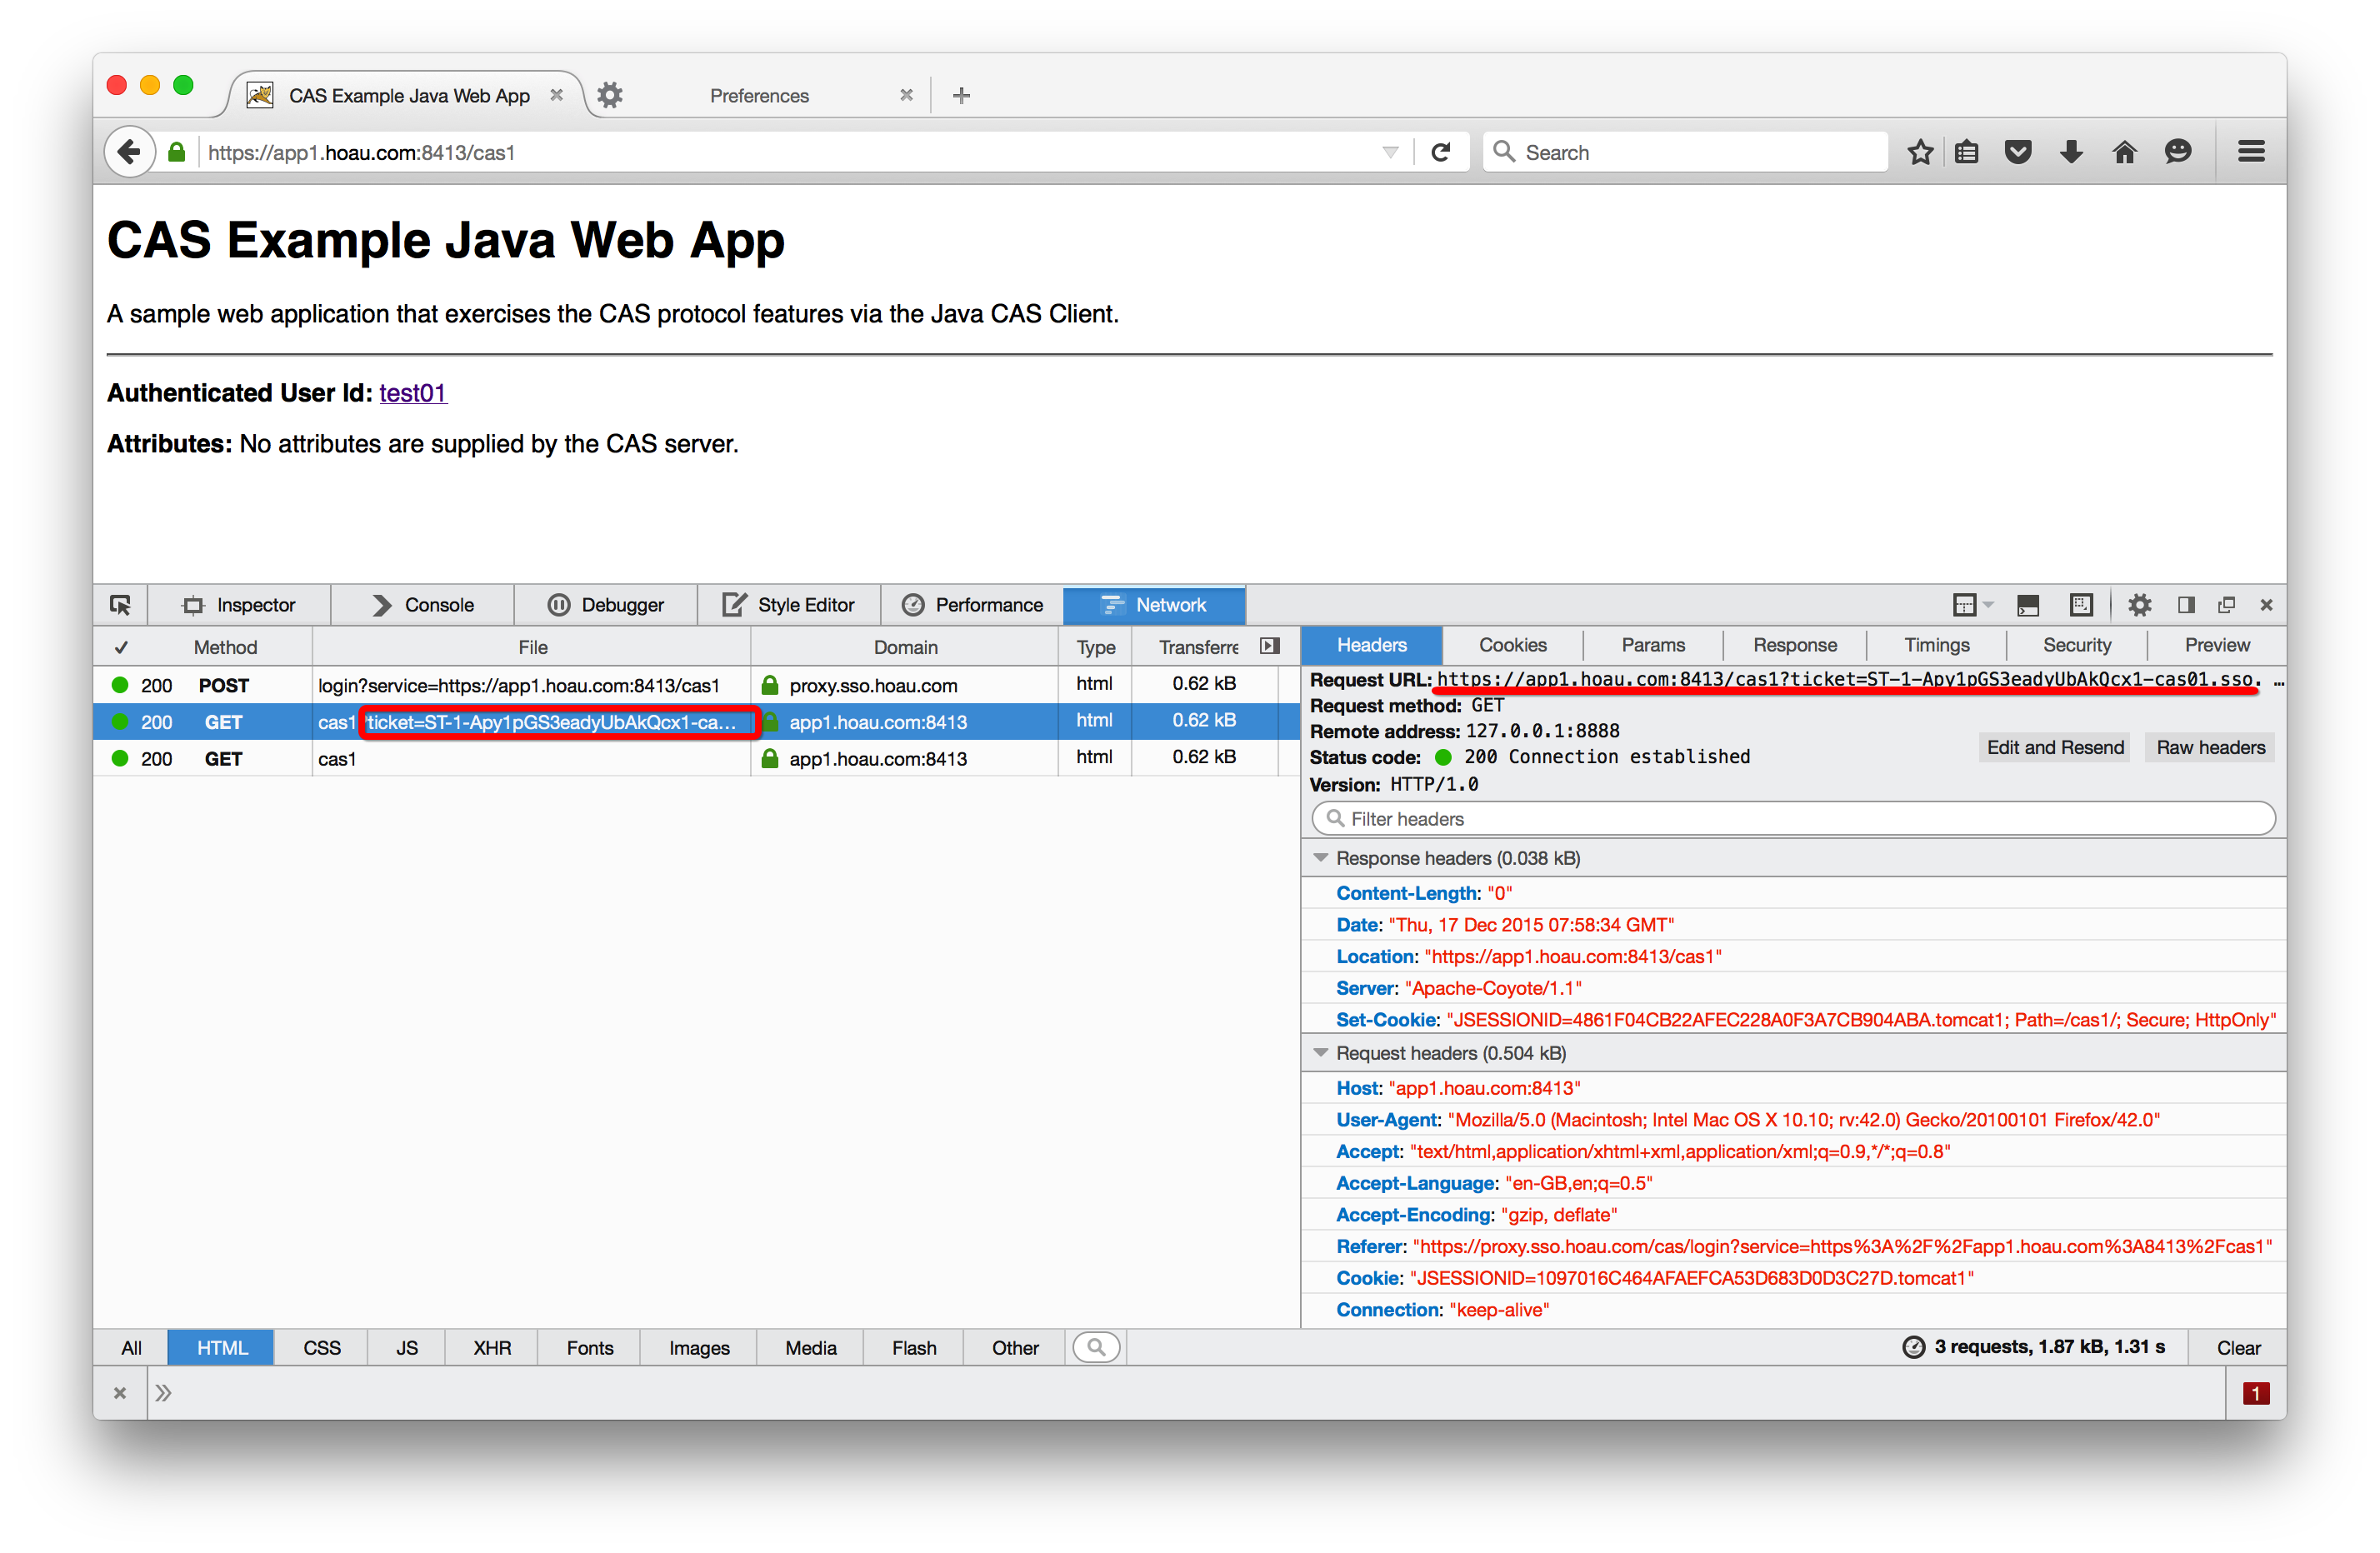
访问“https://app1.hoau.com:8413/cas1”
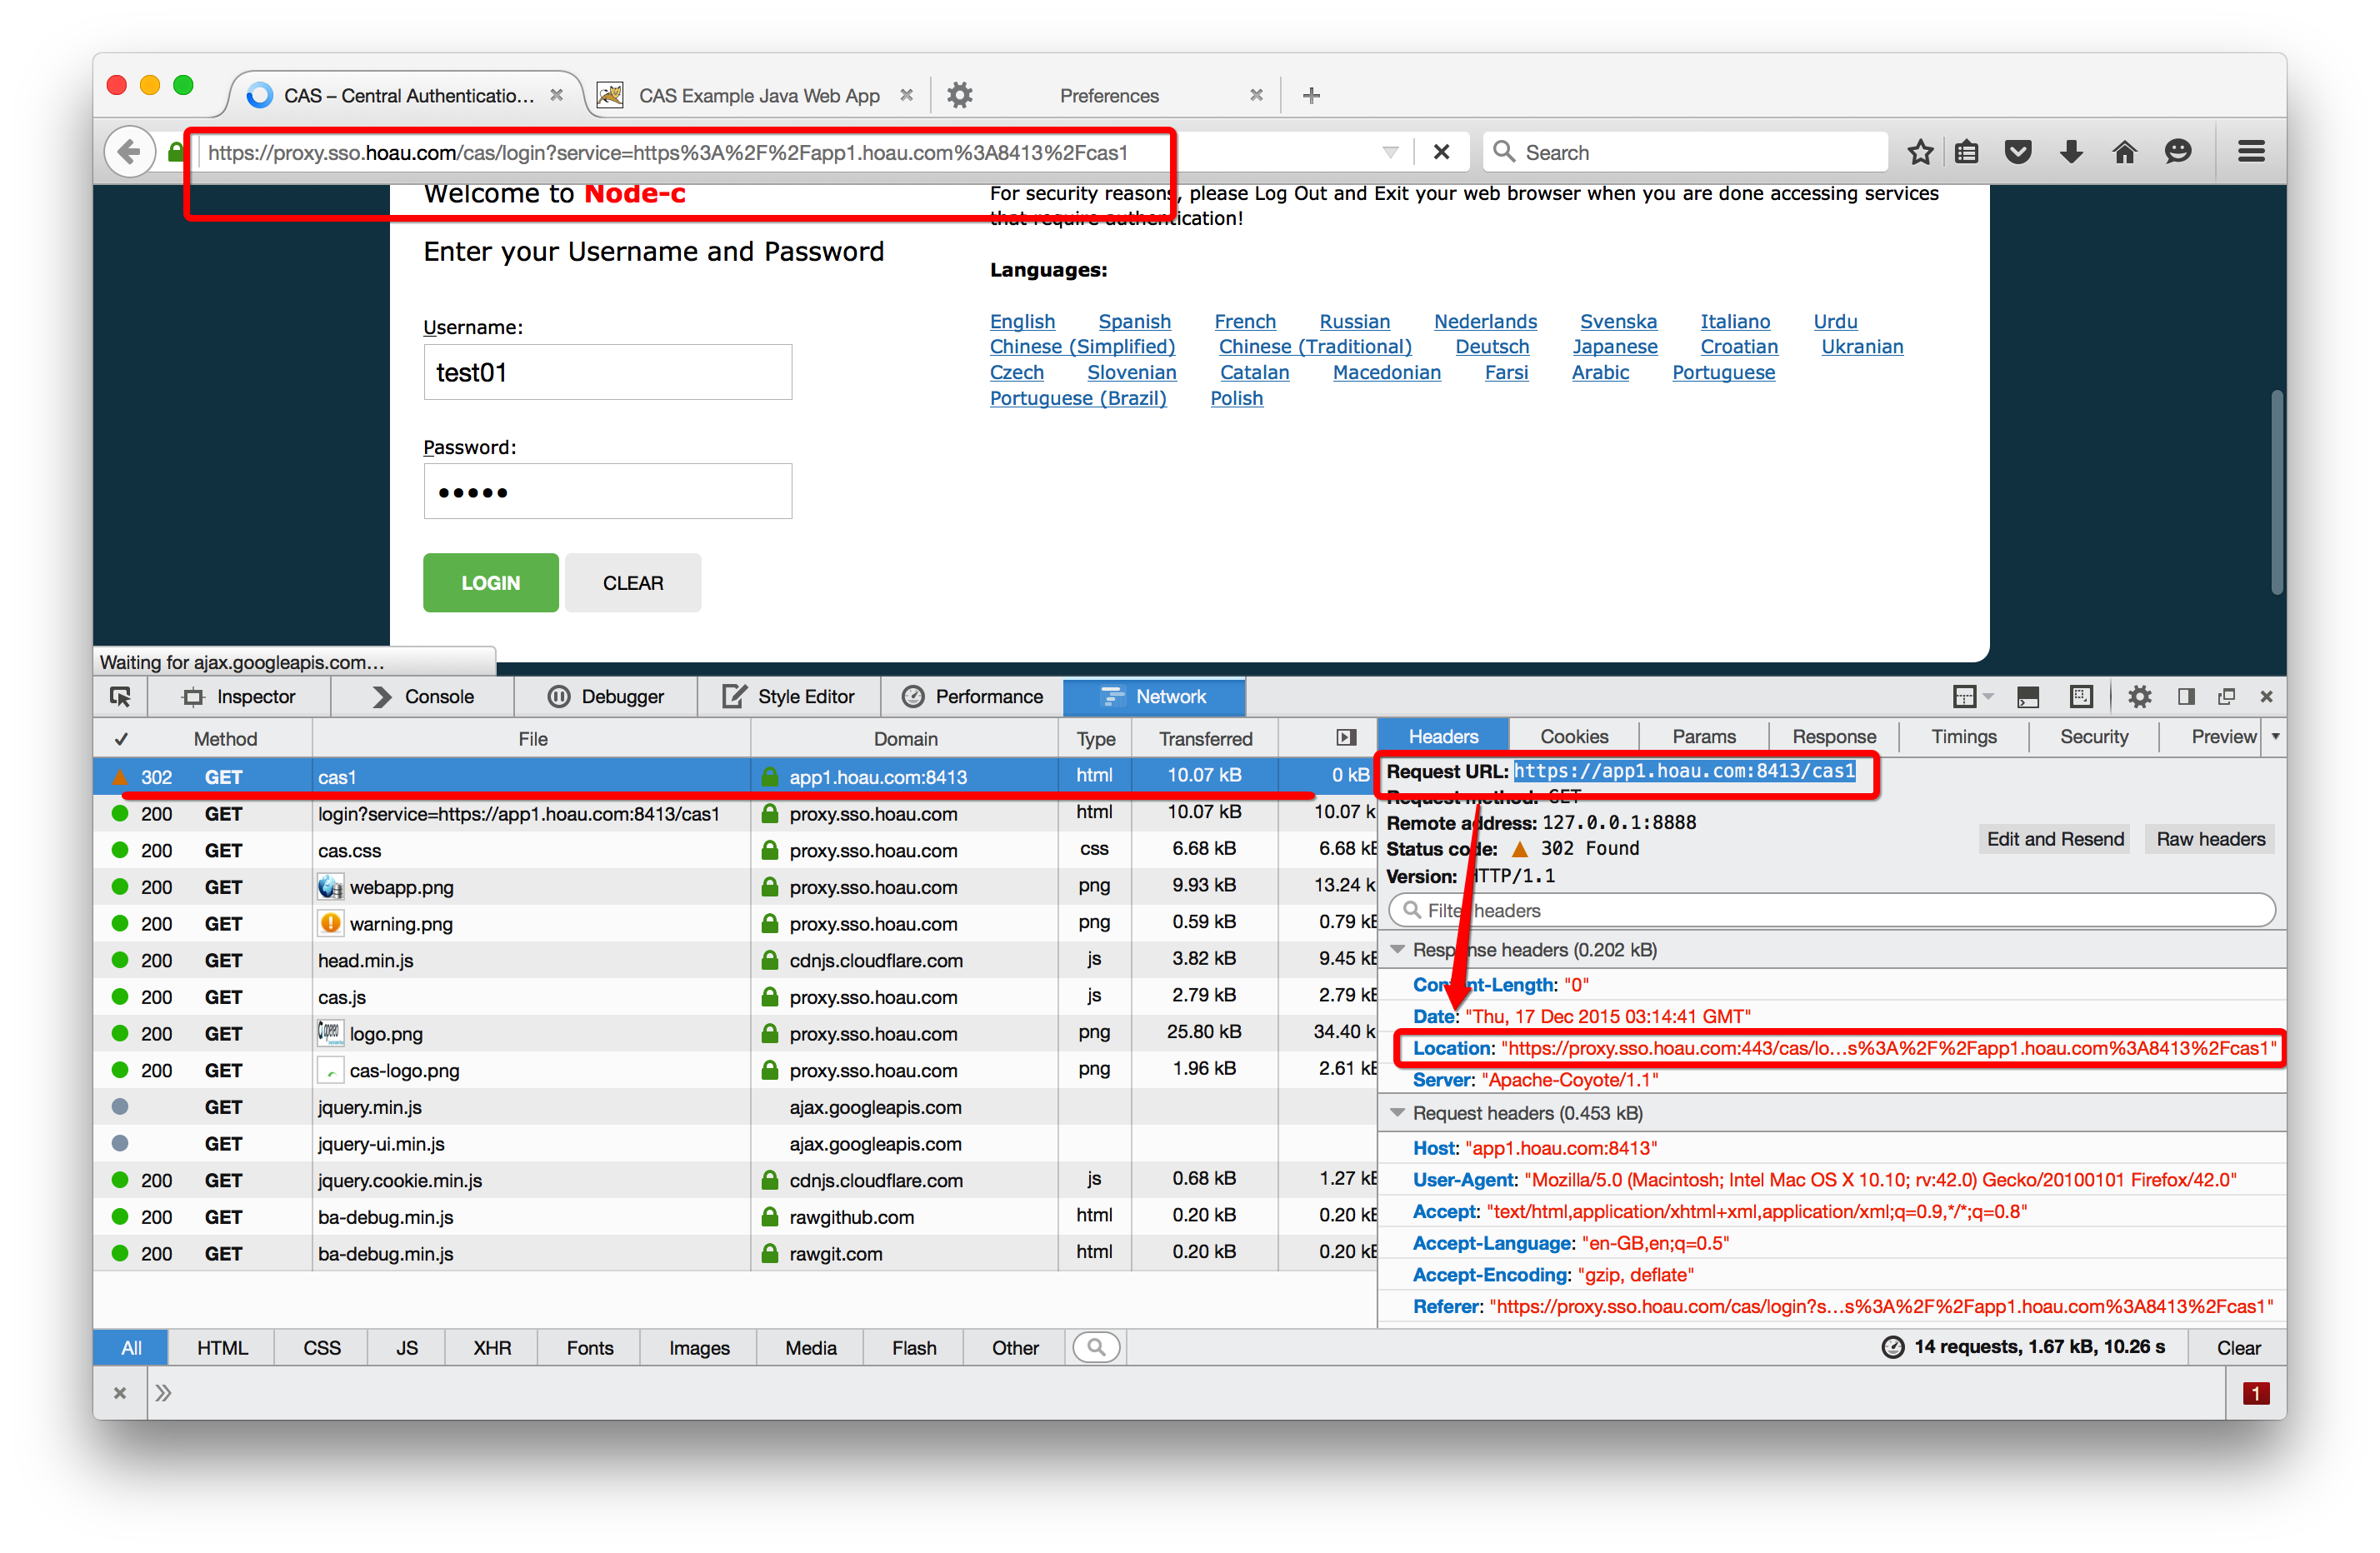
会重定向到“https://proxy.sso.hoau.com/cas/login?service=https%3A%2F%2Fapp1.hoau.com%3A8413%2Fcas1”
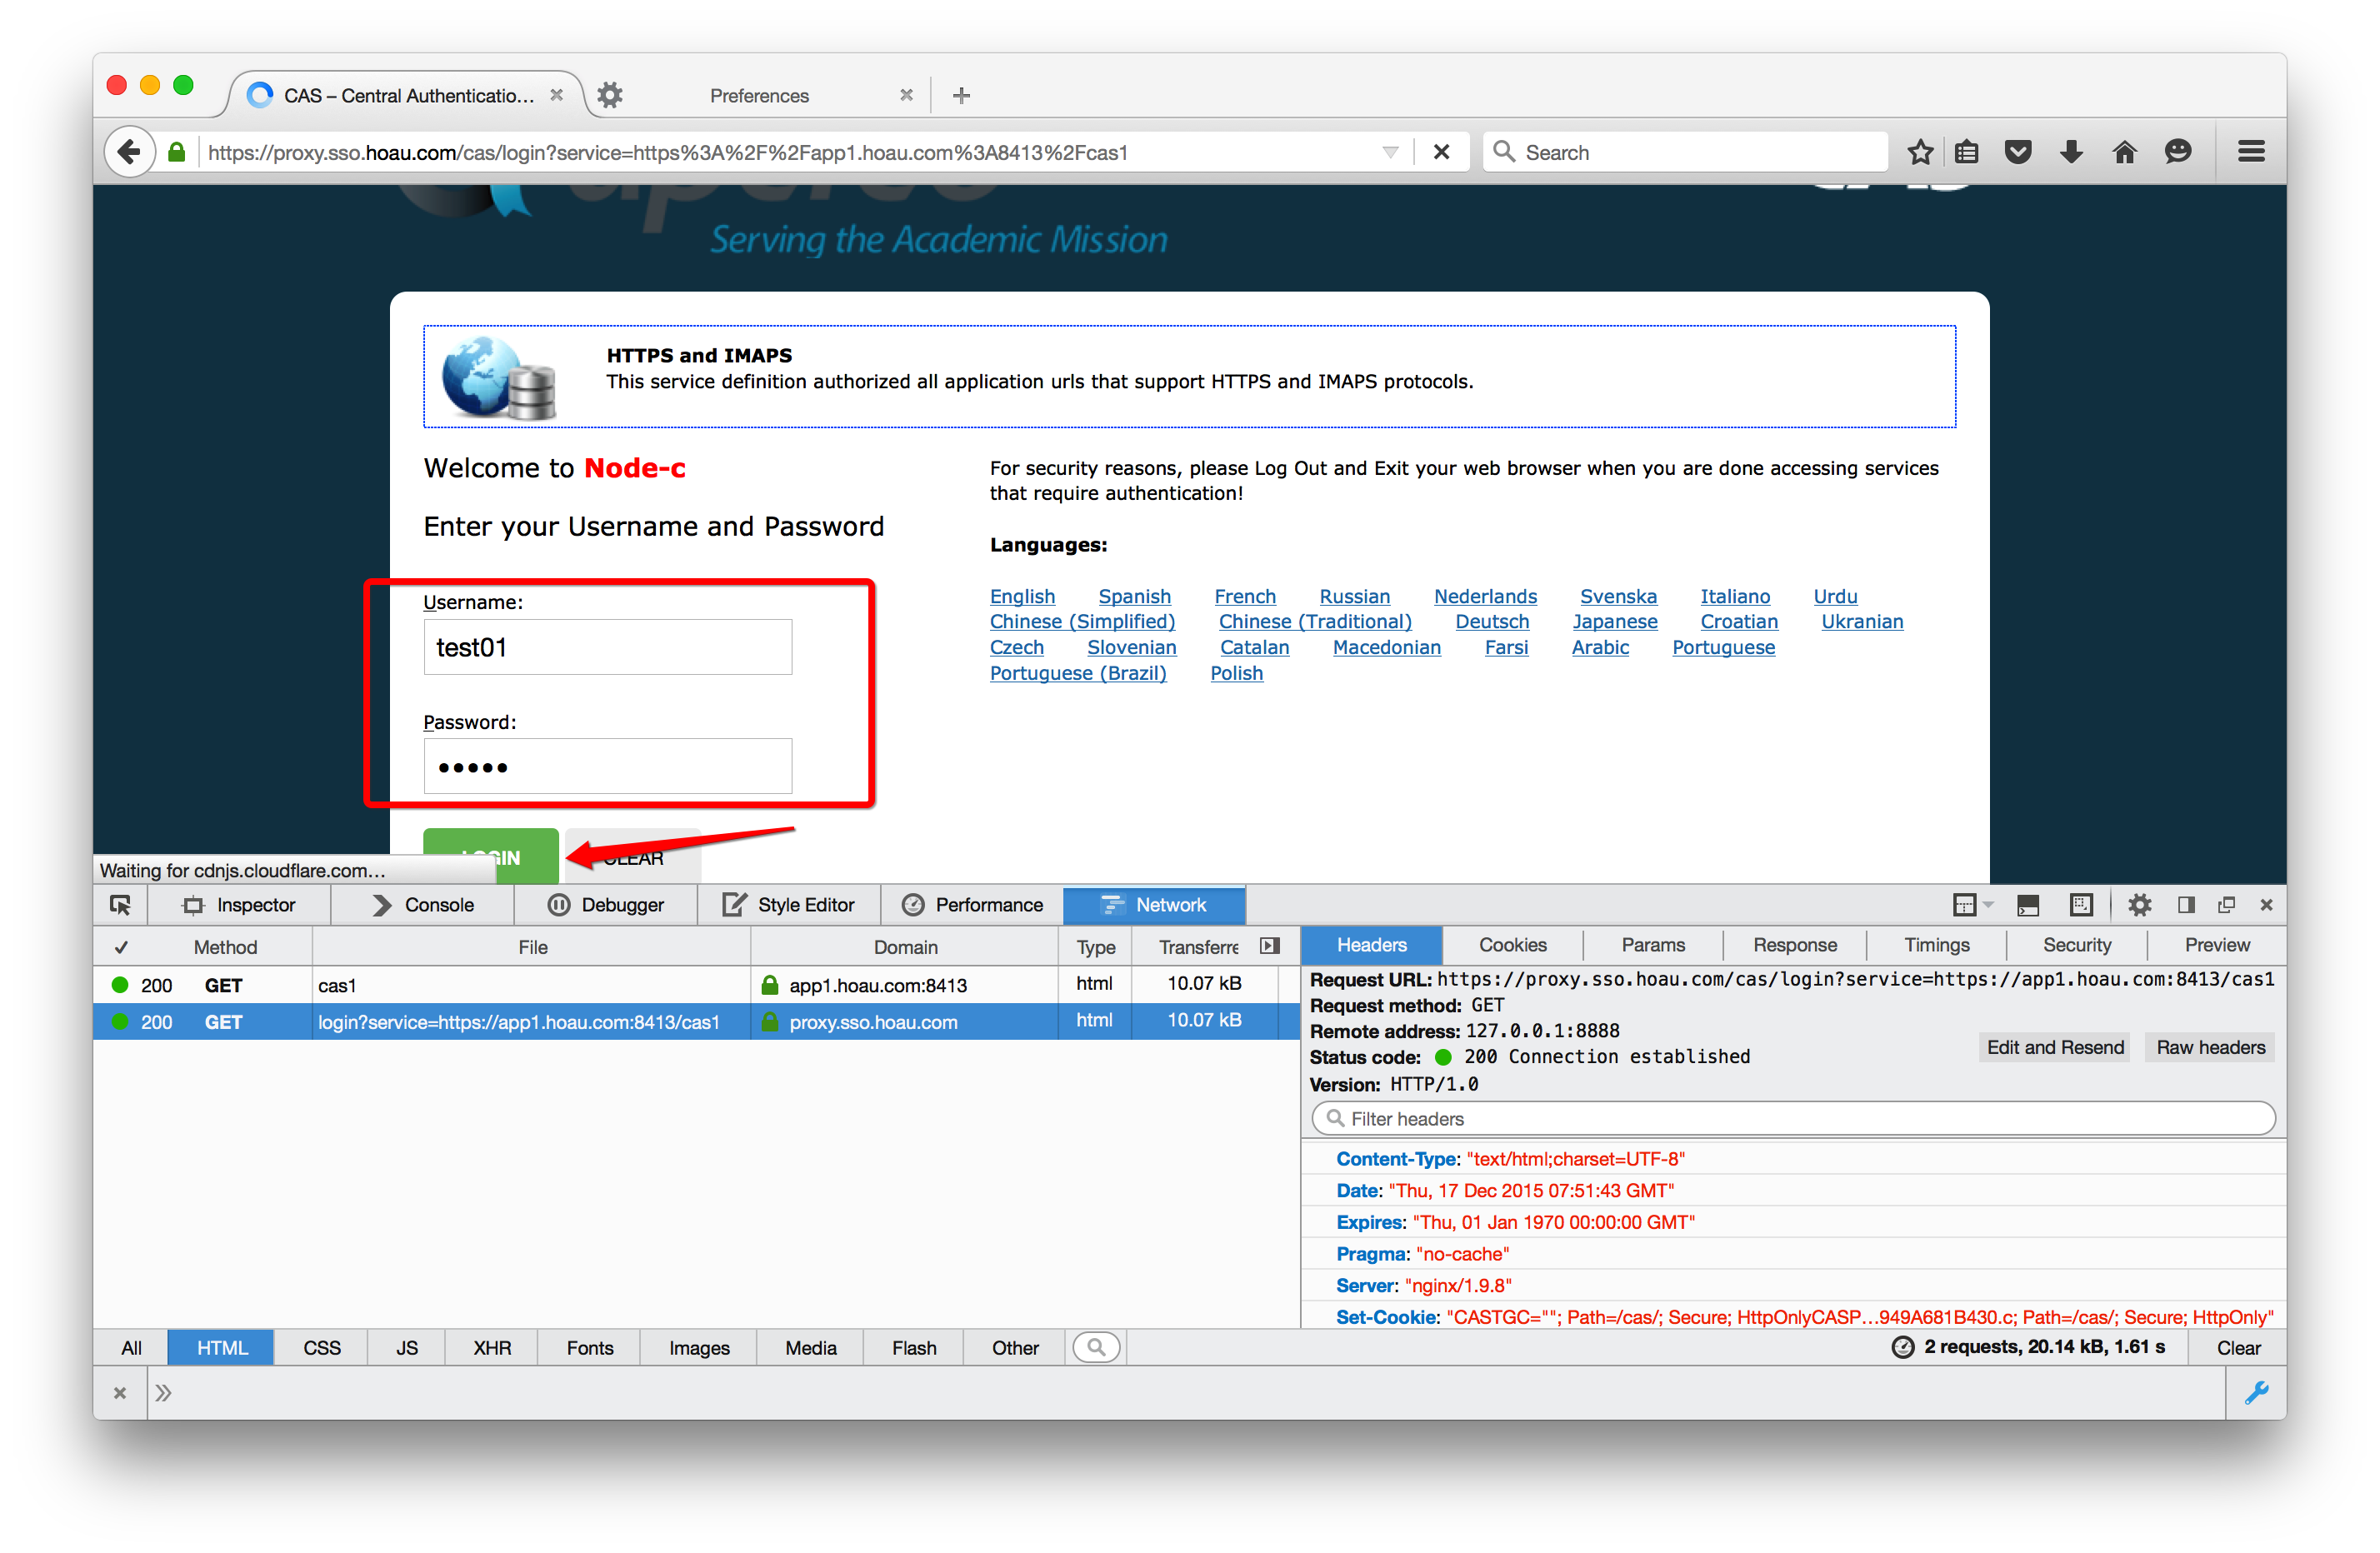
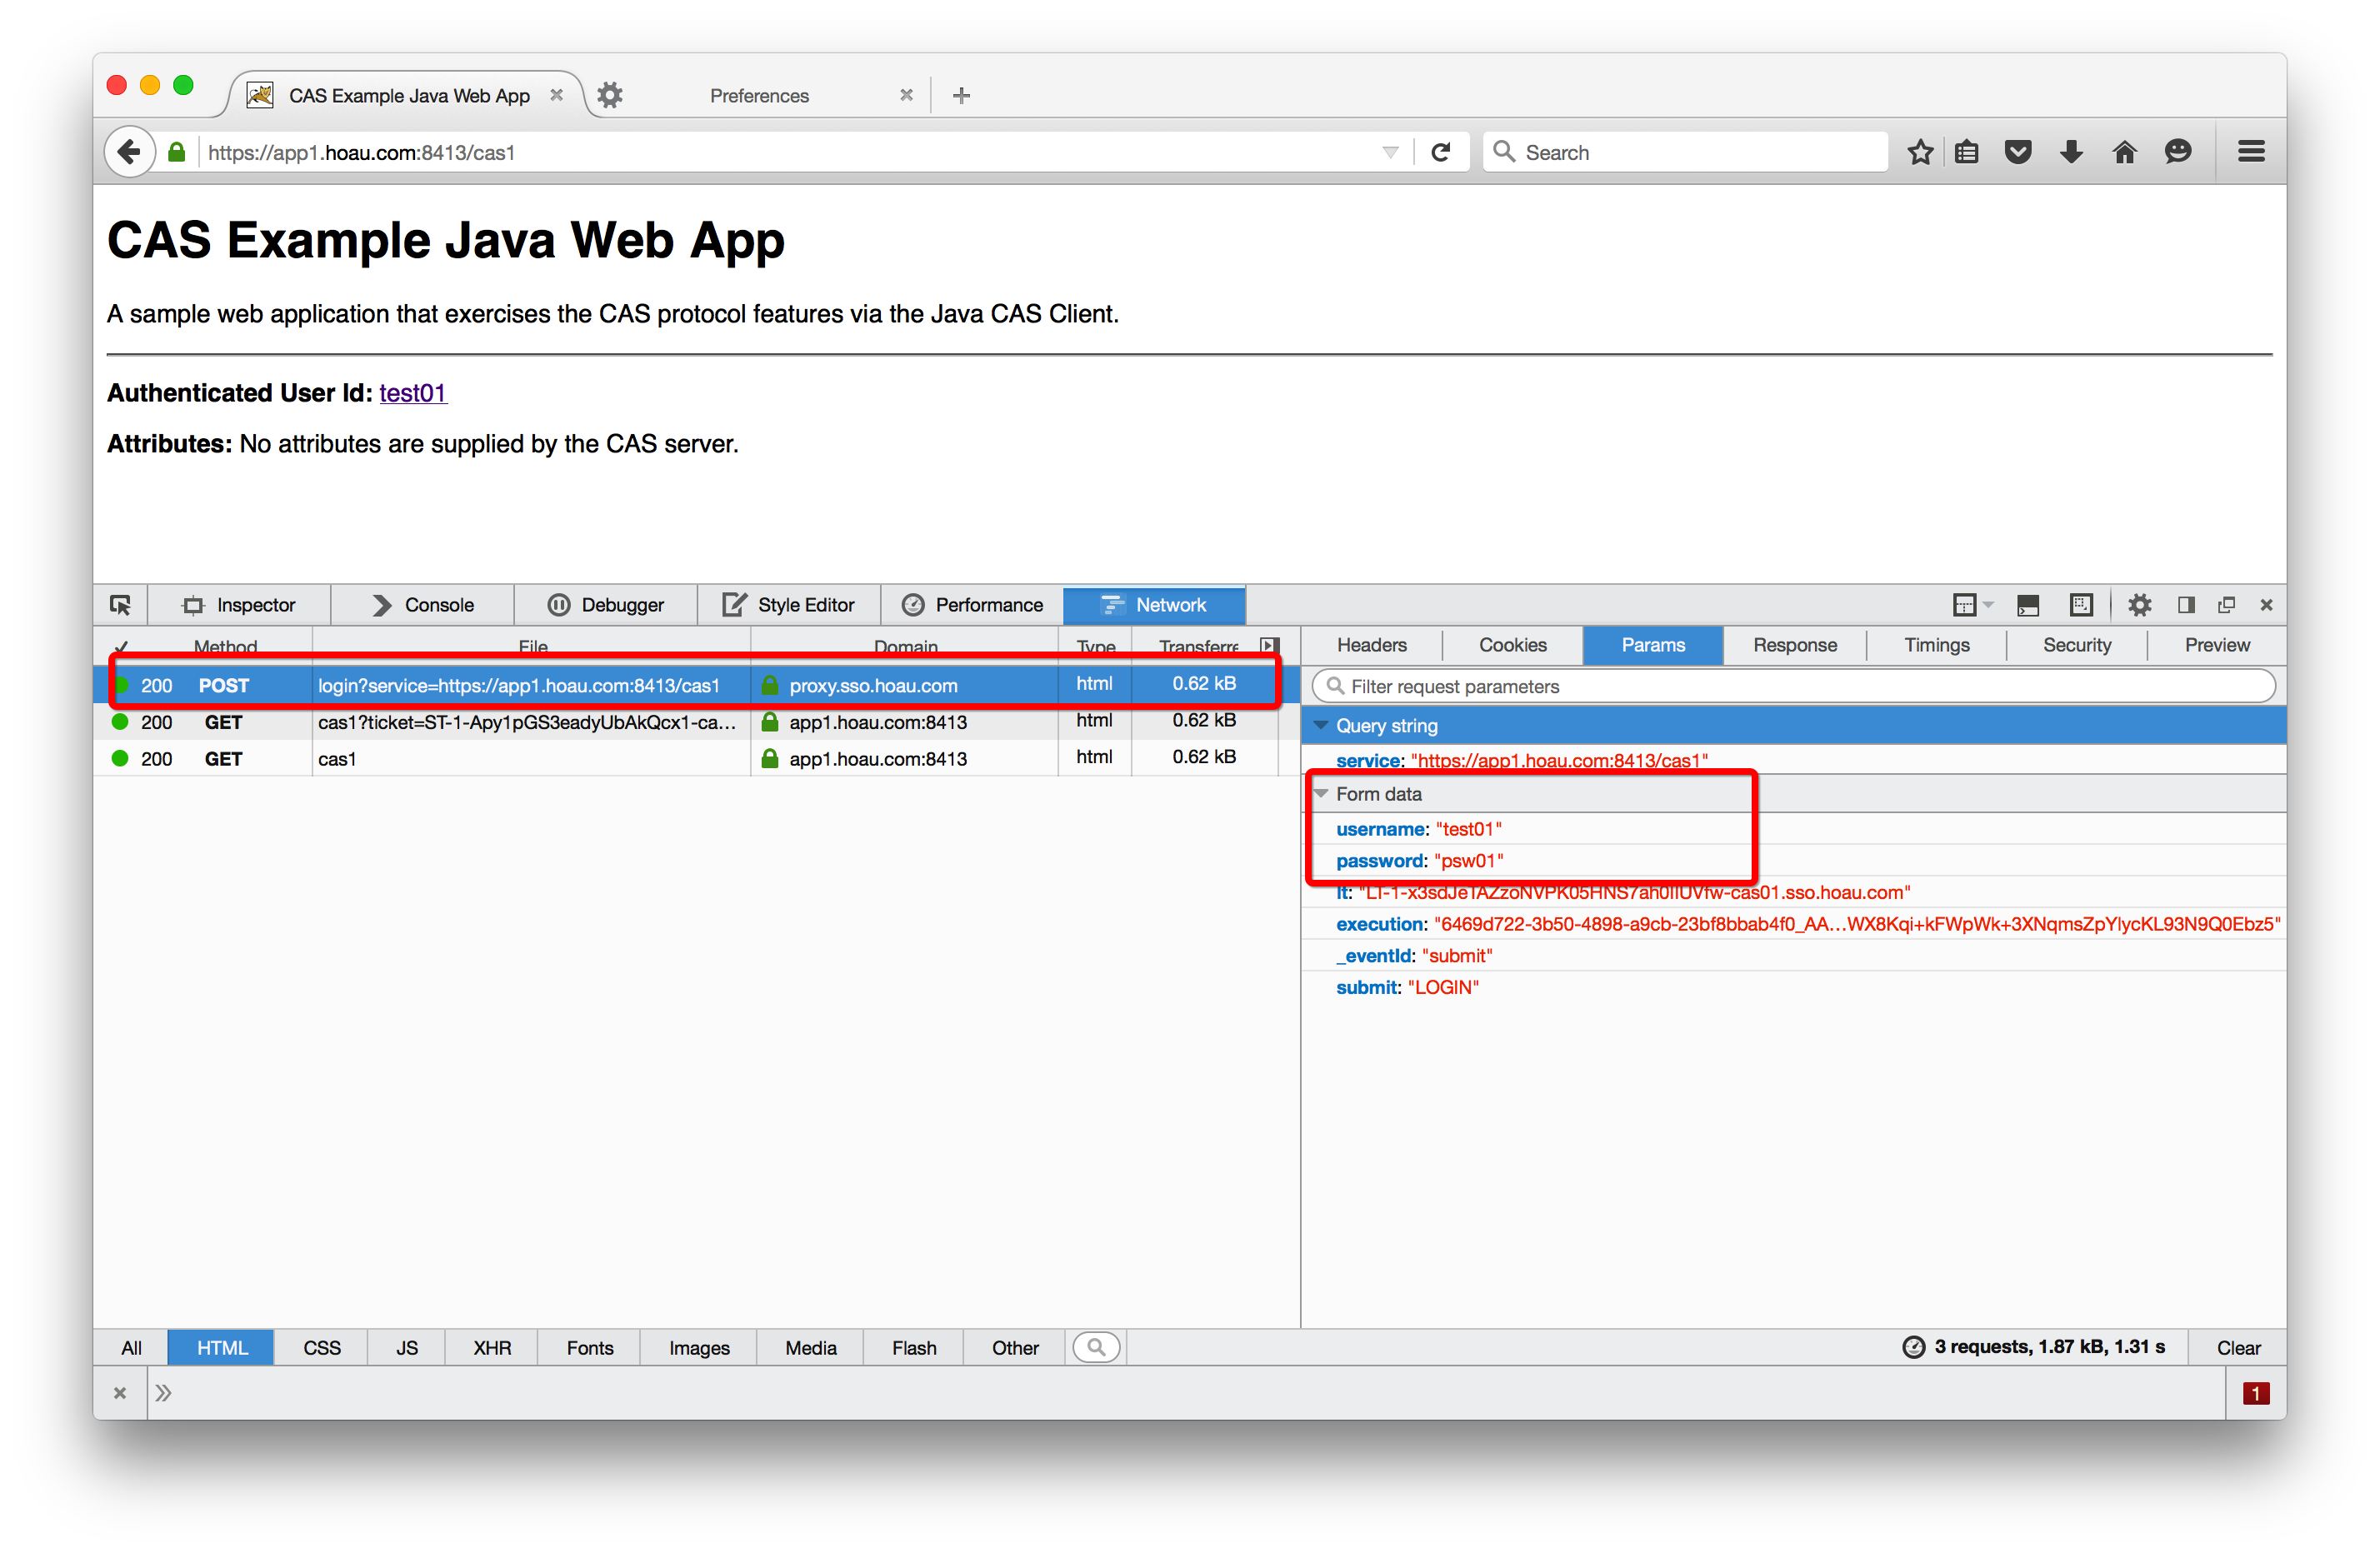
然后输入用户明密码(test01/psw01)
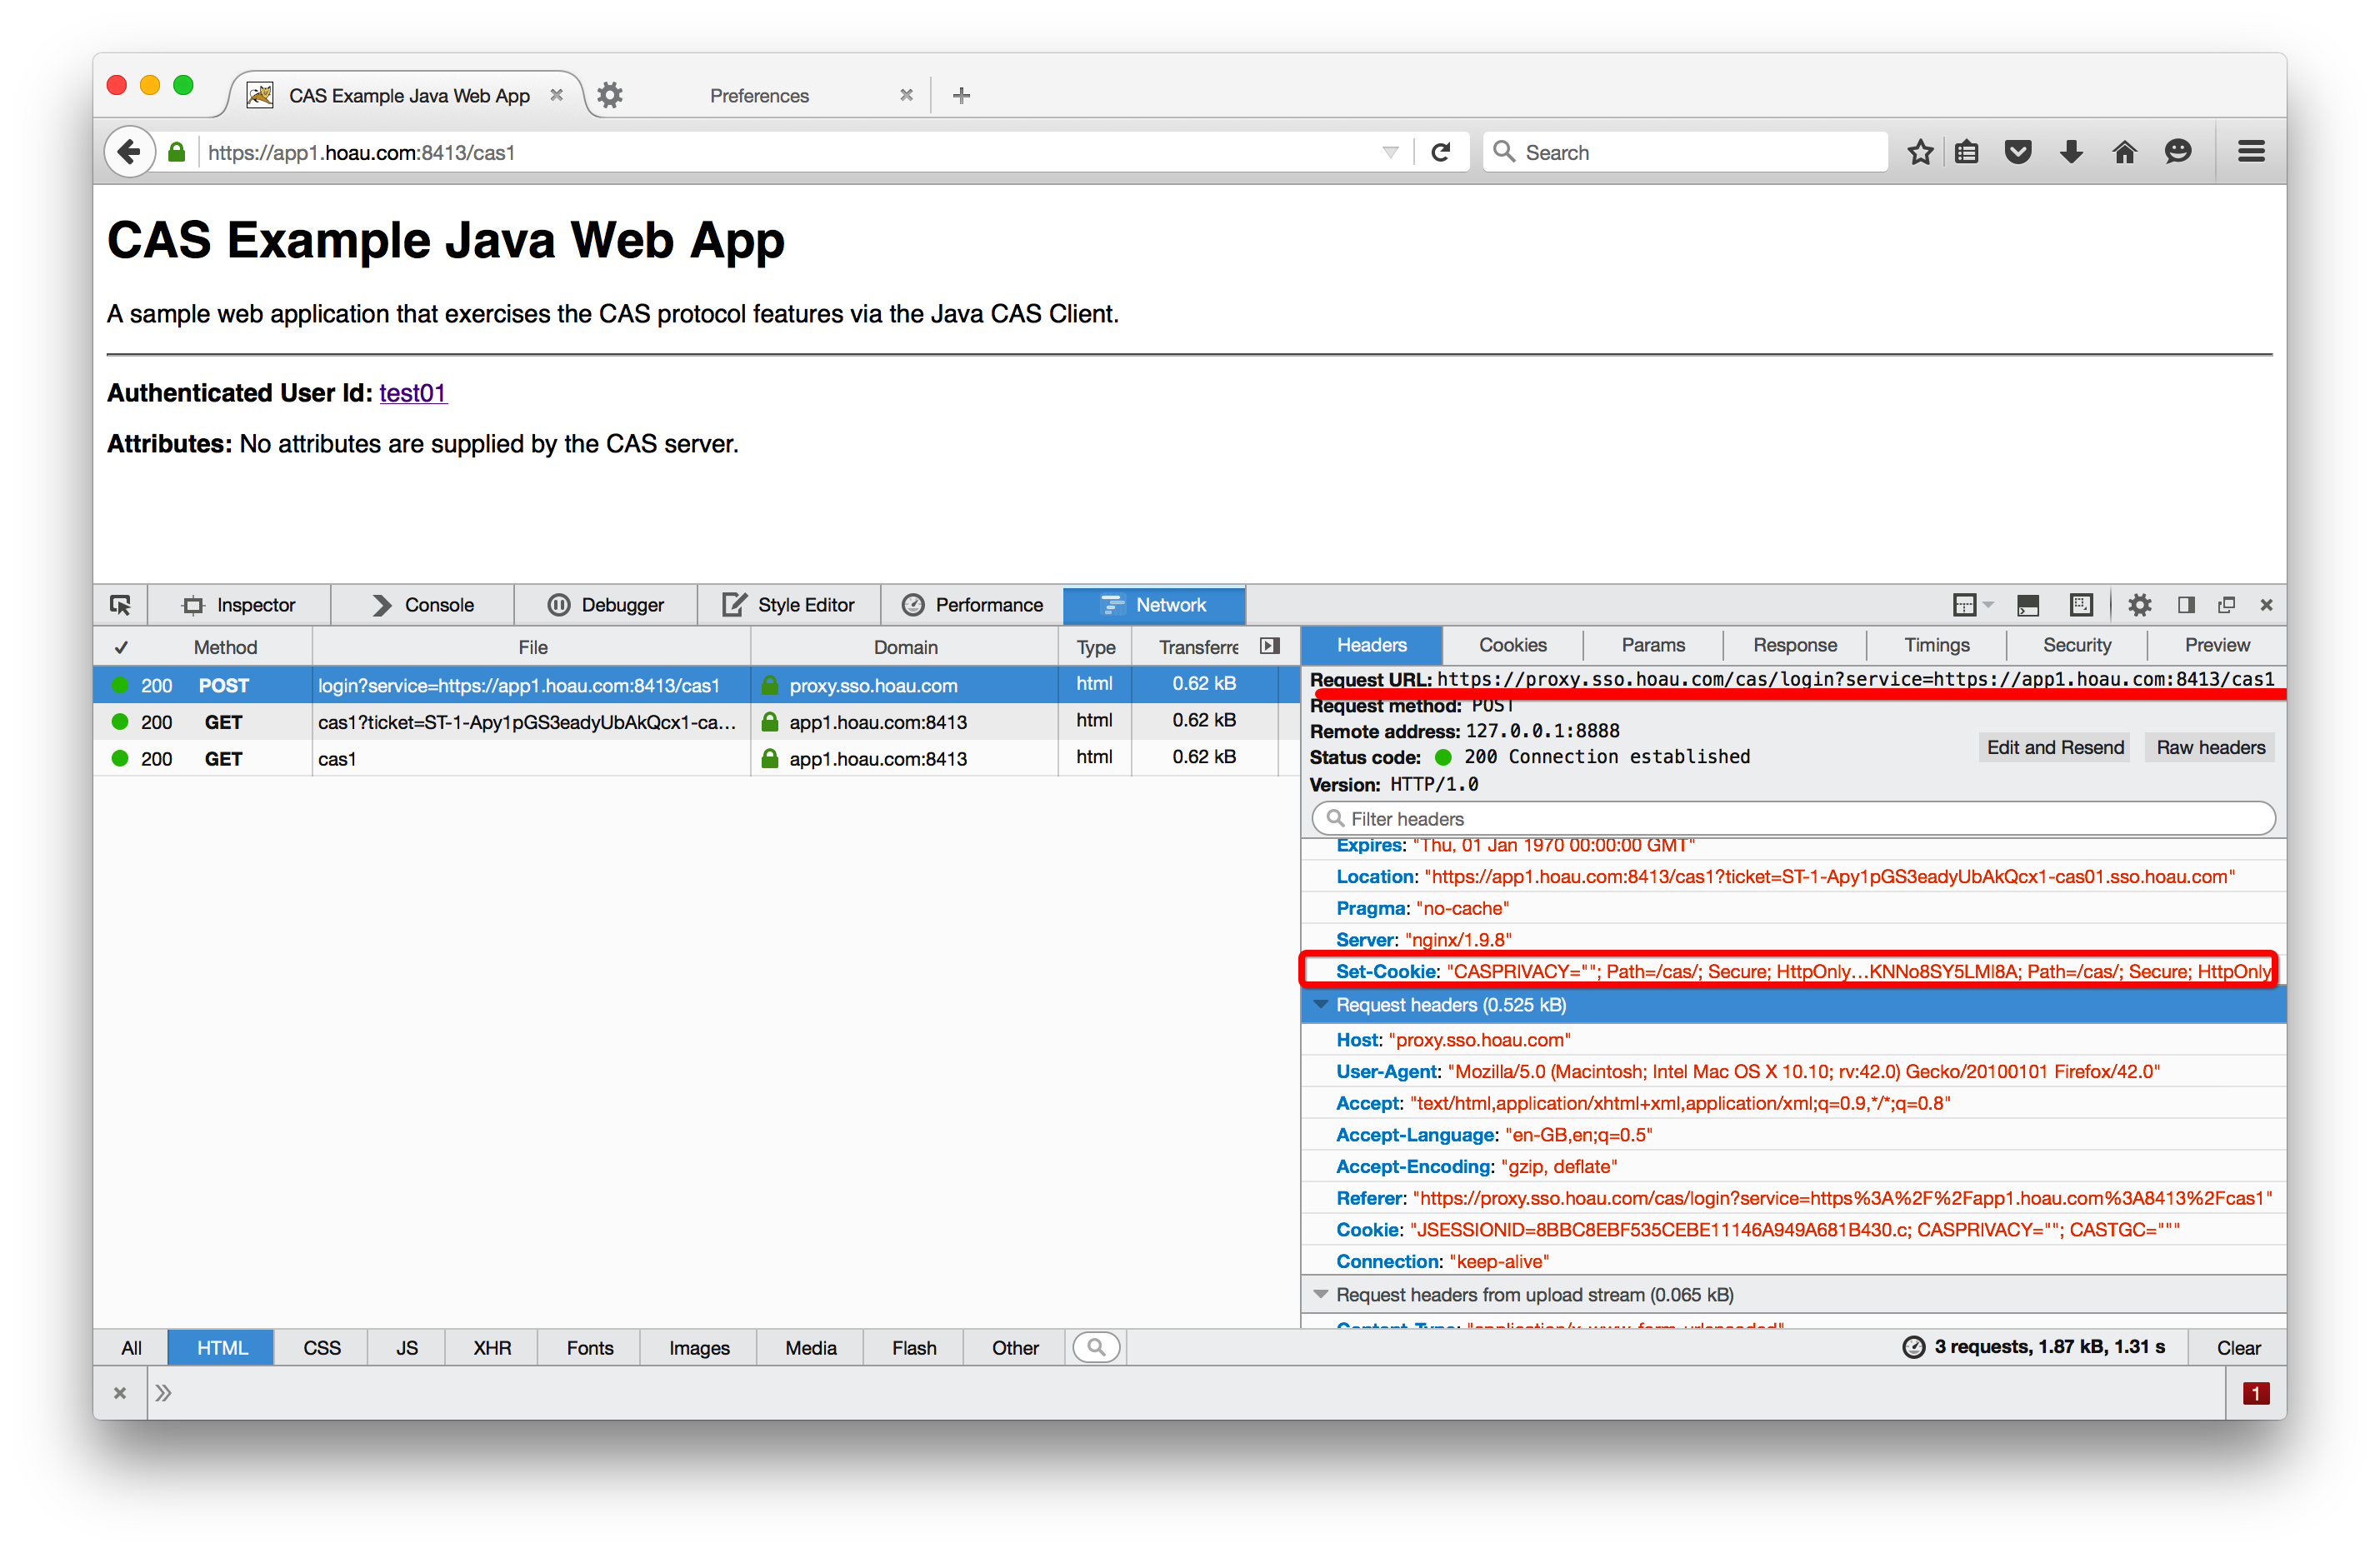
如果验证成功,则会将浏览器重定向到app1的登陆成功页面。
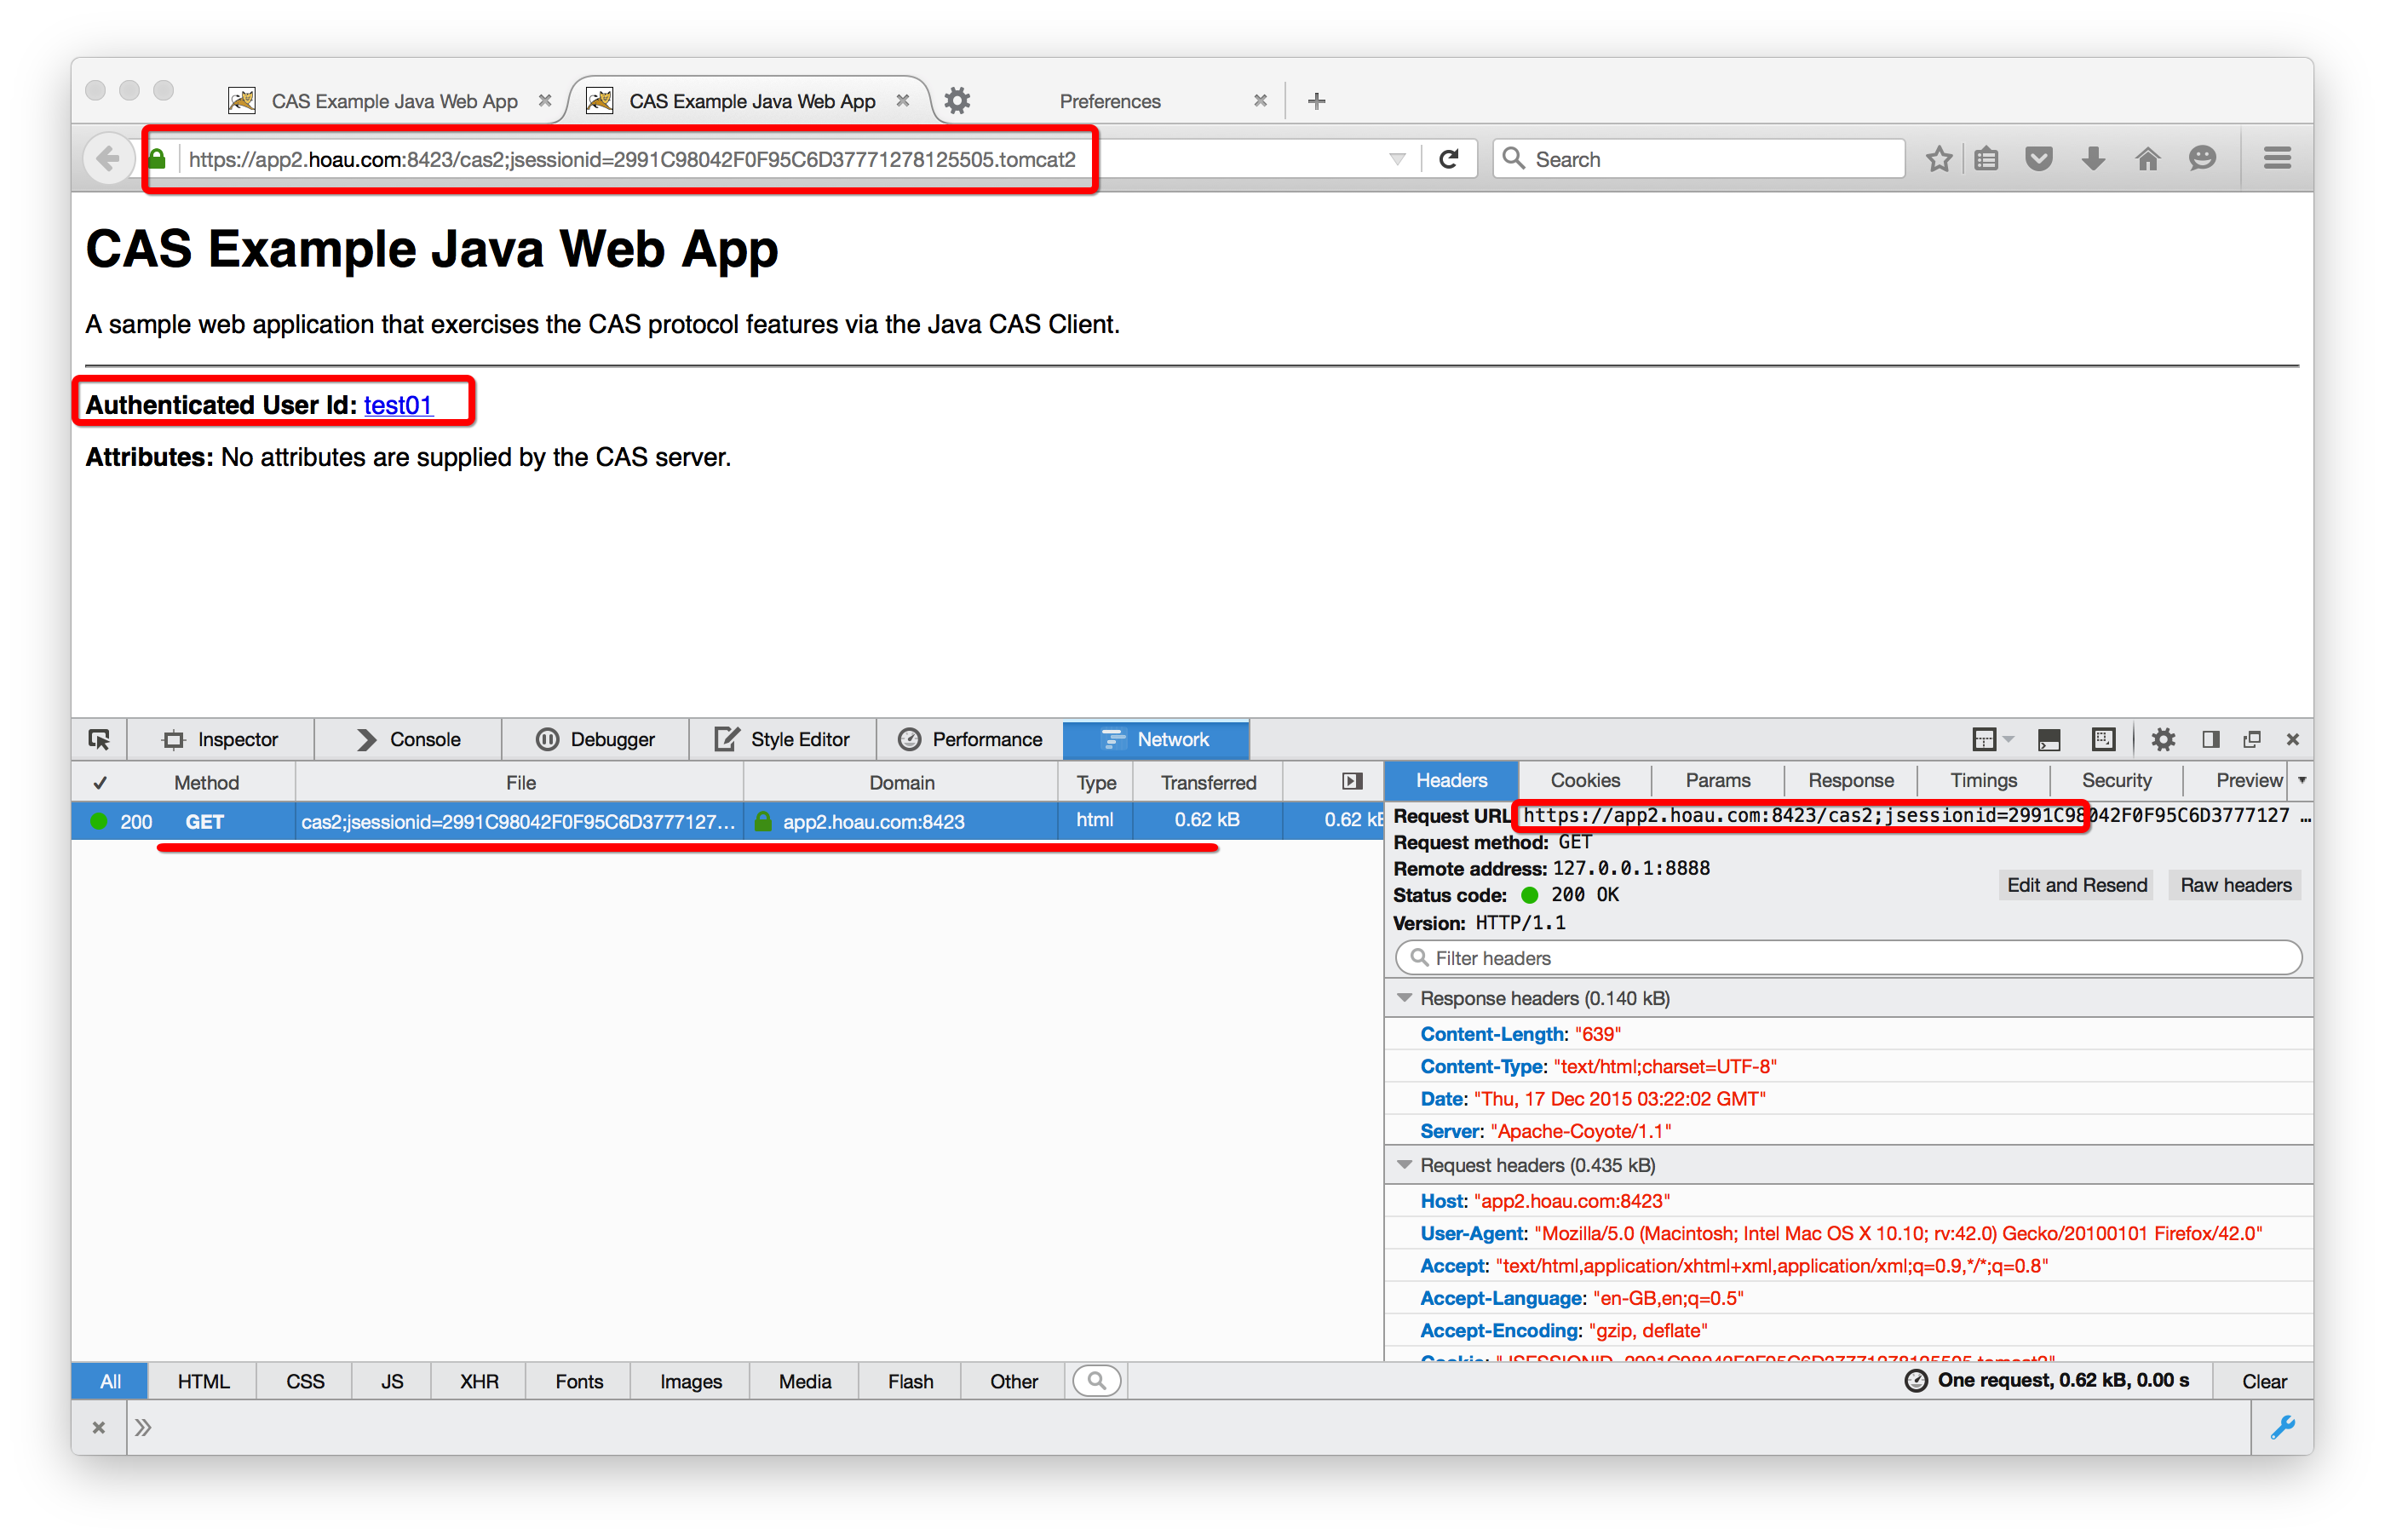
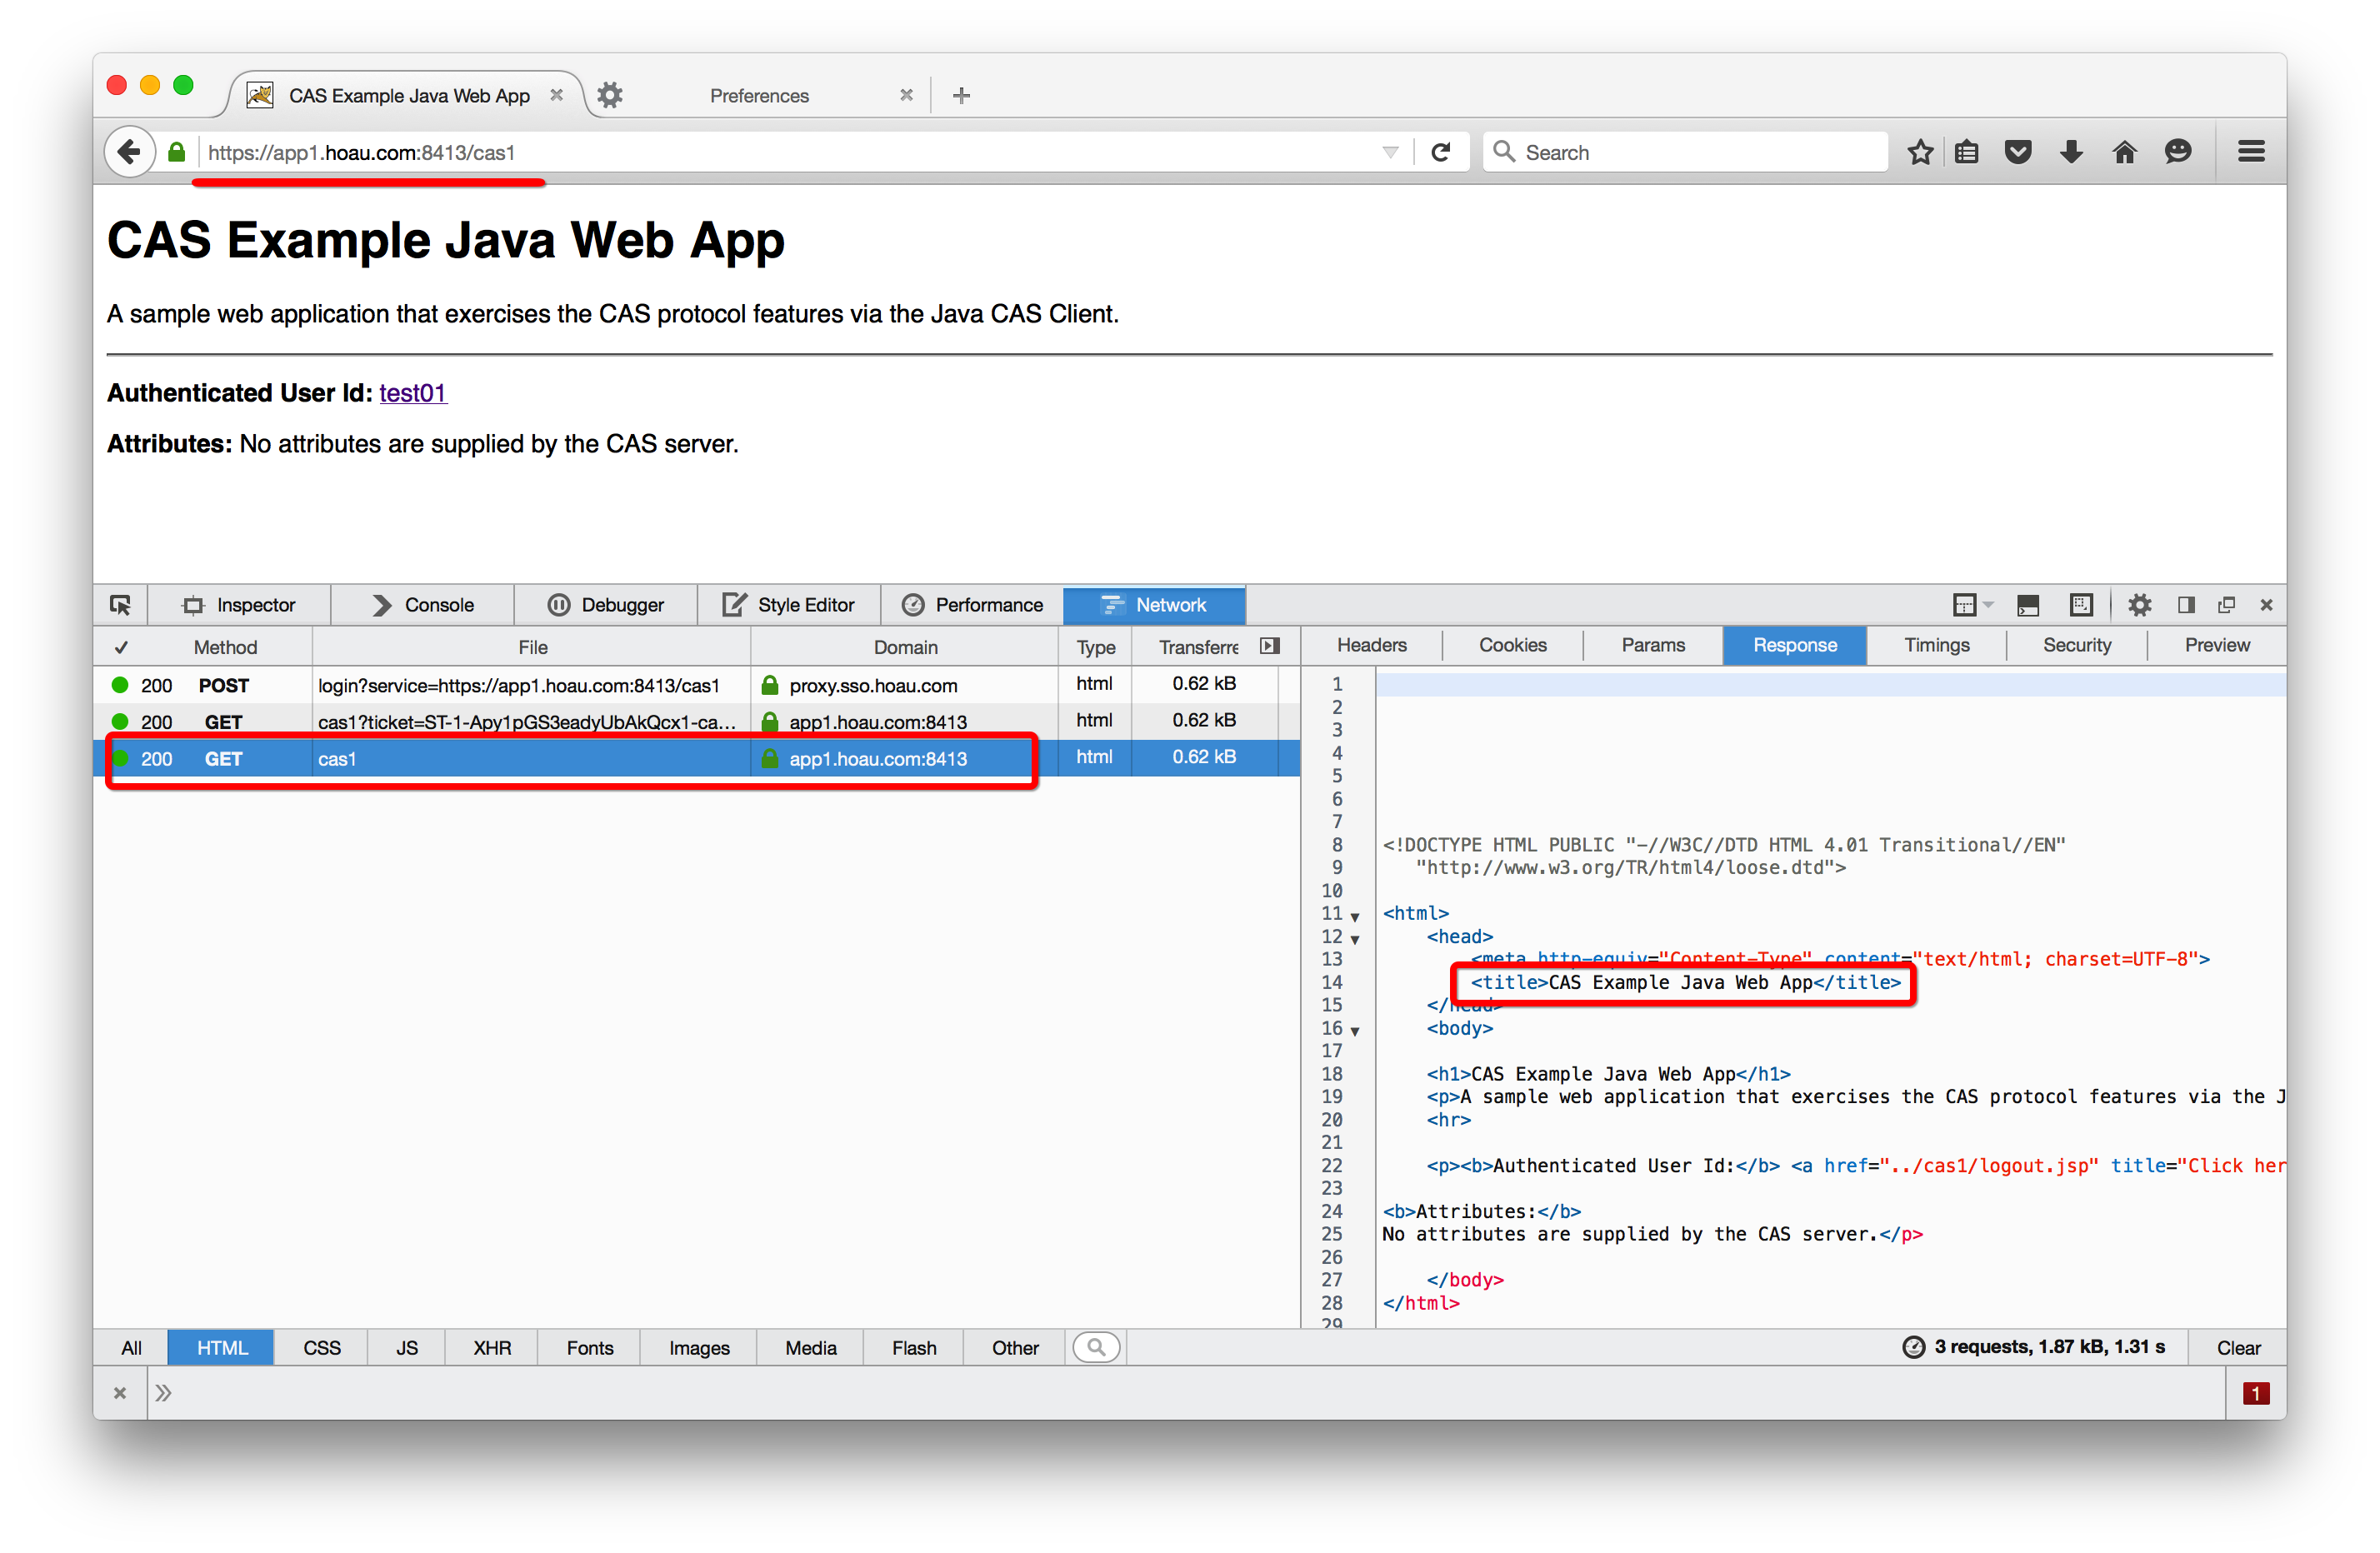
再次访问“https://app1.hoau.com:8413/cas1”
可以直接进入登陆成功页,而无需输入用户名密码。
访问另一应用
同样可以通过test01用户直接进入登陆成功页,而无需输入用户名密码。
上面基本测试通过,我们接着分析网络顺序。
代理下的网络顺序分析
由于这个场景较为简单,所以jasig官网上并没有给出这个场景下的网络顺序图。于是我自己画了一个。
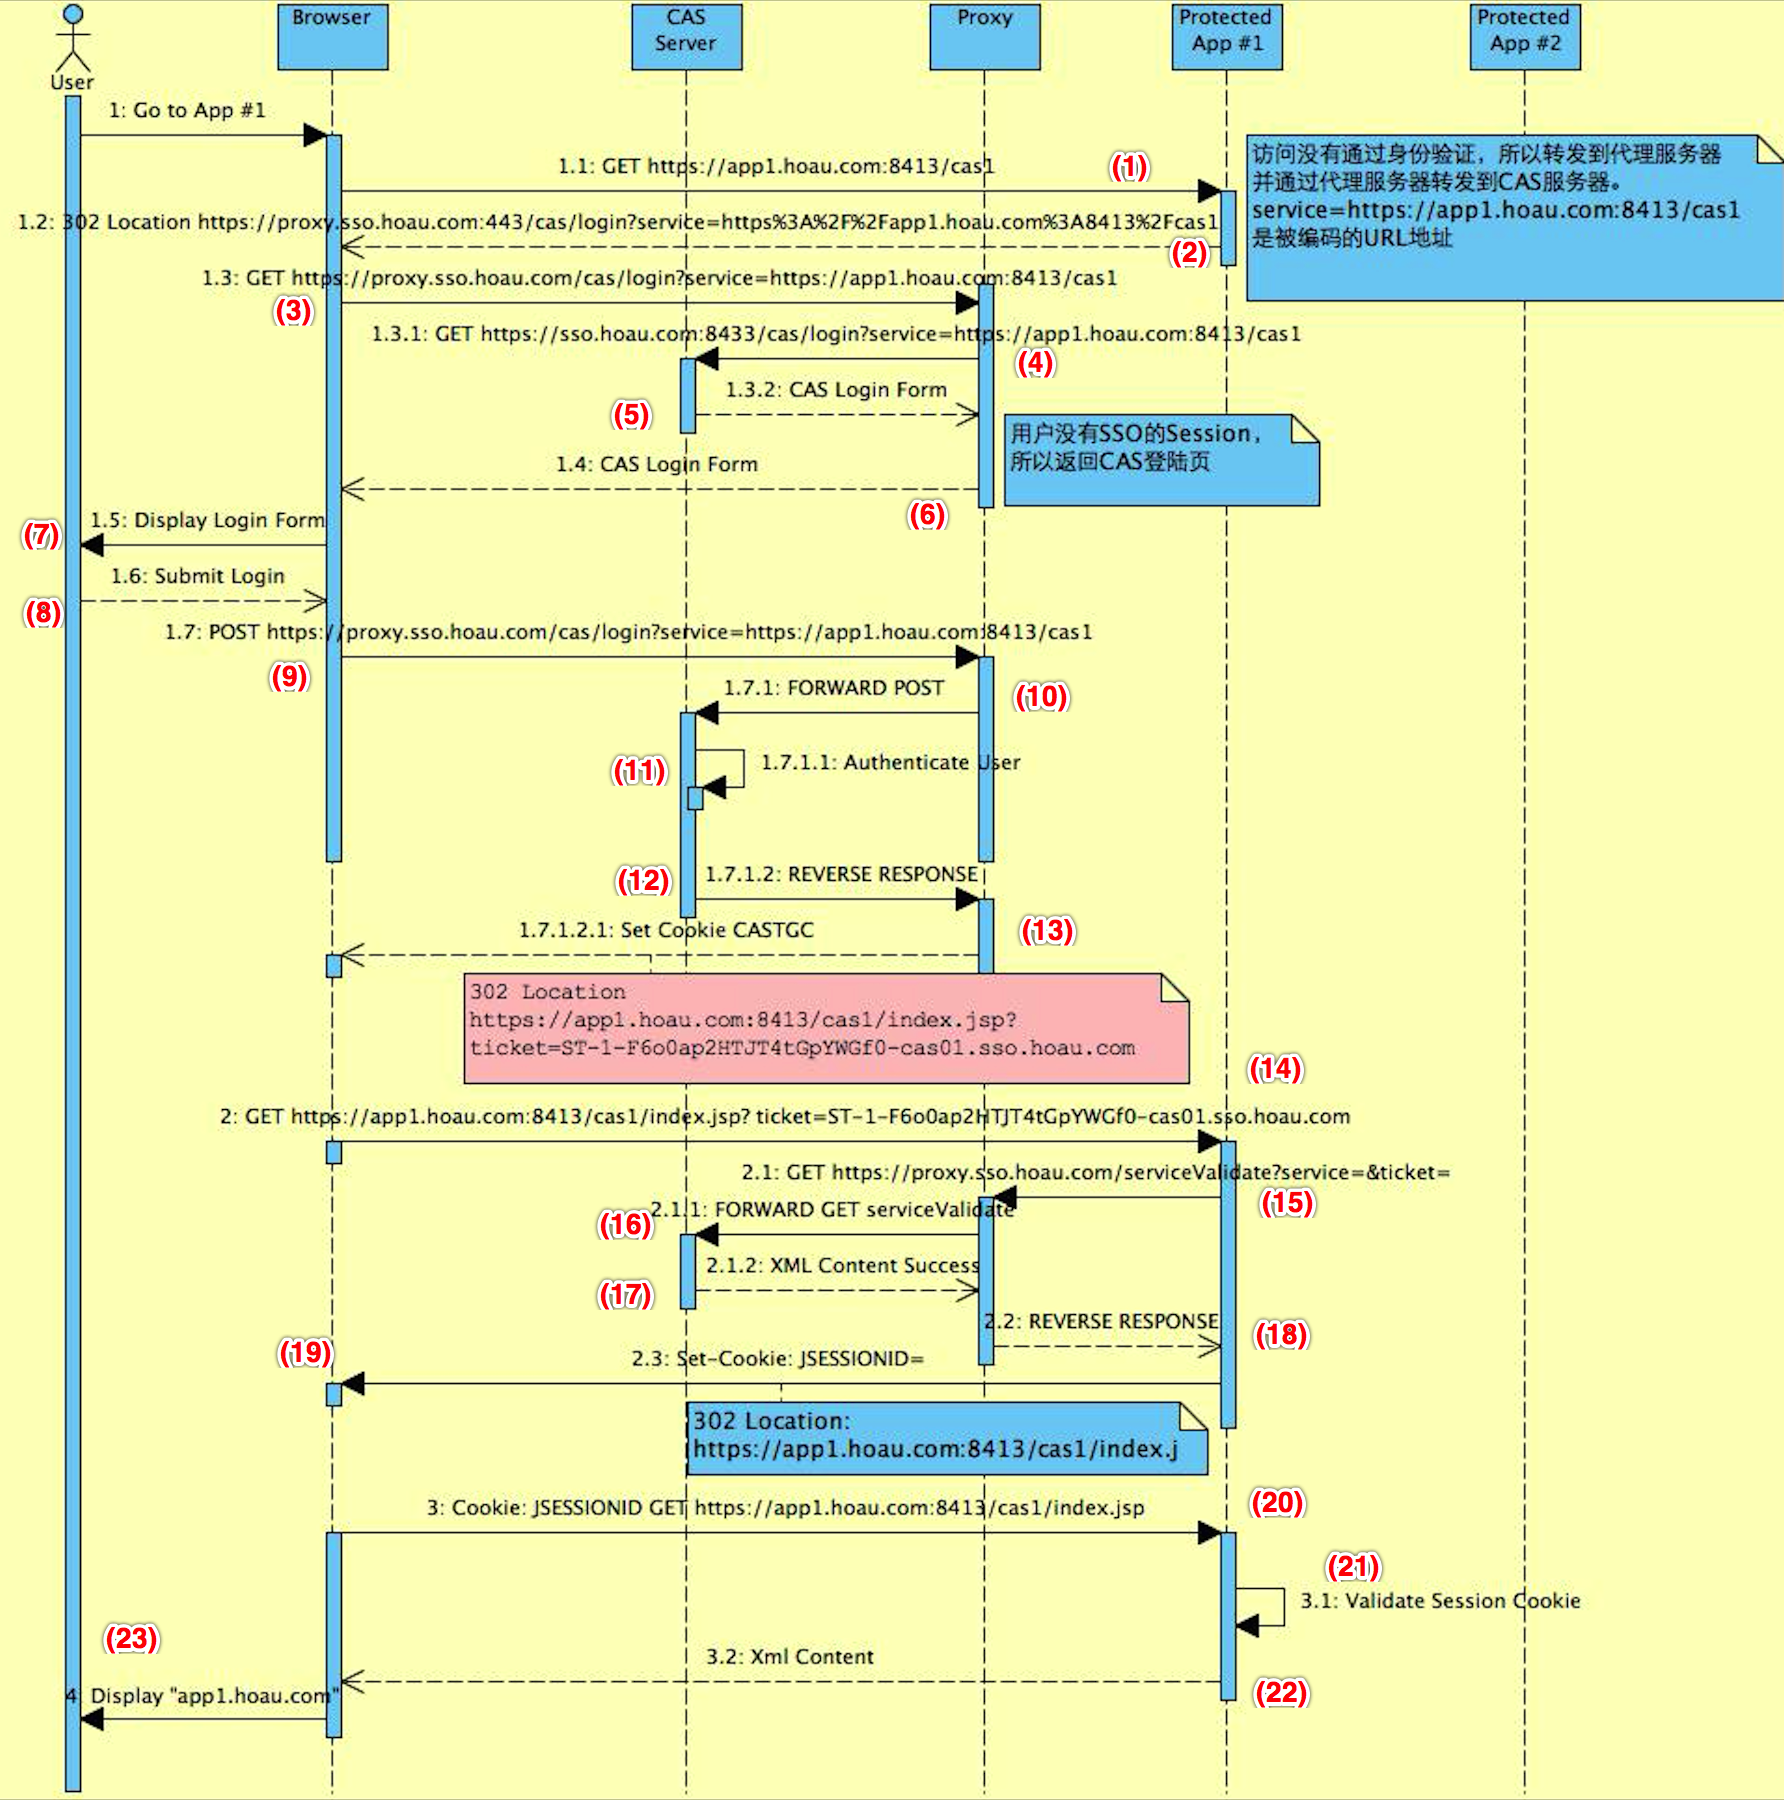
仔细观察可以发现:上图与不通过nginx代理时,官网的序列图类似,只有代理出多了转发和反向的工作。
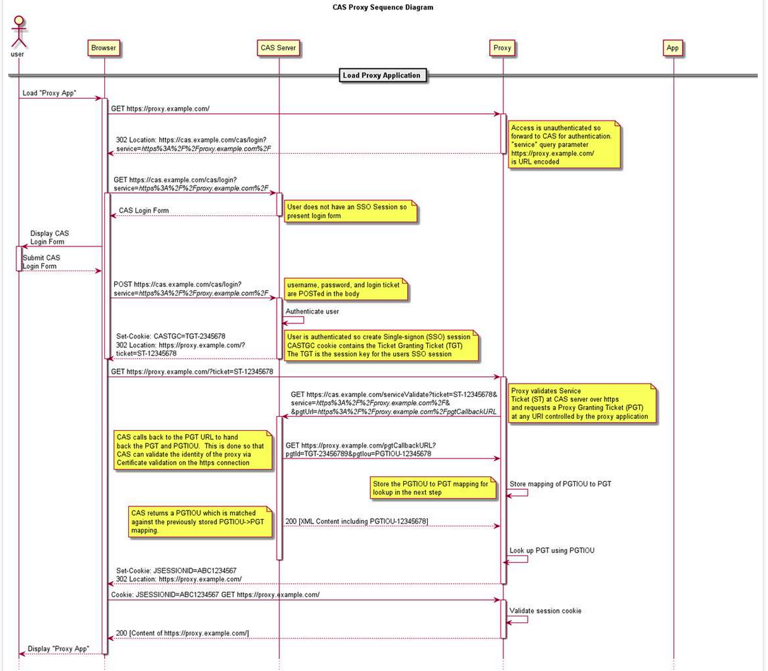
首次访问
https://app1.hoau.com:8413/cas1(0)用户通过浏览器访问上面地址
(1)浏览器访问Protected App #1
(2)Protected App #1尝试验证身份
首次登陆,身份验证未通过,返回重定向消息
302 Location
https://proxy.sso.hoau.com:443/cas/login
    ?service=https://app1.hoau.com:8413/cas1
(3)浏览器重定向以上地址至代理服务器Proxy
(4)Proxy将次请求分发至CAS服务器
https://sso.hoau.com:8433/cas/login
    ?service=https://app1.hoau.com:8413/cas1
CAS服务器发现用户没有SSO的Session,然后返回CAS的登陆页面内容
(5)返回CAS的登陆页面内容至代理服务器
(6)代理将响应的内容返回给浏览器
(7)浏览器为用户呈现登陆页面
(8)用户提交用户名和密码
(9)浏览器提交Form内容至代理
(10)代理转发提交的内容至CAS服务器
(11)CAS服务器验证用户身份
(12)CAS服务器返回相应至代理
(13)代理将响应返回给浏览器
并且设置Cookie
CASTGC由于身份验证成功,此刻浏览器被要求重定向至Protected App #1的登陆页
(14)浏览器被重定向至Protected App #1
并且携带ticket信息。
*注意:以下(15)、(16)、(17)和(18)步为Protected App #1与CAS Server背后的交互。
Protected App #1 收到请求后,会再次访问CAS Server以验证ticket。
(15)(16)Protected App #1通过Proxy请求serviceValidate
(17)(18)CAS服务器经由代理返回响应信息
(19)如果CAS服务器校验通过
则会设置Cookie JSESSIONID,然后将重定向信息返回到浏览器
(20)浏览器再次访问Protected App #1
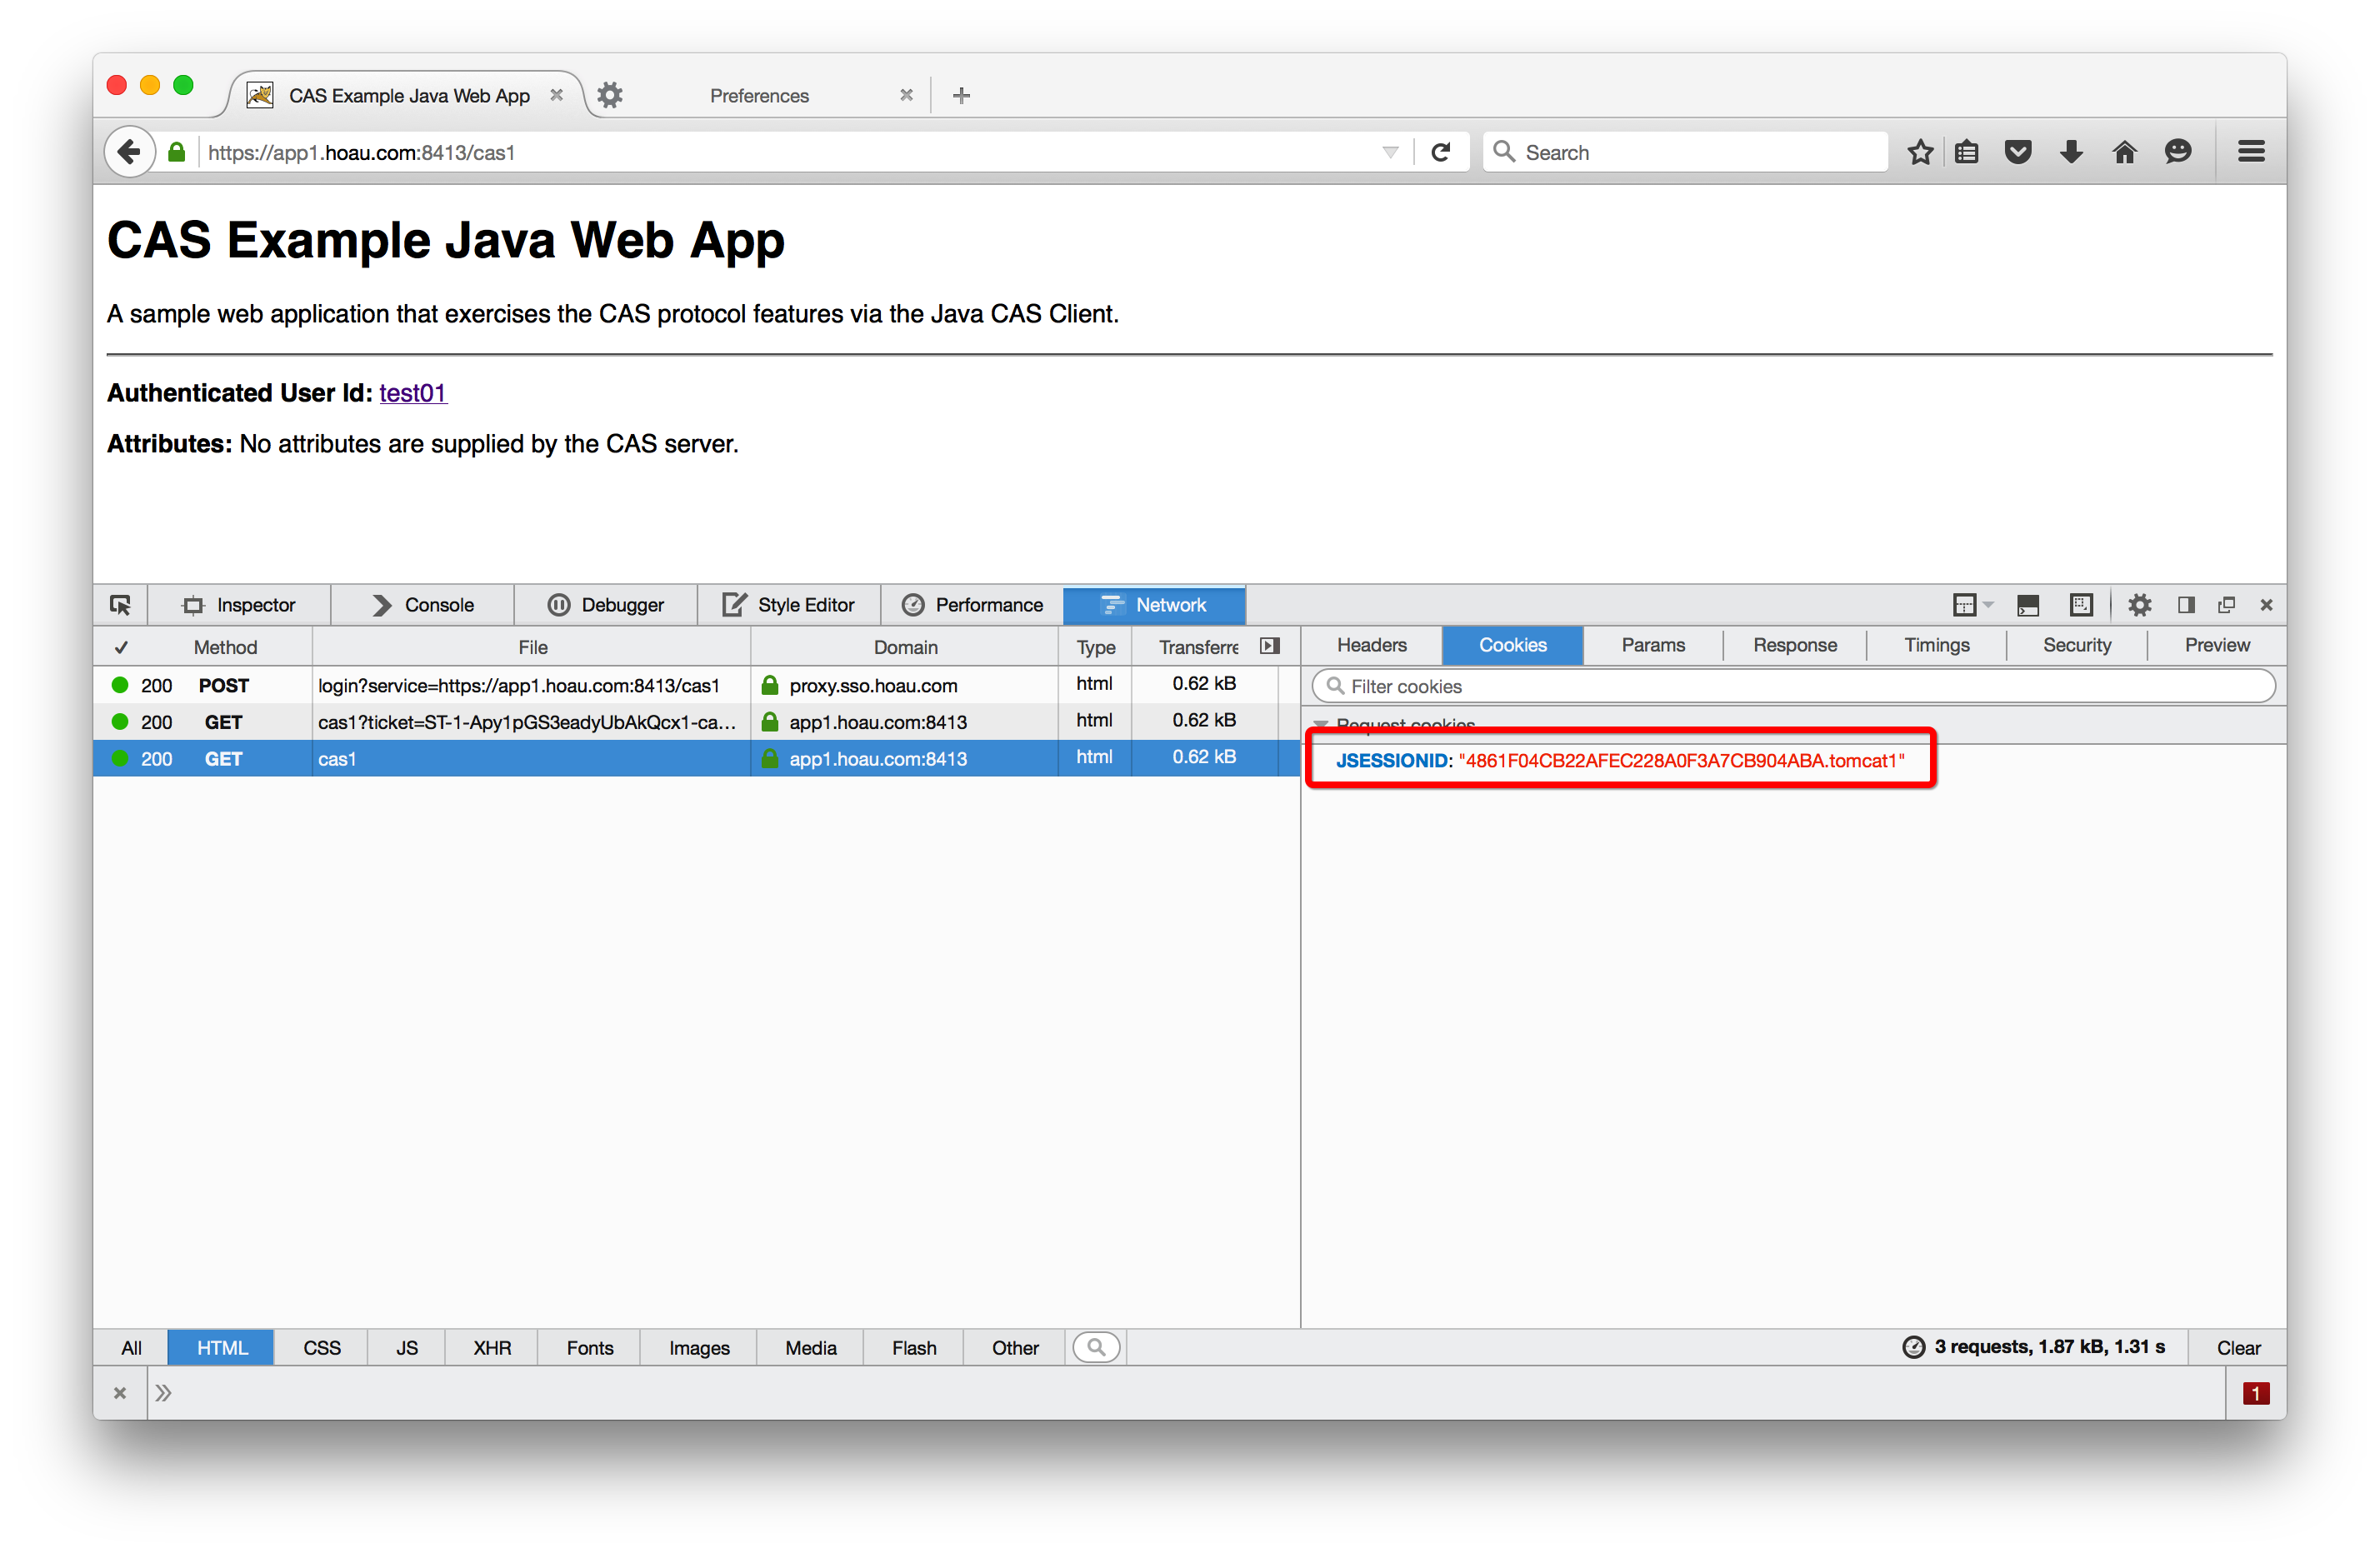
并携带有效的JSESSIONID,这时
(21)Protected App #1会校验Session Cookie
如果验证通过,则
(22)返回目标页面的内容
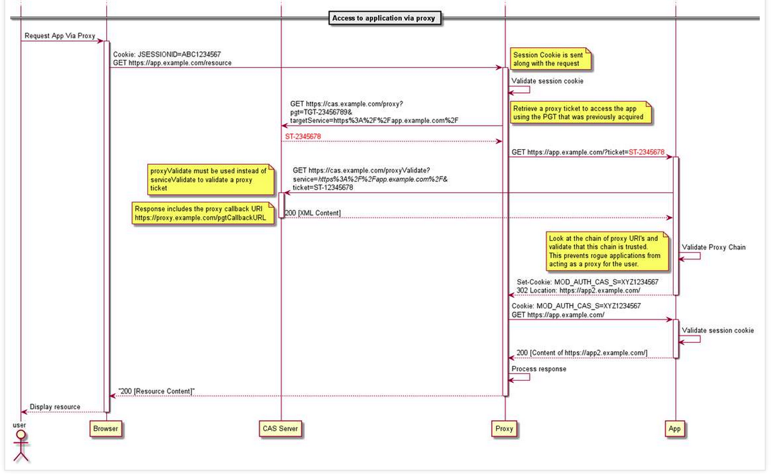
再次访问
https://app1.hoau.com:8413/cas1另一个应用访问
https://app2.hoau.com:8423/cas2以上“再次访问”和“另一应用访问”不在赘述,大家可以自行测试,或参考无代理情况下的序列图:
CAS (4) —— CAS浏览器SSO访问顺序图详解(CAS Web Flow Diagram by Example)
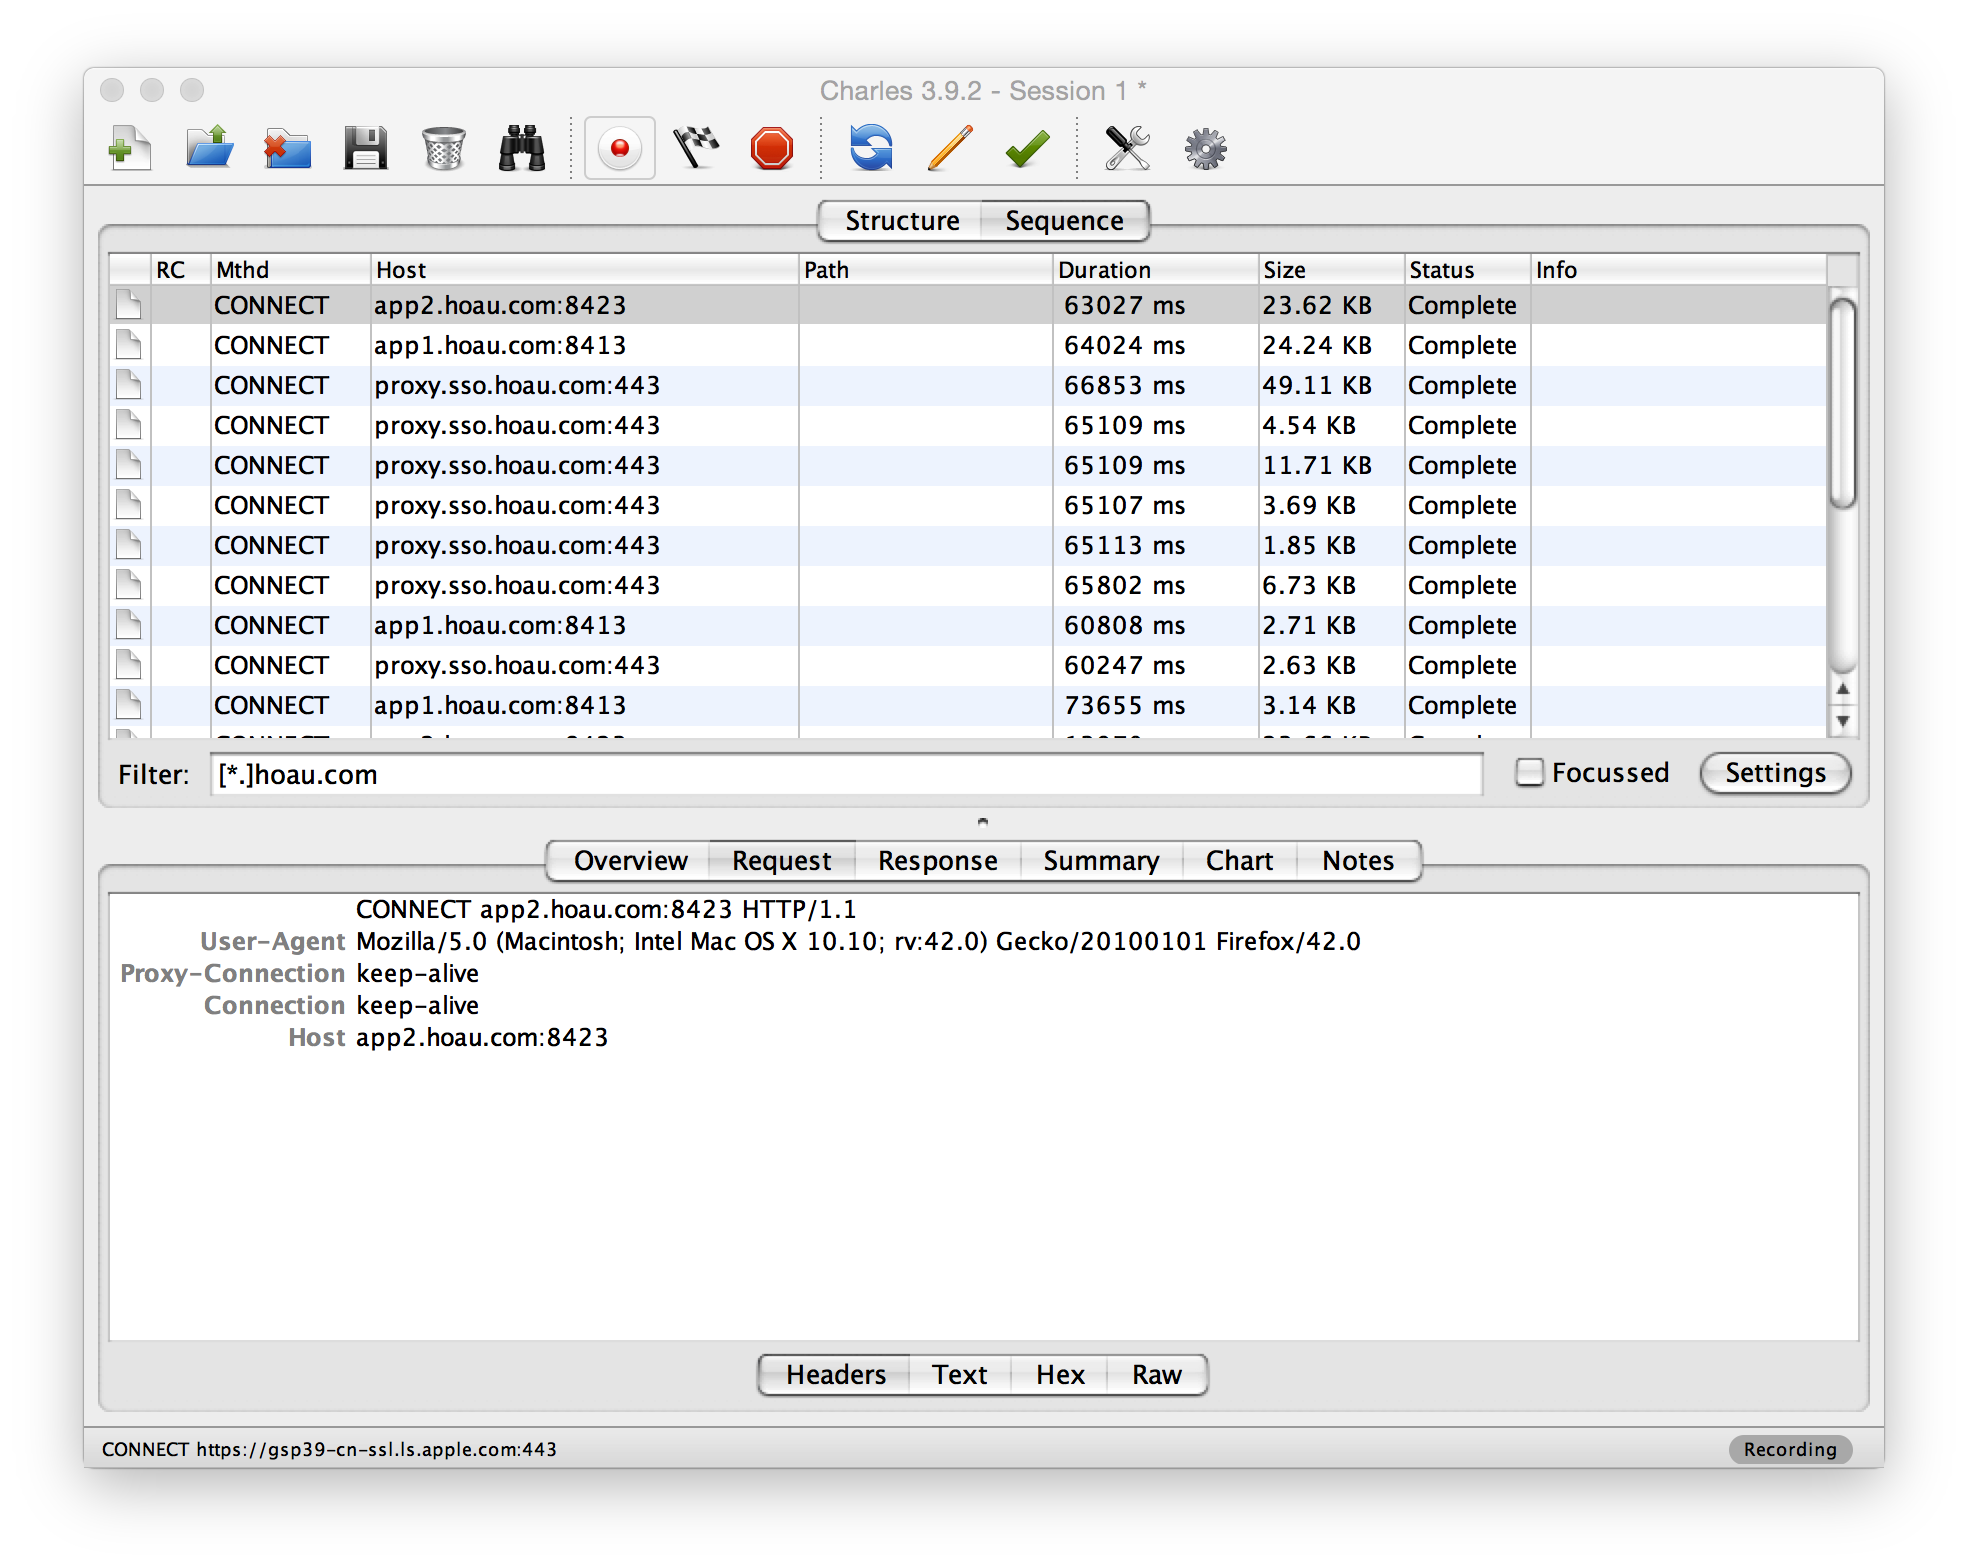
附一个Charles的http顺序图


 6170
6170


 被折叠的 条评论
为什么被折叠?
被折叠的 条评论
为什么被折叠?
 到【灌水乐园】发言


