


一 简介
本篇文章主要介绍:在SpringMVC中如何使用Interceptor+Cookie实现在一定天数之内自动登录的功能。同时还介绍“如果校验失败则跳转到登录页面,在输入用户名、密码等完成登录之后又自动跳转到原页面”的功能实现
本次测试环境是SSM框架,在正式介绍本篇文章之前,建议需要熟悉以下前置知识点:
-
Mybatis中使用mybatis-generator结合Ant脚本快速自动生成Model、Mapper等文件(PS:这是为了快速生成一些基本文件) https://www.zifangsky.cn/431.html
-
SpringMVC通过配置mvc:view-controller直接解析到视图页面(PS:这是为了简化controller中的代码) https://www.zifangsky.cn/648.html
-
基于SpringMVC的Cookie常用操作详解(PS:这是介绍cookie的常用操作) https://www.zifangsky.cn/665.html
-
SpringMVC中使用forward和redirect进行转发和重定向以及重定向时如何传参详解(PS:这是介绍重定向时如何传参的问题) https://www.zifangsky.cn/661.html
-
在SpringMVC中使用拦截器(interceptor)拦截CSRF攻击(PS:这是介绍拦截器的一些基础用法) https://www.zifangsky.cn/671.html
二 代码实现
(1)数据库表设计:
我这里采用的是MySQL,同时设计了两张表,分别是:user和persistent_logins
i)user表:
| 1 2 3 4 5 6 7 8 9 10 11 12 13 14 15 16 |
|
这张表很简单,就是一张普通的用户表
ii)persistent_logins表:
| 1 2 3 4 5 6 7 8 9 |
|
这张表是用户校验用户自动登录的表。设计这张表的原因是我看过一些网上的文章介绍使用cookie自动登录,但是他们基本上都是将用户名、密码、salt等字符串拼接之后md5加密然后保存在cookie中。虽然使用了md5这类非对称加密方式,但是将密码这类关键信息保存在用户端,我觉得是不太靠谱的。因此设计了这张表,将用户名、密码等关键信息加密之后的数据保存到这张表中,在用户的cookie里只保存了没有特殊含义的UUID值以及用户名
这张表中的几个字段的含义分别是:
-
id 主键
-
username 用户名
-
series 用户使用密码登录成功之后获取的一个UUID值,同时用户端保存的cookie记录就是:EncryptionUtil.base64Encode(用户名:此UUID值)
-
token 在拦截器中校验是否能够登录的密文,其加密方式是:EncryptionUtil.sha256Hex(用户名 + “_” + 密码 + “_” + 自动登录失效的时间点的字符串 + “_” + 自定义的salt)
-
validTime 自动登录失效的时间,即:这个时间点之后只能重新用用户名、密码登录,如果在重新登录时勾选了“30天内自动登录”则更新该用户在persistent_logins这个表中的自动登录记录
(2)几个基本的配置文件:
i)web.xml:
| 1 2 3 4 5 6 7 8 9 10 11 12 13 14 15 16 17 18 19 20 21 22 23 24 25 26 27 28 29 30 31 32 33 34 35 36 37 38 39 40 41 42 43 44 45 46 47 48 |
|
ii)context.xml:
| 1 2 3 4 5 6 7 8 9 10 11 12 13 14 15 16 17 18 19 20 21 22 23 24 25 26 27 28 29 30 31 32 33 34 35 36 37 38 39 40 41 42 43 44 45 46 47 48 49 50 51 52 53 54 55 56 57 58 59 60 61 62 63 64 65 66 67 68 69 70 71 72 73 74 75 76 77 78 79 80 81 82 83 84 85 86 87 88 89 90 91 92 93 94 95 96 97 98 99 100 101 |
|
iii)SpringMVC的配置文件springmvc-servlet.xml:
| 1 2 3 4 5 6 7 8 9 10 11 12 13 14 15 16 17 18 19 20 21 22 23 24 25 26 27 28 29 30 31 32 33 34 35 36 37 38 39 40 41 42 43 44 |
|
这里需要注意的是第31-35行的拦截器的配置,这个拦截器就是用于使用cookie自动登录的拦截器,上面那个用于拦截登录时的CSRF攻击的拦截器可以先不用管,直接注释掉或者参考下我的这篇文章:https://www.zifangsky.cn/671.html
(3)Mapper层的代码:
i)UserMapper:
| 1 2 3 4 5 6 7 8 9 10 11 12 13 14 15 16 17 18 19 20 21 22 23 24 25 26 |
|
这里除了使用插件自动生成的几个方法之外,还添加了两个其他的方法,它们对应的SQL语句是:
| 1 2 3 4 5 6 7 8 9 10 11 12 13 14 15 16 17 18 19 |
|
ii)PersistentLoginsMapper:
| 1 2 3 4 5 6 7 8 9 10 11 12 13 14 15 16 17 18 19 20 21 22 23 24 25 26 27 28 29 30 31 32 33 34 35 36 37 |
|
同样,这里也添加了两个其他的方法,它们对应的SQL语句是:
| 1 2 3 4 5 6 7 8 9 10 11 12 |
|
(4)Manager层(即:业务逻辑层):
i)UserManager接口:
| 1 2 3 4 5 6 7 8 9 10 11 12 13 14 15 16 17 18 19 20 21 22 23 24 25 26 27 28 29 30 31 32 33 34 35 36 37 38 39 40 41 42 43 |
|
ii)PersistentLoginsManager接口:
| 1 2 3 4 5 6 7 8 9 10 11 12 13 14 15 16 17 18 19 20 21 22 23 24 25 26 27 28 29 30 31 32 33 |
|
iii)PersistentLoginsManagerImpl实现类:
| 1 2 3 4 5 6 7 8 9 10 11 12 13 14 15 16 17 18 19 20 21 22 23 24 25 26 27 28 29 30 31 32 33 34 35 36 37 38 39 40 41 42 43 44 45 46 47 48 49 50 51 52 53 54 55 56 57 |
|
iv)UserManagerImpl实现类:
| 1 2 3 4 5 6 7 8 9 10 11 12 13 14 15 16 17 18 19 20 21 22 23 24 25 26 27 28 29 30 31 32 33 34 35 36 37 38 39 40 41 42 43 44 45 46 47 48 49 50 51 52 53 54 55 56 57 58 59 60 61 62 63 64 65 66 67 68 69 70 71 72 73 74 75 76 77 78 79 80 81 82 83 84 85 86 87 88 89 90 91 92 93 94 95 96 97 98 99 100 101 102 103 104 105 106 107 108 109 110 111 112 113 114 115 116 117 118 119 120 121 122 123 124 125 126 |
|
注:CookieConstantTable类:
| 1 2 3 4 5 6 7 8 9 10 |
|
CookieUtils类:
| 1 2 3 4 5 6 7 8 9 10 11 12 13 14 15 16 17 18 19 20 21 22 23 24 25 26 27 28 29 30 31 32 33 34 35 36 37 38 39 40 41 42 43 44 45 46 47 48 49 50 51 52 53 54 55 56 57 58 59 60 61 62 63 64 65 66 67 68 69 70 71 72 73 74 75 76 77 78 79 80 81 82 83 84 85 86 87 88 89 90 91 92 93 94 95 96 97 98 99 100 101 102 103 104 105 106 107 108 109 110 111 112 113 114 115 116 117 118 119 120 121 122 123 124 125 126 127 128 129 130 131 132 133 134 135 136 137 138 139 140 141 142 143 144 145 146 147 148 149 150 151 152 153 154 155 156 157 158 159 160 161 162 163 164 165 166 167 168 169 170 171 172 173 174 175 176 177 178 179 180 181 182 183 184 185 186 187 188 189 190 191 192 193 194 195 196 197 198 |
|
EncryptionUtil类:
| 1 2 3 4 5 6 7 8 9 10 11 12 13 14 15 16 17 18 19 20 21 22 23 24 25 26 27 28 29 30 31 32 33 34 35 36 37 38 39 40 41 42 43 44 45 |
|
这个方法类本质上调用的是 commons-codec-1.10.jar 这个jar包中的方法
在这个类中,关于退出登录就不用多做解释了,有详细注释自己参考下就行
关于这个登录方法,实际上我这里的执行流程是这样的:
-
根据用户名、密码执行登录验证
-
如果前台登录的form表单中勾选了“30天内自动登录”的选项,那么就执行下面的保存登录记录到persistent_logins这个表以及cookie中;如果没勾选,那么就直接将验证结果返回到controller中
-
执行保存记录的这个操作,实际上分为以下两步操作:a:向表persistent_logins保存记录,username是当前用户;series是获取的当前的UUID值;token是用户名、密码、cookie到期时间、以及自定义的salt经过sha256非对称加密之后的字符串;validTime是到期时间。b:向“remember-me”这个cookie保存的记录值是用户名和UUID值经过base64编码之后的字符串
-
保存记录,并返回到controller中操作
(5)Controller层:
| 1 2 3 4 5 6 7 8 9 10 11 12 13 14 15 16 17 18 19 20 21 22 23 24 25 26 27 28 29 30 31 32 33 34 35 36 37 38 39 40 41 42 43 44 45 46 47 48 49 50 51 52 53 54 55 56 57 58 59 60 61 62 63 64 65 66 67 68 69 70 71 72 73 74 75 76 77 78 79 80 81 82 83 |
|
在这里,对“callback”的操作主要是在拦截器中判断是否能够自动登录时,如果能够登录那么不用多说直接转到目标页面;如果不能通过验证,那么需要跳转到登录页面进行用户名、密码登录,这里的callback参数的目的就是在拦截器中验证失败跳转到登录页面之前,将本来想要访问的页面路径存储在session中,然后在controller中登录成功之后从session中取出,最后再重定向到那个目标页面
如果对这里的重定向等代码不太理解的话,建议可以参考下我在本篇文章开始时列举的那几篇文章
(6)几个测试使用的前台页面:
首先给出这几个页面之间的层次关系:
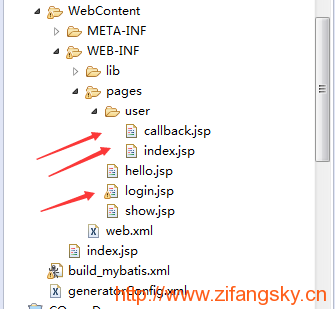
i)login.jsp:
| 1 2 3 4 5 6 7 8 9 10 11 12 13 14 15 16 17 18 19 20 21 22 23 24 25 26 27 28 29 30 31 32 33 34 35 36 37 38 39 40 41 42 43 44 45 46 |
|
登录用的form表单
ii)user目录下的index.jsp:
| 1 2 3 4 5 6 7 8 9 10 11 12 13 14 15 16 17 18 19 20 21 22 |
|
iii)callback.jsp:
| 1 2 3 4 5 6 7 8 9 10 11 12 13 14 15 16 17 18 19 20 |
|
这个页面主要是为了测试登录之后是否能够跳转到原来想要访问的页面
(7)拦截器UserInterceptor:
| 1 2 3 4 5 6 7 8 9 10 11 12 13 14 15 16 17 18 19 20 21 22 23 24 25 26 27 28 29 30 31 32 33 34 35 36 37 38 39 40 41 42 43 44 45 46 47 48 49 50 51 52 53 54 55 56 57 58 59 60 61 62 63 64 65 66 67 68 69 70 71 72 73 74 75 76 77 78 79 80 81 82 83 84 85 86 87 88 89 90 91 92 93 94 95 96 97 98 99 100 101 102 103 104 105 106 107 108 109 110 111 112 113 114 115 116 117 118 119 120 121 122 123 |
|
在这里,验证流程如下:
-
如果在session中存在“user”对象,那么验证通过,允许访问
-
如果session中没有,则需要取出cookie中名字为“remember-me”对应的值,用于下一步验证
-
根据base64解码之后的用户名和UUID值从表“persistent_logins”查询记录
-
取出数据库中保存的token值和到期时间,根据同样的加密方法加密待校验的密文,然后和数据库中的token相比较
-
如果一样,则表示可以自动登录。同时,为了提高安全性,在校验成功之后更新用户端的用于自动登录的cookie记录
-
将“user”对象添加到session中,本次拦截器校验通过
当然,我这里只是简单叙述了下流程,更具体的流程可以自行参考代码中的注释
三 测试
(1)测试使用cookie实现自动登录:
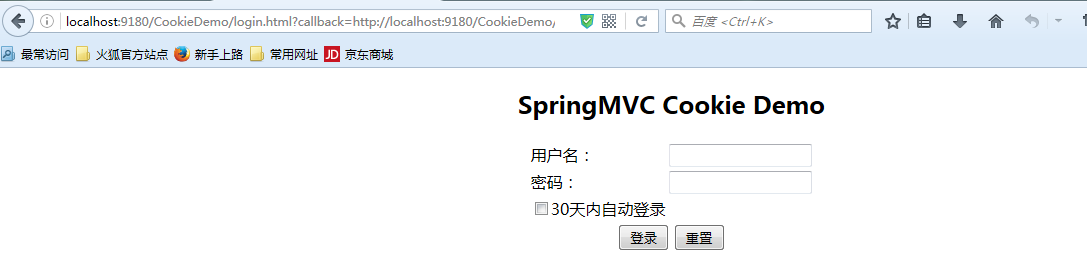
启动项目后,访问:http://localhost:9180/CookieDemo/login.html
输入用户名、密码并勾上“30天内自动登录”:
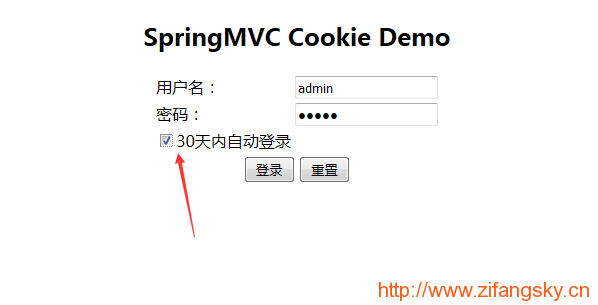
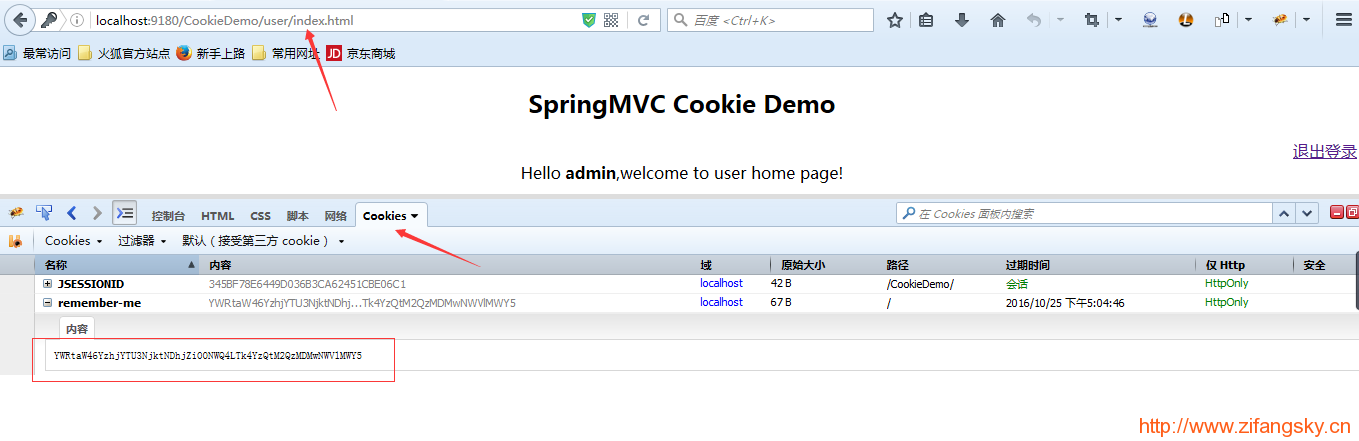
点击登录之后,可以发现页面跳转到了:http://localhost:9180/CookieDemo/user/index.html
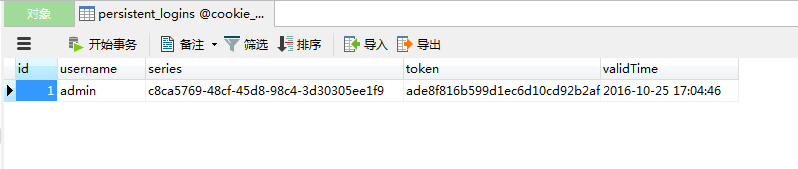
同时生成了一条名为“remember-me”的cookie记录值,其值是:YWRtaW46YzhjYTU3NjktNDhjZi00NWQ4LTk4YzQtM2QzMDMwNWVlMWY5
 如果使用在线base64解码工具解码之后可以发现,这个cookie值的原文是:
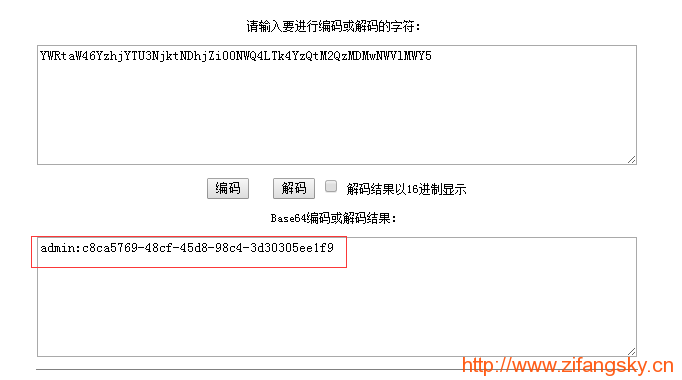
恰好与数据库中persistent_logins表中的记录相对应:
 接着,退出浏览器之后再次打开该浏览器访问:http://localhost:9180/CookieDemo/user/index.html
可以发现:可以直接访问该页面,同时已经是登录状态了。到此,我们的目的已经达成了
(2)测试登录之后跳回到原来想要访问的页面:
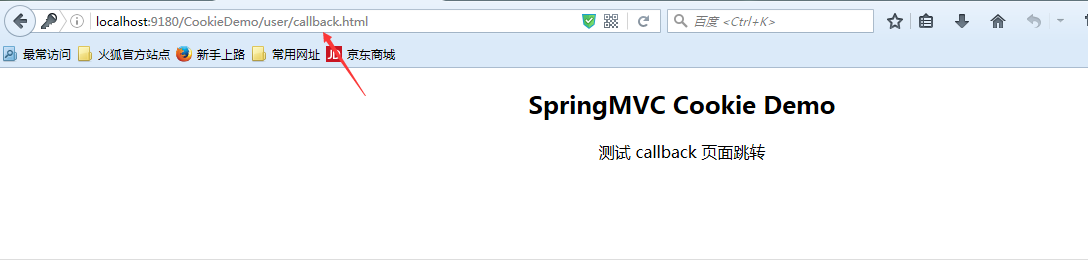
删除浏览器中的“remember-me”这个cookie,或者删掉数据库中persistent_logins表中的记录,然后在退出登录之后访问:http://localhost:9180/CookieDemo/user/callback.html
可以发现,页面已经被自动重定向到登录页面了
接着,输入用户名、密码登录,可以发现:在登录成功之后能够正常跳转到我们原来请求的页面:
 附:本次测试项目的完整源代码:
-
链接:http://pan.baidu.com/s/1nvo72a9 密码:dkxa


 156
156

 被折叠的 条评论
为什么被折叠?
被折叠的 条评论
为什么被折叠?
 到【灌水乐园】发言


