


一、标签(tag)介绍
(1)前文讲的别名(alias)是为了对每一个用户进行标识。而标签(tag)是用来将用户分类分组,这样便于批量推送消息。
(2)可为每个用户打多个标签。(比如: vip、women、game 等等)
(3)不同应用程序、不同的用户,可以打同样的标签。
(4)每次调用至少设置一个 tag。(这个会覆盖之前的设置,不是新增。)
(5)使用空数组或列表表示取消之前的设置。
二、标签使用要求
(1)有效的标签组成:字母(区分大小写)、数字、下划线、汉字。
(2)限制:每个 tag 命名长度限制为 40 字节,最多支持设置 100 个 tag,但总长度不得超过1K字节。(判断长度需采用 UTF-8编码)
(3)单个设备最多支持设置 100 个 tag。App 全局 tag 数量无限制。
三、标签使用的样例说明
下面给某些标签下关联的所有用户发送通知消息。
1,iOS客户端界面
客户端在启动后,我们可以选择我们关注的新闻类别(每个类别对应一个标签)。点击“注册标签”按钮后,便调用 API 将该设备与选择的标签关联起来。

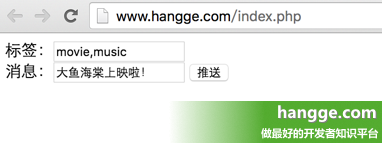
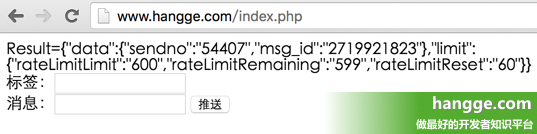
2,服务端界面
我们输入标签(如果给多个标签发送,则用逗号隔开)、消息文本,点击“推送”按钮后,即可给这些标签对应的所有用户发送消息。
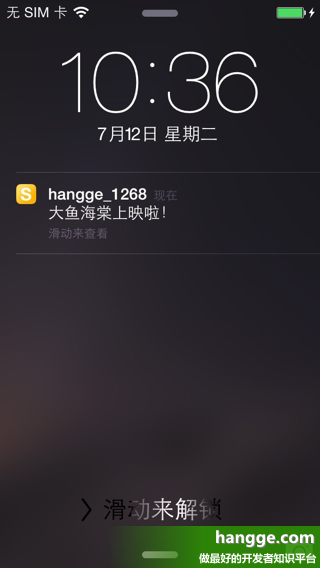
3,客户端显示效果
可以看到关联了这些标签的设备能收到消息,而其他的设备是收不到的。
四、完整代码
1,客户端代码
(1)AppDelegate.swift(这个同之前文章里的一样,没有改变。本文代码已升级至 Swfit3)
import UIKit
@UIApplicationMain
class AppDelegate: UIResponder, UIApplicationDelegate {
var window: UIWindow?
func application(_ application: UIApplication,
didFinishLaunchingWithOptions
launchOptions: [UIApplicationLaunchOptionsKey: Any]?) -> Bool {
//通知类型(这里将声音、消息、提醒角标都给加上)
let userSettings = UIUserNotificationSettings(types: [.alert, .badge, .sound],
categories: nil)
if ((UIDevice.current.systemVersion as NSString).floatValue >= 8.0) {
//可以添加自定义categories
JPUSHService.register(forRemoteNotificationTypes: userSettings.types.rawValue,
categories: nil)
}
else {
//categories 必须为nil
JPUSHService.register(forRemoteNotificationTypes: userSettings.types.rawValue,
categories: nil)
}
// 启动JPushSDK
JPUSHService.setup(withOption: nil, appKey: "7b96331738ea713195698fd",
channel: "Publish Channel", apsForProduction: false)
return true
}
func application(_ application: UIApplication,
didRegisterForRemoteNotificationsWithDeviceToken deviceToken: Data) {
//注册 DeviceToken
JPUSHService.registerDeviceToken(deviceToken)
}
func application(_ application: UIApplication,
didReceiveRemoteNotification userInfo: [AnyHashable : Any],
fetchCompletionHandler
completionHandler: @escaping (UIBackgroundFetchResult) -> Void) {
//增加IOS 7的支持
JPUSHService.handleRemoteNotification(userInfo)
completionHandler(UIBackgroundFetchResult.newData)
}
func application(_ application: UIApplication,
didFailToRegisterForRemoteNotificationsWithError error: Error) {
//可选
NSLog("did Fail To Register For Remote Notifications With Error: \(error)")
}
//..........
}
(2)ViewController.swift(标签注册相关)
import UIKit
class ViewController: UIViewController {
@IBOutlet weak var switch1: UISwitch!
@IBOutlet weak var switch2: UISwitch!
@IBOutlet weak var switch3: UISwitch!
@IBOutlet weak var textView: UITextView!
override func viewDidLoad() {
super.viewDidLoad()
}
//按钮点击
@IBAction func btnTouchUp(sender: AnyObject) {
//获取标签
var tags = Set()
if switch1.on {
tags.insert("movie")
}
if switch2.on {
tags.insert("music")
}
if switch3.on {
tags.insert("game")
}
//注册标签
JPUSHService.setTags(tags,
callbackSelector: #selector(tagsAliasCallBack(_:tags:alias:)),
object: self)
}
//标签注册回调
func tagsAliasCallBack(resCode:CInt, tags:NSSet, alias:NSString) {
textView.text = "响应结果:\(resCode)"
}
override func didReceiveMemoryWarning() {
super.didReceiveMemoryWarning()
}
}
2,服务端代码(index.php)
//引入代码
require 'JPush/autoload.php';
use JPush\Client as JPush;
if(isset($_POST["message"])){
//初始化
$app_key = "7b528333738ec729165798fd";
$master_secret = "32da4e2c36957b247a2c9828";
$client = new JPush($app_key, $master_secret);
//将逗号隔开的字符串拆分成标签数组
$tags = explode(',', $_POST["tags"]);
//简单的推送样例
$result = $client->push()
->setPlatform('ios', 'android')
->addTag($tags)
->setNotificationAlert($_POST["message"])
->options(array(
"apns_production" => true //true表示发送到生产环境(默认值),false为开发环境
))
->send();
echo 'Result=' . json_encode($result);
}
?>
标签:
消息:
推送广播通知


 658
658


 被折叠的 条评论
为什么被折叠?
被折叠的 条评论
为什么被折叠?
 到【灌水乐园】发言


