


1、先导出一个个maven项目下的某些包的源文件到target下的dubbo目录
注意:maven-jar-plugin插件智能打包本项目下的代码(自己写的代码)
<plugin>
				<artifactId>maven-jar-plugin</artifactId>
				<executions>
					<execution>

						<id>dubbo-service-model-export</id>
						<goals>
							<goal>jar</goal>
						</goals><!-- 打包的后缀 -->
						<phase>package</phase><!-- life的多个阶段 ,预打包 -->
						<configuration>
						<outputDirectory>target/dubbo</outputDirectory>
						<classifier>dubbo-service-model-export</classifier><!--dubbo-service-model-export-->
							<includes><!-- 引入 路径 -->
								<include>**/model/**</include>
								<include>**/service/**</include>
								<include>**/export/**</include>
							</includes>
							<excludes>
							<exclude>**/impl/**</exclude>
							</excludes>
						</configuration>
					</execution>
					<execution>
						<id>all</id>
						<goals>
							<goal>jar</goal>
						</goals>
						<phase>package</phase>
						<configuration>
							<classifier>all</classifier><!-- ***-all.jar -->
						<!-- 	<excludes>排除
								<exclude>**/model/**</exclude>
							</excludes>
							<includes>引入
								<include>**/impl/**</include>
							</includes> -->
						</configuration>
					</execution>

				</executions>
			</plugin>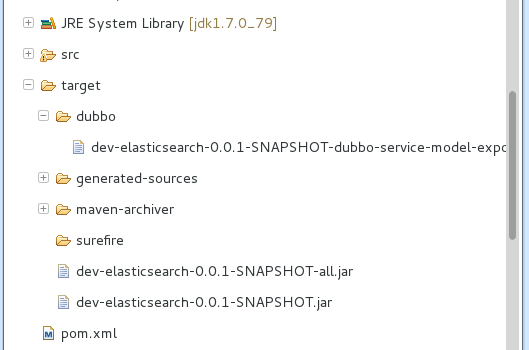
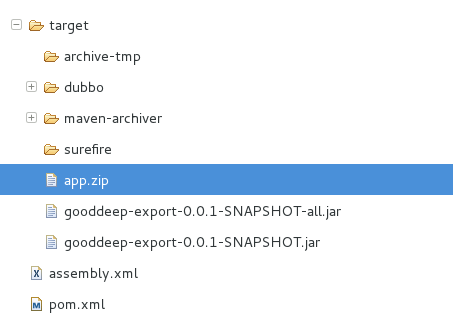
2、使用maven-assembly-plugin插件打包各个依赖包,或者把某些目录下的包打包到一起
<plugin>
                <artifactId>maven-assembly-plugin</artifactId>  <!-- 此文件为此插件的配置文件,此位置为项目根目录下-->
                <version>2.2-beta-5</version>
                <configuration>
                    <finalName>app</finalName>
                    <attach>false</attach>
                    <descriptors>
                        <descriptor>assembly.xml</descriptor>
                    </descriptors>
                </configuration>
                <executions>
                    <execution>
                        <id>make-assembly</id>
                        <phase>package</phase>
                        <goals>
                            <goal>single</goal>
                        </goals>
                    </execution>
                </executions>
            </plugin>
3、编写 assembly.xml文件,放下项目根目录下
<?xml version="1.0" encoding="UTF-8"?>
<assembly xmlns="http://maven.apache.org/plugins/maven-assembly-plugin/assembly/1.1.1" xmlns:xsi="http://www.w3.org/2001/XMLSchema-instance"
    xsi:schemaLocation="http://maven.apache.org/plugins/maven-assembly-plugin/assembly/1.1.1 http://maven.apache.org/xsd/assembly-1.1.1.xsd"
>
    <formats>
        <format>zip</format>
        <!-- format>tar.gz</format -->
    <!-- format>dir</format -->
    </formats>
    <dependencySets>

        <dependencySet>
            <unpack>false</unpack>
            <outputDirectory>lib</outputDirectory>
            <useTransitiveFiltering>true</useTransitiveFiltering>
            <useStrictFiltering>true</useStrictFiltering>
            <fileMode>666</fileMode>
            <includes>
                <include>com.gooddeep.dev:gooddeep-service</include>
           <!--      <include>com.gooddeep.dev:dev-redis</include>
                <include>com.gooddeep.dev:dev-elasticsearch</include>
                <include>com.gooddeep.dev:dev-mongodb</include>
                <include>com.gooddeep.dev:gooddeep-service</include>  -->
            </includes>
        </dependencySet>
    </dependencySets>
    <fileSets>
        <fileSet>
            <directory>/home/lhy/Workspaces/MyEclipse_data/gooddeep-dev/dev-core/target/dubbo</directory>
            <outputDirectory>dubbo/</outputDirectory>
            <filtered>false</filtered>
        </fileSet>
         <fileSet>
            <directory>/home/lhy/Workspaces/MyEclipse_data/gooddeep-dev/dev-elasticsearch/target/dubbo</directory>
            <outputDirectory>dubbo/</outputDirectory>
            <filtered>false</filtered>
        </fileSet>
         <fileSet>
            <directory>/home/lhy/Workspaces/MyEclipse_data/gooddeep-dev/dev-mongodb/target/dubbo</directory>
            <outputDirectory>dubbo/</outputDirectory>
            <filtered>false</filtered>
        </fileSet>
         <fileSet>
            <directory>/home/lhy/Workspaces/MyEclipse_data/gooddeep-dev/dev-redis/target/dubbo</directory>
            <outputDirectory>dubbo/</outputDirectory>
            <filtered>false</filtered>
        </fileSet>
         <fileSet>
            <directory>/home/lhy/Workspaces/MyEclipse_data/gooddeep-service/target/dubbo</directory>
            <outputDirectory>dubbo/</outputDirectory>
            <filtered>false</filtered>
        </fileSet>
    </fileSets>
</assembly>
4、网络学习
使用一个简单的基于spring框架的demo来做程序示例,来介绍maven assembly插件的使用方法。
项目中的代码目录如下:

在以上代码目录中,assembly目录下为打包的描述文件,下面会详细介绍该文件,bin目录下为启动脚本以及readme等文件,main下为maven标准中建立的文件,java代码以及配置文件位于该目录下。
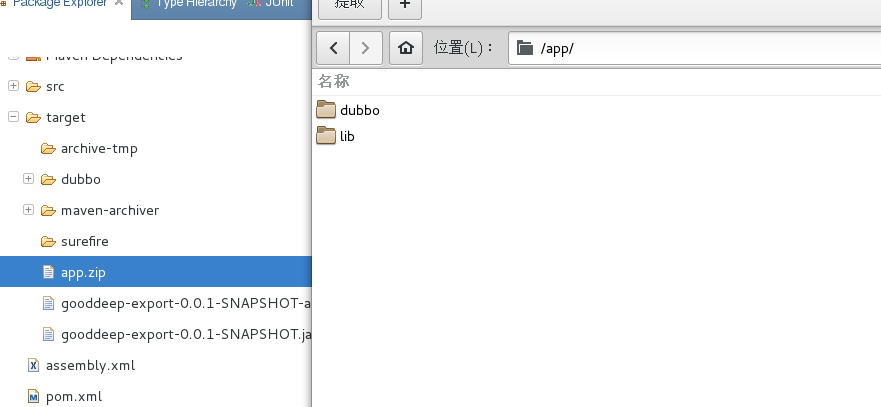
打包完成后压缩包目录如下:

打包完成后,我们可以看到bin目录来存放启动脚本等文件,config为配置文件,lib下为运行时依赖的jar包。
使用maven assembly插件需要在pom文件中配置,添加这个插件
            <plugin>
                <artifactId>maven-assembly-plugin</artifactId>
                <version>2.4.1</version>
                <executions>
                    <execution>
                        <id>make-zip</id>
                        <!-- 绑定到package生命周期阶段上 -->
                        <phase>package</phase>
                        <goals>
                            <!-- 绑定到package生命周期阶段上 -->
                            <goal>single</goal>
                        </goals>
                        <configuration>
                            <descriptors> <!--描述文件路径-->
                                <descriptor>src/assembly/assembly.xml</descriptor>
                            </descriptors>
                        </configuration>
                    </execution>
                </executions>
            </plugin>
其中execution节点,我们配置了执行maven assembly插件的一些配置,descriptor节点配置指向assembly.xml的路径。
在assembly.xml配置了,我们打包的目录以及相应的设置
<assembly xmlns="http://maven.apache.org/plugins/maven-assembly-plugin/assembly/1.1.2"
          xmlns:xsi="http://www.w3.org/2001/XMLSchema-instance"
          xsi:schemaLocation="http://maven.apache.org/plugins/maven-assembly-plugin/assembly/1.1.2 http://maven.apache.org/xsd/assembly-1.1.2.xsd">
    <id>distribution</id>
    <formats>
        <format>zip</format>
    </formats>
    <fileSets>
        <fileSet>
            <directory>${project.basedir}\src\main\resources</directory>
            <outputDirectory>\</outputDirectory>
        </fileSet>
        <fileSet>
            <directory>${project.basedir}\src\bin</directory>
            <outputDirectory>\bin</outputDirectory>
        </fileSet>
    </fileSets>
    <dependencySets>
        <dependencySet>
            <useProjectArtifact>true</useProjectArtifact>
            <outputDirectory>lib</outputDirectory>
            <!-- 将scope为runtime的依赖包打包到lib目录下。 -->
            <scope>runtime</scope>
        </dependencySet>
</dependencySets></assembly> assembly.xml的配置项非常多,可以参考http://maven.apache.org/plugins/maven-assembly-plugin/assembly.html
以上只是用了很少的一部分。
format设置包输出的格式,以上格式设置的为zip格式,目前还支持zip,tar,tar.gz,tar.bz2,jar,dir,war格式
fileSet定义代码目录中与输出目录的映射,在该节点下还有 <includes/>,<excludes/>两个非常有用的节点。
比如:
        <fileSet>
            <directory>${project.basedir}\src\main\resources</directory>
            <outputDirectory>\</outputDirectory>
            <includes>
                <include>some/path</include>
            </includes>
            <excludes>
                <exclude>some/path1</exclude>
            </excludes>
        </fileSet>
以上代码表示归档时包括some/path,不包括some/path1
dependencySets节点下为依赖设置
在上述配置中,表示所有运行时依赖的jar包归档到lib目录下。在上述截图中lib目录下的文件就是所有依赖的jar包
更多节点的用法可以去官网查询
http://maven.apache.org/plugins/maven-assembly-plugin/assembly.html


 3087
3087

 被折叠的 条评论
为什么被折叠?
被折叠的 条评论
为什么被折叠?
 到【灌水乐园】发言


