


接上一章《【Centos】利用Vultr服务器和namesilo布网》(https://my.oschina.net/u/3776619/blog/2051986),在Centos中配置好nginx,并在iptables中开启了80端口,和为了远程mysql操作方便开启了3306端口(当然3306端口可以为了安全不开,用传统的mysql导出导入文件还维护数据库)之后,下面将在nginx服务器中配置php和mysql。
一、mysql的安装与配置
1、先安装mysql,因为之后安装php,同时装php70w-mysql.x86_64,能直接关联上了,不过按理来说先装哪个都行,顶多就是改个配置文件的事情。在centos中,mysql已经叫做mariadb*了,所以要用:
yum -y install mariadb*
systemctl start mariadb.service
从网上的源获取来安装,同时开启mysql服务。
2、安装之后mysql是默认没有登陆密码的,这里我们要设置一个。
通过以下命令来设置root用户的密码:
mysqladmin -u root -p password 你要设置的密码如下图所示:
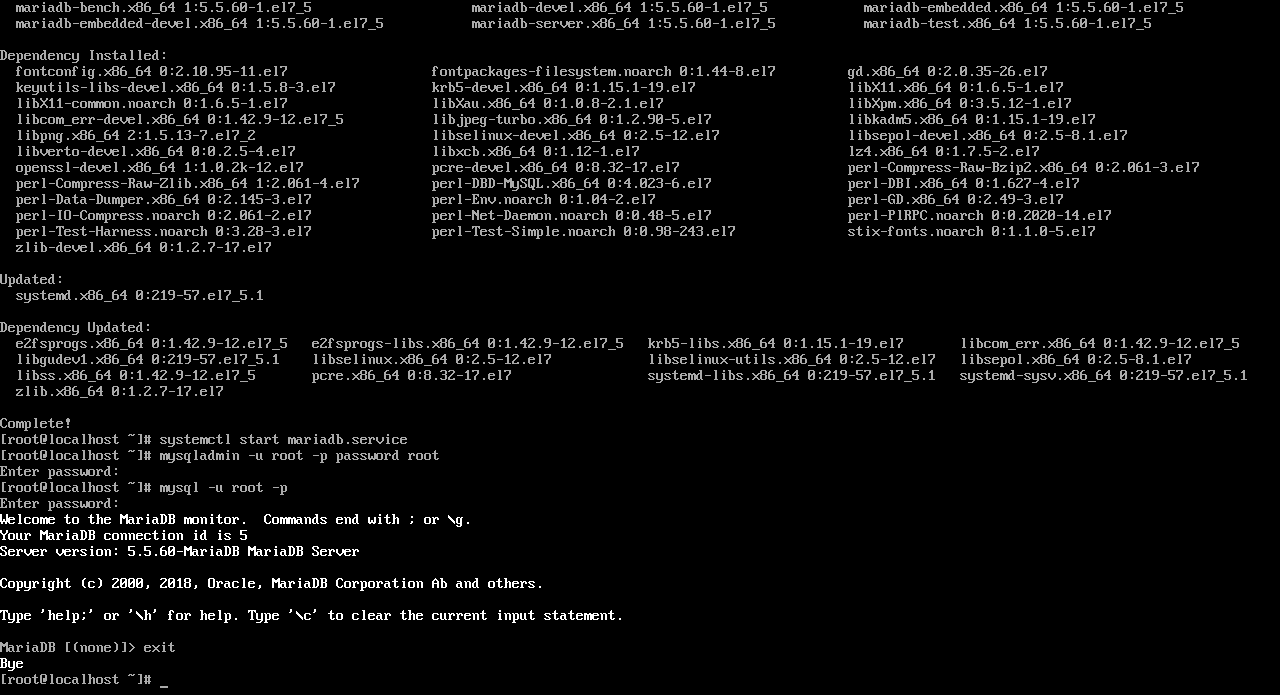
输入该命令之后,它会让你输入原密码的,因为原密码为空,所以直接再按多一下回车,即完成修改。
之后再访问centos上的mysql数据库,直接用:
mysql -u root -p来登陆root用户,再输入密码就可访问。
通过退出exit、use 某某数据库,等mysql命令就能控制mysql。
3、设定mysql的编码。用惯mysql的亲们都基本知道,这玩意默认是latin1编码,我们肯定要将它搞写utf-8的。具体是用:
vi /etc/my.cnf修改mysql的配置文件。在里面插入:
[client]
default-character-set=utf8
[mysqld]
character-set-server=utf8
collation-server=utf8_general_ci
如下图所示:

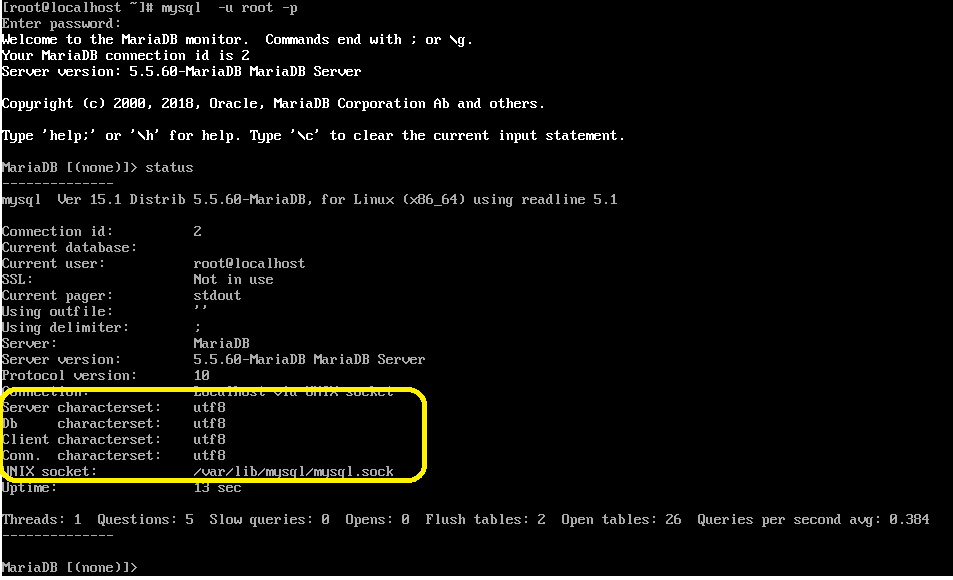
之后用:
systemctl restart mariadb.service重启mysql,然后在通过:
mysql -u root -p在已经登陆mysql的root用户的情况下,输入:status,就能看到mysql的编码已经成为大家喜闻乐见的utf-8了:
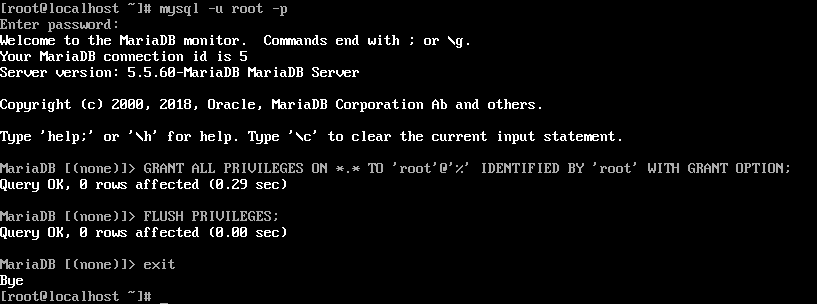
4、之后根据自己的需要,设置允许远程来访问这个mysql,首先你要保证在iptables中3306端口是开启的。然后在通过:
mysql -u root -p在已经登陆mysql的root用户的情况下,输入:
GRANT ALL PRIVILEGES ON *.* TO 'root'@'%' IDENTIFIED BY '本数据库的密码' WITH GRANT OPTION;
FLUSH PRIVILEGES;
来允许远程访问。如下图所示:
这样,在mysql的官网下个workbench(https://dev.mysql.com/downloads/workbench/),如下图:
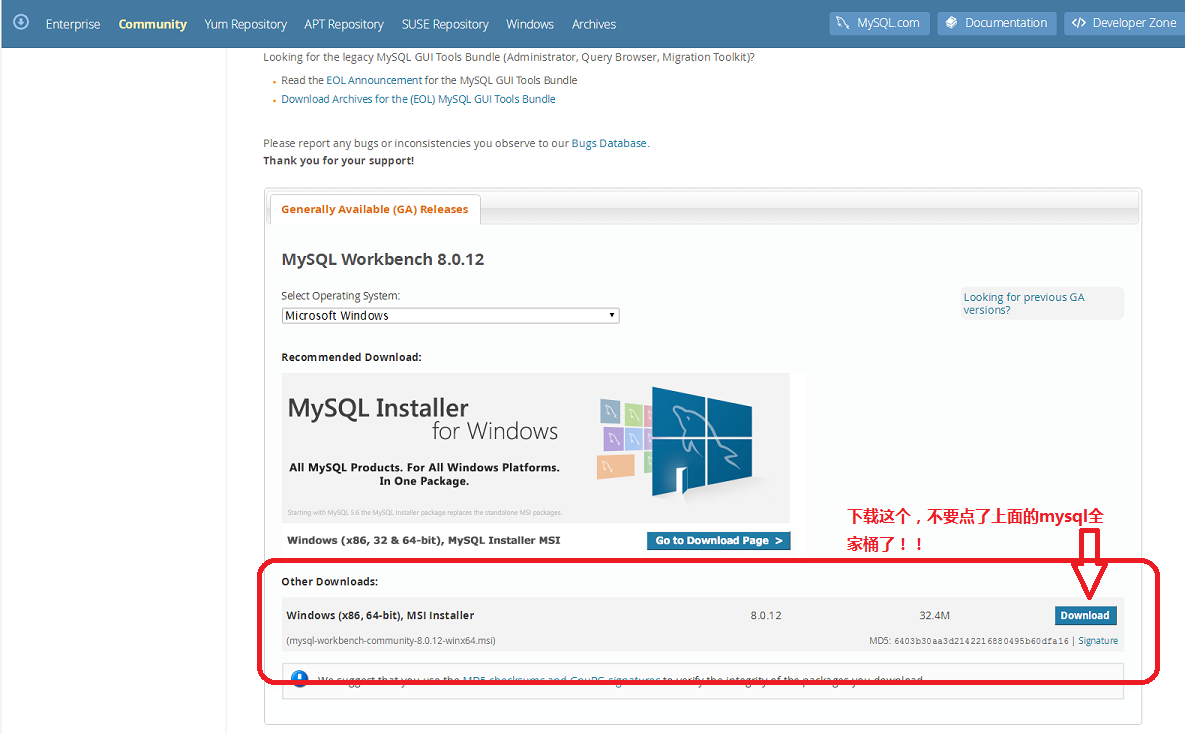
之后得到一个33M左右的mysql-workbench-community-8.0.12-winx64.msi,经过一系列无脑的next下一步安装之后,就能通过connect to Database...在windows远程管理centos上的mysql了,如下图所示。

4、再在centos通过:
systemctl enable mariadb.service配置mysql在centos开机就启动。mysql完事!
二、nginx中php7的配置
1、其实php7和大部分人写惯的php5是几乎没有区别的,所以直接就上最新的php7吧。在nginx中直接用yum获取php还是只拿到5而已。要拿php7,和nginx一样,先要配置两个源:
rpm -Uvh https://dl.fedoraproject.org/pub/epel/epel-release-latest-7.noarch.rpm
rpm -Uvh https://mirror.webtatic.com/yum/el7/webtatic-release.rpm
再通过:
yum install php70w-fpm php70w-opcache
yum install php70w.x86_64 php70w-cli.x86_64 php70w-common.x86_64 php70w-gd.x86_64 php70w-ldap.x86_64 php70w-mbstring.x86_64 php70w-mcrypt.x86_64 php70w-mysql.x86_64 php70w-pdo.x86_64
获得php7,还有一系列相关的组件。
2、之后通过:
vi /etc/nginx/conf.d/default.conf修改/etc/nginx/conf.d/default.conf这个nginx配置文件,在nginx中加载php。
之所以修改/etc/nginx/conf.d/default.conf而不用改/etc/nginx/nginx.conf这个nginx总配置文件,是因为在../conf.d/default.conf这个nginx总配置中,有include /etc/nginx/conf.d/*.conf;指向../conf.d/default.conf。以后还要什么配置直接在../conf/文件夹直接加.conf文件即可。
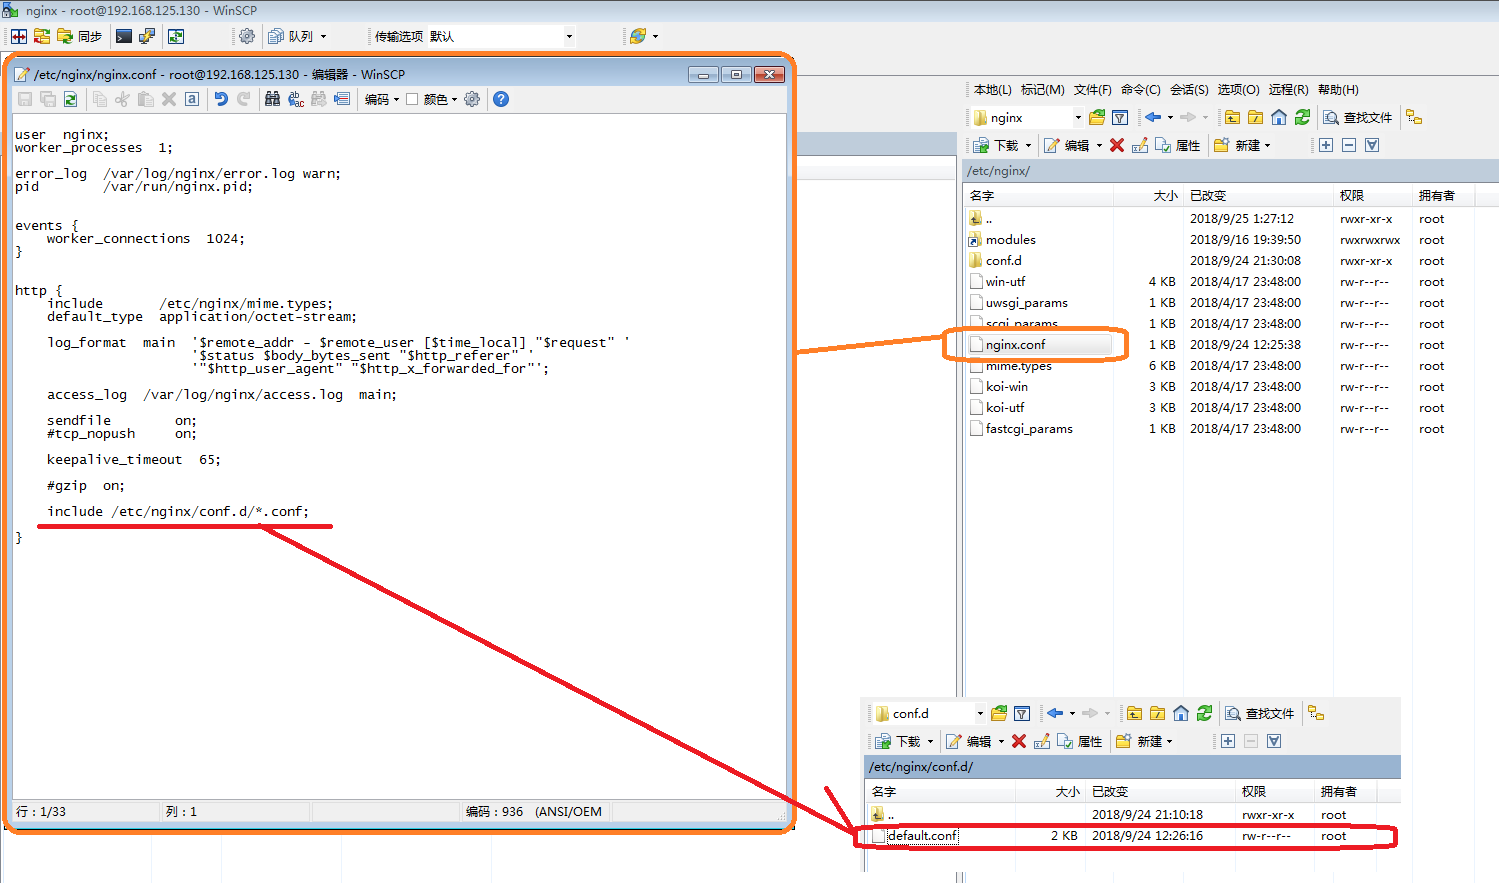
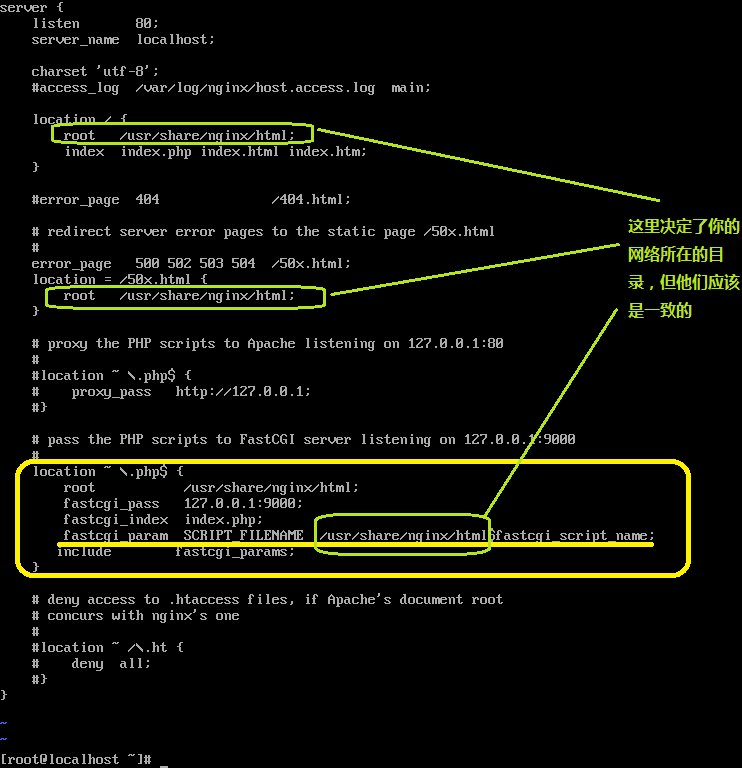
将/etc/nginx/conf.d/default.conf修改如下,其实也就去除几个#号,将注释变成实际运行的语句而已,nginx早就帮你写好了,同时改改fastcgi_param的属性,保持其与你网站的根目录,也就root所对应的目录是一致的。
server {
    listen       80;
    server_name  localhost;

    charset 'utf-8';
    #access_log  /var/log/nginx/host.access.log  main;

    location / {
        root   /usr/share/nginx/html;
        index  index.php index.html index.htm;
    }

    #error_page  404              /404.html;

    # redirect server error pages to the static page /50x.html
    #
    error_page   500 502 503 504  /50x.html;
    location = /50x.html {
        root   /usr/share/nginx/html;
    }

    # proxy the PHP scripts to Apache listening on 127.0.0.1:80
    #
    #location ~ \.php$ {
    #    proxy_pass   http://127.0.0.1;
    #}

    # pass the PHP scripts to FastCGI server listening on 127.0.0.1:9000
    #
    location ~ \.php$ {
        root           /usr/share/nginx/html;
        fastcgi_pass   127.0.0.1:9000;
        fastcgi_index  index.php;
        fastcgi_param  SCRIPT_FILENAME  /usr/share/nginx/html$fastcgi_script_name;
        include        fastcgi_params;
    }

    # deny access to .htaccess files, if Apache's document root
    # concurs with nginx's one
    #
    #location ~ /\.ht {
    #    deny  all;
    #}
}
如图所示:
同时说说,这里php的解析虽然是用到了9000的端口,但这端口我们无须在iptables对外开放。9000是在这centos内部用来解析php的端口。
3、之后,通过:
systemctl start php-fpm
systemctl enable php-fpm
nginx -s reload
systemctl restart nginx
开启nginx的php解析服务,同时设置这个服务开机启动,并且重载nginx的配置文件,同时重启nginx服务器。这上面的修改生效。
4、之后在配置文件指明的root目录,我这没改用默认的/usr/share/nginx/html,这个目录中加个经典的1.php:
<?php
phpinfo();
?>
如下图所示:

再用:
systemctl restart nginx
systemctl restart php-fpm
重启下nginx和php,在windows的浏览器,输入 http://你的网址或ip/1.php,发现能访问则大功告成!


 218
218

 被折叠的 条评论
为什么被折叠?
被折叠的 条评论
为什么被折叠?
 到【灌水乐园】发言


