


1.flume与kafka整合
1.下载插件包
Flume和Kafka插件包下载:https://github.com/beyondj2ee/flumeng-kafka-plugin
2.复制jar包
复制插件包中的jar包到flume/lib中
(删掉不同版本相同jar包,需删除scala-compiler-z.9.2.jar包,否则flume启动会出现问题)
复制kafka/libs中的jar包到flume/lib中
2.配置flume配置文件(监控file)
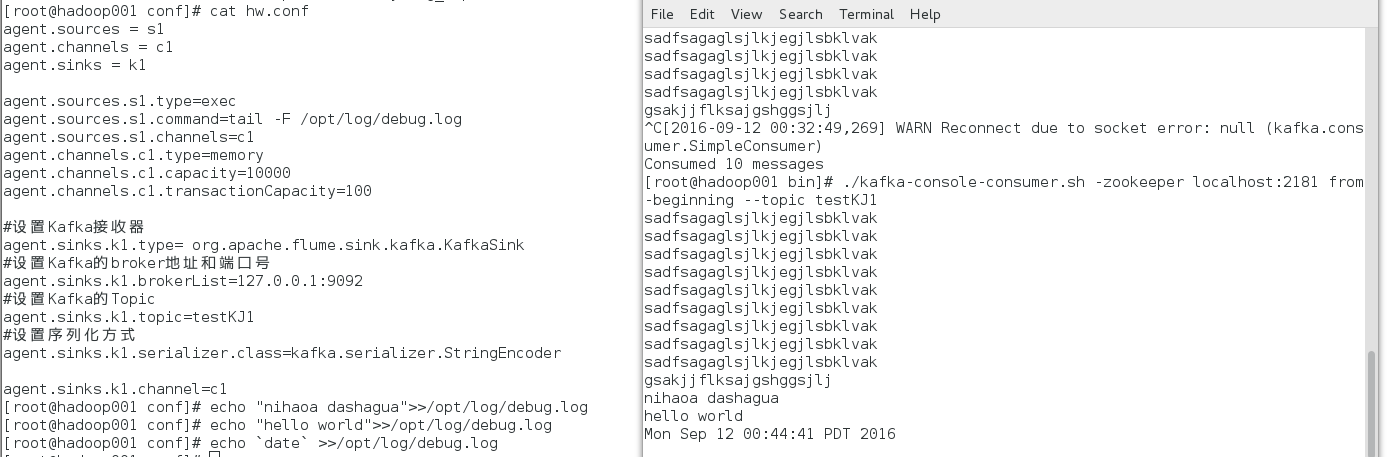
vi /opt/flume/conf/hw.conf
agent.sources = s1
agent.channels = c1
agent.sinks = k1

agent.sources.s1.type=exec
agent.sources.s1.command=tail -F /opt/log/debug.log
agent.sources.s1.channels=c1
agent.channels.c1.type=memory
agent.channels.c1.capacity=10000
agent.channels.c1.transactionCapacity=100

#设置Kafka接收器
agent.sinks.k1.type= org.apache.flume.sink.kafka.KafkaSink
#设置Kafka的broker地址和端口号
agent.sinks.k1.brokerList=127.0.0.1:9092
#设置Kafka的Topic
agent.sinks.k1.topic=testKJ1
#设置序列化方式
agent.sinks.k1.serializer.class=kafka.serializer.StringEncoder
agent.sinks.k1.channel=c13.启动zookeeper(/opt/kafka)
bin/zookeeper-server-start.sh config/zookeeper.properties
4.启动kafka(/opt/kafka)
bin/kafka-server-start.sh config/server.properties
5.启动kafka消费者 (/opt/kafka)
bin/kafka-console-consumer.sh -zookeeper localhost:2181 --from-beginning --topic testKJ1
6.启动flume(/opt/flume)
bin/flume-ng agent -n agent -c conf -f conf/hw.conf -Dflume.root.logger=INFO,console
7.向被监控日志插入数据
echo "nihaoa dashagua">>/opt/log/debug.log
####################################################################################
控制文件举例
监控目录
vi /opt/flume/conf/dir.conf
a1.sources = s1
a1.channels = c1
a1.sinks = k1

a1.sources.s1.type = spooldir
a1.sources.s1.channels = c1
a1.sources.s1.spoolDir = /opt/log/
a1.sources.s1.fileHeader = true

a1.channels.c1.type = memory
a1.channels.c1.capacity = 10000
a1.channels.c1.transactionCapacity = 10000
a1.channels.c1.byteCapacityBufferPercentage = 20
a1.channels.c1.byteCapacity = 800000

a1.sinks.k1.type = org.apache.flume.sink.kafka.KafkaSink
a1.sinks.k1.topic = Dirtopic
a1.sinks.k1.brokerList = 127.0.0.1:9092
a1.sinks.k1.requiredAcks = 1
a1.sinks.k1.batchSize = 20
a1.sinks.k1.channel = c1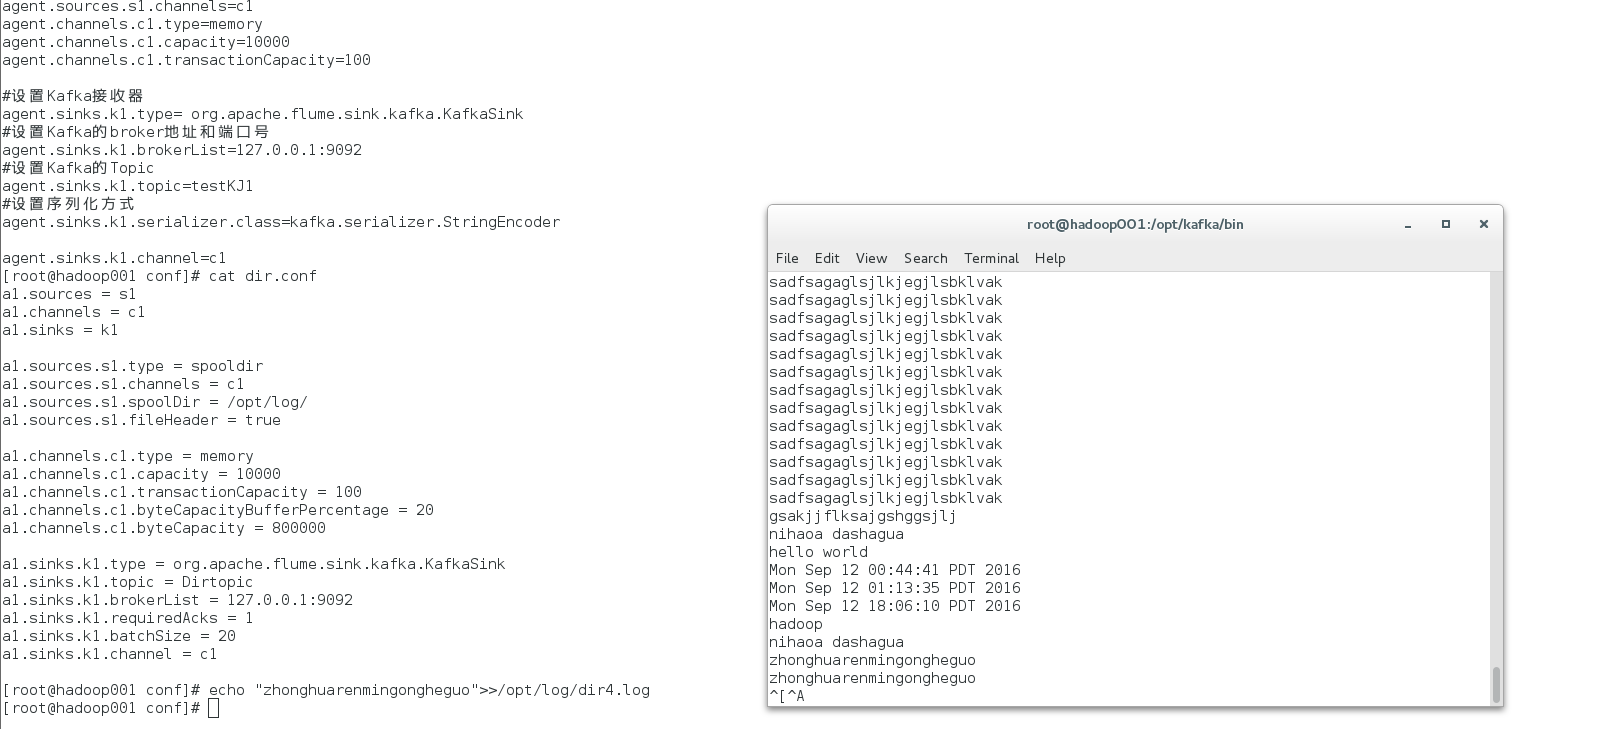
监控目录写入HDFS
vi /opt/flume/conf/dirhdfs.conf
a1.sources = s1
a1.channels = c1
a1.sinks = k2

a1.sources.s1.type = spooldir
a1.sources.s1.channels = c1
a1.sources.s1.spoolDir = /opt/log/
a1.sources.s1.fileHeader = true

a1.channels.c1.type = memory
a1.channels.c1.capacity = 10000
a1.channels.c1.transactionCapacity = 100
a1.channels.c1.byteCapacityBufferPercentage = 20
a1.channels.c1.byteCapacity = 800000

a1.sinks.k2.topic = Dirtopic
a1.sinks.k2.type=hdfs
a1.sinks.k2.channel=c1
a1.sinks.k2.hdfs.path= /tmp/dirhdfs
a1.sinks.k2.hdfs.filePrefix=events-
a1.sinks.k2.hdfs.round=true
a1.sinks.k2.hdfs.roundValue=10
a1.sinks.k2.hdfs.roundUnit=minute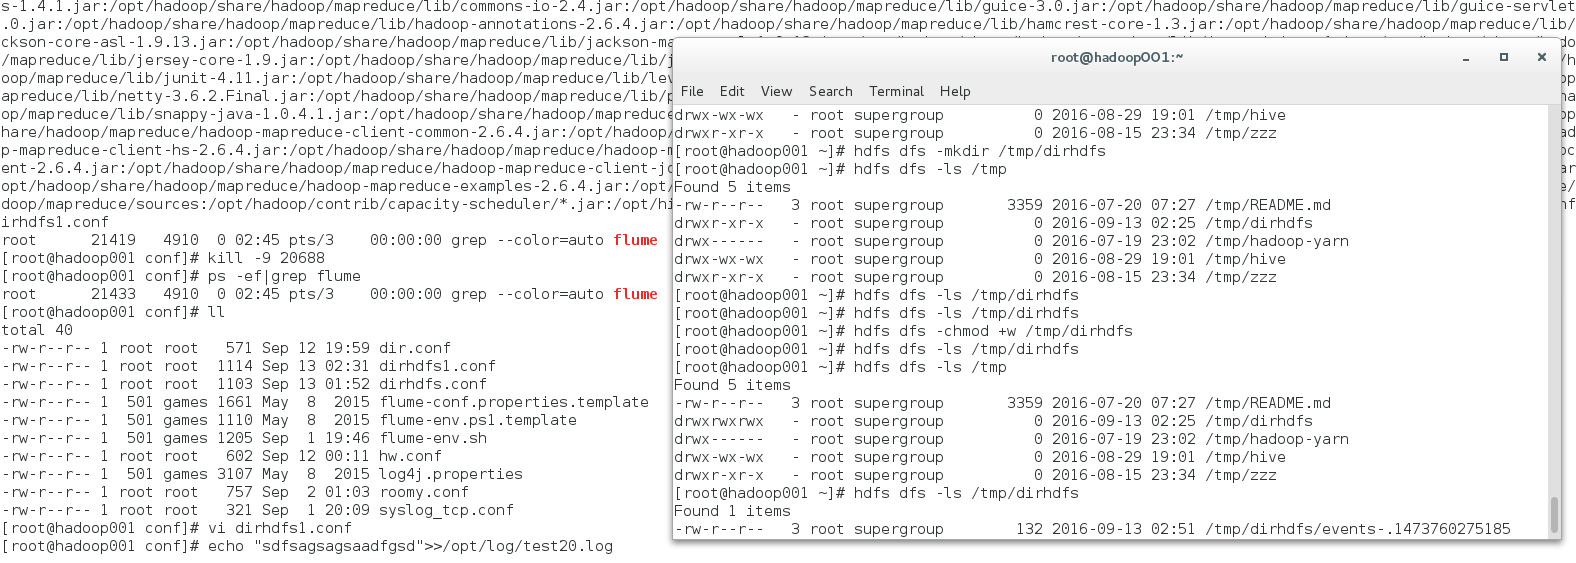
监控目录写入HDFS(按日分目录、按小时分文件)
如/user/hue/logput/20170521下,event-20170521.1495378401218.log
a1.sources = s1
a1.channels = c1
a1.sinks = k2

a1.sources.s1.type = spooldir
a1.sources.s1.channels = c1
a1.sources.s1.spoolDir = /opt/log/
a1.sources.s1.fileHeader = true

a1.channels.c1.type = memory
a1.channels.c1.capacity = 10000
a1.channels.c1.transactionCapacity = 100
a1.channels.c1.byteCapacityBufferPercentage = 20
a1.channels.c1.byteCapacity = 800000

a1.sinks.k2.topic = Dirtopic
a1.sinks.k2.type=hdfs
a1.sinks.k2.channel=c1
a1.sinks.k2.hdfs.useLocalTimeStamp = true
a1.sinks.k2.hdfs.path= /user/hue/logput/%Y%m%d
a1.sinks.k2.hdfs.filePrefix=events-%Y%m%d
a1.sinks.k2.hdfs.fileSuffix=.log
a1.sinks.k2.hdfs.round=true
a1.sinks.k2.hdfs.roundValue=10
a1.sinks.k2.hdfs.roundUnit=minute


 1115
1115


 被折叠的 条评论
为什么被折叠?
被折叠的 条评论
为什么被折叠?
 到【灌水乐园】发言


