


yum安装Nginx
Nginx虚拟主机
安装WordPress
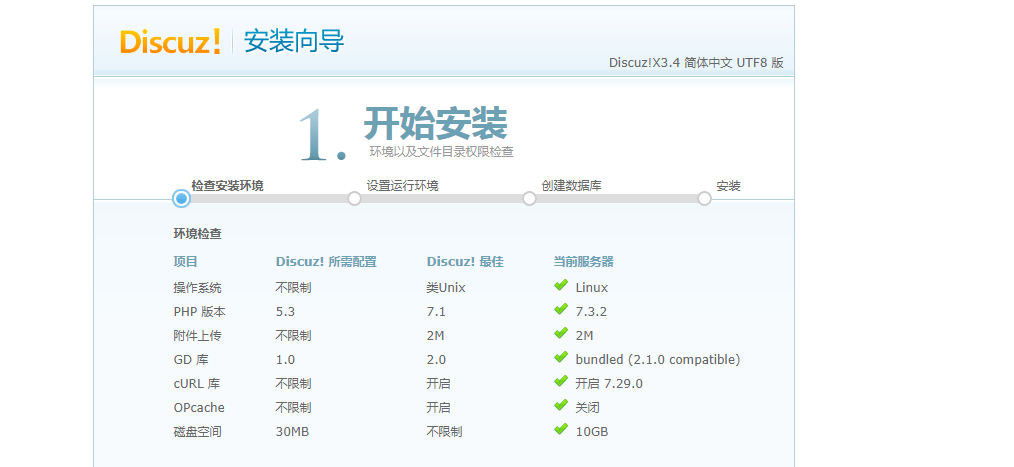
安装discuz
yum安装Nginx
使用源码包安装Nginx需要很多步骤,我们可以使用yum的方式来安装Nginx
- 文档:http://nginx.org/en/linux_packages.html
- 首先将之前编译安装的Nginx进程禁用掉
[root@localhost ~]# ps aux |grep nginx
root       7373  0.0  0.1  45936  1124 ?        Ss   21:44   0:00 nginx: master process /usr/local/nginx/sbin/nginx
nobody     7374  0.0  0.1  46388  1904 ?        S    21:44   0:00 nginx: worker process
root       7376  0.0  0.0 112708   980 pts/0    R+   21:44   0:00 grep --color=auto nginx
[root@localhost ~]# pkill nginx
[root@localhost ~]# ps aux |grep nginx
root       7379  0.0  0.0 112708   980 pts/0    R+   21:44   0:00 grep --color=auto nginx
- 删掉之前编译安装的Nginx
[root@localhost ~]# rm -rf /usr/local/nginx/
- 搭建yum仓库
vi /etc/yum.repos.d/nginx.repo
[nginx]
name=nginx repo
baseurl=http://nginx.org/packages/centos/7/$basearch/
gpgcheck=0
enabled=1
- 查看yum仓库是否生效
[root@localhost ~]# yum list |grep nginx
BDB2053 Freeing read locks for locker 0x5: 7383/140362401236800
nginx.x86_64                                1:1.14.2-1.el7_4.ngx       nginx
nginx-debug.x86_64                          1:1.8.0-1.el7.ngx          nginx
nginx-debuginfo.x86_64                      1:1.14.2-1.el7_4.ngx       nginx
nginx-module-geoip.x86_64                   1:1.14.2-1.el7_4.ngx       nginx
nginx-module-geoip-debuginfo.x86_64         1:1.14.2-1.el7_4.ngx       nginx
nginx-module-image-filter.x86_64            1:1.14.2-1.el7_4.ngx       nginx
nginx-module-image-filter-debuginfo.x86_64  1:1.14.2-1.el7_4.ngx       nginx
nginx-module-njs.x86_64                     1:1.14.2.0.2.7-1.el7_4.ngx nginx
nginx-module-njs-debuginfo.x86_64           1:1.14.2.0.2.7-1.el7_4.ngx nginx
nginx-module-perl.x86_64                    1:1.14.2-1.el7_4.ngx       nginx
nginx-module-perl-debuginfo.x86_64          1:1.14.2-1.el7_4.ngx       nginx
nginx-module-xslt.x86_64                    1:1.14.2-1.el7_4.ngx       nginx
nginx-module-xslt-debuginfo.x86_64          1:1.14.2-1.el7_4.ngx       nginx
nginx-nr-agent.noarch                       2.0.0-12.el7.ngx           nginx
pcp-pmda-nginx.x86_64                       4.1.0-5.el7_6              updates
- 使用yum安装Nginx
[root@localhost ~]# yum install nginx -y
- 可以使用nginx -v 命令来查看Nginx版本。-V查看Nginx的参数。
[root@localhost ~]# nginx -v
nginx version: nginx/1.14.2
[root@localhost ~]# nginx -V
nginx version: nginx/1.14.2
built by gcc 4.8.5 20150623 (Red Hat 4.8.5-28) (GCC)
built with OpenSSL 1.0.2k-fips  26 Jan 2017
TLS SNI support enabled
configure arguments: --prefix=/etc/nginx --sbin-path=/usr/sbin/nginx --modules-path=/usr/lib64/nginx/modules --conf-path=/etc/nginx/nginx.conf --error-log-path=/var/log/nginx/error.log --http-log-path=/var/log/nginx/access.log --pid-path=/var/run/nginx.pid --lock-path=/var/run/nginx.lock --http-client-body-temp-path=/var/cache/nginx/client_temp --http-proxy-temp-path=/var/cache/nginx/proxy_temp --http-fastcgi-temp-path=/var/cache/nginx/fastcgi_temp --http-uwsgi-temp-path=/var/cache/nginx/uwsgi_temp --http-scgi-temp-path=/var/cache/nginx/scgi_temp --user=nginx --group=nginx --with-compat --with-file-aio --with-threads --with-http_addition_module --with-http_auth_request_module --with-http_dav_module --with-http_flv_module --with-http_gunzip_module --with-http_gzip_static_module --with-http_mp4_module --with-http_random_index_module --with-http_realip_module --with-http_secure_link_module --with-http_slice_module --with-http_ssl_module --with-http_stub_status_module --with-http_sub_module --with-http_v2_module --with-mail --with-mail_ssl_module --with-stream --with-stream_realip_module --with-stream_ssl_module --with-stream_ssl_preread_module --with-cc-opt='-O2 -g -pipe -Wall -Wp,-D_FORTIFY_SOURCE=2 -fexceptions -fstack-protector-strong --param=ssp-buffer-size=4 -grecord-gcc-switches -m64 -mtune=generic -fPIC' --with-ld-opt='-Wl,-z,relro -Wl,-z,now -pie'
- 配置文件路径是/etc/nginx/nginx.conf
[root@localhost ~]# ls /etc/nginx/nginx.conf
/etc/nginx/nginx.conf
- 查看配置文件有没有语法错误,使用nginx -t
[root@localhost ~]# nginx -t
nginx: the configuration file /etc/nginx/nginx.conf syntax is ok
nginx: configuration file /etc/nginx/nginx.conf test is successful
- 启动nginx
[root@localhost ~]# systemctl start nginx
- 如果提示错误,则运行如下命令
Job for nginx.service failed because a configured resource limit was exceeded. See "systemctl status nginx.service" and "journalctl -xe" for details.
[root@localhost init.d]# sudo netstat -lnp | grep 0.0.0.0:80  (提升权限的命令
Nginx虚拟主机
在一个web服务上能跑多个站点,每个站点就是一个虚拟主机。
[root@localhost /]# vi /etc/nginx/nginx.conf         打开Nginx配置文件
http {
    include       /etc/nginx/mime.types;
    default_type  application/octet-stream;

    log_format  main  '$remote_addr - $remote_user [$time_local] "$request" '
                      '$status $body_bytes_sent "$http_referer" '
                      '"$http_user_agent" "$http_x_forwarded_for"';

    access_log  /var/log/nginx/access.log  main;

    sendfile        on;
    #tcp_nopush     on;

    keepalive_timeout  65;

    #gzip  on;

    include /etc/nginx/conf.d/*.conf;      这个就是虚拟主机配置文件的路径。
- 可以看到,默认在这个路径下有一个default.conf的文件
[root@localhost /]# ls /etc/nginx/conf.d/
default.conf
- 查看虚拟主机配置文件,定义虚拟主机配置文件,以域名为命名
server {
    listen       80;
    server_name  localhost;

    #charset koi8-r;
    #access_log  /var/log/nginx/host.access.log  main;

    location / {
        root   /usr/share/nginx/html;
        index  index.html index.htm;
    }

    #error_page  404              /404.html;
- 这时候可以通过ip地址来访问该站点下的内容,是可以访问到的,如果访问不到,可以看一下是不是防火墙的安全策略的问题。iptables -nvL 查看防火墙规则
- iptables -nvL 查看防火墙规则,如果确认是防火墙的问题,可以将80端口写入白名单。
firewall-cmd --add-port=80/tcp --permanent          将80端口写入安全策略。
firewall-cmd --reload                   重新加载firewalld
- Nginx配置文件
server {
    listen       80;
    server_name www.gongzi.com;

    #charset koi8-r;
    #access_log  /var/log/nginx/host.access.log  main;

    location / {
        root   /usr/share/nginx/gongzi;
        index  index.html index.htm;
    }
- 检查配置有无错误。
nginx -t //查看配置文件是否有错误
nginx -s reload //重新加载配置文件
systemctl restart nginx  //重启nginx
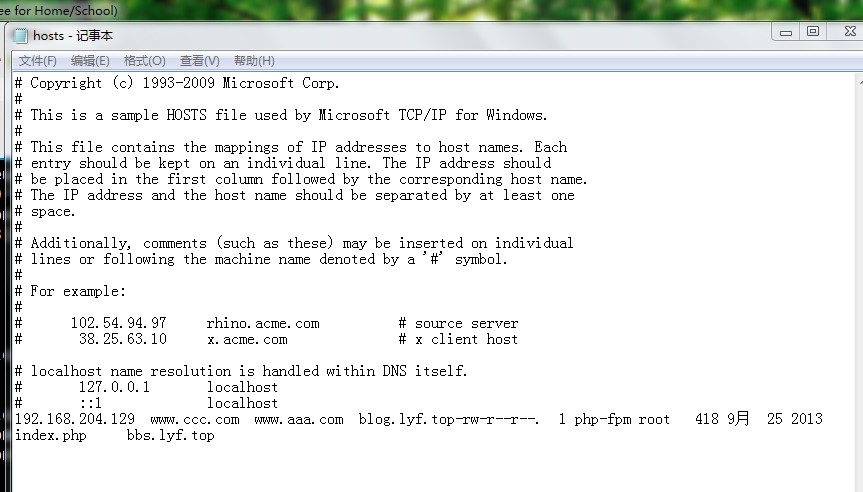
- 通过修改hosts文件使域名生效,使用域名访问
默认虚拟主机
排在第一位的虚拟主机配置文件就是默认虚拟主机,或者是在配置文件中listen 80 后面添加default_server 。这样可以将该配置文件的站点定义成默认虚拟主机。
- 默认虚拟主机,举个例子,abc.com能解析到该服务器,但是配置文件中并没有配置abc.com的域名,照样可以访问到默认虚拟主机的内容。添加一行deny all可以取消默认虚拟主机带来的泛解析
补充
Ctrl+z可以暂停一个进程,按fg可以再次回到进程。
新建一个站点blog
- 新建一个blog.com.conf的虚拟主机配置文件
server {
    listen       80;
    server_name  blog.abc.com;

    #access_log  /var/log/nginx/host.access.log  main;
    #charset koi8-r;

    location / {
        root   /data/wwwroot/blog.abc.com;
        index  index.html index.htm index.php;
    }

    error_page   500 502 503 504  /50x.html;
    location = /50x.html {
        root   /data/wwwroot/blog.abc.com;
    }
    location ~ \.php$ {
        root           /data/wwwroot/blog.abc.com;
        fastcgi_pass   127.0.0.1:9000;
        fastcgi_index  index.php;
        fastcgi_param  SCRIPT_FILENAME  /data/wwwroot/blog.abc.com$fastcgi_script_name;
        include        fastcgi_params;
    }


}
- 创建相应的目录
[root@localhost conf.d]# mkdir -p /data/wwwroot/blog.abc.com
- 验证配置文件是否有错并重新加载
[root@localhost conf.d]# nginx -t
[root@localhost conf.d]# nginx -s reload
安装WordPress
-
先进入到data/wwwroot/blog.abc.com目录
-
下载WordPress下载地址: https://cn.wordpress.org/download/
[root@localhost blog.abc.com]# wget https://cn.wordpress.org/wordpress-5.0.2-zh_CN.tar.gz
- 将下载的压缩包解压
[root@localhost blog.abc.com]# tar zxvf wordpress-5.0.2-zh_CN.tar.gz
- 将解压的目录下的所有东西复制到当前目录,然后将压缩包和原目录删掉。
[root@localhost blog.abc.com]# cp wordpress/* ./
cp: omitting directory ‘wordpress/wp-admin’
cp: omitting directory ‘wordpress/wp-content’
cp: omitting directory ‘wordpress/wp-includes’
[root@localhost blog.abc.com]# ls
index.php    wordpress                     wp-blog-header.php    wp-cron.php        wp-login.php     wp-signup.php
license.txt  wordpress-5.0.2-zh_CN.tar.gz  wp-comments-post.php  wp-links-opml.php  wp-mail.php      wp-trackback.php
readme.html  wp-activate.php               wp-config-sample.php  wp-load.php        wp-settings.php  xmlrpc.php
[root@localhost blog.abc.com]# rm -rf wordpress wordpress-5.0.2-zh_CN.tar.gz
- 创建数据库设置数据库(先连接到MariaDB)
[root@localhost blog.abc.com]# mysql -uroot -ppassword
Welcome to the MariaDB monitor.  Commands end with ; or \g.
Your MariaDB connection id is 66
Server version: 10.3.12-MariaDB MariaDB Server

Copyright (c) 2000, 2018, Oracle, MariaDB Corporation Ab and others.

Type 'help;' or '\h' for help. Type '\c' to clear the current input statement.

MariaDB [(none)]> create database blog;
- 在MariaDB中为blog数据库创建用户
grant all on blog.* to 'blog'@'127.0.0.1' identified by 'pbxfuej3LR4r';
- 切换到blog库,查询blog库里有什么标
use blog;
show tables;
安装discuz
- discuz官网:http://www.discuz.net/forum.php
- 先安装git工具
yum install git -y
- 克隆discuz
git clone https://gitee.com/ComsenzDiscuz/DiscuzX.git
- 复制upload里面的内容到我们自定义的路径下
[root@localhost DiscuzX]# cp -r upload /data/wwwroot/bbs.abc.site
- 定义主机配置文件
server {
    listen       80;
    server_name bbs.abc.site;

    #charset koi8-r;
    #access_log  /var/log/nginx/host.access.log  main;

    location / {
        root   /data/wwwroot/bbs.abc.site;
        index  index.html index.htm index.php;
    }

    location ~ \.php$ {
        root           /data/wwwroot/bbs.abc.site;
        fastcgi_pass   127.0.0.1:9000;
        fastcgi_index  index.php;
        fastcgi_param  SCRIPT_FILENAME  /data/wwwroot/bbs.abc.site$fastcgi_script_name;
        include        fastcgi_params;
    }

}
- 重新加载配置文件并检查有无错误
[root@localhost conf.d]# nginx -s reload
[root@localhost conf.d]# nginx -t
nginx: the configuration file /etc/nginx/nginx.conf syntax is ok
nginx: configuration file /etc/nginx/nginx.conf test is successful
[root@localhost nginx]# setenforce 0
- 修改目录属主权限。
[root@localhost bbs.abc.site]# chown -R php-fpm  config data uc_server/data  uc_client/data
[root@localhost bbs.abc.site]# chown -R php-fpm  config data uc_server/data  uc_client/data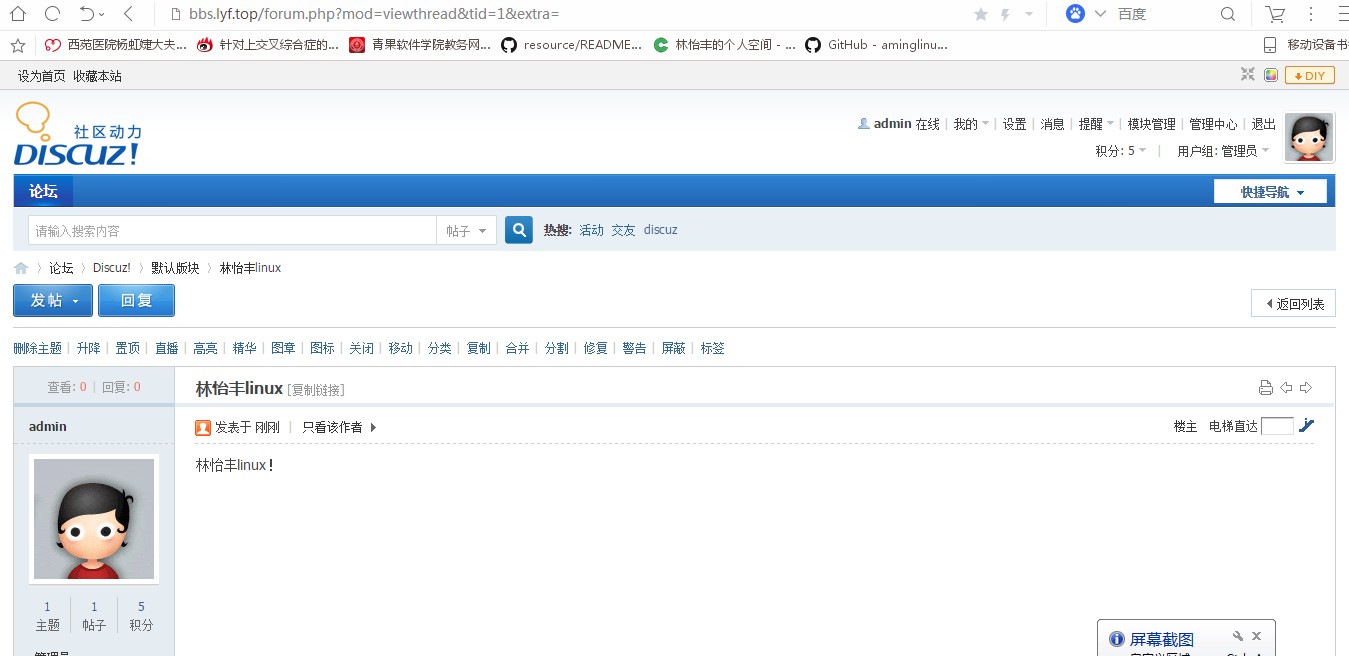

参考代码(实际操作有些出入,不完整的流程)
[root@test01 ~]# vi /etc/yum.repos.d/nginx.repo
[nginx]
name=nginx repo
baseurl=http://nginx.org/packages/centos/7/$basearch/
gpgcheck=0
enabled=1
[root@test01 ~]# yum list |grep nginx
nginx.x86_64 1:1.14.2-1.el7_4.ngx nginx
nginx-debug.x86_64 1:1.8.0-1.el7.ngx nginx
nginx-debuginfo.x86_64 1:1.14.2-1.el7_4.ngx nginx
nginx-module-geoip.x86_64 1:1.14.2-1.el7_4.ngx nginx
nginx-module-geoip-debuginfo.x86_64 1:1.14.2-1.el7_4.ngx nginx
nginx-module-image-filter.x86_64 1:1.14.2-1.el7_4.ngx nginx
nginx-module-image-filter-debuginfo.x86_64 1:1.14.2-1.el7_4.ngx nginx
nginx-module-njs.x86_64 1:1.14.2.0.2.7-1.el7_4.ngx nginx
nginx-module-njs-debuginfo.x86_64 1:1.14.2.0.2.7-1.el7_4.ngx nginx
nginx-module-perl.x86_64 1:1.14.2-1.el7_4.ngx nginx
nginx-module-perl-debuginfo.x86_64 1:1.14.2-1.el7_4.ngx nginx
nginx-module-xslt.x86_64 1:1.14.2-1.el7_4.ngx nginx
nginx-module-xslt-debuginfo.x86_64 1:1.14.2-1.el7_4.ngx nginx
nginx-nr-agent.noarch 2.0.0-12.el7.ngx nginx
pcp-pmda-nginx.x86_64 4.1.0-5.el7_6 updates
[root@test01 ~]# killall nginx
-bash: killall: 未找到命令
[root@test01 ~]# pkill nginx
[root@test01 ~]# ps aux |grep nginx
root 2953 0.0 0.0 112728 980 pts/0 R+ 20:35 0:00 grep --color=auto nginx
[root@test01 ~]# rm -rf /usr/local/nginx/
[root@test01 ~]# yum install -y nginx
[root@test01 ~]# ls /etc/nginx/
conf.d koi-utf mime.types nginx.conf uwsgi_params
fastcgi_params koi-win modules scgi_params win-utf
[root@test01 ~]# ls /etc/nginx/nginx.conf 主配置文件
/etc/nginx/nginx.conf
[root@test01 ~]# ls /etc/nginx/conf.d 子配置文件
default.conf
[root@test01 ~]# nginx -v 查看nginx的版本
nginx version: nginx/1.14.2
[root@test01 ~]# nginx -V 查看nginx的版本及编译参数
nginx version: nginx/1.14.2
built by gcc 4.8.5 20150623 (Red Hat 4.8.5-28) (GCC)
built with OpenSSL 1.0.2k-fips 26 Jan 2017
TLS SNI support enabled
configure arguments: --prefix=/etc/nginx --sbin-path=/usr/sbin/nginx --modules-path=/usr/lib64/nginx/modules --conf-path=/etc/nginx/nginx.conf --error-log-path=/var/log/nginx/error.log --http-log-path=/var/log/nginx/access.log --pid-path=/var/run/nginx.pid --lock-path=/var/run/nginx.lock --http-client-body-temp-path=/var/cache/nginx/client_temp --http-proxy-temp-path=/var/cache/nginx/proxy_temp --http-fastcgi-temp-path=/var/cache/nginx/fastcgi_temp --http-uwsgi-temp-path=/var/cache/nginx/uwsgi_temp --http-scgi-temp-path=/var/cache/nginx/scgi_temp --user=nginx --group=nginx --with-compat --with-file-aio --with-threads --with-http_addition_module --with-http_auth_request_module --with-http_dav_module --with-http_flv_module --with-http_gunzip_module --with-http_gzip_static_module --with-http_mp4_module --with-http_random_index_module --with-http_realip_module --with-http_secure_link_module --with-http_slice_module --with-http_ssl_module --with-http_stub_status_module --with-http_sub_module --with-http_v2_module --with-mail --with-mail_ssl_module --with-stream --with-stream_realip_module --with-stream_ssl_module --with-stream_ssl_preread_module --with-cc-opt='-O2 -g -pipe -Wall -Wp,-D_FORTIFY_SOURCE=2 -fexceptions -fstack-protector-strong --param=ssp-buffer-size=4 -grecord-gcc-switches -m64 -mtune=generic -fPIC' --with-ld-opt='-Wl,-z,relro -Wl,-z,now -pie'
[root@test01 ~]# systemctl start nginx 启动nginx
[root@test01 ~]# ps aux |grep nginx
root 3024 0.0 0.0 46324 968 ? Ss 20:52 0:00 nginx: master process /usr/sbin/nginx -c /etc/nginx/nginx.conf
nginx 3025 0.0 0.1 46724 1932 ? S 20:52 0:00 nginx: worker process
root 3027 0.0 0.0 112728 980 pts/0 R+ 20:52 0:00 grep --color=auto nginx
[root@test01 ~]#systemctl restart nginx 重启nginx
[root@test01 ~]# systemctl stop nginx 关闭nginx
[root@test01 ~]# ps aux |grep nginx
\root 3038 0.0 0.0 112728 980 pts/0 R+ 20:53 0:00 grep --color=auto nginx
[root@test01 ~]# nginx -t 查看nginx的配置文件有没有错误
nginx: the configuration file /etc/nginx/nginx.conf syntax is ok
nginx: configuration file /etc/nginx/nginx.conf test is successful
[root@test01 ~]# which nginx
/usr/sbin/nginx
[root@test01 ~]# echo $PATH
/usr/local/sbin:/usr/local/bin:/usr/sbin:/usr/bin:/root/bin:/usr/local/mysql/bin:/usr/local/mysql/bin:/root/bin
[root@test01 ~]# vi /etc/nginx.conf
[root@test01 ~]# vi /etc/nginx/nginx.conf
[root@test01 ~]# cd /etc/nginx/conf.d/
[root@test01 conf.d]# ls
default.conf
[root@test01 conf.d]# vi default.conf
打开另一台虚拟机测试80端口通不通
[root@test02 ~]# telnet 192.168.28.107 80
Trying 192.168.28.107...
telnet: connect to address 192.168.28.107: No route to host
因为防火墙,因为实验为了方便直接关闭防火墙, firewalld开启状态下,windows用浏览器访问192.168.28.107不能打开,stop firewalld,windows可以打开192.168.28.107。还有一种方法就是添加一条规则
[root@test01 conf.d]# systemctl stop firewalld
[root@test01 conf.d]# ps aux |grep firewalld\
> ^C
[root@test01 conf.d]# ps aux |grep firewalld\
> ^C
[root@test01 conf.d]# ps aux |grep firewalld
root 3127 0.0 0.0 112728 980 pts/0 R+ 21:17 0:00 grep --color=auto firewalld
[root@test01 conf.d]# firewall-cmd --add-port=80/tcp --permanent 加上premanent永久生效,不加测临时生效
success
添加一条80端口的规则
[root@test01 conf.d]# firewall-cmd --reload 执行一下reload
success
每一个虚拟主机就是一个站点。每个站点就有域名,设定一个域名。
[root@test01 conf.d]# vi default.conf
server {
listen 80;
server_name www.aaa.com; 设置www.aaa.com为域名
[root@test01 conf.d]# nginx -t 查看nginx配置文件有没有错
nginx: the configuration file /etc/nginx/nginx.conf syntax is ok
nginx: configuration file /etc/nginx/nginx.conf test is successful
[root@test01 conf.d]# nginx -s reload 重载配置文件,重载之前一定要reload一下
如何让访问www.aaa.com,现在www.aaa.com没有指向到192.168.28.107上,有这个域名的dns权限就可以了。可以在买过域名里用dnspad去做解析。我们用另一种方法让aaa.com指向到107上,还可以修改windows的host文件添加一条。用aaa.com访问也可以,用107访问也可以,同一个ip可以加多个域名,同时添加 www.bbb.com也是一样。这个就叫默认的虚拟主机,也是nginx的第一个虚拟主机
[root@test01 conf.d]# ls
default.conf
[root@test01 conf.d]# vi /etc/hosts
127.0.0.1 localhost localhost.localdomain localhost4 localhost4.localdomain4
::1 localhost localhost.localdomain localhost6 localhost6.localdomain6
192.168.28.107 www.aaa.com
[root@test01 conf.d]# ping www.aaa.com
PING www.aaa.com (192.168.28.107) 56(84) bytes of data.
64 bytes from www.aaa.com (192.168.28.107): icmp_seq=1 ttl=64 time=0.361 ms
64 bytes from www.aaa.com (192.168.28.107): icmp_seq=2 ttl=64 time=0.046 ms
^C
[root@test01 conf.d]# vi default.conf 在80端口后面加上default_server 就是默认虚拟主机
server {
listen 80 default_server;
[root@test01 conf.d]# cp default.conf 2.conf
[root@test01 conf.d]# vi 2.conf
server {
listen 80;
server_name www.ccc.com;
#charset koi8-r;
#access_log /var/log/nginx/host.access.log main;
location / {
root /tmp/html; 改下路径
index index.html index.htm;
}
#error_page 404 /404.html;
# redirect server error pages to the static page /50x.html
#
# proxy the PHP scripts to Apache listening on 127.0.0.1:80
#
#location ~ \.php$ {
# proxy_pass http://127.0.0.1;
#}
# pass the PHP scripts to FastCGI server listening on 127.0.0.1:9000
#
#location ~ \.php$ {
"2.conf" 41L, 967C
[root@test01 conf.d]# mkdir /tmp/html/
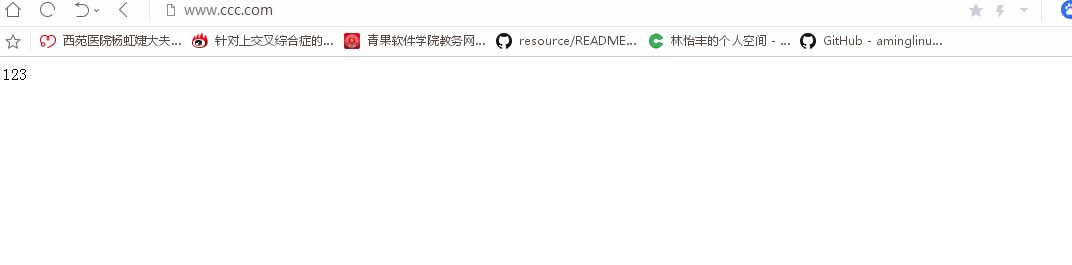
[root@test01 conf.d]# echo > 111 /tmp/html/index.html
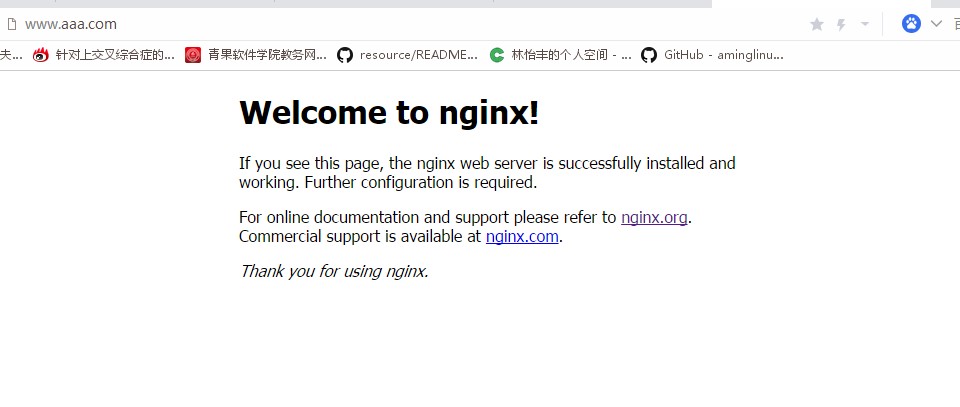
同时在windows的host下添加www.ccc.com,用windows浏览器打开,出现请求到1111,说明没有请求到虚拟主机。如果不能打开,用setenforce 0临时关闭selinux。再用www.bbb.com.打开,出现Welcome to nginx!,说明又请求到默认虚拟主机了
泛解析(就是任何一个域名解析到你的服务器上都可以解析,应该禁用掉)
禁掉默认虚拟主机,加一行 deny all;
[root@test01 conf.d]# vi default.conf
server {
listen 80 default_server;
server_name www.aaa.com;
deny all;
做网站了,做一个博客
[root@test01 conf.d]# cp 2.conf www.champin.top.conf
[root@test01 conf.d]# ls
2.conf www.champin.top.conf default.conf
[root@test01 conf.d]# vim www.champin.top.conf
server {
listen 80;
server_name www.champin.top;
#charset koi8-r; 定义字符集
#access_log /var/log/nginx/host.access.log main; 访问日志
location / {
root /data/wwwroot/www.champin.top;
index index.html index.htm index.php;
}
location ~ \.php$ {
root /data/wwwroot/www.champin.top; 定义php所在的路径
fastcgi_pass 127.0.0.1:9000; php-fpm的监听地址
fastcgi_index index.php;
fastcgi_param SCRIPT_FILENAME /data/wwwroot/www.champin.top$fastcgi_script_name;
include fastcgi_params;
}
[root@test01 conf.d]# nginx -t
nginx: the configuration file /etc/nginx/nginx.conf syntax is ok
nginx: configuration file /etc/nginx/nginx.conf test is successful
[root@test01 conf.d]# nginx -s reload
[root@test01 conf.d]# cd /data/wwwroot/www.champin.top/
[root@test01 www.champin.top]# wget https://cn.wordpress.org/wordpress-5.0.3-zh_CN.zip
--2019-02-14 23:42:41-- https://cn.wordpress.org/wordpress-5.0.3-zh_CN.zip
[root@test01 www.champin.top]# ls
wordpress-5.0.3-zh_CN.zip
[root@test01 www.champin.top]# unzip wordpress-5.0.3-zh_CN.zip 解压
[root@test01 www.champin.top]# ls
wordpress wordpress-5.0.3-zh_CN.zip
[root@test01 www.champin.top]# mv wordpress/* ./ 把wordpress里面的文件全部移动到当前目录下
[root@test01 www.champin.top]# ls
index.php wp-admin wp-includes wp-signup.php
license.txt wp-blog-header.php wp-links-opml.php wp-trackback.php
readme.html wp-comments-post.php wp-load.php xmlrpc.php
wordpress wp-config-sample.php wp-login.php
wordpress-5.0.3-zh_CN.zip wp-content wp-mail.php
wp-activate.php wp-cron.php wp-settings.php
[root@test01 www.champin.top]# rm -rvf wordpress wordpress-5.0.3-zh_CN.zip
已删除目录:"wordpress"
已删除"wordpress-5.0.3-zh_CN.zip"
[root@test01 www.champin.top]# ls
index.php wp-blog-header.php wp-includes wp-settings.php
license.txt wp-comments-post.php wp-links-opml.php wp-signup.php
readme.html wp-config-sample.php wp-load.php wp-trackback.php
wp-activate.php wp-content wp-login.php xmlrpc.php
wp-admin wp-cron.php wp-mail.php
现在就可以用www.champin.top访问了。
创建数据库
[root@test01 www.champin.top]# mysql -uroot -pchamlinux
Welcome to the MariaDB monitor. Commands end with ; or \g.
Your MariaDB connection id is 9
Server version: 10.3.12-MariaDB MariaDB Server
Copyright (c) 2000, 2018, Oracle, MariaDB Corporation Ab and others.
Type 'help;' or '\h' for help. Type '\c' to clear the current input statement.
MariaDB [(none)]>
MariaDB [(none)]> create database blogtop; 创建库
Query OK, 1 row affected (0.003 sec)
MariaDB [(none)]> grant all on blogtop.* to 'blogtop'@'127.0.0.1' identified by '55gzpzWkdkuS';
Query OK, 0 rows affected (0.019 sec) 创建用户,用另外一台虚拟机mkpasswd生成随机密码
[root@test01 www.champin.top]# mysql -ublogtop -p55gzpzWkdkuS -h127.0.0.1 尝试登录
Welcome to the MariaDB monitor. Commands end with ; or \g.
Your MariaDB connection id is 10
Server version: 10.3.12-MariaDB MariaDB Server
Copyright (c) 2000, 2018, Oracle, MariaDB Corporation Ab and others.
Type 'help;' or '\h' for help. Type '\c' to clear the current input statement.
MariaDB [(none)]>
MariaDB [(none)]> show databases;
+--------------------+
| Database |
+--------------------+
| blogtop |
| information_schema |
| test |
+--------------------+
3 rows in set (0.009 sec)
在网页打开。填入数据,出现 抱歉,我不能写入wp-config.php文件。
您可以手工创建wp-config.php文件,并将以下文字粘贴于其中
[root@test01 www.champin.top]# ls -l
总用量 192
-rw-r--r--. 1 root root 418 9月 25 2013 index.php
-rw-r--r--. 1 root root 19935 1月 4 00:24 license.txt
-rw-r--r--. 1 root root 6989 1月 11 18:02 readme.html
-rw-r--r--. 1 root root 6878 12月 13 09:30 wp-activate.php
drwxr-xr-x. 9 root root 4096 1月 11 18:00 wp-admin
-rw-r--r--. 1 root root 364 12月 19 2015 wp-blog-header.php
-rw-r--r--. 1 root root 1889 5月 3 2018 wp-comments-post.php
-rw-r--r--. 1 root root 2735 1月 11 18:02 wp-config-sample.php
drwxr-xr-x. 5 root root 69 1月 11 18:02 wp-content
-rw-r--r--. 1 root root 3669 8月 20 2017 wp-cron.php
drwxr-xr-x. 19 root root 8192 1月 11 18:00 wp-includes
-rw-r--r--. 1 root root 2422 11月 21 2016 wp-links-opml.php
-rw-r--r--. 1 root root 3306 8月 22 2017 wp-load.php
-rw-r--r--. 1 root root 37296 12月 13 08:28 wp-login.php
-rw-r--r--. 1 root root 8048 1月 11 2017 wp-mail.php
-rw-r--r--. 1 root root 17421 10月 23 15:04 wp-settings.php
-rw-r--r--. 1 root root 30091 4月 30 2018 wp-signup.php
-rw-r--r--. 1 root root 4620 10月 24 2017 wp-trackback.php
-rw-r--r--. 1 root root 3065 9月 1 2016 xmlrpc.php
[root@test01 www.champin.top]# chown -R php-fpm . 更改当前文件的所有属主
[root@test01 www.champin.top]# ls -l
总用量 192
-rw-r--r--. 1 php-fpm root 418 9月 25 2013 index.php
-rw-r--r--. 1 php-fpm root 19935 1月 4 00:24 license.txt
-rw-r--r--. 1 php-fpm root 6989 1月 11 18:02 readme.html
-rw-r--r--. 1 php-fpm root 6878 12月 13 09:30 wp-activate.php
drwxr-xr-x. 9 php-fpm root 4096 1月 11 18:00 wp-admin
-rw-r--r--. 1 php-fpm root 364 12月 19 2015 wp-blog-header.php
-rw-r--r--. 1 php-fpm root 1889 5月 3 2018 wp-comments-post.php
-rw-r--r--. 1 php-fpm root 2735 1月 11 18:02 wp-config-sample.php
drwxr-xr-x. 5 php-fpm root 69 2月 15 00:19 wp-content
-rw-r--r--. 1 php-fpm root 3669 8月 20 2017 wp-cron.php
drwxr-xr-x. 19 php-fpm root 8192 1月 11 18:00 wp-includes
-rw-r--r--. 1 php-fpm root 2422 11月 21 2016 wp-links-opml.php
-rw-r--r--. 1 php-fpm root 3306 8月 22 2017 wp-load.php
-rw-r--r--. 1 php-fpm root 37296 12月 13 08:28 wp-login.php
-rw-r--r--. 1 php-fpm root 8048 1月 11 2017 wp-mail.php
-rw-r--r--. 1 php-fpm root 17421 10月 23 15:04 wp-settings.php
-rw-r--r--. 1 php-fpm root 30091 4月 30 2018 wp-signup.php
-rw-r--r--. 1 php-fpm root 4620 10月 24 2017 wp-trackback.php
-rw-r--r--. 1 php-fpm root 3065 9月 1 2016 xmlrpc.php
在尝试就可以成功了
登录到数据库里面看有没有表
[root@test01 www.champin.top]# mysql -ublogtop -p55gzpzWkdkuS -h127.0.0.1
Welcome to the MariaDB monitor. Commands end with ; or \g.
Your MariaDB connection id is 17
Server version: 10.3.12-MariaDB MariaDB Server
Copyright (c) 2000, 2018, Oracle, MariaDB Corporation Ab and others.
Type 'help;' or '\h' for help. Type '\c' to clear the current input statement.
MariaDB [(none)]> use blogtop
Reading table information for completion of table and column names
You can turn off this feature to get a quicker startup with -A
Database changed
MariaDB [blogtop]> show tables;
+-----------------------+
| Tables_in_blogtop |
+-----------------------+
| wp_commentmeta |
| wp_comments |
| wp_links |
| wp_options |
| wp_postmeta |
| wp_posts |
| wp_term_relationships |
| wp_term_taxonomy |
| wp_termmeta |
| wp_terms |
| wp_usermeta |
| wp_users |
+-----------------------+
12 rows in set (0.003 sec)
[root@test01 www.champin.top]# ls -lt
总用量 196
drwxr-xr-x. 5 php-fpm root 69 2月 15 00:21 wp-content
-rw-rw-rw-. 1 php-fpm php-fpm 3016 2月 15 00:21 wp-config.php 新生成一个文件
-rw-r--r--. 1 php-fpm root 6989 1月 11 18:02 readme.html
-rw-r--r--. 1 php-fpm root 2735 1月 11 18:02 wp-config-sample.php
drwxr-xr-x. 9 php-fpm root 4096 1月 11 18:00 wp-admin
drwxr-xr-x. 19 php-fpm root 8192 1月 11 18:00 wp-includes
-rw-r--r--. 1 php-fpm root 19935 1月 4 00:24 license.txt
-rw-r--r--. 1 php-fpm root 6878 12月 13 09:30 wp-activate.php
-rw-r--r--. 1 php-fpm root 37296 12月 13 08:28 wp-login.php
-rw-r--r--. 1 php-fpm root 17421 10月 23 15:04 wp-settings.php
-rw-r--r--. 1 php-fpm root 1889 5月 3 2018 wp-comments-post.php
-rw-r--r--. 1 php-fpm root 30091 4月 30 2018 wp-signup.php
-rw-r--r--. 1 php-fpm root 4620 10月 24 2017 wp-trackback.php
-rw-r--r--. 1 php-fpm root 3306 8月 22 2017 wp-load.php
-rw-r--r--. 1 php-fpm root 3669 8月 20 2017 wp-cron.php
-rw-r--r--. 1 php-fpm root 8048 1月 11 2017 wp-mail.php
-rw-r--r--. 1 php-fpm root 2422 11月 21 2016 wp-links-opml.php
-rw-r--r--. 1 php-fpm root 3065 9月 1 2016 xmlrpc.php
-rw-r--r--. 1 php-fpm root 364 12月 19 2015 wp-blog-header.php
-rw-r--r--. 1 php-fpm root 418 9月 25 2013 index.php
切记在生产环境中,只需要把可写,和需要写的设置写权限
安装discuz
[root@test01 ~]# git clone https://gitee.com/ComsenzDiscuz/DiscuzX.git
正克隆到 'DiscuzX'...
remote: Enumerating objects: 7404, done.
remote: Counting objects: 100% (7404/7404), done.
remote: Compressing objects: 100% (4767/4767), done.
remote: Total 7404 (delta 2662), reused 7153 (delta 2588)
接收对象中: 100% (7404/7404), 12.12 MiB | 1.54 MiB/s, done.
处理 delta 中: 100% (2662/2662), done.
[root@test01 ~]# ls
11.txt 1.txt 2.txt 3.txt anaconda-ks.cfg DiscuzX startingup.sh
[root@test01 ~]# cd DiscuzX/
[root@test01 DiscuzX]# ls
readme README.md upload utility
[root@test01 DiscuzX]# ls
readme README.md upload utility
[root@test01 DiscuzX]# ls upload/ 这个程序下面的就是网站上的程序
admin.php config favicon.ico index.php misc.php search.php uc_client
api connect.php forum.php install plugin.php source uc_server
api.php crossdomain.xml group.php m portal.php static
archiver data home.php member.php robots.txt template
[root@test01 DiscuzX]# cp -r upload /data/wwwroot/bbs.champin.top 拷贝目录需要加r
[root@test01 DiscuzX]# ls !$
ls /data/wwwroot/bbs.www.champin.top
admin.php config favicon.ico index.php misc.php search.php uc_client
api connect.php forum.php install plugin.php source uc_server
api.php crossdomain.xml group.php m portal.php static
archiver data home.php member.php robots.txt template
[root@test01 DiscuzX]# cd /etc/nginx/conf.d/
[root@test01 conf.d]# ls
2.conf default.conf www.champin.top.conf
[root@test01 conf.d]# cp www.champin.top.conf bbs.champin.top.conf 拷贝一份虚拟主机配置文件
[root@test01 conf.d]# vim bbs.champin.top.conf vi虚拟主机配置文件
server {
listen 80;
server_name bbs.champin.top;
#charset koi8-r;
#access_log /var/log/nginx/host.access.log main;
location / {
root /data/wwwroot/bbs.champin.top;
index index.html index.htm index.php;
}
location ~ \.php$ {
root /data/wwwroot/bbs.champin.top;
fastcgi_pass 127.0.0.1:9000;
fastcgi_index index.php;
fastcgi_param SCRIPT_FILENAME /data/wwwroot/bbs.champin.top$fastcgi_script_name;
include fastcgi_params;
}
}
[root@test01 conf.d]# nginx -t
nginx: the configuration file /etc/nginx/nginx.conf syntax is ok
nginx: configuration file /etc/nginx/nginx.conf test is successful
[root@test01 conf.d]# nginx -s reload
设置一下windows的host就可以访问了,会出现文件不可写
[root@test01 conf.d]# cd /data/wwwroot/bbs.champin.top/
[root@test01 bbs.champin.top]# ls -l
总用量 68
-rw-r--r--. 1 root root 2748 2月 15 01:25 admin.php
drwxr-xr-x. 10 root root 149 2月 15 01:25 api
-rw-r--r--. 1 root root 727 2月 15 01:25 api.php
drwxr-xr-x. 2 root root 23 2月 15 01:25 archiver
drwxr-xr-x. 2 root root 90 2月 15 01:25 config
-rw-r--r--. 1 root root 1017 2月 15 01:25 connect.php
-rw-r--r--. 1 root root 106 2月 15 01:25 crossdomain.xml
drwxr-xr-x. 12 root root 202 2月 15 01:25 data
-rw-r--r--. 1 root root 5558 2月 15 01:25 favicon.ico
-rw-r--r--. 1 root root 2245 2月 15 01:25 forum.php
-rw-r--r--. 1 root root 821 2月 15 01:25 group.php
-rw-r--r--. 1 root root 1280 2月 15 01:25 home.php
-rw-r--r--. 1 root root 5890 2月 15 01:25 index.php
drwxr-xr-x. 5 root root 64 2月 15 01:25 install
drwxr-xr-x. 2 root root 23 2月 15 01:25 m
-rw-r--r--. 1 root root 1025 2月 15 01:25 member.php
-rw-r--r--. 1 root root 2435 2月 15 01:25 misc.php
-rw-r--r--. 1 root root 1788 2月 15 01:25 plugin.php
-rw-r--r--. 1 root root 977 2月 15 01:25 portal.php
-rw-r--r--. 1 root root 582 2月 15 01:25 robots.txt
-rw-r--r--. 1 root root 1155 2月 15 01:25 search.php
drwxr-xr-x. 10 root root 168 2月 15 01:25 source
drwxr-xr-x. 7 root root 86 2月 15 01:25 static
drwxr-xr-x. 3 root root 38 2月 15 01:25 template
drwxr-xr-x. 7 root root 106 2月 15 01:25 uc_client
drwxr-xr-x. 14 root root 256 2月 15 01:25 uc_server
[root@test01 bbs.champin.top]# chown -R php-fpm config data uc_server/data uc_client/data
更改这几个目录的权限后刷新网页就可以
接下来就是创建数据库了
[root@test01 bbs.champin.top]# mysql -uroot -pchamlinux
Welcome to the MariaDB monitor. Commands end with ; or \g.
Your MariaDB connection id is 37
Server version: 10.3.12-MariaDB MariaDB Server
Copyright (c) 2000, 2018, Oracle, MariaDB Corporation Ab and others.
Type 'help;' or '\h' for help. Type '\c' to clear the current input statement.
MariaDB [(none)]> create database bbs;
Query OK, 1 row affected (0.001 sec)
MariaDB [(none)]> grant all on bbs.* to 'bbs'@127.0.0.1 identified by '55gzpzWkdkuS';
Query OK, 0 rows affected (0.008 sec)
MariaDB [(none)]> quit
Bye
然后尝试连接一下
[root@test01 bbs.champin.top]# mysql -ubbs -p55gzpzWkdkuS -h127.0.0.1
Welcome to the MariaDB monitor. Commands end with ; or \g.
Your MariaDB connection id is 39
Server version: 10.3.12-MariaDB MariaDB Server
Copyright (c) 2000, 2018, Oracle, MariaDB Corporation Ab and others.
Type 'help;' or '\h' for help. Type '\c' to clear the current input statement.
MariaDB [(none)]>
MariaDB [(none)]> show databases; 查看库(查看bbs库)
+--------------------+
| Database |
+--------------------+
| bbs |
| information_schema |
| test |
+--------------------+
3 rows in set (0.001 sec)
在网页填入建好的数据库ip和用户及密码等信息,就完成了


 4万+
4万+

 被折叠的 条评论
为什么被折叠?
被折叠的 条评论
为什么被折叠?
 到【灌水乐园】发言


