


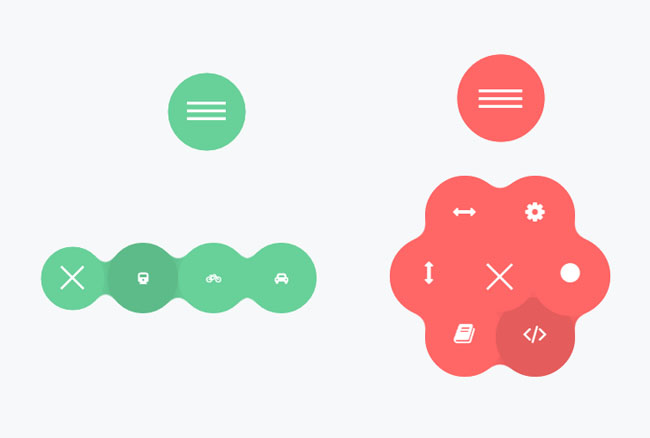
分享一款基于jQuery弹性展开收缩菜单插件gooey.js。这是一款基于gooey.js插件实现的弹性菜单特效代码。效果图如下:
实现的代码。
html代码:
<header class="plugin-demo-header"> <h1>Gooey Menu</h1> <nav id="gooey-upper"> <input type="checkbox" class="menu-open" name="menu-open1" id="menu-open1"/> <label class="open-button" for="menu-open1"> <span class="burger burger-1"></span> <span class="burger burger-2"></span> <span class="burger burger-3"></span> </label> <a href="#features" class="gooey-menu-item"> <i title="Features" class="fa fa-cog fa-2x"></i> </a> <a href="#h-spaced-menu" class="gooey-menu-item"> <i title="Horizontal Menu" class="fa fa-arrows-h fa-2x"></i> </a> <a href="#menu-v-example" class="gooey-menu-item"> <i title="Vertical Menu" class="fa fa-arrows-v fa-2x"></i> </a> <a href="#docs" class="gooey-menu-item"> <i title="Docs" class="fa fa-book fa-2x"></i> </a> <a href="#event-api" class="gooey-menu-item"> <i title="Event API" class="fa fa-code fa-2x"></i> </a> <a href="#round" class="gooey-menu-item"> <i title="Round Menu" class="fa fa-circle fa-2x"></i> </a> </nav> </header> <div class="container"> <div id="page1"> <h1 class="section-label"> Menu Styles</h1> <div class="section-cont" id="h-spaced-menu"> <i class="desc">Horizontal menu with glued items</i> <div class="row"> <div class="col-xs-12 col-sm-6 col-md-5"> <nav id="gooey-h"> <input type="checkbox" class="menu-open" name="menu-open2" id="menu-open2"/> <label class="open-button" for="menu-open2"> <span class="burger burger-1"></span> <span class="burger burger-2"></span> <span class="burger burger-3"></span> </label> <a href="#" class="gooey-menu-item"> <i class="fa fa-train"></i> </a> <a href="#" class="gooey-menu-item"> <i class="fa fa-bicycle"></i> </a> <a href="#" class="gooey-menu-item"> <i class="fa fa-rocket"></i> </a> <a href="#" class="gooey-menu-item"> <i class="fa fa-automobile"></i> </a> </nav> </div> <div class="col-xs-12 col-md-7 code-example"> <pre class="prettyprint linenums"> $(function() { $("#gooey-h").gooeymenu({ style: "horizontal", contentColor: "white", horizontal: { menuItemPosition: "glue" } }); }); </pre> </div> </div> </div> <div class="section-cont" id="round"> <div class="row"> <div class="col-md-5 col-xs-12 col-sm-6 round-example"> <i class="desc">Round menu with glued items (the glued effect may be achieved by adjusting "size" and circle radius property values closer (e.g, 80 and 85)) </i> <nav id="gooey-round"> <input type="checkbox" class="menu-open" name="menu-open3" id="menu-open3"/> <label class="open-button" for="menu-open3"> <span class="burger burger-1"></span> <span class="burger burger-2"></span> <span class="burger burger-3"></span> </label> <a href="#" class="gooey-menu-item"> <i class="fa fa-train"></i> </a> <a href="#" class="gooey-menu-item"> <i class="fa fa-bicycle"></i> </a> <a href="#" class="gooey-menu-item"> <i class="fa fa-rocket"></i> </a> <a href="#" class="gooey-menu-item"> <i class="fa fa-automobile"></i> </a> <a href="#" class="gooey-menu-item"> <i class="fa fa-plane"></i> </a> </nav> </div> <div class="col-md-7 col-xs-12 code-example"> <pre class="prettyprint linenums"> $(function() { $("#gooey-round").gooeymenu({ bgColor: "#ffc0cb", contentColor: "white", style: "circle", circle: { radius: 85 }, size: 80 }); }); </pre> </div> </div> </div> <div class="section-cont" id="menu-v-example"> <div class="row"> <div class="col-md-5 col-xs-12 vertical-example"> <i class="desc">Vertical menu ("up" and "down" direction may be achieved by changing corresponding properties). </i> <nav id="gooey-v"> <input type="checkbox" class="menu-open" name="menu-open4" id="menu-open4"/> <label class="open-button" for="menu-open4"> <span class="burger burger-1"></span> <span class="burger burger-2"></span> <span class="burger burger-3"></span> </label> <a href="#" class="gooey-menu-item"> <i class="fa fa-train"></i> </a> <a href="#" class="gooey-menu-item"> <i class="fa fa-bicycle"></i> </a> <a href="#" class="gooey-menu-item"> <i class="fa fa-rocket"></i> </a> <a href="#" class="gooey-menu-item"> <i class="fa fa-automobile"></i> </a> </nav> </div> <div class="col-md-7 col-xs-12 code-example"> <pre class="prettyprint linenums"> $(function() { $("#gooey-v").gooeymenu({ style: "vertical", vertical: { menuItemPosition: "spaced", direction: "up" } }); }); </pre> </div> </div> </div> <h1 class="section-label"> Event API</h1> <div class="section-cont" id="event-api"> <div class="row"> <div class="col-md-5 col-xs-12 event-api-ex"> <i class="desc">Use event API to hook into animation "open" and "close" events. In this example, we change menu item colors when menu "open" and "close" events are triggered. </i> <nav id="gooey-API"> <input type="checkbox" class="menu-open" name="menu-open5" id="menu-open5"/> <label class="open-button" for="menu-open5"> <span class="burger burger-1"></span> <span class="burger burger-2"></span> <span class="burger burger-3"></span> </label> <a href="#" class="gooey-menu-item"> <i class="fa fa-train"></i> </a> <a href="#" class="gooey-menu-item"> <i class="fa fa-bicycle"></i> </a> <a href="#" class="gooey-menu-item"> <i class="fa fa-rocket"></i> </a> <a href="#" class="gooey-menu-item"> <i class="fa fa-automobile"></i> </a> <a href="#" class="gooey-menu-item"> <i class="fa fa-plane"></i> </a> </nav> </div> <div class="col-md-7 col-xs-12 code-example"> <pre class="prettyprint linenums"> $(function() { $("#gooey-round").gooeymenu({ circle: { radius: 85 }, open: function() { $(this).find(".gooey-menu-item").css("background-color", "steelblue"); $(this).find(".open-button").css("background-color", "steelblue"); }, close: function(gooey) { $(this).find(".gooey-menu-item").css("background-color", "#00ffff"); $(this).find(".open-button").css("background-color", "#00ffff"); } }); }); </pre> </div> </div> </div> </div> <div id="docs"> <div class="plugin-details"> <h1 class="section-label"> Plugin details</h1> <p> <span class="bold">Version</span>: 1.0 <br> <span class="bold">Created by</span>: Kirill Goltsman <br> <span class="bold">Email</span>: goltsmank@gmail.com </p> </div> <h1 class="section-label"> 1. Getting started</h1> <p> Put "gooey" plugin folder into your project. Include below code snippets into <code> head</code> section of your html file. You may include Font Awesome plugin if you want ready-made icons in your menu. </p> <pre class="prettyprint linenums lang-html"> <script type="text/javascript" src="https://ajax.googleapis.com/ajax/libs/jquery/1.11.2/jquery.min.js"></script> <script type="text/javascript" src="gooey/src/gooey.min.js"></script> <link rel="stylesheet" href="https://cdnjs.cloudflare.com/ajax/libs/font-awesome/4.3.0/css/font-awesome.min.css"> <link rel="stylesheet" href="gooey/src/gooey.min.css"> </pre> <h1 class="section-label"> 2. Add Markup</h1> <p> Add markup to your html file. You can use any number of menu links and any labels or text for your menu links. The markup structure proposed below is desirable to avoid any bugs. You can use any valid class or id name for your <code>nav</code> element. This will be automatically handled by the plugin. <br> <span class="bold" style="color: red;">Note:</span> If you use several menus on one page, don't forget to create unique ids and names for your hidden checkbox elements that have class ".menu-open". </p> <pre class="prettyprint linenums html-lang"> <nav id="gooey"> <input type="checkbox" class="menu-open" name="menu-open" id="menu-open"/> <label class="open-button" for="menu-open"> <span class="burger burger-1"> </span> <span class="burger burger-2"> </span> <span class="burger burger-3"> </span> </label> <a href="#" class="gooey-menu-item"> <i class="fa fa-cab"> </i> </a> <a href="#" class="gooey-menu-item"> <i class="fa fa-automobile"> </i> </a> <a href="#" class="gooey-menu-item"> <i class="fa fa-truck"> </i> </a> <a href="#" class="gooey-menu-item"> <i class="fa fa-rocket"> </i> </a> </nav> </pre> <h1 class="section-label"> 3. Hook up your menu</h1> <p> To indicate your settings, put the following code within a <code>script</code> tag in your <code>head</code> section, html <code>body</code> element or in a separate Javascript file. Here is an example of how to set a horizontal Gooey Menu with pink menu items. Please, remember that a selector's id or class on which <code>gooeyMenu</code> function is called should be identical to <code>nav</code> element id or class in your html markup (in this example, <code>nav</code> id is <code>gooey</code>) </p> <pre class="prettyprint linenums"> $(function() { $("#gooey").gooeymenu({ style: "horizontal", bgColor: "pink" }); }); </pre> <h1 class="section-label"> 4. Specify your settings</h1> <p> You have a list of options to tailor a gooey menu to your needs </p> <pre class=" prettyprint linenums"> style: "horizontal", // {String} Sets gooey menu style. Accepted values: "horizontal","vertical","circle" size:70, // {Integer} Sets a menu item's size in pixels margin:"medium", // {String} Sets the margin between menu items. Acts only if "spaced" option of "horizontal" or "vertical" style is selected. Accepted values: "small","medium" and "large" bgColor: "steelblue", // {String} Sets background-color of a menu-item element contentColor:"white", // {String} Sets font color of a menu item's content; transitionStep:100, // {Integer} Sets a speed rate at which each menu item unfolds in milliseconds bounce:false, // {Boolean} Turns "bounce" effect off if {false} and on if {true} bounceLength:"medium", // {String} Sets the bounce length, if bounce effect is enabled. Accepted values: "small", "medium" and "large" hover:"white", // {String} Sets menu items' color on hover // Style-specific settings circle: { radius:80 // {Integer} Sets a radius of menu circle when a menu is opened (in pixels) }, horizontal: { menuItemPosition:"glue" // {String} "Spaced" option sets the spacing of menu items by a specified margin. "Glue" option makes items stacked. }, vertical: { menuItemPosition:"spaced" // {String} "Spaced" option sets the spacing of menu items by a specified margin. "Glue" option makes items stacked. direction:"up" // {String} Values: "up" or "down". A direction in which vertical menu unfolds }, //Callback API open:function(){}, // {function} Fires when a gooey menu is opened. <code>$(this)</code> context for the function is the element on which <code>gooeymenu</code> was called close:function() {} // {function} Fires when a gooey menu is closed. <code>$(this)</code> context for the function is the element on which <code>gooeymenu</code> was called }; }; </pre> <h1 class="section-label"> Styling your menu</h1> <p> Style menu's margins and indentation. You may set menu items indentation by changing left/top/right/bottom or margin properties of menu items and menu open button. Since menu's size will depend on a number of items and menu style selected, you have a full freedom to set position of your menu according to your needs. Note, that .navimenu container is relatively positioned by default and menu items are absolutely positioned. </p> <pre class="prettyprint linenums"> .navimenu .gooey-menu-item, .navimenu .open-button { border-radius: 100%; left: 50px; /* Style left indent */ top:100px; /* Style top indent */ position: absolute; } </pre> <p> Change a burger icon's background</p> <pre class='prettyprint linenums'> .navimenu .burger { background: white; } </pre> <h1 class="section-label"> Credits</h1> <p> Scripts and plugins used in the demo and these docs</p> <ol class='bold'> <li>jQuery</li> <li>FontAwesome </li> <li>Google Code Prettify </li> </ol> </div> </div> <header class="plugin-demo-header">


 1256
1256


 被折叠的 条评论
为什么被折叠?
被折叠的 条评论
为什么被折叠?
 到【灌水乐园】发言


