1. ActiveMQ入门
前面的文章已经写过MQ的相关概念,这里不再赘述。
1.1 ActiveMQ是什么
ActiveMQ是Apache下的开源项目,完全支持JMS1.1和J2EE1.4规范的JMS Provider实现。
1.2 ActiveMQ的特点
- 支持多种语言编写客户端
- 对Spring的支持,很容易和Spring整合
- 支持多种传输协议:TCP,SSL,NIO,UDP等
- 支持Ajax请求
1.3 ActiveMQ的安装
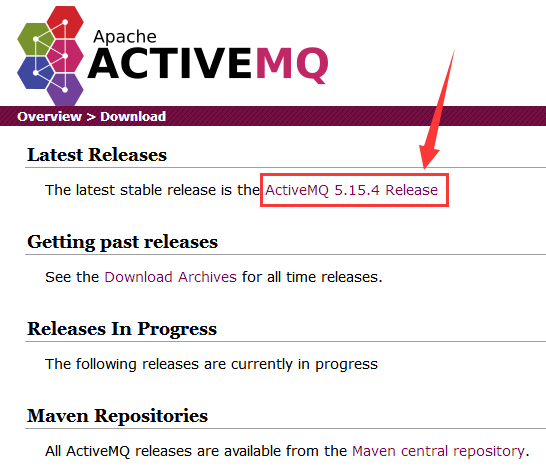
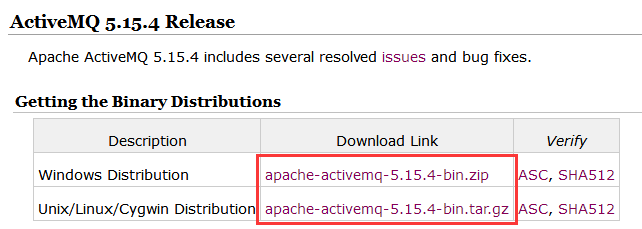
1.3.1 官网下载
|
|
|
|
|
|
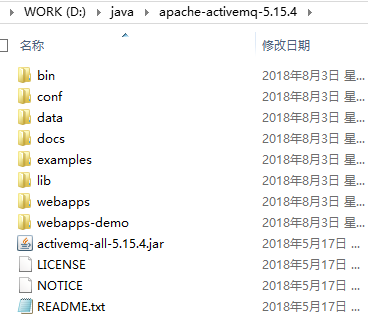
| 解压后的文件夹结构:
|
1.3.2 启动ActiveMQ
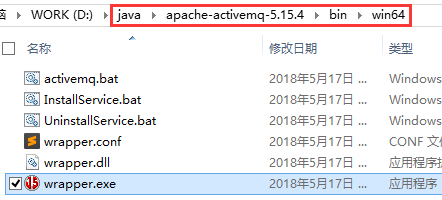
| 直接双击这个“wrapper.exe”即可
|
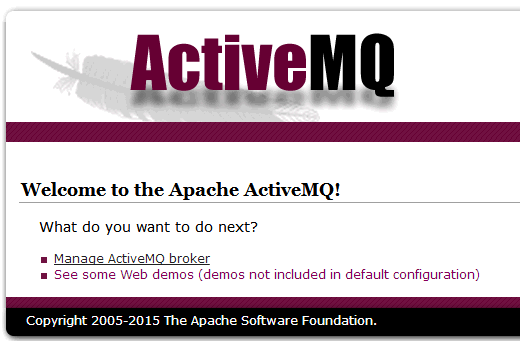
| 之后可以在浏览器输入http://localhost:8161/
|
1.3.3 进入管理中心
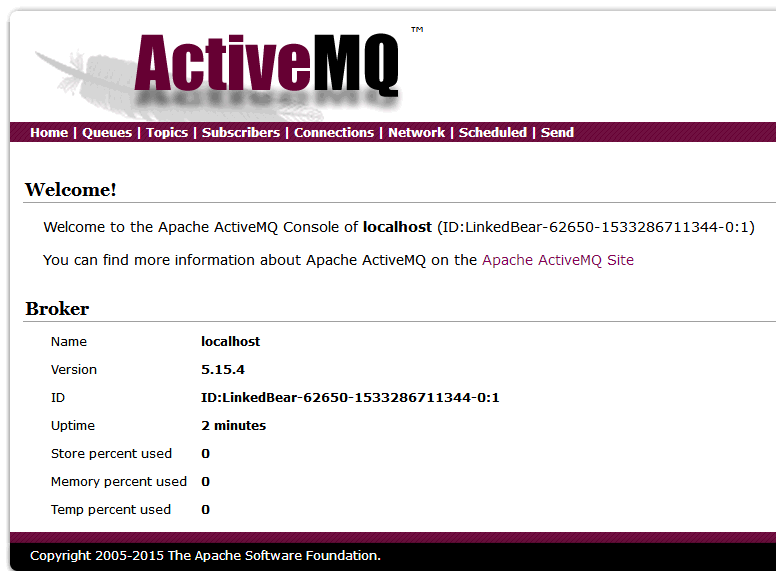
| 点击Manage ActiveMQ broker,会弹出身份验证,输入admin,admin即可
|
|
|
1.4 搭建Maven工程框架
<project xmlns="http://maven.apache.org/POM/4.0.0" xmlns:xsi="http://www.w3.org/2001/XMLSchema-instance"

    xsi:schemaLocation="http://maven.apache.org/POM/4.0.0 http://maven.apache.org/xsd/maven-4.0.0.xsd">

    <modelVersion>4.0.0</modelVersion>

    <groupId>com.linkedbear</groupId>

    <artifactId>ActiveMQ-Demo</artifactId>

    <version>0.0.1-SNAPSHOT</version>


    <properties>

        <activemq.version>5.15.4</activemq.version>

    </properties>


    <parent>

        <groupId>org.springframework.boot</groupId>

        <artifactId>spring-boot-starter-parent</artifactId>

        <version>2.0.0.RELEASE</version>

    </parent>


    <dependencies>

        <dependency>

            <groupId>org.springframework.boot</groupId>

            <artifactId>spring-boot-starter-web</artifactId>

        </dependency>

        <!-- ActiveMQ -->

        <dependency>

             <groupId>org.apache.activemq</groupId>

             <artifactId>activemq-client</artifactId>

             <version>${activemq.version}</version>

         </dependency>


        <!-- 热部署 -->

        <dependency>

            <groupId>org.springframework.boot</groupId>

            <artifactId>spring-boot-devtools</artifactId>

        </dependency>

    </dependencies>


    <build>

        <plugins>

            <plugin>

                <artifactId>maven-compiler-plugin</artifactId>

                <configuration>

                    <source>1.8</source>

                    <target>1.8</target>

                </configuration>

            </plugin>

        </plugins>

    </build>

</project>
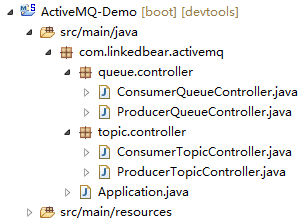
1.5 创建工程目录结构
|
|
之前的文章中写过,JMS的消息传递有两种模式,前面的RocketMQ中只写了一对一模式,本篇文章将会编写两种模式。
1.6 一对一模式的Queue
1.6.1 生产者
/**

 * 生产者Controller

 * @Title ProducerQueueController

 * @author LinkedBear

 * @Time 2018年8月3日 下午4:52:49

*/

@Controller

public class ProducerQueueController {

    @RequestMapping("/queueProduceMessage")

    @ResponseBody

    public Map<String, Object> queueProduceMessage() throws Exception {

        //JMS的使用比较类似于JDBC与Hibernate

        //1. 创建一个连接工厂(类似于JDBC中的注册驱动),需要传入TCP协议的ActiveMQ服务地址

        ActiveMQConnectionFactory connectionFactory = new ActiveMQConnectionFactory("tcp://127.0.0.1:61616");

        //2. 创建连接(类似于DriverManager.getConnection)

        Connection connection = connectionFactory.createConnection();

        //3. 开启连接(ActiveMQ创建的连接是需要手动开启的)

        connection.start(); //注意不是open。。。

        //4. 获取session(类似于Hibernate中的session,都是用会话来进行操作)

        //里面有两个参数,参数1为是否开启事务,参数2为消息确认模式

        Session session = connection.createSession(false, Session.AUTO_ACKNOWLEDGE);

        //5. 创建一对一的消息队列

        Queue queue = session.createQueue("test_queue");

        //6. 创建一条消息

        String text = "test queue message" + Math.random();

        TextMessage message = session.createTextMessage(text);

        //7. 消息需要发送方,要创建消息发送方(生产者),并绑定到某个消息队列上

        MessageProducer producer = session.createProducer(queue);

        //8. 发送消息

        producer.send(message);

        //9. 关闭连接

        producer.close();

        session.close();

        connection.close();


        //------显示发送的消息到视图上------

        Map<String, Object> map = new HashMap<>();

        map.put("message", text);

        return map;

    }

}
1.6.2 消费者
/**

 * 消费者Controller

 * @Title ConsumerQueueController

 * @author LinkedBear

 * @Time 2018年8月3日 下午4:52:56

*/

@Controller

public class ConsumerQueueController {

    @RequestMapping("/queueGetMessage1")

    public void queueGetMessage1() throws Exception {

        //1. 创建一个连接工厂,需要传入TCP协议的ActiveMQ服务地址

        ActiveMQConnectionFactory connectionFactory = new ActiveMQConnectionFactory("tcp://127.0.0.1:61616");

        //2. 创建连接

        Connection connection = connectionFactory.createConnection();

        //3. 开启连接

        connection.start(); //注意不是open。。。

        //4. 获取session

        //里面有两个参数,参数1为是否开启事务,参数2为消息确认模式

        Session session = connection.createSession(false, Session.AUTO_ACKNOWLEDGE);

        //5. 创建一对一的消息队列

        Queue queue = session.createQueue("test_queue");


        //------------前5步都是相同的,以下为不同----------------

        //6. 创建消费者

        MessageConsumer consumer = session.createConsumer(queue);

        //7. 使用监听器监听队列中的消息

        consumer.setMessageListener(new MessageListener() {

            @Override

            public void onMessage(Message message) {

                TextMessage textMessage = (TextMessage) message;

                try {

                    String text = textMessage.getText();

                    System.out.println("收到消息:" + text);

                } catch (JMSException e) {

                    e.printStackTrace();

                }

            }

        });


        //由于设置监听器后不能马上结束方法,要在这里加一个等待点

        System.in.read();


        //8. 关闭连接

        consumer.close();

        session.close();

        connection.close();

    }


    @RequestMapping("/queueGetMessage2")

    public void queueGetMessage2() throws Exception //(完全相同,不再重复)

}
1.6.3 运行结果
| 先执行两个消息的消费者 |
| 执行http://localhost:8080/queueProduceMessage:
但是只收到一条消息
|
1.7 一对多模式的Topic
1.7.1 生产者
/**

 * 生产者Controller

 * @Title ProducerTopicController

 * @author LinkedBear

 * @Time 2018年8月3日 下午4:52:49

*/

@Controller

public class ProducerTopicController {

    @RequestMapping("/topicProduceMessage")

    @ResponseBody

    public Map<String, Object> topicProduceMessage() throws Exception {

        //JMS的使用比较类似于JDBC与Hibernate

        //1. 创建一个连接工厂(类似于JDBC中的注册驱动),需要传入TCP协议的ActiveMQ服务地址

        ActiveMQConnectionFactory connectionFactory = new ActiveMQConnectionFactory("tcp://127.0.0.1:61616");

        //2. 创建连接(类似于DriverManager.getConnection)

        Connection connection = connectionFactory.createConnection();

        //3. 开启连接(ActiveMQ创建的连接是需要手动开启的)

        connection.start(); //注意不是open。。。

        //4. 获取session(类似于Hibernate中的session,都是用会话来进行操作)

        //里面有两个参数,参数1为是否开启事务,参数2为消息确认模式

        Session session = connection.createSession(false, Session.AUTO_ACKNOWLEDGE);

        //5. 创建一对多的消息广播

        Topic topic = session.createTopic("test_topic");

        //6. 创建一条消息

        String text = "test topic message" + Math.random();

        TextMessage message = session.createTextMessage(text);

        //7. 消息需要发送方,要创建消息发送方(生产者),并广播到某个消息广播端上

        MessageProducer producer = session.createProducer(topic);

        //8. 发送消息

        producer.send(message);

        //9. 关闭连接

        producer.close();

        session.close();

        connection.close();


        //------显示发送的消息到视图上------

        Map<String, Object> map = new HashMap<>();

        map.put("message", text);

        return map;

    }

}
1.7.2 消费者
/**

 * 消费者Controller

 * @Title ConsumerTopicController

 * @author LinkedBear

 * @Time 2018年8月3日 下午4:52:56

*/

@Controller

public class ConsumerTopicController {

    @RequestMapping("/topicGetMessage")

    public void topicGetMessage() throws Exception {

        //1. 创建一个连接工厂,需要传入TCP协议的ActiveMQ服务地址

        ActiveMQConnectionFactory connectionFactory = new ActiveMQConnectionFactory("tcp://127.0.0.1:61616");

        //2. 创建连接

        Connection connection = connectionFactory.createConnection();

        //3. 开启连接

        connection.start(); //注意不是open。。。

        //4. 获取session

        //里面有两个参数,参数1为是否开启事务,参数2为消息确认模式

        Session session = connection.createSession(false, Session.AUTO_ACKNOWLEDGE);

        //5. 创建一对多的消息广播

        Topic topic = session.createTopic("test_topic");


        //------------前5步都是相同的,以下为不同----------------

        //6. 创建消费者

        MessageConsumer consumer = session.createConsumer(topic);

        //7. 使用监听器监听队列中的消息

        consumer.setMessageListener(new MessageListener() {

            @Override

            public void onMessage(Message message) {

                TextMessage textMessage = (TextMessage) message;

                try {

                    String text = textMessage.getText();

                    System.out.println("收到消息:" + text);

                } catch (JMSException e) {

                    e.printStackTrace();

                }

            }

        });


        //由于设置监听器后不能马上结束方法,要在这里加一个等待点

        System.in.read();


        //8. 关闭连接

        consumer.close();

        session.close();

        connection.close();

    }


    @RequestMapping("/topicGetMessage2")

    public void topicGetMessage2() throws Exception //(完全相同,不再重复)

}
1.7.3 运行结果
| 先执行两个消息的消费者 |
| 执行http://localhost:8080/topicProduceMessage:
这次收到了两条消息
|
2. RocketMQ与ActiveMQ的对比
从这两种消息中间件的编写过程来看,两种产品的区别是比较大的,下面就这两种产品进行多方面对比。
参考文章:https://blog.csdn.net/jasonhui512/article/details/53231566
| 比较项 | RocketMQ | ActiveMQ |
| 语言支持 | 只支持Java | 多语言,Java为主 |
| 可用性 | 分布式 | 主从 |
| JMS规范 | 常用的使用方式没有遵循JMS | 严格遵循JMS规范 |
| 消息持久化 | 硬盘 | 内存,硬盘,数据库 |
| 部署方式 | 独立部署 | 独立部署、嵌入应用,可以与Spring很好的整合 |
| 社区活跃 | 活跃 | 不很活跃 |





 3880
3880

 被折叠的 条评论
为什么被折叠?


