


USING BRANCHES
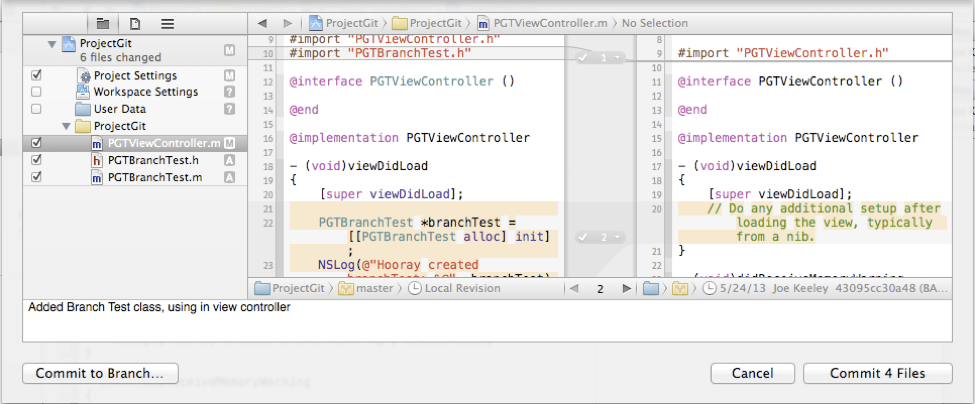
Branches can be a very effective tool to isolate new features or experiments in code. Xcode has pretty good support for branches, but it is not shown in the project view. The first method you can use to commit code to a branch is to select “Commit to Branch…” instead of “Commit X Files” from the commit view.
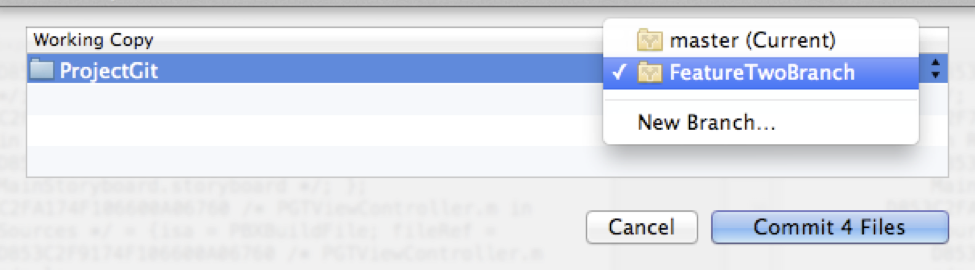
Xcode will ask you to select a branch to commit to, or will allow you to create a new branch.
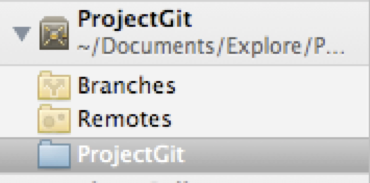
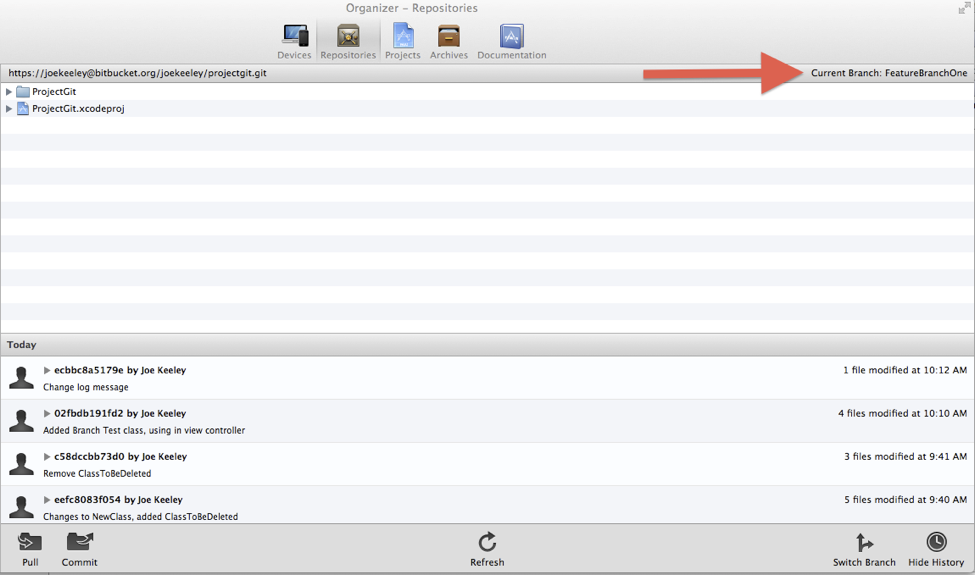
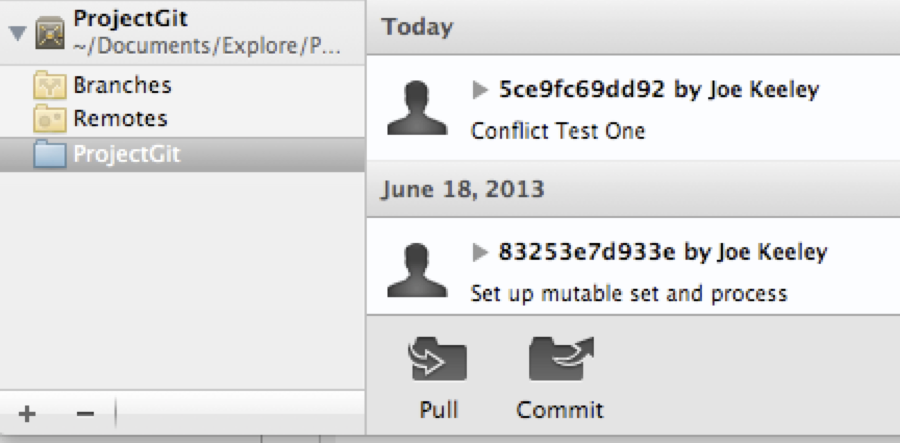
Once you have committed to a branch from master, you will be automatically switched to that branch. You can continue making changes and commits to the branch. So how do you know what branch you are on in Xcode, or get back to the master branch, or switch to another branch? Visit the Repositories in the Organizer, find the repository for your project, and select the working copy.
To see what branch you are currently on, look in the upper right hand corner of the Repository view.
To switch back to master or to another branch, click the “Switch Branch” button in the lower right hand corner. Select another branch, and your Xcode project workspace will be updated to reflect the current contents of the other branch.
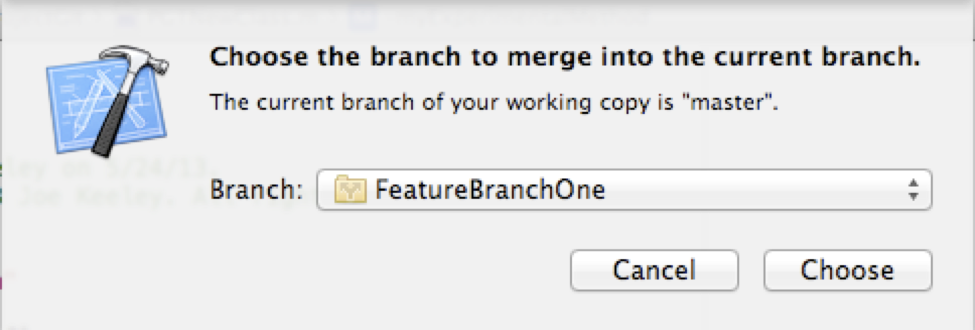
When you are ready to merge a branch, switch to the branch you want to merge into first from the Organizer. Then switch back to the project view, and select File | Source Control | Merger from the Xcode menu. Xcode will ask which branch you would like to merge into your current branch.
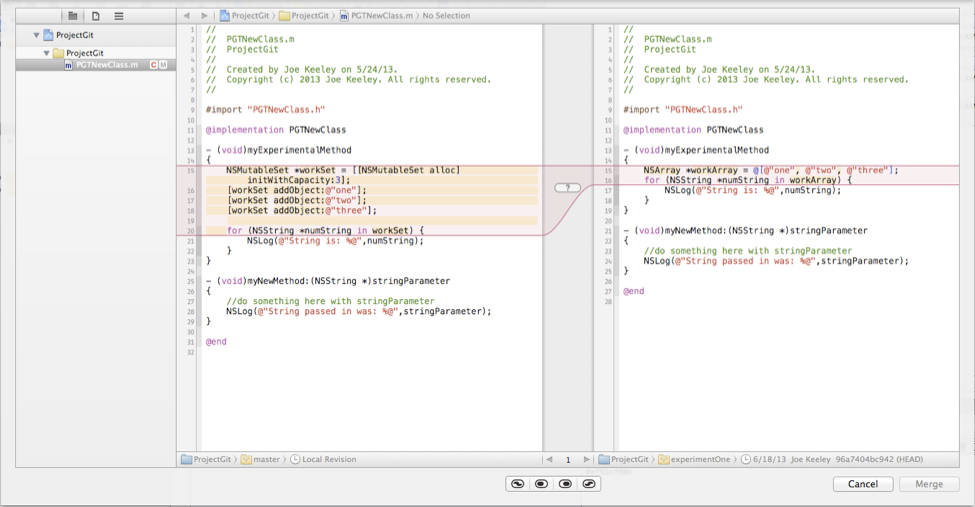
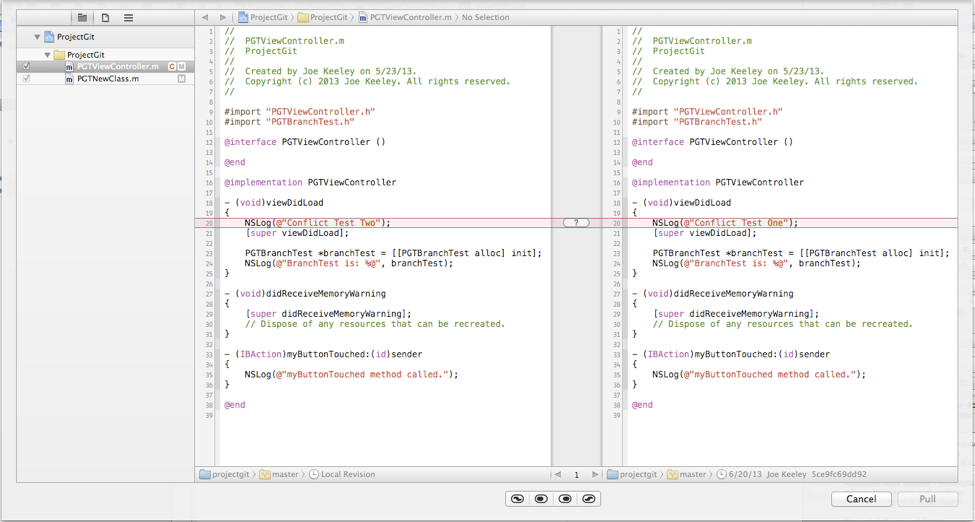
Xcode will then present a merge view, which will allow you to review each difference between the current branch and merge branch.
Use the sliders to selectively include or exclude changes from the branch in the merge.
If there is a conflict in the merge, the merge view will highlight the conflict in the merge view with red and a question mark in the center.
The merge view will offer four choices for resolving the conflict: keep both changes, placing the left before right, keep only the left changes, keep only the right changes, and keep both changes, placing the right before left. In addition the code can be directly edited in the merge view.
KEEPING IN SYNC WITH REMOTE REPOSITORIES
As you make changes in your local working copy you will want to keep them in sync with the remote repository. Xcode offers support for pulling from and pushing to a remote repository, and for tracking remote branches.
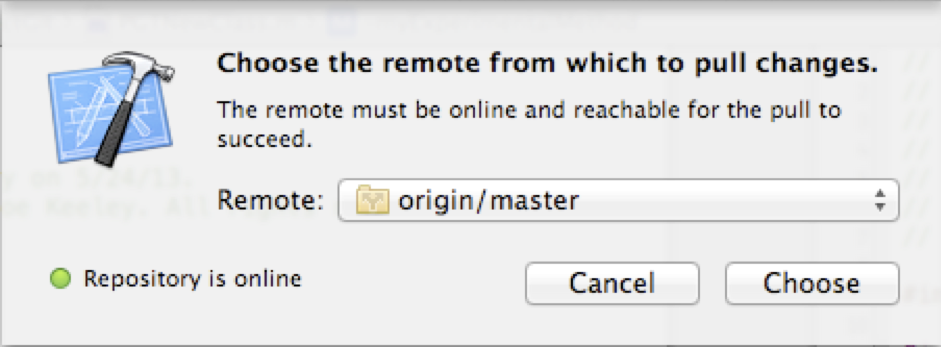
There are two ways to pull from a remote repository. The first is from the project window. Select File | Source Control | Pull from the Xcode menu when viewing a project window. If there are no uncommitted changes in the working copy, Xcode will present a dialog to select which remote and branch to pull from. (Note that a pull can be completed using command line Git when changes are present, but Xcode will not pull with uncommitted changes in the working directory.)
Alternatively, the Pull button from the Organizer Repositories view can be used when a working copy is selected.
If a conflict is detected on the pull, Xcode will present the merge viewer to resolve the conflict. Just like resolving a conflict between branches, the merge viewer can be used to select which change(s) should be kept and in what order they should be if both are desired. If you do not want to resolve the conflict, click the Cancel button in the merge view and the pull will not take place.
If the conflict is resolved, the working copy will be modified and will need to be committed and pushed.
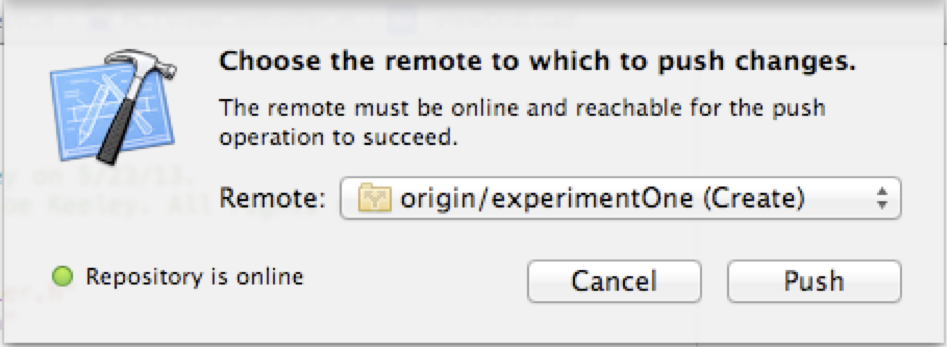
To push changes to the remote repository, select File | Source Control | Push from the Xcode menu when viewing a project window.
A branch can also be pushed to the remote repository. Xcode will detect if the branch does not yet exist in the remote, and will indicate if the branch will be created by a push.
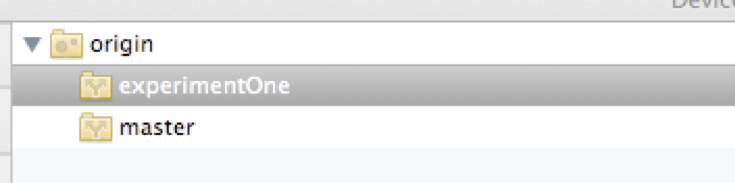
Once a branch has been created on the remote repository, other working copies can track that branch. To track a branch, visit Organizer, Repositories, and select Remotes for the project repository. Expand the remote name to see the available branches. (In my testing, I was not able to get Xcode to refresh remote branches without restarting Xcode).
Select a remote branch and click the Track Branch button at the bottom of the view. This will pull down the branch from the remote repository to the local repository, will allow you to switch to the branch in Xcode, and will allow pulls and pushes to take place from it.
SUMMARY
As we have seen here, Xcode has very usable support for common Git tasks, including setting up Git for a new project, cloning an existing project, handling modifications and commits, viewing history, using branches, and pushing and pulling from remote repositories. Xcode does not have direct support for stashing, tags, or more advanced topics like rebasing or submodules. However, all of the items that Xcode does not support can be performed using the command line tools or using a third party tool. In my day to day work with a distributed development team, I am frequently able to perform all of my Git tasks in Xcode, and only rarely need to resort to the command line. Take a second look at Xcode’s Git support if you have not done so before, and give feedback to the Xcode team so they can keep enhancing and improving Git support in Xcode.


 7673
7673

 被折叠的 条评论
为什么被折叠?
被折叠的 条评论
为什么被折叠?
 到【灌水乐园】发言


