


To create our bootable Windows PE CD, we will need our Windows Vista with Service Pack 1 product DVD media. This is important as there are several versions of Windows PE out there. Specifically, there’s Windows PE 1.0 which was based . the Windows XP kernel; then there’s Windows PE which is based . the Windows Vista RTM kernel; and finally there’s Windows PE 2.1 which is based . the Windows Vista SP1 kernel which is also the same as the Windows Server 2008 kernel. So if you want to deploy both Windows Vista SP1 and Windows Server 2008, you need to use the latest version of Windows PE which is version 2.1, and this means you need a technician computer that has the version 1.1 of the Windows Automated Installation Kit (Windows AIK) installed . it. And finally, you’ll need a CD burner and third-party CD-burning software so you can burn your customized Windows PE .iso file .to CD-R media. Got everything? Let’s go!<?xml:namespace prefix = o ns = "urn:schemas-microsoft-com:office:office" />
要创建一个可引导的Windows PE光盘,我们需要Vista SP1的DVD盘。由于PE有许多版本,每个版本对应不同的Windows 版本,PE 1.0对应XP核心,PE 2.0对应Vista核心,而PE2.1则对应Vista SP1和2008。如果你需要部署Vista SP1,你需要PE 2.1版,也就是WAIK版本要1.1以上。此外,如果需要你还得准备一台刻录机。
Creating a Customized Windows PE 2.1 Boot CD
创建一个定制的Windows PE 2.1引导CD
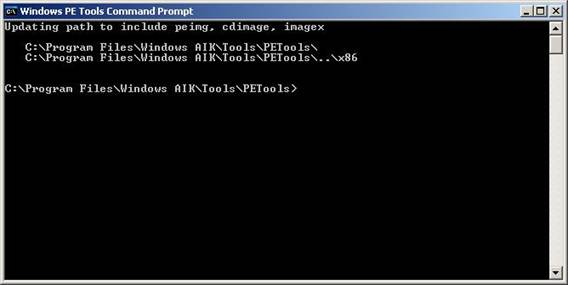
Log .to your technician computer (I’m using a computer running Windows Server 2003 that has the Windows AIK installed . it) and click Start, All Programs, Microsoft Windows AIK, Windows PE Tools Command Prompt. As shown in Figure 1, this opens a Windows PE Tools Command Prompt window with C:\Program Files\Windows AIK\Tools\PETools as your current directory.
在安装WAIK的计算机上,打开Windows PE Tools Command Prompt
<?xml:namespace prefix = v ns = "urn:schemas-microsoft-com:vml" />
Type copype.cmd x86 C:\WinPE_x86 to run the copype.cmd command . which automatically creates a Windows PE build environment containing all the files needed for the 32-bit version of Windows PE:
用copype.cmd命令能够自动拷贝PE需要的文件到一个指定的目录里,这里我们把PE的文件拷贝到c:\winpe_x86里:
C:\Program Files\Windows AIK\Tools\PETools>copype x86 C:\WinPE_x86
===================================================
Creating Windows PE customization working directory
C:\WinPE_x86
===================================================
1 file(s) copied.
1 file(s) copied.
C:\Program Files\Windows AIK\Tools\PETools\x86\boot\bcd
C:\Program Files\Windows AIK\Tools\PETools\x86\boot\boot.sdi
C:\Program Files\Windows AIK\Tools\PETools\x86\boot\bootfix.bin
C:\Program Files\Windows AIK\Tools\PETools\x86\boot\etfsboot.com
C:\Program Files\Windows AIK\Tools\PETools\x86\boot\fonts\chs_boot.ttf
C:\Program Files\Windows AIK\Tools\PETools\x86\boot\fonts\cht_boot.ttf
C:\Program Files\Windows AIK\Tools\PETools\x86\boot\fonts\jpn_boot.ttf
C:\Program Files\Windows AIK\Tools\PETools\x86\boot\fonts\kor_boot.ttf
C:\Program Files\Windows AIK\Tools\PETools\x86\boot\fonts\wgl4_boot.ttf
9 File(s) copied
C:\Program Files\Windows AIK\Tools\PETools\x86\EFI\microsoft\boot\bcd
C:\Program Files\Windows AIK\Tools\PETools\x86\EFI\microsoft\boot\fonts\chs_boot.ttf
C:\Program Files\Windows AIK\Tools\PETools\x86\EFI\microsoft\boot\fonts\cht_boot.ttf
C:\Program Files\Windows AIK\Tools\PETools\x86\EFI\microsoft\boot\fonts\jpn_boot.ttf
C:\Program Files\Windows AIK\Tools\PETools\x86\EFI\microsoft\boot\fonts\kor_boot.ttf
C:\Program Files\Windows AIK\Tools\PETools\x86\EFI\microsoft\boot\fonts\wgl4_boot.ttf
6 File(s) copied
1 file(s) copied.
As shown in Figure 2, the copype.cmd . creates a new directory named C:\WinPE_x86 and this directory contains the files you will use shortly to create your Windows PE CD. The . also changes your current directory to your new build directory C:\WinPE_x86.
如图所示,copype.cmd创建了一个目录并把文件拷贝到目录中。
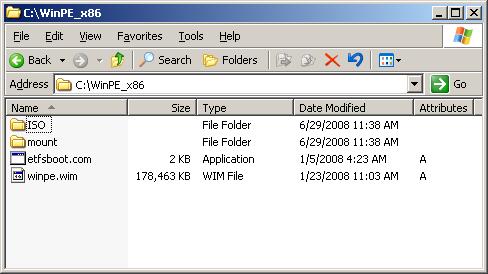
If you explore this build directory, you will find various files and folders within. Table 1 provides a summary of the files and folders in this directory:
下表提供了目录中的文件和文件夹的摘要
|
File or Folder
|
De.ion
|
|
\ISO
|
Contains the files needed to build an .iso file using Oscdimg.exe
|
|
\Mount
|
Use ImageX to mount the base Windows PE image to this folder when customizing your base Windows PE image
|
|
Etfsboot.com
|
A program that creates the CD boot sector
|
|
Winpe.wim
|
The base Windows PE image file
|
Table 1: Files and folders in the Windows PE build directory
Now let’s customize our Windows PE build environment by copying the ImageX.exe tool into it as we’ll need this tool later . for capturing an image of a master installation we wish to deploy. To copy ImageX.exe into our build environment, type copy “C:\Program Files\Windows AIK\Tools\x86\imagex.exe” C:\WinPE_x86\ISO\ at your Windows PE Tools Command Prompt:
C:\WinPE_x86>copy "C:\Program Files\Windows AIK\Tools\x86\imagex.exe" C:\WinPE_x86\ISO\
1 file(s) copied.
现在我们把imagex.exe从waik安装目中中拷贝到WinPE_x86下的ISO目录里,这就把它添加到pe中
Next we’ll use the Oscdimg.exe tool to create an .iso image from our Windows PE build files. To do this, change your current directory to C:\Program Files\Windows AI\Tools\x86 and then type oscdimg –n –bC:\WinPE_x86\etfsboot.com C:\WinPE_x86\ISO C:\WinPE_x86.iso at your command prompt like this:
下面我们用Oscdimg.exe创建一个iso文件。调用命令:
Oscdimg –n –bC:\WinPE_x86\etfsboot.com c:\winpe_x86\iso c:\Winpe_x86.iso
C:\WinPE_x86>cd "C:\Program Files\Windows AIK\Tools\x86"
C:\Program Files\Windows AIK\Tools\x86>oscdimg -n -bC:\WinPE_x86\etfsboot.com C:\WinPE_x86\ISO C:\WinPE_x86.iso
C:\Program Files\Windows AIK\Tools\x86>oscdimg -n -bC:\WinPE_x86\etfsboot.com C:\WinPE_x86\ISO C:\WinPE_x86.iso
OSCDIMG 2.54 CD-ROM and DVD-ROM Premastering Utility
Copyright (C) Microsoft, 1993-2007. All rights reserved.
Licensed .ly for producing Microsoft authorized content.
Scanning source tree
Scanning source tree complete (17 files in 8 directories)
Computing directory information complete
Image file is 210825216 bytes
Writing 17 files in 8 directories to C:\WinPE_x86.iso
100% complete
Final image file is 210825216 bytes
Done.
下面我们用
Oscdimg.exe
创建一个
iso
文件。调用命令:
Oscdimg –n –bC:\WinPE_x86\etfsboot.com c:\winpe_x86\iso c:\Winpe_x86.iso
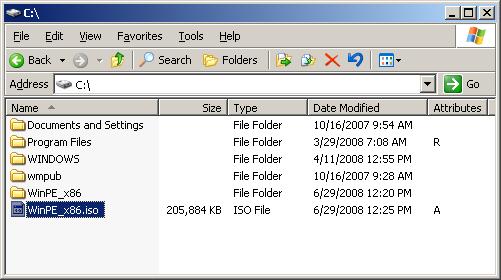
Once Oscdimg.exe has finished its work (it takes a few minutes) you’ll now have a bootable .iso file of your customized Windows PE build environment in the root of your system drive as shown in Figure 3:
The final step is to use your CD burner and third-party CD-burning software to burn this .iso file .to recordable CD-R media. The simplest arrangement is to have a CD burner and software installed . your technician computer, but if you don’t then you can copy your WinPE_x86.iso file (it’s about 206 MB) .to a network share or removable media and transfer it to the computer you have your burner ..
最后就是把做好的PE烧录到光盘里。
Testing Your Windows PE CD
测试你的PE cD
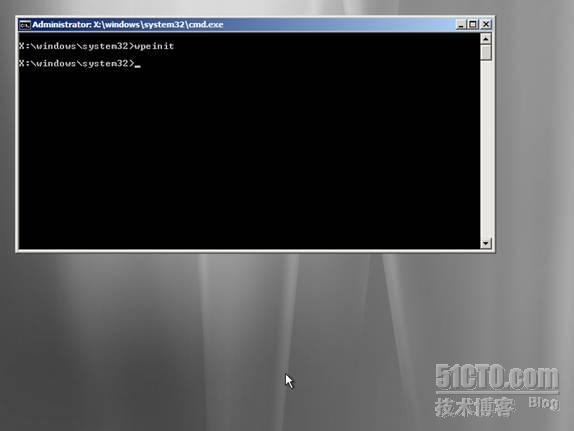
To test your Windows PE and see if it works, insert it into the CD-ROM drive of a computer and turn the computer .. If your computer doesn’t have any operating system installed . it, Windows PE will load and initialize and you’ll get the command prompt shown in Figure 4. If your computer already has an operating system installed, press a key when prompted to boot from CD in order to load and initialize Windows PE.
把光盘放入计算机,测试一下你的PE是否能正常工作。如果你的机器没有安装任何系统,PE会直接读取初始化,你会很快进入命令行。如果你的机器已经有系统了,在提示从CD引导时按一下键盘才会引导。
Examining Windows PE
查看Windows PE
Finally, let’s take a few minutes and examine the Windows PE environment we’ve just booted into. If you type hostname at the X:\> prompt, you should see that your Windows PE installation has a computer name that begins with “minint-“ followed by some randomly-generated characters. If you type ipconfig you should see either a valid IP address obtained from a DHCP server (if there is .e . your network) or an auto-generated IP address of the form 169.254.x.y. And if you type D:\imagex /? (or E:\imagex /? if your computer already has an operating system installed) you should see the syntax for using the ImageX command, which indicates that the ImageX tool is present . the Windows PE CD as intended. So far, so good.
最终,让我们花一些时间来看下我们刚刚进入的PE环境。如果你执行Hostname命令,你会发现你的计算机名是由”minint”开头的随即字符组成。你可以通过ipconfig来获得计算机的网络信息。当然,你还能使用刚刚添加的imageX来执行操作,到目前位置一切都很好。
What’s this X: drive stuff however? It’s called a RAM drive - that is, a disk volume contained in physical memory instead of . some physical device such as a hard drive. When you boot your computer using read-only bootable Windows PE media such as a CD, what happens is that Windows PE automatically creates a RAM drive and allocates 32 MB of space for this drive. This RAM disk is then used as a work area for any commands you run or any operations Windows PE needs to perform. Meanwhile, the Windows PE operating system itself is also loaded in its entirety into the physical memory of your computer, so this means .ce the X:\> prompt appears, you can eject your Windows PE CD and still be able to run commands like ipconfig and hostname and so . (though not imagex since that tool resides . the CD). This is handy in case you need to supply some additional drivers or .s or something, as you can supply these files . a different CD which you can insert after you’ve removed your Windows PE CD.
那么X:又是什么呢?它其实是一个由内存虚拟的磁盘,我们把一部分内寸映射为驱动器,作为硬盘来使用。当你使用Windows PE的光盘引导时,会自动使用32M内存来生成这个虚拟盘。这个虚拟盘用于加载你所需要的工具,同时PE也整个被加载到内存中。这么做是为了让你能继续使用光驱,而不用担心取出光盘后系统就无法使用。
转载于:https://blog.51cto.com/xmuxsp/128764


 114
114


 被折叠的 条评论
为什么被折叠?
被折叠的 条评论
为什么被折叠?
 到【灌水乐园】发言


