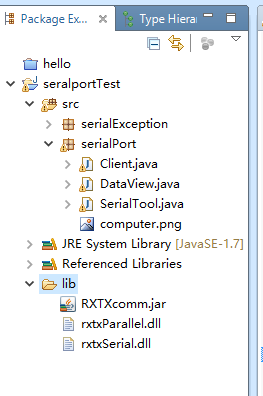
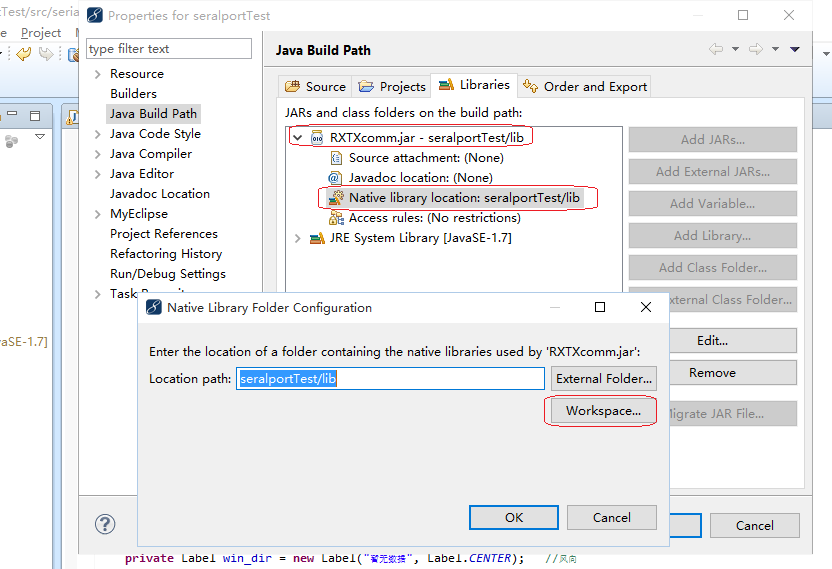
一.需要的工具和文件
1.myeclipse 版本:3.0以上即可。
2.rxtx-2.1-7-bins-r2 .zip 出处:http://users.frii.com/jarvi/rxtx/download.html。
3.JDK 版本:我用的是1.5版,但是我认为更低的版本也没有问题。
二.环境搭建的步骤
step1.在eclipse中新建一个工程(根据你自己的需要,Applet,tomcat,java工程等均可)。
step2.在工程下建一个lib文件夹。

step3.将rxtx-2.1-7-bins-r2 .zip解压缩,得到文件夹[rxtx-2.1-7-bins-r2]。
step4.将[rxtx-2.1-7-bins-r2]\RXTXcomm.jar这个文件copy到step2创建的lib中。
step5.将[rxtx-2.1-7-bins-r2]\Windows\i368-mingw32目录下的两个dll文件copy到step2创建的lib中。
step6.在工程上右键 -> Properties -> Java Builder Path -> Libraries -> Add JARs -> 选择step2中创建的lib目录下的RXTXcomm.jar -> OK。
step7.最关键的一步: 点RXTXcomm.jar前面的小加号(+) -> 选择Native library location -> 点右边一列按钮中的Edit… -> 选择step2中创建的lib目录 -> OK。

补充:如果你的代码需要调用本地dll,你可以通过同样的方式设置Native library location。
注意:
系统如果需要64位的插件,可以从下面的链接下载:
http://fizzed.com/oss/rxtx-for-java
三.环境配置完了以后,可以写一个程序来测试一下了。以下是我的test程序。
import gnu.io.CommPortIdentifier;
import java.util.Enumeration;
public class CommTest {
static CommPortIdentifier portId;
static Enumeration portList;
static int bauds[] = { 9600, 19200, 57600, 115200 };
public static void main(String[] args) {
portList = CommPortIdentifier.getPortIdentifiers();
while (portList.hasMoreElements()) {
portId = (CommPortIdentifier) portList.nextElement();
if (portId.getPortType() == CommPortIdentifier.PORT_SERIAL) {
System.out.println("Find CommPort: " + portId.getName());
}
}
}
}


 385
385

 被折叠的 条评论
为什么被折叠?


