


本实验部署DRBD + HEARDBEAT + NFS 环境,建立一个高可用(HA)的文件服务器集群。在方案中,通过DRBD保证了服务器数据的完整性和一致性。DRBD类似于一个网络RAID-1功能。当你将数据写入本地文件系统时,数据还将会被发送到网络中另一台主机上,以相同的形式记录在一个另文件系统中。主节点与备节点的数据可以保证实时相互同步。当本地主服务器出现故障时,备份服务器上还会保留有一份相同的数据,可以继续使用。在高可用(HA)中使用DRBD功能,可以代替使用一个共享盘阵。因为数据同时存在于本地主服务器和备份服务器上。切换时,远程主机只要使用它上面的那份备份数据,就可以继续提供主服务器上相同的服务,并且client用户对主服务器的故障无感知。
系统环境:
[root@localhost ~]# uname -r
2.6.18-164.el5
[root@localhost ~]# cat /etc/redhat-release
Red Hat Enterprise Linux Server release 5.4 (Tikanga)
拓扑图:

主机名配置
node1主机名配置
[root@localhost ~]# vim /etc/sysconfig/network
3 HOSTNAME=node1.a.com
[root@localhost ~]# hostname node1.a.com #配置后需注销才能生效
[root@localhost ~]# hostname #查看主机名
node1.a.com
配置本地DNS解析
[root@node1 ~]# vim /etc/hosts
5 192.168.2.10 node1.a.com
6 192.168.2.11 node2.a.com
查看分区
[root@node1 ~]# fdisk -l
255 heads, 63 sectors/track, 2610 cylinders
Units = cylinders of 16065 * 512 = 8225280 bytes
/dev/sda1 * 1 13 104391 83 Linux
/dev/sda2 14 1288 10241437+ 83 Linux
/dev/sda3 1289 1353 522112+ 82 Linux swap / Solaris
增加一个扩展分区
[root@node1 ~]# fdisk /dev/sda
There is nothing wrong with that, but this is larger than 1024,
and could in certain setups cause problems with:
1) software that runs at boot time (e.g., old versions of LILO)
2) booting and partitioning software from other OSs
(e.g., DOS FDISK, OS/2 FDISK)
255 heads, 63 sectors/track, 2610 cylinders
Units = cylinders of 16065 * 512 = 8225280 bytes
/dev/sda1 * 1 13 104391 83 Linux
/dev/sda2 14 1288 10241437+ 83 Linux
/dev/sda3 1289 1353 522112+ 82 Linux swap / Solaris
Command action
e extended
p primary partition (1-4)
e ##扩展分区
Selected partition 4
First cylinder (1354-2610, default 1354):
Using default value 1354
Last cylinder or +size or +sizeM or +sizeK (1354-2610, default 2610):
Using default value 2610
255 heads, 63 sectors/track, 2610 cylinders
Units = cylinders of 16065 * 512 = 8225280 bytes
/dev/sda1 * 1 13 104391 83 Linux
/dev/sda2 14 1288 10241437+ 83 Linux
/dev/sda3 1289 1353 522112+ 82 Linux swap / Solaris
/dev/sda4 1354 2610 10096852+ 5 Extended
Command (m for help): n
First cylinder (1354-2610, default 1354):
Using default value 1354
Last cylinder or +size or +sizeM or +sizeK (1354-2610, default 2610): +1g
Command (m for help): p
255 heads, 63 sectors/track, 2610 cylinders
Units = cylinders of 16065 * 512 = 8225280 bytes
/dev/sda1 * 1 13 104391 83 Linux
/dev/sda2 14 1288 10241437+ 83 Linux
/dev/sda3 1289 1353 522112+ 82 Linux swap / Solaris
/dev/sda4 1354 2610 10096852+ 5 Extended
/dev/sda5 1354 1476 987966 83 Linux
保存退出
Command (m for help): w
内核重新识别分区
[root@node1 ~]# partprobe /dev/sda
[root@node1 ~]# cat /proc/partitions
major minor #blocks name
8 1 104391 sda1
8 2 10241437 sda2
8 3 522112 sda3
8 4 0 sda4
8 5 987966 sda5
把下载好的rpm安装包传到node1上,如图:

[root@node1 ~]# rpm -ivh drbd83-8.3.8-1.el5.centos.i386.rpm
安装内核模块
[root@node1 ~]# rpm -ivh kmod-drbd83-8.3.8-1.el5.centos.i686.rpm
安装之后形成的文件
[root@node1 ~]# rpm -ql drbd83 |less
[root@node1 ~]# rpm -ql kmod-drbd83 |less
将这两个安装包copy到node2,并安装
[root@node1 ~]# scp *.rpm node2.a.com:/root/
The authenticity of host 'node2.a.com (192.168.2.11)' can't be established.
RSA key fingerprint is 3a:64:a0:6e:d0:21:14:6c:e9:1e:84:50:89:42:05:29.
Are you sure you want to continue connecting (yes/no)? yes
Warning: Permanently added 'node2.a.com,192.168.2.11' (RSA) to the list of known hosts.
root@node2.a.com's password:
drbd83-8.3.8-1.el5.centos.i386.rpm 100% 217KB 216.7KB/s 00:00
kmod-drbd83-8.3.8-1.el5.centos.i686.rpm 100% 123KB 123.0KB/s 00:00
[root@node1 ~]# vim /etc/drbd.conf
#
# please have a a look at the example configuration file in
# /usr/share/doc/drbd83/drbd.conf
#
进入底行模式下,进行读取那个文件
:read /usr/share/doc/drbd83-8.3.8/drbd.conf
可以看到
include "drbd.d/global_common.conf";通用配置的文件
include "drbd.d/*.res"; 定义资源的文件
下面编辑通用的配置文件
[root@node1 ~]# cd /etc/drbd.d/
为了安全,先把文件做个备份
[root@node1 drbd.d]# cp global_common.conf global_common.conf.bak
[root@node1 drbd.d]# vim global_common.conf
编辑好的文件如下:
usage-count yes;
# minor-count dialog-refresh disable-ip-verification
}
protocol C;
wfc-timeout 120;
degr-wfc-timeout 120;
}
disk {
on-io-error detach;
fencing resource-only;
net {
cram-hmac-alg "sha1";
shared-secret "mydrbdlab";
}
syncer {
rate 100M;
}
[root@node1 drbd.d]# vim web.res 名字自己随意起
resource web {
on node1.a.com {
device /dev/drbd0;
disk /dev/sda5;
address 192.168.2.10:7789;
meta-disk internal;
}
device /dev/drbd0;
disk /dev/sda5;
address 192.168.2.11:7789;
meta-disk internal;
}
}
[root@node1 drbd.d]# scp * node2.a.com:/etc/drbd.d/
root@node2.a.com's password:
global_common.conf 100% 506 0.5KB/s 00:00
global_common.conf.bak 100% 1418 1.4KB/s 00:00
web.res 100% 347 0.3KB/s 00:00
[root@node1 drbd.d]# scp /etc/drbd.conf node2.a.com:/etc/
root@node2.a.com's password:
drbd.conf 100% 100 0.1KB/s 00:00
[root@node1 drbd.d]#
主机名配置
[root@localhost ~]# vim /etc/sysconfig/network
3 HOSTNAME=node2.a.com
[root@localhost ~]# hostname node2.a.com
[root@localhost ~]# hostname #查看主机名
node1.a.com
配置本地DNS解析
[root@node2 ~]# vim /etc/hosts
5 192.168.2.10 node1.a.com
6 192.168.2.11 node2.a.com
增加分区
[root@node2 ~]# fdisk -l
255 heads, 63 sectors/track, 2610 cylinders
Units = cylinders of 16065 * 512 = 8225280 bytes
/dev/sda1 * 1 13 104391 83 Linux
/dev/sda2 14 1288 10241437+ 83 Linux
/dev/sda3 1289 1353 522112+ 82 Linux swap / Solaris
[root@node2 ~]# fdisk /dev/sda
There is nothing wrong with that, but this is larger than 1024,
and could in certain setups cause problems with:
1) software that runs at boot time (e.g., old versions of LILO)
2) booting and partitioning software from other OSs
(e.g., DOS FDISK, OS/2 FDISK)
Command action
e extended
p primary partition (1-4)
e
Selected partition 4
First cylinder (1354-2610, default 1354):
Using default value 1354
Last cylinder or +size or +sizeM or +sizeK (1354-2610, default 2610):
Using default value 2610
255 heads, 63 sectors/track, 2610 cylinders
Units = cylinders of 16065 * 512 = 8225280 bytes
/dev/sda1 * 1 13 104391 83 Linux
/dev/sda2 14 1288 10241437+ 83 Linux
/dev/sda3 1289 1353 522112+ 82 Linux swap / Solaris
/dev/sda4 1354 2610 10096852+ 5 Extended
First cylinder (1354-2610, default 1354):
Using default value 1354
Last cylinder or +size or +sizeM or +sizeK (1354-2610, default 2610): +1g
255 heads, 63 sectors/track, 2610 cylinders
Units = cylinders of 16065 * 512 = 8225280 bytes
/dev/sda1 * 1 13 104391 83 Linux
/dev/sda2 14 1288 10241437+ 83 Linux
/dev/sda3 1289 1353 522112+ 82 Linux swap / Solaris
/dev/sda4 1354 2610 10096852+ 5 Extended
/dev/sda5 1354 1476 987966 83 Linux
The partition table has been altered!
The kernel still uses the old table.
The new table will be used at the next reboot.
Syncing disks.
[root@node2 ~]# partprobe /dev/sda
[root@node2 ~]# cat /proc/partitions
major minor #blocks name
8 1 104391 sda1
8 2 10241437 sda2
8 3 522112 sda3
8 4 0 sda4
8 5 987966 sda5
安装drbd服务
[root@node2 ~]# rpm -ivh drbd83-8.3.8-1.el5.centos.i386.rpm
warning: drbd83-8.3.8-1.el5.centos.i386.rpm: Header V3 DSA signature: NOKEY, key ID e8562897
Preparing... ########################################### [100%]
1:drbd83 ########################################### [100%]
[root@node2 ~]# rpm -ivh kmod-drbd83-8.3.8-1.el5.centos.i686.rpm
warning: kmod-drbd83-8.3.8-1.el5.centos.i686.rpm: Header V3 DSA signature: NOKEY, key ID e8562897
Preparing... ########################################### [100%]
1:kmod-drbd83 ########################################### [100%]
[root@node1 drbd.d]# drbdadm create-md web
Writing meta data...
initializing activity log
NOT initialized bitmap
New drbd meta data block successfully created.
Writing meta data...
initializing activity log
NOT initialized bitmap
New drbd meta data block successfully created.
在双方的节点上启动服务
[root@node1 drbd.d]# service drbd start
Starting DRBD resources: [
web
Found valid meta data in the expected location, 1011671040 bytes into /dev/sda5.
d(web) s(web) n(web) ]..........
***************************************************************
DRBD's startup script waits for the peer node(s) to appear.
- In case this node was already a degraded cluster before the
reboot the timeout is 120 seconds. [degr-wfc-timeout]
- If the peer was available before the reboot the timeout will
expire after 120 seconds. [wfc-timeout]
(These values are for resource 'web'; 0 sec -> wait forever)
To abort waiting enter 'yes' [ 33]:
Starting DRBD resources: [
web
Found valid meta data in the expected location, 1011671040 bytes into /dev/sda5.
d(web) s(web) n(web) ].
如图:


下面把node1设为主设备,要在node1上执行下面命令
[root@node1 drbd.d]# drbdadm -- --overwrite-data-of-peer primary web
可以查看同步过程
[root@node1 drbd.d]# watch -n 1 'cat /proc/drbd'
查看状态,可以看到node1为Primary,node2为Secondary
[root@node1 drbd.d]# drbd-overview
0:web Connected Primary/Secondary UpToDate/UpToDate C r----
[root@node2 drbd.d]# drbd-overview
0:web Connected Secondary/Primary UpToDate/UpToDate C r----
先把分区进行格式化,如图:
[root@node1 drbd.d]# mkfs -t ext3 -L drbdweb /dev/drbd0

挂载分区
在node1上创建挂载点,并进行挂载
[root@node1 drbd.d]# mkdir /mnt/web
[root@node1 drbd.d]# mount /dev/drbd0 /mnt/web
[root@node1 drbd.d]# df -h
Filesystem Size Used Avail Use% Mounted on
/dev/sda2 9.5G 2.6G 6.5G 29% /
/dev/sda1 99M 12M 83M 12% /boot
tmpfs 125M 0 125M 0% /dev/shm
/dev/drbd0 950M 18M 885M 2% /mnt/web
在/mnt/web上写个文件,测试同步
[root@node1 drbd.d]# cd /mnt/web/
[root@node1 web]# echo "hello" >index.html
现在要把node1变成Secondary,node2变成Primary
先卸载,再降级
[root@node1 ~]# umount /mnt/web
[root@node1 ~]# drbdadm secondary web
在node2上执行
[root@node2 drbd.d]# drbdadm primary web
查看状态
[root@node1 ~]# drbd-overview
0:web Connected Secondary/Primary UpToDate/UpToDate C r----
[root@node1 ~]#
[root@node2 drbd.d]# drbd-overview
0:web Connected Primary/Secondary UpToDate/UpToDate C r----
还可以用下面命令查看主从状态
[root@node1 ~]# drbdadm role web
在node2上创建挂载点,并进行挂载
[root@node2 drbd.d]# mkdir /mnt/web
[root@node2 drbd.d]# mount /dev/drbd0 /mnt/web/
[root@node2 drbd.d]# df -h
Filesystem Size Used Avail Use% Mounted on
/dev/sda2 9.5G 2.6G 6.5G 29% /
/dev/sda1 99M 12M 83M 12% /boot
tmpfs 125M 0 125M 0% /dev/shm
/dev/drbd0 950M 18M 885M 2% /mnt/web
查看一下是否有刚才创建的文件,如图:

两台服务器的nfs配置必须要一致
node1的配置
修改相关文件
[root@node1 ~]# vim /etc/exports
/mnt/web *(rw,sync,insecure,no_root_squash,no_wdelay)
执行相关操作
[root@node1 ~]# service portmap start && chkconfig portmap on
Starting portmap: [ OK ]
[root@node1 ~]# service nfs start && chkconfig nfs on
Starting NFS services: [ OK ]
Starting NFS quotas: [ OK ]
Starting NFS daemon: [ OK ]
Starting NFS mountd: [ OK ]
修改nfs启动脚本
[root@node1 ~]# vim /etc/init.d/nfs
122 killproc nfsd -9
node2的配置
修改相关文件
[root@node2 ~]# vim /etc/exports
/mnt/web *(rw,sync,insecure,no_root_squash,no_wdelay)
执行相关操作
[root@node2 ~]# service portmap start && chkconfig portmap on
Starting portmap: [ OK ]
[root@node2 ~]# service nfs start && chkconfig nfs on
Starting NFS services: [ OK ]
Starting NFS quotas: [ OK ]
Starting NFS daemon: [ OK ]
Starting NFS mountd: [ OK ]
修改nfs启动脚本
[root@node2 ~]# vim /etc/init.d/nfs
122 killproc nfsd -9
Heartbeat的配置要求两个节点的配置一致
在node1上进行如下操作
安装相关软件包:(配置好yum环境)
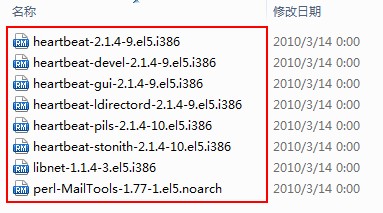
[root@node1 ~]# yum install -y heartbeat-2.1.4-9.el5.i386.rpm heartbeat-pils-2.1.4-10.el5.i386.rpm heartbeat-stonith-2.1.4-10.el5.i386.rpm libnet-1.1.4-3.el5.i386.rpm perl-MailTools-1.77-1.el5.noarch.rpm --nogpgcheck
复制模版文件
[root@node1 ~]# cd /usr/share/doc/heartbeat-2.1.4/
[root@node1 heartbeat-2.1.4]# cp ha.cf haresources authkeys /etc/ha.d/
修改相关的配置信息
[root@node1 heartbeat-2.1.4]# cd /etc/ha.d/
[root@node1 ha.d]# vim ha.cf
24 debugfile /var/log/ha-debug
29 logfile /var/log/ha-log
34 logfacility local0
48 keepalive 2
56 deadtime 10
76 udpport 694
122 bcast eth0
158 auto_failback off
215 node node1.a.com
216 node node2.a.com
修改资源文件
[root@node1 ha.d]# echo "node1.a.com IPaddr::192.168.2.9/24/eth0/192.168.2.255 drbddisk::web Filesystem::/dev/drbd0::/mnt/web::ext3 killnfsd" >>/etc/ha.d/haresources
修改key文件
[root@node1 ha.d]# vim authkeys
23 auth 1
24 1 crc
手工创建文件
[root@node1 ha.d]# cd resource.d/
[root@node1 resource.d]# echo "killall -9 nfsd ; /etc/init.d/nfs restart ; exit 0" >>/etc/ha.d/resource.d/killnfsd
修改配置文件的权限
[root@node1 ha.d]# chmod 600 authkeys
[root@node1 ha.d]# chmod 755 resource.d/killnfsd
启动服务
[root@node1 ha.d]# service heartbeat start
安装相关软件包:(配置好yum环境)
[root@node2 ~]# yum install -y heartbeat-2.1.4-9.el5.i386.rpm heartbeat-pils-2.1.4-10.el5.i386.rpm heartbeat-stonith-2.1.4-10.el5.i386.rpm libnet-1.1.4-3.el5.i386.rpm perl-MailTools-1.77-1.el5.noarch.rpm --nogpgcheck
复制模版文件
[root@node2 ~]# cd /usr/share/doc/heartbeat-2.1.4/
[root@node2 heartbeat-2.1.4]# cp ha.cf haresources authkeys /etc/ha.d/
修改相关的配置信息
[root@node2 heartbeat-2.1.4]# cd /etc/ha.d/
[root@node2 ha.d]# vim ha.cf
24 debugfile /var/log/ha-debug
29 logfile /var/log/ha-log
34 logfacility local0
48 keepalive 2
56 deadtime 10
76 udpport 694
122 bcast eth0
158 auto_failback off
215 node node1.a.com
216 node node2.a.com
修改资源文件
[root@node2 ha.d]# echo "node1.a.com IPaddr::192.168.2.9/24/eth0/192.168.2.255 drbddisk::web Filesystem::/dev/drbd0::/mnt/web::ext3 killnfsd" >>/etc/ha.d/haresources
修改key文件
[root@node2 ha.d]# vim authkeys
23 auth 1
24 1 crc
手工创建文件
[root@node2 ha.d]# cd resource.d/
[root@node2 resource.d]# echo "killall -9 nfsd ; /etc/init.d/nfs restart ; exit 0" >>/etc/ha.d/resource.d/killnfsd
修改配置文件的权限
[root@node2 ha.d]# chmod 600 authkeys
[root@node2 ha.d]# chmod 755 resource.d/killnfsd
启动服务
[root@node2 ha.d]# service heartbeat start


新建挂载点,并挂载
[root@localhost ~]# mkdir /mnt/nfs
[root@localhost ~]# mount 192.168.2.9:/mnt/web /mnt/nfs
[root@localhost ~]# df -h
Filesystem Size Used Avail Use% Mounted on
/dev/sda2 9.7G 2.6G 6.7G 28% /
/dev/sda1 99M 12M 83M 12% /boot
tmpfs 125M 0 125M 0% /dev/shm
/dev/hdc 2.8G 2.8G 0 100% /mnt/cdrom
192.168.2.9:/mnt/web 950M 18M 885M 2% /mnt/nfs

[root@node1 ~]# drbdadm role web
Primary/Secondary
[root@node2 ~]# drbdadm role web
Secondary/Primary
do
echo ------\>trying touch x:`date`
touch x
echo \<-----done touch x:`date`
echo
sleep 1
done
[root@localhost nfs]# bash /mnt/test.sh
------>trying touch x:Thu Oct 18 18:40:03 CST 2012
<-----done touch x:Thu Oct 18 18:40:03 CST 2012
<-----done touch x:Thu Oct 18 18:40:05 CST 2012
<-----done touch x:Thu Oct 18 18:40:07 CST 2012
<-----done touch x:Thu Oct 18 18:40:09 CST 2012
[root@node1 ~]# service heartbeat stop
Stopping High-Availability services:
[ OK ]
<-----done touch x:Thu Oct 18 18:40:15 CST 2012
touch: cannot touch `x': Stale NFS file handle
<-----done touch x:Thu Oct 18 18:40:17 CST 2012
<-----done touch x:Thu Oct 18 18:41:07 CST 2012
转载于:https://blog.51cto.com/lee0128/1030623


 8079
8079

 被折叠的 条评论
为什么被折叠?
被折叠的 条评论
为什么被折叠?
 到【灌水乐园】发言


