


绪论
Redis 是一个开源(BSD许可)的,内存中的数据结构存储系统,它可以用作数据库、缓存和消息中间件。 它支持多种类型的数据结构,如 字符串(strings), 散列(hashes), 列表(lists), 集合(sets), 有序集合(sorted sets) 与范围查询, bitmaps, hyperloglogs 和 地理空间(geospatial) 索引半径查询。 Redis 内置了 复制(replication),LUA脚本(Lua scripting), LRU驱动事件(LRU eviction),事务(transactions) 和不同级别的 磁盘持久化(persistence), 并通过 Redis哨兵(Sentinel)和自动 分区(Cluster)提供高可用性(high availability)。
以上内容摘自http://www.redis.cn/
一.安装redis
1.redis安装错误提示
[root@localhost yum.repos.d]# yum -y install redis
Loaded plugins: fastestmirror, langpacks
Loading mirror speeds from cached hostfile
 * base: mirrors.aliyun.com
 * extras: mirrors.zju.edu.cn
 * updates: mirrors.aliyun.com
No package redis available.
Error: Nothing to do
网上查了下是因为没有安装EPEL
2.安装RPEL
打开网站https://fedoraproject.org/wiki/EPEL/zh-cn
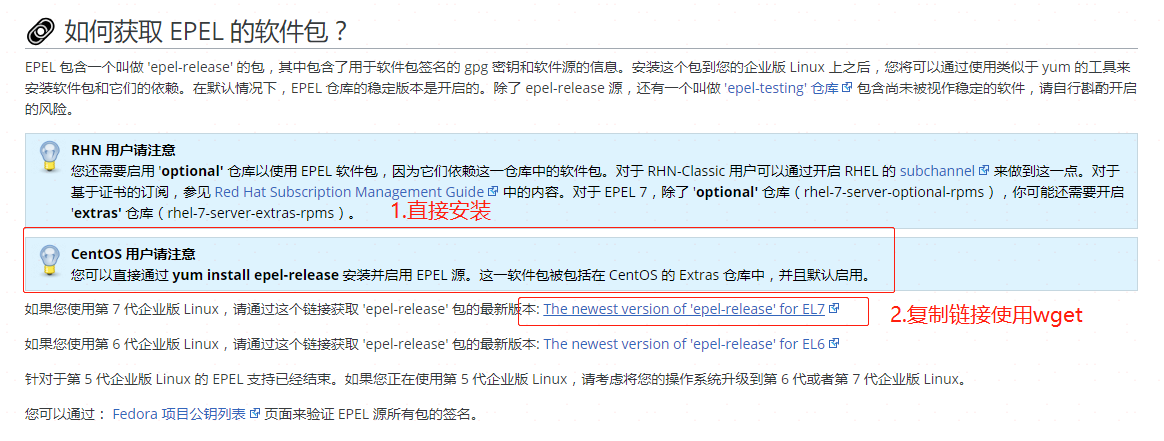
方式一:直接安装
yum install epel-release方式二:
wget https://dl.fedoraproject.org/pub/epel/epel-release-latest-7.noarch.rpm2018-08-09 21:58:22 (79.8 KB/s) - ‘epel-release-latest-7.noarch.rpm’ saved [15080/15080]
[root@localhost Downloads]# rpm -ivh epel-release-latest-7.noarch.rpm3.安装redis
1.yum直接安装
yum install redis但是发现版本是老版本,现在稳定版是4.0

所以还是选择去官网下载源码再编译安装,如果版本无所谓就上面安装就行
2.源码编译安装
1.去官网 https://redis.io/download
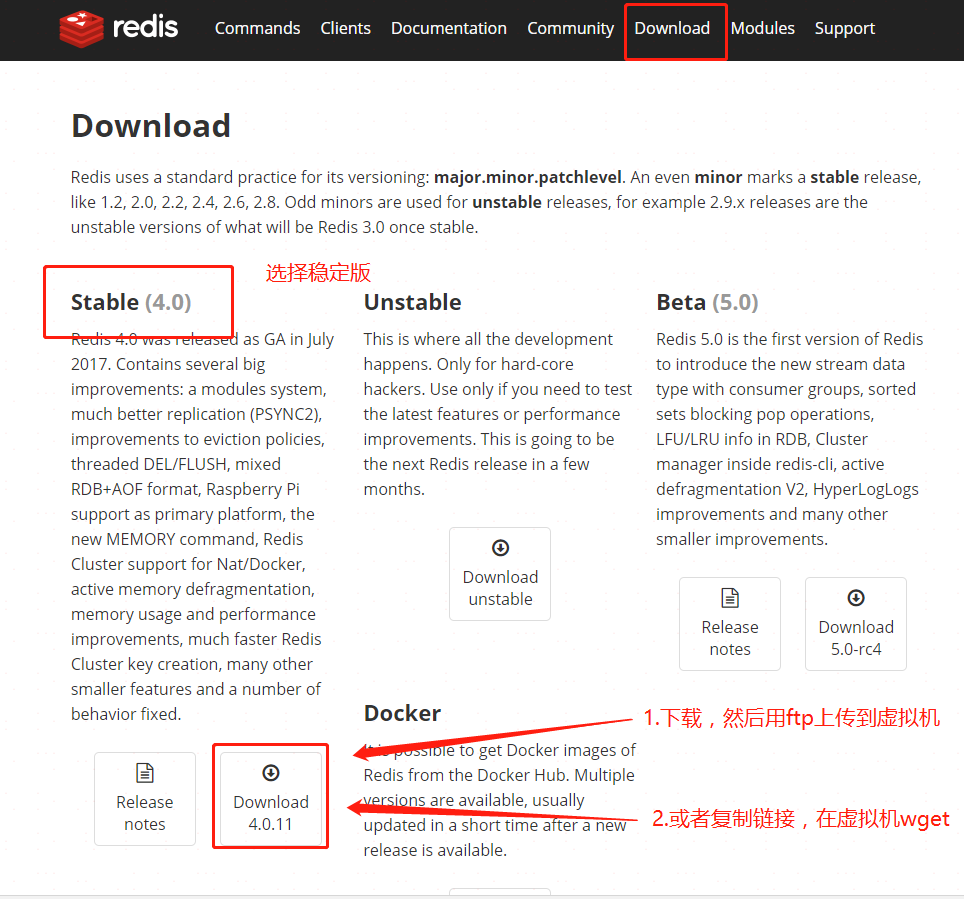
2.解压
tar -zxvf redis-4.0.11.tar.gzcd redis-4.0.11/3.编译安装
make PREFIX=/usr/local/redis/redis-4.0.11/ install安装完成后,在redis安装目录下会出现一个bin目录,bin目录下有几个可执行文件
redis-benchmark         ---性能测试工具
redis-check-aof         ---AOF文件修复工具
redis-check-rdb         ---RDB文件检测工具(快照持久化文件)
redis-cli               ---命令行客户端
redis-sentinel -> redis-server   ---redis哨兵
redis-server            ---redis服务器启动命令
4.到bin目录测试运行
cd /usr/local/redis/redis-4.0.11/bin

#运行
./redis-server
25548:C 10 Aug 00:30:44.451 # oO0OoO0OoO0Oo Redis is starting oO0OoO0OoO0Oo
25548:C 10 Aug 00:30:44.451 # Redis version=4.0.11, bits=64, commit=00000000, modified=0, pid=25548, just started
25548:C 10 Aug 00:30:44.451 # Warning: no config file specified, using the default config. In order to specify a config file use ./redis-server /path/to/redis.conf
25548:M 10 Aug 00:30:44.453 * Increased maximum number of open files to 10032 (it was originally set to 1024).
                _._
           _.-``__ ''-._
      _.-``    `.  `_.  ''-._           Redis 4.0.11 (00000000/0) 64 bit
  .-`` .-```.  ```\/    _.,_ ''-._
 (    '      ,       .-`  | `,    )     Running in standalone mode
 |`-._`-...-` __...-.``-._|'` _.-'|     Port: 6379
 |    `-._   `._    /     _.-'    |     PID: 25548
  `-._    `-._  `-./  _.-'    _.-'
 |`-._`-._    `-.__.-'    _.-'_.-'|
 |    `-._`-._        _.-'_.-'    |           http://redis.io
  `-._    `-._`-.__.-'_.-'    _.-'
 |`-._`-._    `-.__.-'    _.-'_.-'|
 |    `-._`-._        _.-'_.-'    |
  `-._    `-._`-.__.-'_.-'    _.-'
      `-._    `-.__.-'    _.-'
          `-._        _.-'
              `-.__.-'
出现以上信息说明成功安装,接下来修改配置。
二.配置redis
1.从解压源文件夹拷贝配置文件到安装目录
cp redis.conf /usr/local/redis
2.修改安装目录的配置文件
①将daemonize no 中的no 改为yes(意味着redis在后台启动)
②在bind 127.0.0.1 前面加#号 默认只有本机才能够连接
3.带配置启动
cd到bin目录
./redis-server ../redis.conf查看进程
ps -aux|grep redisroot 27415 0.0 0.1 145312 2192 ? Ssl 02:58 0:00 ./redis-server 192.168.0.104:6379
root 27428 0.0 0.0 112704 972 pts/2 S+ 02:58 0:00 grep --color=auto redis
杀死进程 或者./redis-cli
kill 27415
三.设置开机自启
1.在/etc目录下创建redis目录
2.拷贝前面的安装目录的配置文件到/etc/redis目录并改名为6379.conf
cp redis.conf /etc/redis/6379.conf3.将解压源代码目录utils中的redis的启动脚本复制一份放到/etc/init.d目录下并命名为redisd(通常都以d结尾表示是后台自启动服务)
cp redis_init_script /etc/init.d/redisd修改redisd,添加REDISPATH(安装目录),方便后面修改
REDISPATH=/usr/local/redis/redis-4.0.11
EXEC=${REDISPATH}/bin/redis-server
CLIEXEC=${REDISPATH}/bin/redis-cli
4.设置redis开机自启动
先切换到/etc/init.d目录下
然后执行自启命令
chkconfig redisd on现在可以直接已服务的形式启动和关闭redis了
启动:
service redisd start关闭:
service redisd stop5.创建redis-cli软连接
ln -s /usr/local/redis/redis-4.0.11/bin/redis-cli /usr/bin/redis-cli6.测试
在任意位置输入
redis-cli输入ping
127.0.0.1:6379> ping
PONG
127.0.0.1:6379>
ok,大功告成
四.redis集群(待续)
本人目前还在学习,单机版够用了,以后需要再安装配置吧


 259
259


 被折叠的 条评论
为什么被折叠?
被折叠的 条评论
为什么被折叠?
 到【灌水乐园】发言


