


一、简介
inflate方法是LayoutInflater类中的一个公有方法,该方法共有4个重载的方法原型,不过看源码便知,如下方法1,2,3最后兜兜转转都调用了方法4:
public View inflate(@LayoutRes int resource, @Nullable ViewGroup root)
public View inflate(XmlPullParser parser, @Nullable ViewGroup root)
public View inflate(@LayoutRes int resource, @Nullable ViewGroup root, boolean attachToRoot)
public View inflate(XmlPullParser parser, @Nullable ViewGroup root, boolean attachToRoot)
二、主要方法详解
参数:
parser:一个xml dom节点,在该节点中包含了待生成的视图层次结构的描述信息
root:一个可选的ViewGroup对象,当attachToRoot为true时,root为生成的view树的parent;当attachToRoot为false时,root仅为一个为生成的视图层次提供参数的对象
attachToRoot:是否将生成的视图层次附加到root参数上,false:root仅仅用于为xml文件的根节点创建正确的参数子类
返回:
返回生成的view树的根节点
参数组合:
(注:参数parser不能为空,若为空,会提示错误):
Case1:当参数root == null时,函数调用为inflate(parser, null)
Case2:当参数root != null && attachToRoot == false时,函数调用为inflate(parser, root, false)
Case3:当参数root != null && attachToRoot == true时,函数调用为inflate(parser, root, true)
那么如上几种参数场景都会有怎样的返回值呢?我们接下来一起看看inflate方法内部的实现吧!
inflate方法源码分析:
public View inflate(XmlPullParser parser, @Nullable ViewGroup root,
   boolean attachToRoot) {
  synchronized (mConstructorArgs) {
   final Context inflaterContext = mContext;
   /*
    * attrs:从给定的parser中获得的一个xml属性集,我们一般不会直接使用该类型参数
    * 所以不用管,只需知道attrs中包含了我们传进去的layout文件中所定义的参数属性值便好
    */
   final AttributeSet attrs = Xml.asAttributeSet(parser);
   Context lastContext = (Context) mConstructorArgs[0];
   mConstructorArgs[0] = inflaterContext;
   /* result为待返回的View对象 */
   View result = root;
   /*
    * 这里有一段代码,未贴出来 功能:寻找xml中的根节点,找到时将起始节点的名称赋值给name 若没有找到则抛异常
    */
   if (TAG_MERGE.equals(name)) {
    // 当根节点为merge节点时的处理
    if (root == null || !attachToRoot) {
     throw new InflateException(
       "<merge /> can be used only with a valid "
         + "ViewGroup root and attachToRoot=true");
    }
    /*
     * 这是一个递归方法,从xml根节点开始向下递归,先初始化该层view,
     * 然后初始化下一层view,当整个view树都生成完毕时调用onFinishInflate()
     * 接下来我们就可以通过findViewById方法找到具有id属性的view了
     */
    rInflate(parser, root, inflaterContext, attrs, false);
   } else {
    // 根节点不为merge节点时的处理
    /*
     * temp为xml文件中的根节点view
     * createViewFromTag方法用于根据给定的参数集attrs为名为name的tag标签生成一个view
     * 由上文可知,此处name为xml文件的根节点名称,所以temp为xml的root view
     */
    final View temp = createViewFromTag(root, name,
      inflaterContext, attrs);
    ViewGroup.LayoutParams params = null;
    if (root != null) {
     // 注意:root非空时的处理
     // Create layout params that match root, if supplied
     /*
      * generateLayoutParams是ViewGroup中提供的一个public方法
      * 用于根据给定的参数集attrs生成一个LayoutParams
      * LayoutParams一般由view使用,用于告诉view的parent,他们想要的layout样式
      * 一个基本的LayoutParams一般只用于描述他们的size信息,即view的width和height
      *
      * 注意:此处通过root来调用generateLayoutParams得到了一个LayoutParams对象
      */
     params = root.generateLayoutParams(attrs);
     if (!attachToRoot) {
      /*
       * 当root != null && attachToRoot == false时(即前面说的Case2)
       * 用params所指代的LayoutParams为tamp设置布局参数
       */
      temp.setLayoutParams(params);
     }
    }
    // Inflate all children under temp against its context.
    rInflateChildren(parser, temp, attrs, true);
    /*
     * 当root != null && attachToRoot == true时(即前面说的Case3)
     * 将根节点为temp的view树添加到root上,temp的布局参数为params
     */
    if (root != null && attachToRoot) {
     root.addView(temp, params);
    }
    /*
     * 当root == null || !attachToRoot时(前面说的Case1和Case2属于这种情况)
     * 将temp赋值给result
     */
    if (root == null || !attachToRoot) {
     result = temp;
    }
   }
   /*
    * 返回得到的view树的根节点
    *
    * 注意:不同情况下的result值是不一样的
    * 当root == null时,result为xml根节点view,但并未为该view设置LayoutParams值
    * 当root != null && attachToRoot == false时
    * result为xml根节点view,且根据xml文件中提供的参数值为该view设置了LayoutParams值
    * 当root != null && attachToRoot == true时,result为初始值root
    */
   return result;
  }
}
参数组合结果:
假设root 的xml文件为layout_root,待infalte的xml文件为layout_child:
layout_root:
<?xml version="1.0" encoding="utf-8"?>
<LinearLayout xmlns:android="http://schemas.android.com/apk/res/android"
    android:id="@+id/ll_root"
    android:orientation="vertical"
    android:layout_width="300dp"
    android:layout_height="400dp"
    android:background="@color/forestgreen"
>
<TextView
    android:id="@+id/tv_root_ll"
    android:layout_width="wrap_content"
    android:layout_height="wrap_content"
    android:text="LL and root"
    android:layout_gravity="center_horizontal"
    android:textSize="20sp"
    />
</LinearLayout>
layout_child:
<?xml version="1.0" encoding="utf-8"?>
<LinearLayout xmlns:android="http://schemas.android.com/apk/res/android"
    android:id="@+id/ll_child"
    android:orientation="vertical"
    android:layout_width="200dp"
    android:layout_height="200dp"
    android:background="@color/violet"
    >
    <TextView
        android:id="@+id/tv_child_ll"
        android:layout_width="wrap_content"
        android:layout_height="wrap_content"
        android:text="LL and child"
        android:layout_gravity="center_horizontal"
        android:textSize="20sp"
        />
</LinearLayout>
所以由4中的分析可知,3中3种case下面的返回值分别为:
Case1:返回id为ll_child的LinearLayout视图,该view的LayoutParams为null
Case2:返回id为ll_child的LinearLayout视图,该view的LayoutParams为xml文件layout_child中提供的参数,即width和height分别为200dp和200dp
Case3:返回id为ll_root的LinearLayout视图,该view的LayoutParams为xml文件layout_root中提供的参数,即width和height分别为300dp和400dp,同时由于这是一个vertical的LinearLayout,所以会将layout_child所代表的view树添加到id为tv_child_ll的TextView下面
实验:
下面根据上面三种case分别进行实验,查看显示效果
-
Case1:
 private void caseOne(){
    childView = inflater.inflate(R.layout.layout_child, null);
    setContentView(childView);
}
实验结果: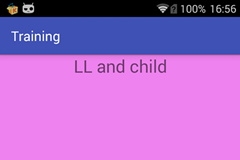
结果分析:由5可知,该情况下返回的是一个LayoutParams == null,根节点id为ll_child的LinearLayout,至于为什么显示效果如上图所示则涉及到setContentView方法以及Android的窗口加载原理,简而言之就是在Android加载布局文件时,如果view的LayoutParams为null,则默认将该view的width和height赋值为MATCH_PARENT,具体请参考我的下一篇博客《Android 从setContentView谈Activity界面的加载过程》
Case2:
private void caseTwo(){
    rootView = (ViewGroup)inflater.inflate(R.layout.layout_root,null);
    childView = inflater.inflate(R.layout.layout_child, rootView, false);
    setContentView(childView);
}
实验结果:
结果分析:由上图可以看出,该情况与5中的分析相符
Case3:
private void caseThree(){
    rootView = (ViewGroup)inflater.inflate(R.layout.layout_root,null);
    childView = inflater.inflate(R.layout.layout_child, rootView, true);
    setContentView(childView);
}
实验结果:
结果分析:由上图可以看出,该情况与5中的分析相符


 754
754

 被折叠的 条评论
为什么被折叠?
被折叠的 条评论
为什么被折叠?
 到【灌水乐园】发言


