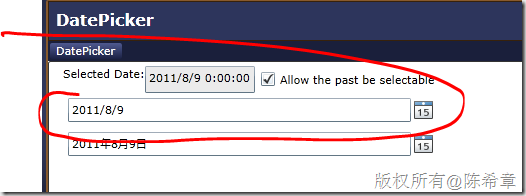
这是日前被问到的一个小问题,情况是这样的:Silverlight里面有一个DatePicker控件,它可以让用户选择或者输入日期。
这个控件其实很不错,既可选择,又可以输入。
但问题就出在这个输入上面,有时候我们可能不希望用户去输入,而是必须选择。但是,我们在DatePicker控件上面却找不到类似于IsReadOnly这样的属性。
其实,这样的需求,可以通过修改DatePicker控件的模板来实现。下面是一个示例
<UserControl
    xmlns:sdk="http://schemas.microsoft.com/winfx/2006/xaml/presentation/sdk"
    x:Class="SilverlightApplication3.MainPage"
    xmlns="http://schemas.microsoft.com/winfx/2006/xaml/presentation"
    xmlns:x="http://schemas.microsoft.com/winfx/2006/xaml"
    xmlns:d="http://schemas.microsoft.com/expression/blend/2008"
    xmlns:mc="http://schemas.openxmlformats.org/markup-compatibility/2006"
    mc:Ignorable="d"
    d:DesignHeight="300"
    d:DesignWidth="400"
    xmlns:dp="clr-namespace:System.Windows.Controls.Primitives;assembly=System.Windows.Controls">

    <Grid
        x:Name="LayoutRoot"
        Background="White">
        <sdk:DatePicker
            Height="40"
            Width="300">
            <sdk:DatePicker.Template>
                <ControlTemplate>
                    <Border
                        BorderBrush="Black"
                        BorderThickness="1">
                        <Grid
                            x:Name="Root">
                            <Grid.ColumnDefinitions>
                                <ColumnDefinition
                                    Width="*"></ColumnDefinition>
                                <ColumnDefinition
                                    Width="Auto"></ColumnDefinition>
                            </Grid.ColumnDefinitions>
                            <dp:DatePickerTextBox
                                IsReadOnly="True"
                                x:Name="TextBox"
                                Margin="5"></dp:DatePickerTextBox>
                            <Button
                                Content="Pick"
                                Grid.Column="1"
                                x:Name="Button"
                                Margin="5"></Button>
                            <Popup
                                x:Name="Popup"></Popup>
                        </Grid>
                    </Border>

                </ControlTemplate>
            </sdk:DatePicker.Template>
        </sdk:DatePicker>
    </Grid>
</UserControl>
怎么理解上面的定义呢?我们用了一个Grid,里面放了三个控件。这里的关键就在于,包括Grid在内的四个控件的名称都是有规定的,而且控件类型也是规定的。请参考下面的文档就知道了
http://msdn.microsoft.com/en-us/library/cc278067(v=vs.95).aspx
The following table lists the named parts for the DatePicker control.
| DatePicker Part | Type | Description |
|---|---|---|
| Root | The root of the control. | |
| Button | The button that opens and closes the Calendar. | |
| TextBox | The text box that allows you to input a date. | |
| Popup | The popup for the DatePicker control. |
也就是说,这个控件为了支持定制,内部是定制好了所谓的Part,这都是可以替换的,只要名称和类型一样即可。
从这个例子看来,其他很多控件也是可以定制的,只要参考下面的介绍即可
http://msdn.microsoft.com/en-us/library/cc278075(v=VS.95).aspx
所以说,理解模板,对于Silvelight或者WPF开发来说,是很重要的,给大家参考


 2174
2174


 被折叠的 条评论
为什么被折叠?


