Jenkins企业持续集成+网站自动部署(从0开始)
- 企业网站,WEB网站,后台基于Apache、Nginx对外发布的,发布目录;
- 发布目录存放的内容,网站的真实数据,更新网站就对网站发布目录数据进行替换;
- 开发提交一个需求,给一个网站zip|war包,如何去部署呢?
- 运维SA拿到zip、war包,找到要替换的服务器网站发布目录,对网站发布目录进行备份;
- 通过工具CRT、xshell、RZ上传war包,上传至服务器临时目录,解压压缩包;
- 通过cp命令、mv命令,将上传war数据cp到网站发布目录;
- 重启WEB服务器,让网站最新的代码生效,给测试人员、开发人员发一封邮件;
持续集成中的 pipeline 技术和 docker 都是当前正在发展的主流方向,当然把它们结合起来在 CI/CD 过程中发挥出更强大的威力也是大家共同的目标。本文将介绍如何在 Jenkins pipeline 中集成使用 docker,好在当前的 Jenkins 已经默认通过插件实现了与 docker 的集成,所以这将是一段轻松愉快的旅程。
添加 linux 主机作为 build agent
简单起见,我们使用一台安装了 docker 的 linux 虚机,并通过 ssh 将其启动为 Jenkins server 的 build agent。主要操作步骤如下:
在 linux 机器上创建一个用户 jenkins, 密码为 123456
创建目录 /var/jenkins, 并把 owner 修改为 jenkins
安装 jre,注意:必须安装
我们通过下面的脚本一次搞定这些操作:
#!/bin/bash
# run this script like this: sudo./addsudouser.sh

useradd -m jenkins -d/home/jenkins -s /bin/bash;
echo 'jenkins:xA123456' | sudochpasswd
usermod -a -G sudo jenkins;
usermod -a -G docker jenkins;
echo 'jenkins   ALL=(ALL:ALL) NOPASSWD: ALL' >>/etc/sudoers;
sudo mkdir /var/jenkins
sudo chown jenkins/var/jenkins
sudo apt-get -y installdefault-jre
在 linux 虚机上执行上面的脚本,然后在 Jenkins 中添加 node(build agent):
其中的 “Remote rootdirectory” 就是刚才创建的 /var/jenkins 目录。”Launch method” 选择 “Launchslave agents via SSH”。Host 为 linux 虚机的 IP,Credentials则为刚才创建的 jenkins 用户。
运行简单的 demo
先来运行一个简单的 demo。创建一个 pipeline 类型的 job,并输入下面的 pipeline script:
pipeline {
    agent {
        docker { image 'node:7-alpine' }
    }
    stages {
        stage('Test') {
            steps {
                sh 'node --version'
            }
        }
    }
}
运行该任务,执行结果如下:
[Pipeline] {
[Pipeline] stage
[Pipeline] { (Test)
[Pipeline] sh
[myjob] Running shell script
+ node --version
v7.10.1[Pipeline] }
[Pipeline] // stage[Pipeline] }
其中的命令 node —version 就是在容器中执行的。
通过 label 指定运行 stage 的 agent
Jenkins 默认会把任务分配给任何可用的 agent,如果我们要指定任务执行的 agent,可以在 docker 的配置中指定 label,这样该任务只会被分配到具有某个 label 的 agent 上运行:
agent {
    docker {
        image 'node:7-alpine'
        label 'xxxxxx'
    }
}
在 Folder 级别指定 label 和 registry 信息
我们还可以在 folder 级别指定 label,这样的设置会应用在 folder 内所有没有设置 label 的任务上:
除了 label,还可以设置 docker registry URL 及其身份认证的凭据。
运行多个不同的容器
我们还可以在不同的 stage 中运行不同的容器,其实就是每个 stage 用自己的容器镜像创建容器并执行任务,stage 之间没啥关系:
pipeline {
    agent none
    stages {
        stage('Back-end') {
            agent {
                docker { image'appropriate/curl' }
            }
            steps {
                sh 'curl www.google.com'
            }
        }
        stage('Front-end') {
            agent {
                docker { image 'node:7-alpine'}
            }
            steps {
                sh 'node --version'
            }
        }
    }
}
使用 Dockerfile
通过指定 Dockerfile 文件,在 build agent 上直接构建容器镜像,然后生成容器并执行命令。下面的 demo 中我们通过 Dockerfile 创建一个包含 curl 工具的容器镜像,然后通过该镜像启动容器并执行 HTTP 请求。该 demo 一共包含三个文件:Dockerfile 、entrypoint.sh 和 Jenkinsfile,大家可以直接从这里下载它们。
先看一下 Dockerfile 文件的内容:
FROM alpine:latest
RUN apk add —update curl&& rm -rf /var/cache/apk/*
COPY entrypoint.sh /
ENTRYPOINT[“/entrypoint.sh”]
CMD [“curl”]
其中的 entrypoint.sh 内容如下:
#!/bin/sh
set -e
# Prepend "curl" ifthe first argument is not an executableif ! type -- "$1"&> /dev/null; then
    set -- curl "$@"fi
exec "$@"
Jenkinsfile 的内容如下:
pipeline {
    agent {
        dockerfile {
            filename 'Dockerfile'
            dir 'curl'
            label 'docker'
        }
    }
    stages {
        stage('Test') {
            steps {
                sh 'curl http://www.cnblogs.com/sparkdev/p/8795141.html'
            }
        }
    }
}
注意,该文件中我们设置了 dir 为 curl 目录,这是因为此项目的 Dockerfile 文件不是在代码库的根目录下,所以需要指定其相对目录的路径。
然后在 Jenkins 中创建 pipeline 类型的 job,并把 pipeline 的Definition 设置为 “Pipeline script from SCM” 。接下来设置好代码仓库的路径就可以了。运行该任务,从日志上可以看到取完代码后先通过 Dockerifle 文件构建了容器镜像:并在容器中运行了 curl http://www.cnblogs.com/sparkdev/p/8795141.html 命令。
把生成的容器镜像推送到仓库中
上面的例子中我们通过 Dockerfile 生成了容器镜像,并且完成了相关的测试(通过 curl 请求了测试网页)。接下来就是把生成的容器镜像推送到镜像仓库中。下面将演示如何在 pipeline 中把构建的镜像推送的镜像仓库。首先在 Folder 的配置界面中添加访问 dockerhub.com 凭据如下:
如果是访问 dockerhub 就不需要填写 “Docker registry URL”。然后添加下面的Pipeline script:
node {
    checkout([$class: 'GitSCM', branches:[[name: '*/master']], userRemoteConfigs: [[url:'https://github.com/sparkdevo/ctools.git']]])
    docker.withRegistry('','9e70c1eb-814c-4cf2-97e9-5bfc20461231') {
        def customImage =docker.build("ljfpower/curl:${env.BUILD_ID}","./curl")
        customImage.inside {
            sh 'curlhttp://www.cnblogs.com/sparkdev/p/8795141.html'
        }
        customImage.push()
        customImage.push('latest')
    }
}
注意,9e70c1eb-814c-4cf2-97e9-5bfc20461231 刚才创建的凭据的 ID,可以从 foder 的 Credentials 界面中获得。运行这个任务,执行成功后去 dockerhub.com 上看一下,是不是已经把新构建的镜像推送上去了:

总结
从本文的几个简单 demo 可以看出,jenkins pipeline 和 docker 集成的已经很好了。当然你还可以实现更多更复杂的用例,赶紧动手吧!
链接:
jenkins:https://www.iyunv.com/thread-536240-1-1.html
jenkins pipeline 语法详解:https://www.cnblogs.com/fengjian2016/p/8227532.html
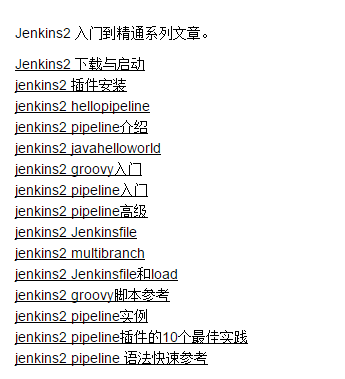
Jenkins pipeline 入门到精通系列文章 : https://www.cnblogs.com/itech/p/5875428.html

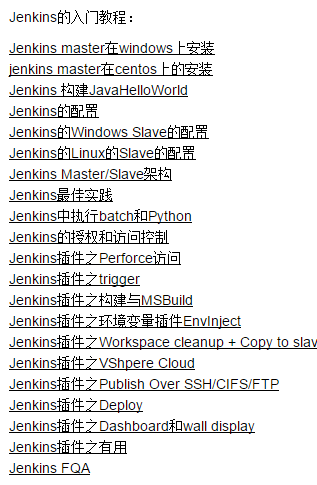
Jenkins入门总结 : https://www.cnblogs.com/itech/archive/2011/11/23/2260009.html

设置jenkins代理 : https://www.cnblogs.com/itech/p/5939741.html
jenkins和docker 使用docker作为slave : https://www.cnblogs.com/itech/p/5692218.html
jenkins和docker 在docker里运行jenkins : https://www.cnblogs.com/itech/p/5666615.html
jenkins插件 build timeout和build timestamp : https://www.cnblogs.com/itech/p/5694728.html
jenkins 插件开发资料 : https://www.cnblogs.com/itech/p/5715252.html
jenkins2 pipeline 语法快速参考 : https://www.cnblogs.com/itech/p/5679002.html
jenkins2 pipeline插件的10个最佳实践 : https://www.cnblogs.com/itech/p/5678643.html
jenkins2 pipeline实例 : https://www.cnblogs.com/itech/p/5663676.html
jenkins2 groovy脚本参考 : https://www.cnblogs.com/itech/p/5660717.html
jenkins2 Jenkinsfile和load : https://www.cnblogs.com/itech/p/5660628.html
jenkins2 multibranch : https://www.cnblogs.com/itech/p/5660244.html
jenkins2 Jenkinsfile : https://www.cnblogs.com/itech/p/5659997.html
jenkins2 pipeline高级 : https://www.cnblogs.com/itech/p/5646219.html
jenkins2 pipeline入门 : https://www.cnblogs.com/itech/p/5633948.html
jenkins插件 查看job修改历史 : https://www.cnblogs.com/itech/p/5629998.html
jenkins插件 查看job下次运行时间 : https://www.cnblogs.com/itech/p/5629860.html
jenkins2 groovy语法 : https://www.cnblogs.com/itech/p/5627968.html
jenkins2 javahelloworld : https://www.cnblogs.com/itech/p/5627640.html
jenkins2 pipeline介绍 : https://www.cnblogs.com/itech/p/5621257.html
jenkins2 hello pipeline : https://www.cnblogs.com/itech/p/5611888.html
jenkins2 插件安装 :
Jenkins2 - 下载与启动 : https://www.cnblogs.com/itech/p/5603952.html
配置sonar和jenkins进行代码审查 : https://www.cnblogs.com/itech/p/5192557.html
Jenkins配置基于角色的项目权限管理 : https://www.cnblogs.com/itech/p/5192545.html
Jenkins和maven自动化构建java程序 : https://www.cnblogs.com/itech/p/5192540.html
Jenkins修改workspace和build目录 : https://www.cnblogs.com/itech/p/5192162.html
centos中安装tomcat6 : https://www.cnblogs.com/itech/p/3506011.html
centos安装tomcat7 : https://www.cnblogs.com/itech/p/3515846.html
centos中安装tomcat+jenkins : https://www.cnblogs.com/itech/p/3506079.html
在centos中安装jenkins master为service : https://www.cnblogs.com/itech/p/3504906.html
在centos中安装jenkins master测试环境 : https://www.cnblogs.com/itech/p/3504722.html
Jenkins入门总结 : https://www.cnblogs.com/itech/archive/2011/11/23/2260009.html
Jenkins插件之有用 : https://www.cnblogs.com/itech/archive/2011/11/23/2259994.html
Jenkins插件之Dashboard和wall display : https://www.cnblogs.com/itech/archive/2011/11/22/2259044.html
Jenkins插件之Deploy : https://www.cnblogs.com/itech/archive/2011/11/21/2257487.html
Jenkins插件之Publish Over SSH/CIFS/FTP : https://www.cnblogs.com/itech/archive/2011/11/21/2257377.html
Jenkins插件之VShpere Cloud : https://www.cnblogs.com/itech/archive/2011/11/21/2257038.html
Jenkins插件之Workspace cleanup + Copy to slave : https://www.cnblogs.com/itech/archive/2011/11/21/2256937.html
Jenkins插件之环境变量插件EnvInject : https://www.cnblogs.com/itech/archive/2011/11/18/2254188.html
Jenkins插件之构建与MSBuild : https://www.cnblogs.com/itech/archive/2011/11/17/2252916.html
Jenkins插件之trigger : https://www.cnblogs.com/itech/archive/2011/11/17/2252647.html
Jenkins插件之Perforce访问 : https://www.cnblogs.com/itech/archive/2011/11/15/2249723.html
Jenkins的授权和访问控制 : https://www.cnblogs.com/itech/archive/2011/11/15/2249457.html
Jenkins中执行batch和Python : https://www.cnblogs.com/itech/archive/2011/11/14/2248507.html
Jenkins最佳实践 : https://www.cnblogs.com/itech/archive/2011/11/14/2248460.html
Jenkins Master/Slave架构 : https://www.cnblogs.com/itech/archive/2011/11/11/2245849.html
Jenkins的Linux的Slave的配置 : https://www.cnblogs.com/itech/archive/2011/11/10/2244690.html
Jenkins的Windows Slave的配置 : https://www.cnblogs.com/itech/archive/2011/11/09/2243025.html
Jenkins master在windows上安装 : https://www.cnblogs.com/itech/archive/2011/11/02/2233343.html
Jenkins的配置 : https://www.cnblogs.com/itech/archive/2011/11/04/2236230.html
Jenkins 构建JavaHelloWorld : https://www.cnblogs.com/itech/archive/2011/11/03/2234662.html
在容器中运行 Jenkins pipeline 任务 : https://www.jianshu.com/p/b9a421b21253
- CentOS 7 部署Gitlab+Jenkins持续集成(CI)环境(1000) : https://www.cnblogs.com/bigdevilking/p/9543092.html
- CentOS 7 Gitlab+Jenkins持续集成+自动化部署(712) : https://www.cnblogs.com/bigdevilking/p/9544476.html


 373
373


 被折叠的 条评论
为什么被折叠?


