


自动化运维之cobbler安装centos7.3
一、cobbler简介和服务
Cobbler是一款自动化操作系统安装的实现,与PXE安装系统的区别就是可以同时部署多个版本的系统,而PXE只能选择一种系统。而如今的架构动辄就是上千台的服务器。而存在一些操作系统不统一的现象,例如最初的架构采用的是CentOS5系列的系统,而新出现了一些技术后,需要新的操作系统的支持,一方面是需要批量部署装机,而另一方面还需要考虑到如果老版本的服务器出现故障后还需要重新去部署。并且提供Web配置页面,可以只需要一些点击就可以完成一些操作。
二、cobbler实战
安装cobbler 等依赖服务
# yum install cobbler cobbler-web dhcp tftp-server pykickstart httpd -y
启动httpd 和cobbler服务
# /etc/init.d/httpd restart
# /etc/init.d/cobblerd start
使用 cobbler check (5、6、8三步并不需要执行)检查,检查后使用cobbler sync同步操作
# cobbler check
如果执行# cobbler check 报错,执行 # /etc/init.d/cobblerd restart 重启即可
Traceback (most recent call last):
File "/usr/bin/cobbler", line 36, in <module>
sys.exit(app.main())
File "/usr/lib/python2.6/site-packages/cobbler/cli.py", line 657, in main
rc = cli.run(sys.argv)
File "/usr/lib/python2.6/site-packages/cobbler/cli.py", line 270, in run
self.token = self.remote.login("", self.shared_secret)
File "/usr/lib64/python2.6/xmlrpclib.py", line 1199, in __call__
return self.__send(self.__name, args)
File "/usr/lib64/python2.6/xmlrpclib.py", line 1489, in __request
verbose=self.__verbose
File "/usr/lib64/python2.6/xmlrpclib.py", line 1253, in request
return self._parse_response(h.getfile(), sock)
File "/usr/lib64/python2.6/xmlrpclib.py", line 1392, in _parse_response
return u.close()
File "/usr/lib64/python2.6/xmlrpclib.py", line 838, in close
raise Fault(**self._stack[0])
xmlrpclib.Fault: <Fault 1: "<class 'cobbler.cexceptions.CX'>:'login failed'">
[root@mini1 html]# /etc/init.d/cobblerd restart

The following are potential configuration items that you may want to fix:

1 : The 'server' field in /etc/cobbler/settings must be set to something other than localhost, or kickstarting features will not work. This should be a resolvable hostname or IP for the boot server as reachable by all machines that will use it.
2 : For PXE to be functional, the 'next_server' field in /etc/cobbler/settings must be set to something other than 127.0.0.1, and should match the IP of the boot server on the PXE network.
3 : some network boot-loaders are missing from /var/lib/cobbler/loaders, you may run 'cobbler get-loaders' to download them, or, if you only want to handle x86/x86_64 netbooting, you may ensure that you have installed a *recent* version of the syslinux package installed and can ignore this message entirely. Files in this directory, should you want to support all architectures, should include pxelinux.0, menu.c32, elilo.efi, and yaboot. The 'cobbler get-loaders' command is the easiest way to resolve these requirements.
4 : file /etc/xinetd.d/rsync does not exist
5 : since iptables may be running, ensure 69, 80/443, and 25151 are unblocked
6 : debmirror package is not installed, it will be required to manage debian deployments and repositories
7 : The default password used by the sample templates for newly installed machines (default_password_crypted in /etc/cobbler/settings) is still set to 'cobbler' and should be changed, try: "openssl passwd -1 -salt 'random-phrase-here' 'your-password-here'" to generate new one
8 : fencing tools were not found, and are required to use the (optional) power management features. install cman or fence-agents to use them

Restart cobblerd and then run 'cobbler sync' to apply changes.
上述结果直接告诉了安装cobbler需要哪些步骤,一步步按照提示进行操作即可
部署第一步+第二步+第七步
vim /etc/cobbler/settings
server: 192.168.3.12
next_server: 192.168.3.12 #指定tftp所在的服务器
manage_dhcp: 1 #使用cobbler管理dhcp
使用openssl对密码加密(前面的cadmin是加盐随机值,后面的admin是密码)
# openssl passwd -1 -salt 'admin' 'admin'
$1$admin$1kgWpnZpUx.vTroWPXPIB0
修改password
vim /etc/cobbler/settings
default_password_crypted: "$1$admin$1kgWpnZpUx.vTroWPXPIB0"
保存文件再次使用# cobbler check重新检查
部署第三步:
# cobbler get-loaders
部署第四步:把disable选项改为no,并重新启动xinetd
# vim /etc/xinetd.d/rsync
service rsync
{
disable = no # 将disable 改为 no
flags = IPv6
socket_type = stream
wait = no
user = root
server = /usr/bin/rsync
server_args = --daemon
log_on_failure += USERID
}
# /etc/init.d/xinetd restart
重启cobbler,并重新cobbler check
修改/etc/cobbler/dhcp.template 文件,该文件通过cobbler sync可以管理/etc/dhcp/dhcpd.conf文件,所以在此不需要更改/etc/dhcp/dhcpd.conf文件,因为改了也没用,每次cobbler sync就会按照预定义重新初始化dhcp配置文件
# vim /etc/cobbler/dhcp.template
subnet 192.168.3.0 netmask 255.255.255.0 {
option routers 192.168.3.1;
option domain-name-servers 192.168.1.13;
option subnet-mask 255.255.255.0;
range dynamic-bootp 192.168.3.100 192.168.3.200;
default-lease-time 21600;
max-lease-time 43200;
next-server $next_server;
执行# cobbler sync
使用vmvare虚拟机的iso镜像挂载到/mnt 路径(如下图),并导入镜像
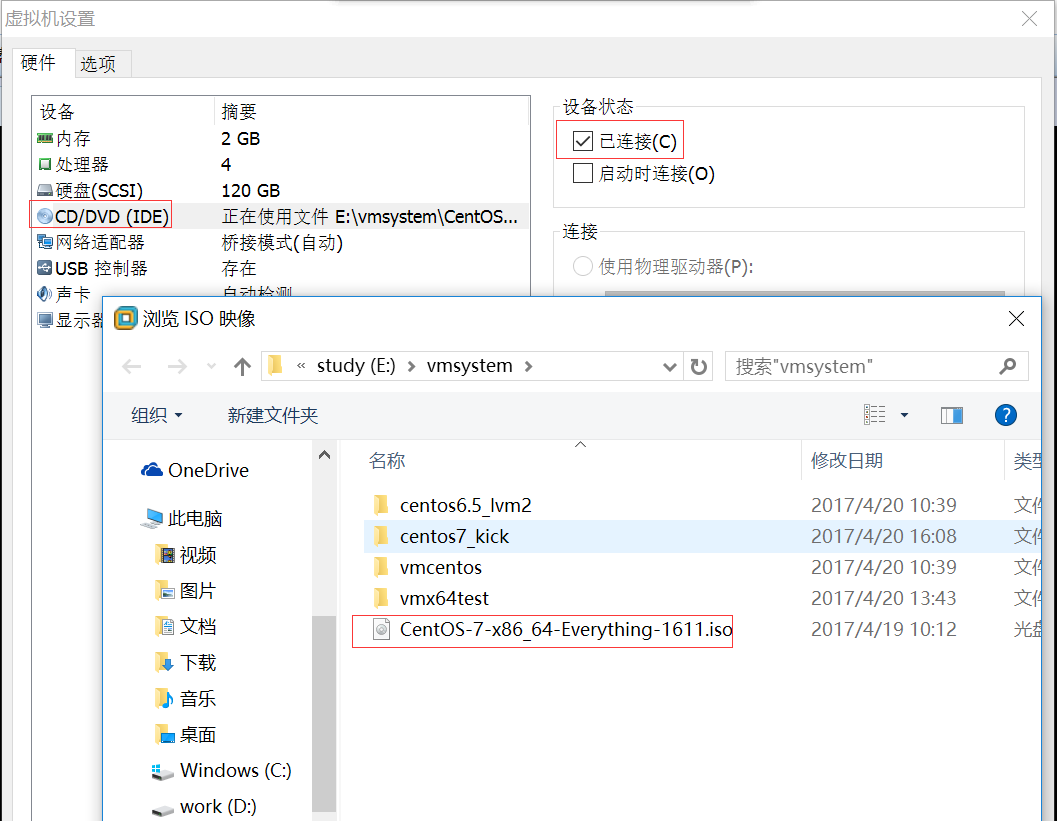
cobbler –name:倒进后的名字 –arch:镜像架构 –path:挂载路径
# mount /dev/cdrom /mnt
# cobbler import --path=/mnt/ --name=CentOS-7.3-x86_64 --arch=x86_64
task started: 2017-04-20_174857_import
task started (id=Media import, time=Thu Apr 20 17:48:57 2017)
Found a candidate signature: breed=redhat, version=rhel6
Found a candidate signature: breed=redhat, version=rhel7
Found a matching signature: breed=redhat, version=rhel7
Adding distros from path /var/www/cobbler/ks_mirror/CentOS-7.3-x86_64:
creating new distro: CentOS-7.3-x86_64
trying symlink: /var/www/cobbler/ks_mirror/CentOS-7.3-x86_64 -> /var/www/cobbler/links/CentOS-7.3-x86_64
creating new profile: CentOS-7.3-x86_64
associating repos
checking for rsync repo(s)
checking for rhn repo(s)
checking for yum repo(s)
starting descent into /var/www/cobbler/ks_mirror/CentOS-7.3-x86_64 for CentOS-7.3-x86_64
processing repo at : /var/www/cobbler/ks_mirror/CentOS-7.3-x86_64
need to process repo/comps: /var/www/cobbler/ks_mirror/CentOS-7.3-x86_64
looking for /var/www/cobbler/ks_mirror/CentOS-7.3-x86_64/repodata/*comps*.xml
Keeping repodata as-is :/var/www/cobbler/ks_mirror/CentOS-7.3-x86_64/repodata
*** TASK COMPLETE ***
导入后镜像所在位置:/var/www/cobbler/ks_mirror/
# ls /var/www/cobbler/ks_mirror/
CentOS-7.3-x86_64 config
给kickstart定义ks文件目录/var/lib/cobbler/kickstarts/为cobbler默认存放kickstart配置文件的位置
# cd /var/lib/cobbler/kickstarts/
vim /var/lib/cobbler/kickstarts/centos7.3_x86_64.cfg
#version=DEVEL
# System authorization information
auth --enableshadow --passalgo=sha512
# Use network installation
url --url="http://192.168.3.12/cobbler/ks_mirror/CentOS-7.3-x86_64/"
# Use text mode install
text
ignoredisk --only-use=sda
# Keyboard layouts
keyboard --vckeymap=us --xlayouts='us'
# System language
lang en_US.UTF-8
# Firewall configuration
firewall --disabled
selinux --disabled
# Reboot after installation
reboot

# Network information
network --bootproto=dhcp --device=ens33 --onboot=on --ipv6=auto
network --hostname=localhost.localdomain

# Root password
rootpw --iscrypted $6$23hVX55axEtxScyM$jowXwPr8f2xqipe0Xnaj8XHtwNBlufsvCqqDQDrokM1M0kzxwzPlvzHJmJzusubb6zAU/hKpW5oIDCpa.n7zs0
# System services
services --disabled="chronyd"
# System timezone
timezone Asia/Shanghai --isUtc --nontp
# System bootloader configuration
bootloader --append=" crashkernel=auto" --location=mbr --boot-drive=sda
# Clear the Master Boot Record
zerombr
# Partition clearing information
clearpart --all --initlabel
firstboot --disable
# Disk partitioning information
part pv.194 --fstype="lvmpv" --ondisk=sda --size=75779
part /boot --fstype="xfs" --ondisk=sda --size=300
volgroup centos --pesize=4096 pv.194
logvol /data --fstype="xfs" --size=40956 --name=data --vgname=centos
logvol swap --fstype="swap" --size=4096 --name=swap --vgname=centos
logvol / --fstype="xfs" --size=30720 --name=root --vgname=centos

%packages
@^minimal
@core
kexec-tools

%end

# cobbler profile report
Name : CentOS-7.3-x86_64
TFTP Boot Files : {}
Comment :
DHCP Tag : default
Distribution : CentOS-7.3-x86_64
Enable gPXE? : 0
Enable PXE Menu? : 1
Fetchable Files : {}
Kernel Options : {}
Kernel Options (Post Install) : {}
Kickstart : /var/lib/cobbler/kickstarts/sample_end.ks
Kickstart Metadata : {}
Management Classes : []
Management Parameters : <<inherit>>
Name Servers : []
Name Servers Search Path : []
Owners : ['admin']
Parent Profile :
Internal proxy :
Red Hat Management Key : <<inherit>>
Red Hat Management Server : <<inherit>>
Repos : []
Server Override : <<inherit>>
Template Files : {}
Virt Auto Boot : 1
Virt Bridge : xenbr0
Virt CPUs : 1
Virt Disk Driver Type : raw
Virt File Size(GB) : 5
Virt Path :
Virt RAM (MB) : 512
Virt Type : kvm

# cobbler list
distros:
CentOS-7.3-x86_64

profiles:
CentOS-7.3-x86_64

systems:

repos:

images:

mgmtclasses:

packages:

files:
使用cobbler profile指定ks文件位置和内核参数(net.ifnames=0和biosdevname=0代表更改网卡为eth0 --> 运维标准化)
# cobbler profile edit --name=CentOS-7.3-x86_64 --kickstart=/var/lib/cobbler/kickstarts/centos7.3_x86_64.cfg
# cobbler profile edit --name=CentOS-7.3-x86_64 --kopts='net.ifnames=0 biosdevname=0'
根据机器的MAC地址(新建虚拟机的时候直接生成,如果是购买的物理机就可以向供应商获取),自动绑定IP,网关,dns等
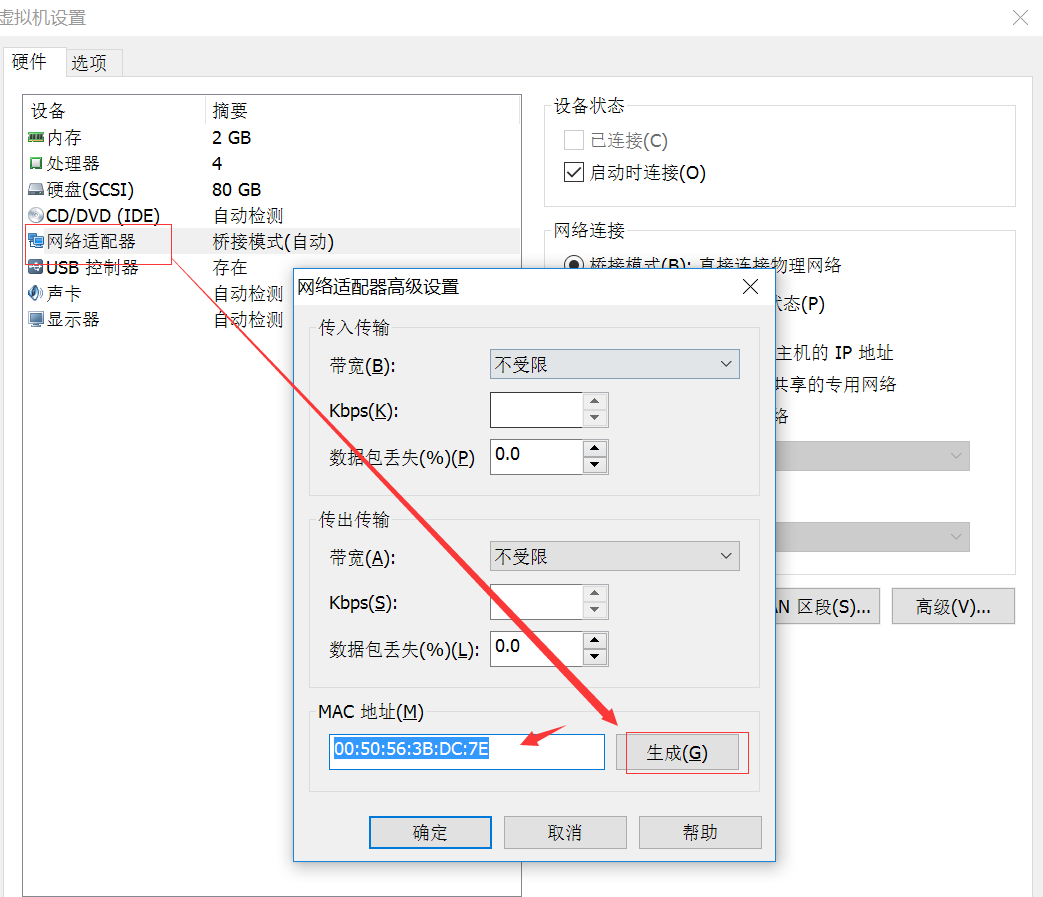
cobbler system add --name=chinasoft --mac=00:50:56:3B:DC:7E --profile=CentOS-7.3-x86_64 --ip-address=192.168.3.177 --subnet=255.255.255.0 --gateway=192.168.3.1 --interface=eth0 --static=1 --hostname=node3.chinasoft.com --name-servers="114.114.114.114"
使用sync同步配置
# cobbler sync
# cobbler system list
chinasoft
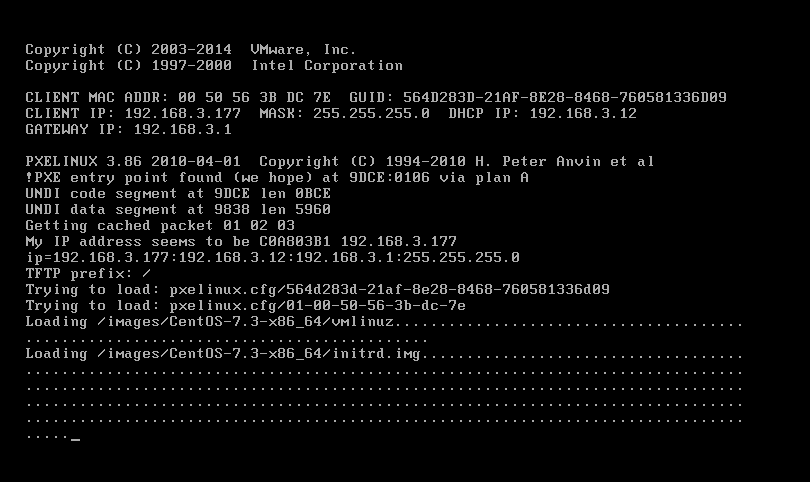
注意:客户端机器装系统时,要先使用修改bios启动然后修改为网卡启动,把network boot from Intel E1000调整为最上,F10保存
重启机器就开始自动安装操作系统了,安装完成以后进系统发现ifconfig eth0、hostname、防火墙、selinux、都和我们预定义的一致

修改cobbler提示
# vim /etc/cobbler/pxe/pxedefault.template
DEFAULT menu
PROMPT 0
MENU TITLE by jack | http://www.cnclogs.com/reblue520
TIMEOUT 200
TOTALTIMEOUT 6000
ONTIMEOUT $pxe_timeout_profile
LABEL local
MENU LABEL (local)
MENU DEFAULT
LOCALBOOT -1
$pxe_menu_items
MENU end
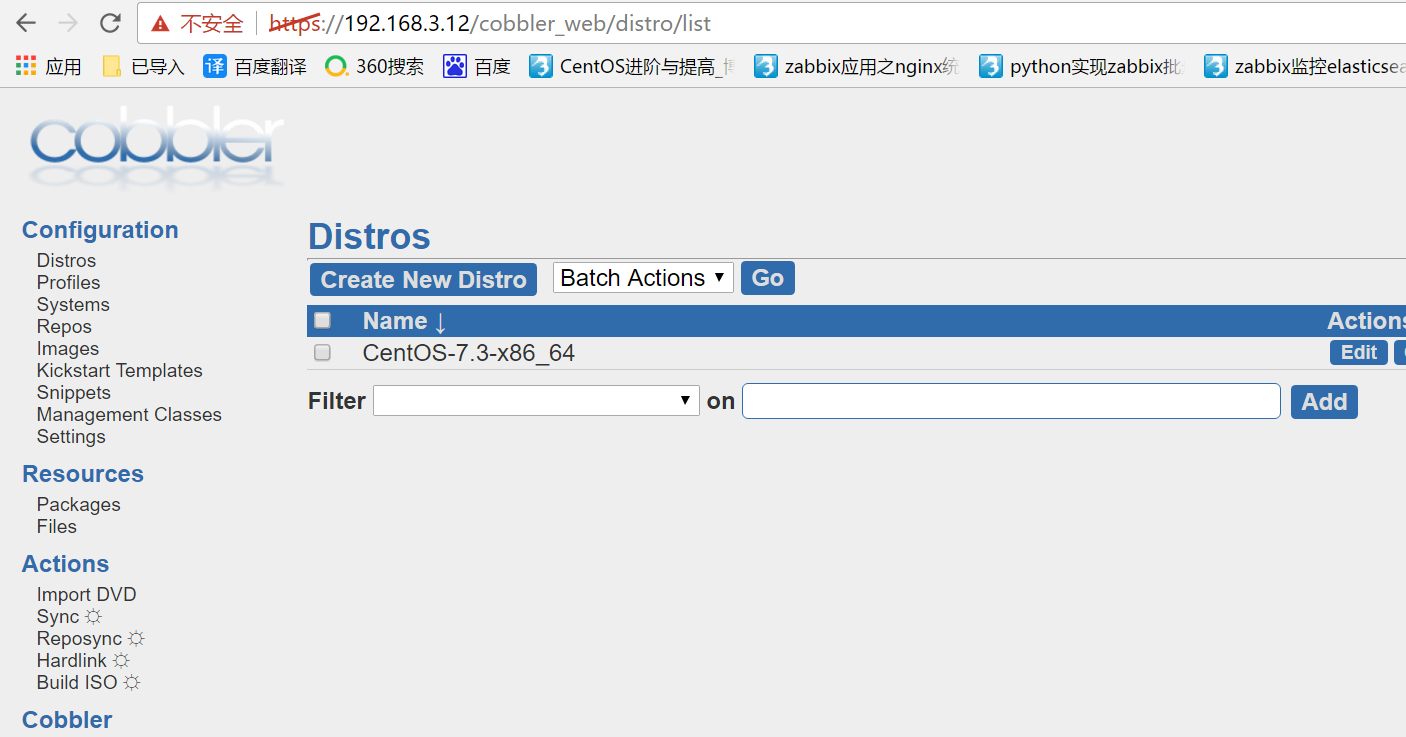
三、web界面管理cobbler
在最开始yum的时候安装了cobbler-web,当然也就可以使用web界面管理cobbler
新版cobbler的web界面使用的是https,登录https://192.168.3.12/cobbler_web
(默认情况下username和password都是cobbler,可以通过用户名所在文件: /etc/cobbler/users.conf 和 密码所在文件:/etc/cobbler/users.digest进行管理 管理)
待安装完后,关闭机器,否则会反复安装,因此也要注意生产环境,尽量不要从网卡启动,防止机器意外重装


 1664
1664


 被折叠的 条评论
为什么被折叠?
被折叠的 条评论
为什么被折叠?
 到【灌水乐园】发言


