


一、前言
前面的文章我们已经讲了如何搭建服务注册中心,如何搭建客户端去注册。接下来我们讲一下服务的发现与消费
二、服务注册
1.首先下载服务注册中心源码
2.项目源码请到 : https://github.com/mrg1511104848/my-eureka-server.git下载
3.导入到idea
4.运行服务注册中心
------------------------------------------------------------------------------------------
1.首先下载客户端源码
2.项目源码请到 : https://github.com/mrg1511104848/springboot-study下载
3.导入到 idea
4.通过idea 的 maven package 功能,将源码打包成 jar
5.通过命令行启动两个客户端
java -jar xxx.jar --server.port=9998
java -jar xxx.jar --server.port=9999
------------------------------------------------------------------------------------------
三、服务消费
这里的消费我们用Ribbon
1.概念:
Ribbon : 首先我们看以下spring官方怎么解释的
Ribbon is a client-side load balancer that gives you a lot of control over the behavior of HTTP and TCP clients
功能区是一个客户端负载均衡器,可以让您对HTTP和TCP客户端的行为有很多控制权。
2.如何引用Ribbon
a.创建项目
首先复制一下本地的spring-boot项目,将其中的git信息删除。改一下名 叫做ribbon-customer。
b.添加依赖
<dependency>
            <groupId>org.springframework.cloud</groupId>
            <artifactId>spring-cloud-starter-netflix-ribbon</artifactId>
        </dependency>
c.使用
创建主类
package com.myspringboot;

import org.springframework.boot.SpringApplication;
import org.springframework.boot.autoconfigure.SpringBootApplication;
import org.springframework.cloud.client.discovery.EnableDiscoveryClient;
import org.springframework.cloud.client.loadbalancer.LoadBalanced;

import org.springframework.context.annotation.Bean;
import org.springframework.web.client.RestTemplate;


@EnableDiscoveryClient
@SpringBootApplication
public class StudyApplication {
    @Bean
    @LoadBalanced
    RestTemplate restTemplate(){
        return new RestTemplate();
    }
    public static void main(String[] args) {
        SpringApplication.run(StudyApplication.class, args);
    }

}
加入 @EnableDiscoveryClient
加入 restTemplate 用于获取负载均衡的一个管理对象
d.创建Controller,消费其他服务。
package com.myspringboot.web;


import com.netflix.discovery.converters.Auto;
import org.springframework.beans.factory.annotation.Autowired;
import org.springframework.cloud.client.ServiceInstance;
import org.springframework.cloud.client.discovery.DiscoveryClient;
import org.springframework.cloud.client.discovery.EnableDiscoveryClient;
import org.springframework.cloud.client.hypermedia.DiscoveredResource;
import org.springframework.web.bind.annotation.RequestMapping;
import org.springframework.web.bind.annotation.RequestMethod;
import org.springframework.web.bind.annotation.RestController;
import org.springframework.web.client.RestTemplate;

import java.util.List;


@RestController
public class CustomerController {
    @Autowired
    private RestTemplate restTemplate;
    @RequestMapping(value="/ribbon-consumer",method=RequestMethod.GET)
    public String helloConsumer(){
        return restTemplate.getForEntity("http://HELLO-SERVICE/hello",String.class).getBody();
    }


}
这里通过调用restTemplate获取需要消费的服务。并消费。
e.修改配置
src\main\resources 下的application.yml 修改 server.port = 9898
、 spring.application.name=ribbon-consumer
f.访问刚创建的Controller,看看结果和我们预想是否一致
http://localhost:9898/ribbon-consumer。
浏览器输出
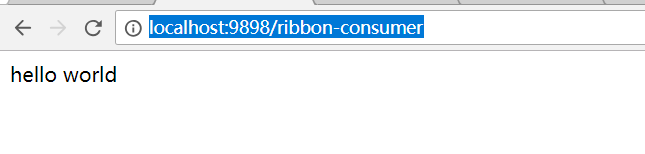
证明服务消费成功,成功调用了其他的几个服务。
四、总结
本章主要讲了如何Ribbon的概念,以及如何通过Ribbon进行服务的消费。
如果对本章有疑问,欢迎留言。
关于本章的源码已经更新至github,欢迎下载和star
https://github.com/mrg1511104848/ribbon-consumer


 1777
1777

 被折叠的 条评论
为什么被折叠?
被折叠的 条评论
为什么被折叠?
 到【灌水乐园】发言


