一、Spring Cloud简介:
Spring Cloud是对Netflix的多个开源组件进一步的封装而成,同时又实现了和云端平台,和SpringBoot开发框架很好的集成。
Spring Cloud为开发者提供了在分布式系统(配置管理,服务发现,熔断,路由,微代理,控制总线,一次性token,全居琐,leader选举,分布式session,集群状态)中快速构建的工具,使用SpringCloud的开发者可以快速的启动服务或构建应用、同时能够快速和云平台资源进行对接。
二、创建服务端
参考Spring Inuti搭建Spring Boot项目 搭建基础Boot项目
在pom.xml中添加依赖:
<dependency>
	<groupId>org.springframework.cloud</groupId>
	<artifactId>spring-cloud-starter-eureka-server</artifactId>
</dependency>
  <dependencyManagement>
	<dependencies>
		<dependency>
			<groupId>org.springframework.cloud</groupId>
			<artifactId>spring-cloud-dependencies</artifactId>
			<version>Brixton.RELEASE</version>
			<type>pom</type>
			<scope>import</scope>
	</dependency>
</dependencies>
在Application启动文件中添加注解:@EnableEurekaServer
@EnableEurekaServer
@SpringBootApplication
public class SpringCloudApplication {

	public static void main(String[] args) {
		SpringApplication.run(SpringCloudApplication.class, args);
	}
}
在配置文件application.properties中添加配置:
server.port=1228
eureka.client.register-with-eureka=false
eureka.client.fetch-registry=false
eureka.client.serviceUrl.defaultZone=http://localhost:${server.port}/Eureka/
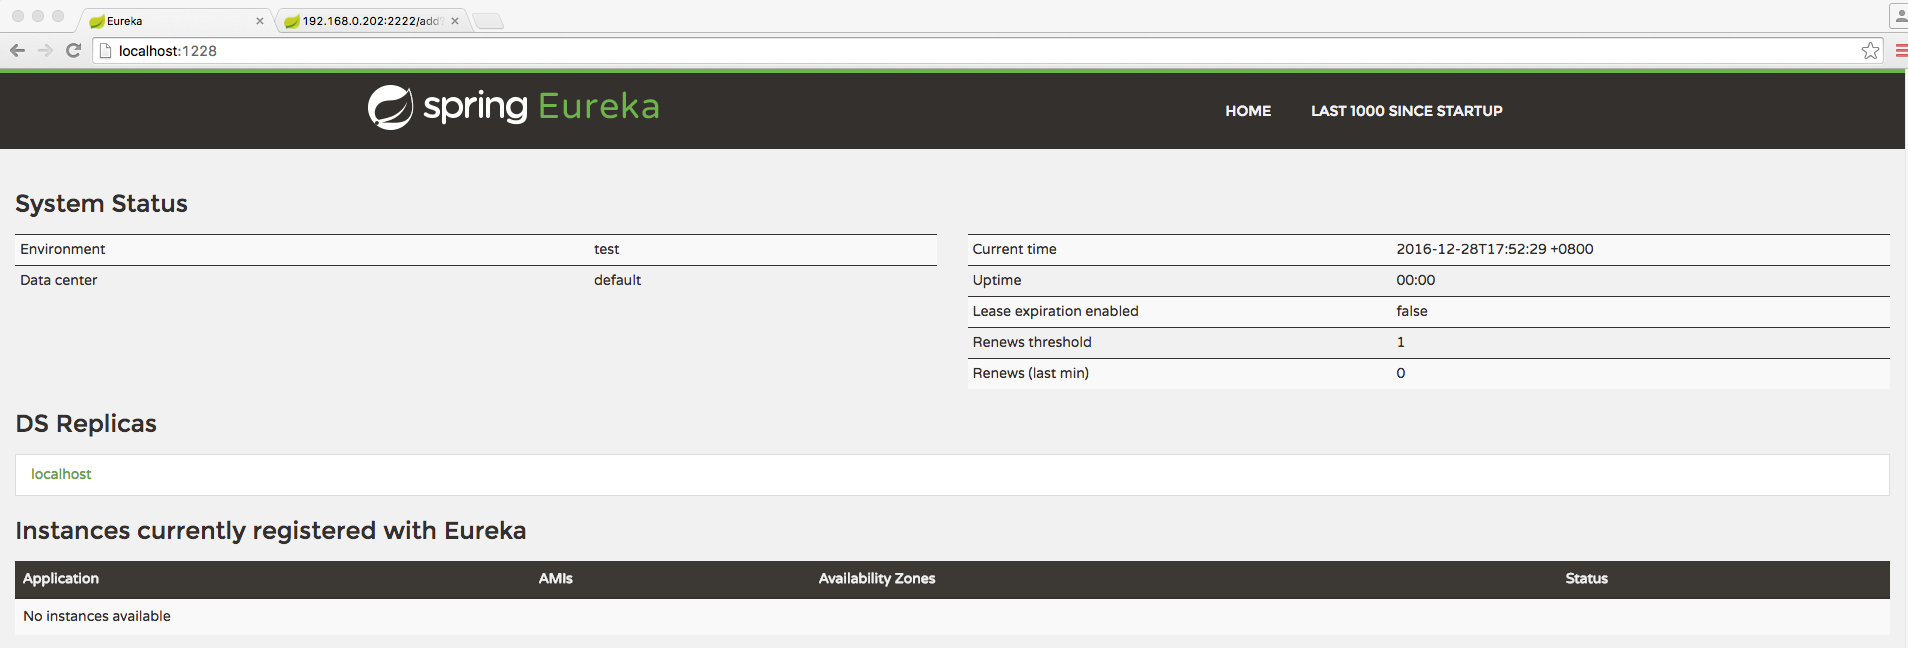
点击 启动程序 启动工程后,访问:http://localhost:1228/ (注意要有最后的反斜杠)
三、创建提供服务的客户端
参考Spring Inuti搭建Spring Boot项目 搭建基础Boot项目
在pom.xml中添加依赖:
<dependency>
	<groupId>org.springframework.cloud</groupId>
	<artifactId>spring-cloud-starter-eureka</artifactId>
</dependency>
  <dependencyManagement>
	<dependencies>
		<dependency>
			<groupId>org.springframework.cloud</groupId>
			<artifactId>spring-cloud-dependencies</artifactId>
			<version>Brixton.RELEASE</version>
			<type>pom</type>
			<scope>import</scope>
	</dependency>
</dependencies>
实现接口提供API支持
/**
 * Created by 从小就坏 on 2016/12/28.
 */

@RestController
public class HelenController {
    private final Logger logger = Logger.getLogger(getClass());

    @Autowired
    private DiscoveryClient client;

    @RequestMapping(value = "/add" ,method = RequestMethod.GET)
    public String add() {
        ServiceInstance instance = client.getLocalServiceInstance();
        logger.info("/add, host:" + instance.getHost() + ", service_id:" + instance.getServiceId() + ", result:" + r);
        return "HELEN";
    }
}
在Application启动文件中添加注解:@EnableEurekaServer
@EnableEurekaServer
@SpringBootApplication
public class SpringCloudApplication {

	public static void main(String[] args) {
		SpringApplication.run(SpringCloudApplication.class, args);
	}
}
在配置文件application.properties中添加配置:
spring.application.name=compute-service
server.port=1229
eureka.client.serviceUrl.defaultZone=http://localhost:1228/eureka/
启动2个工程你会发现你的服务注册好了


 2万+
2万+

 被折叠的 条评论
为什么被折叠?


