


Redis的常用配置说明:
下载好redis之后都会有redis.conf的文件,这个文件就是redis的配置,可以在这里修改。
以下是redis配置的说明:
# Redis configuration file example

# Note on units: when memory size is needed, it is possible to specifiy
# it in the usual form of 1k 5GB 4M and so forth:
#
# 1k => 1000 bytes
# 1kb => 1024 bytes
# 1m => 1000000 bytes
# 1mb => 1024*1024 bytes
# 1g => 1000000000 bytes
# 1gb => 1024*1024*1024 bytes
#
# units are case insensitive so 1GB 1Gb 1gB are all the same.

# By default Redis does not run as a daemon. Use 'yes' if you need it.
# Note that Redis will write a pid file in /var/run/redis.pid when daemonized.
#Redis默认不是以守护进程的方式运行,可以通过该配置项修改,使用yes启用守护进程
daemonize no

# When running daemonized, Redis writes a pid file in /var/run/redis.pid by
# default. You can specify a custom pid file location here.
#当 Redis 以守护进程的方式运行的时候,Redis 默认会把 pid 文件放在/var/run/redis.pid
#可配置到其他地址,当运行多个 redis 服务时,需要指定不同的 pid 文件和端口
pidfile /var/run/redis.pid

# Accept connections on the specified port, default is 6379.
# If port 0 is specified Redis will not listen on a TCP socket.
#redis连接的端口
port 6379

# If you want you can bind a single interface, if the bind option is not
# specified all the interfaces will listen for incoming connections.
#指定Redis可接收请求的IP地址,不设置将处理所有请求,建议生产环境中设置
# bind 127.0.0.1

# Specify the path for the unix socket that will be used to listen for
# incoming connections. There is no default, so Redis will not listen
# on a unix socket when not specified.
#
# unixsocket /tmp/redis.sock
# unixsocketperm 755

# Close the connection after a client is idle for N seconds (0 to disable)
#客户端连接的超时时间,单位为秒,超时后会关闭连接
timeout 0

# Set server verbosity to 'debug'
# it can be one of:
# debug (a lot of information, useful for development/testing)
# verbose (many rarely useful info, but not a mess like the debug level)
# notice (moderately verbose, what you want in production probably)
# warning (only very important / critical messages are logged)
#日志记录等级,4个可选值
loglevel verbose

# Specify the log file name. Also 'stdout' can be used to force
# Redis to log on the standard output. Note that if you use standard
# output for logging but daemonize, logs will be sent to /dev/null
#配置 log 文件地址,默认打印在命令行终端的窗口上,也可设为/dev/null屏蔽日志
logfile stdout

# To enable logging to the system logger, just set 'syslog-enabled' to yes,
# and optionally update the other syslog parameters to suit your needs.
# syslog-enabled no

# Specify the syslog identity.
# syslog-ident redis

# Specify the syslog facility.  Must be USER or between LOCAL0-LOCAL7.
# syslog-facility local0

# Set the number of databases. The default database is DB 0, you can select
# a different one on a per-connection basis using SELECT <dbid> where
# dbid is a number between 0 and 'databases'-1
#设置数据库的个数,可以使用 SELECT 命令来切换数据库。
databases 16

################################ SNAPSHOTTING  #################################
#
# Save the DB on disk:
#
#   save <seconds> <changes>
#
#   Will save the DB if both the given number of seconds and the given
#   number of write operations against the DB occurred.
#
#   In the example below the behaviour will be to save:
#   after 900 sec (15 min) if at least 1 key changed
#   after 300 sec (5 min) if at least 10 keys changed
#   after 60 sec if at least 10000 keys changed
#
#   Note: you can disable saving at all commenting all the "save" lines.
#设置 Redis 进行数据库镜像的频率。保存数据到disk的策略
#900秒之内有1个keys发生变化时
#30秒之内有10个keys发生变化时
#60秒之内有10000个keys发生变化时
#以下的配置三个都不能缺少,这样能保证不管修改数据频率高还是低的情况,数据都会保存。
save 900 1
save 300 10
save 60 10000

# Compress string objects using LZF when dump .rdb databases?
# For default that's set to 'yes' as it's almost always a win.
# If you want to save some CPU in the saving child set it to 'no' but
# the dataset will likely be bigger if you have compressible values or keys.
#在进行镜像备份时,是否进行压缩
rdbcompression yes

# The filename where to dump the DB
#镜像备份文件的文件名
dbfilename dump.rdb

# The working directory.
#
# The DB will be written inside this directory, with the filename specified
# above using the 'dbfilename' configuration directive.
#
# Also the Append Only File will be created inside this directory.
#
# Note that you must specify a directory here, not a file name.
#数据库镜像备份的文件放置的路径
#路径跟文件名分开配置是因为 Redis 备份时,先会将当前数据库的状态写入到一个临时文件
#等备份完成时,再把该临时文件替换为上面所指定的文件
#而临时文件和上面所配置的备份文件都会放在这个指定的路径当中
#默认值为 ./
dir ./

################################# REPLICATION #################################

# Master-Slave replication. Use slaveof to make a Redis instance a copy of
# another Redis server. Note that the configuration is local to the slave
# so for example it is possible to configure the slave to save the DB with a
# different interval, or to listen to another port, and so on.
#设置该数据库为其他数据库的从数据库
# slaveof <masterip> <masterport>

# If the master is password protected (using the "requirepass" configuration
# directive below) it is possible to tell the slave to authenticate before
# starting the replication synchronization process, otherwise the master will
# refuse the slave request.
#指定与主数据库连接时需要的密码验证
#masterauth <master-password> 当本机为从服务时,设置主服务的连接密码
# masterauth <master-password>

# When a slave lost the connection with the master, or when the replication
# is still in progress, the slave can act in two different ways:
#
# 1) if slave-serve-stale-data is set to 'yes' (the default) the slave will
#    still reply to client requests, possibly with out of data data, or the
#    data set may just be empty if this is the first synchronization.
#
# 2) if slave-serve-stale data is set to 'no' the slave will reply with
#    an error "SYNC with master in progress" to all the kind of commands
#    but to INFO and SLAVEOF.
#当slave丢失与master的连接时,或slave仍然在于master进行数据同步时(未与master保持一致)
#slave可有两种方式来响应客户端请求:
#1)如果 slave-serve-stale-data 设置成 'yes'(默认),slave仍会响应客户端请求,此时可能会有问题
#2)如果 slave-serve-stale-data 设置成 'no',slave会返回"SYNC with master in progress"错误信息,但 INFO 和SLAVEOF命令除外。
slave-serve-stale-data yes

# Slaves send PINGs to server in a predefined interval. It's possible to change
# this interval with the repl_ping_slave_period option. The default value is 10
# seconds.
#
# repl-ping-slave-period 10

# The following option sets a timeout for both Bulk transfer I/O timeout and
# master data or ping response timeout. The default value is 60 seconds.
#
# It is important to make sure that this value is greater than the value
# specified for repl-ping-slave-period otherwise a timeout will be detected
# every time there is low traffic between the master and the slave.
#
# repl-timeout 60

################################## SECURITY ###################################

# Require clients to issue AUTH <PASSWORD> before processing any other
# commands.  This might be useful in environments in which you do not trust
# others with access to the host running redis-server.
#
# This should stay commented out for backward compatibility and because most
# people do not need auth (e.g. they run their own servers).
#
# Warning: since Redis is pretty fast an outside user can try up to
# 150k passwords per second against a good box. This means that you should
# use a very strong password otherwise it will be very easy to break.
#设置客户端连接后进行任何其他指定前需要使用的密码
#redis速度相当快,一个外部用户在一秒钟进行150K次密码尝试,需指定强大的密码来防止暴力破解
# requirepass foobared

# Command renaming.
#
# It is possilbe to change the name of dangerous commands in a shared
# environment. For instance the CONFIG command may be renamed into something
# of hard to guess so that it will be still available for internal-use
# tools but not available for general clients.
#
# Example:
#
# rename-command CONFIG b840fc02d524045429941cc15f59e41cb7be6c52
#
# It is also possilbe to completely kill a command renaming it into
# an empty string:
#
# rename-command CONFIG ""

################################### LIMITS ####################################

# Set the max number of connected clients at the same time. By default there
# is no limit, and it's up to the number of file descriptors the Redis process
# is able to open. The special value '0' means no limits.
# Once the limit is reached Redis will close all the new connections sending
# an error 'max number of clients reached'.
#限制同时连接的客户数量。
#当连接数超过这个值时,redis 将不再接收其他连接请求,客户端尝试连接时将收到 error 信息
# maxclients 128

# Don't use more memory than the specified amount of bytes.
# When the memory limit is reached Redis will try to remove keys with an
# EXPIRE set. It will try to start freeing keys that are going to expire
# in little time and preserve keys with a longer time to live.
# Redis will also try to remove objects from free lists if possible.
#
# If all this fails, Redis will start to reply with errors to commands
# that will use more memory, like SET, LPUSH, and so on, and will continue
# to reply to most read-only commands like GET.
#
# WARNING: maxmemory can be a good idea mainly if you want to use Redis as a
# 'state' server or cache, not as a real DB. When Redis is used as a real
# database the memory usage will grow over the weeks, it will be obvious if
# it is going to use too much memory in the long run, and you'll have the time
# to upgrade. With maxmemory after the limit is reached you'll start to get
# errors for write operations, and this may even lead to DB inconsistency.
#设置redis能够使用的最大内存。
#达到最大内存设置后,Redis会先尝试清除已到期或即将到期的Key(设置过expire信息的key)
#在删除时,按照过期时间进行删除,最早将要被过期的key将最先被删除
#如果已到期或即将到期的key删光,仍进行set操作,那么将返回错误
#此时redis将不再接收写请求,只接收get请求。
#maxmemory的设置比较适合于把redis当作于类似memcached 的缓存来使用
# maxmemory <bytes>

# MAXMEMORY POLICY: how Redis will select what to remove when maxmemory
# is reached? You can select among five behavior:
#
# volatile-lru -> remove the key with an expire set using an LRU algorithm
# allkeys-lru -> remove any key accordingly to the LRU algorithm
# volatile-random -> remove a random key with an expire set
# allkeys->random -> remove a random key, any key
# volatile-ttl -> remove the key with the nearest expire time (minor TTL)
# noeviction -> don't expire at all, just return an error on write operations
#
# Note: with all the kind of policies, Redis will return an error on write
#       operations, when there are not suitable keys for eviction.
#
#       At the date of writing this commands are: set setnx setex append
#       incr decr rpush lpush rpushx lpushx linsert lset rpoplpush sadd
#       sinter sinterstore sunion sunionstore sdiff sdiffstore zadd zincrby
#       zunionstore zinterstore hset hsetnx hmset hincrby incrby decrby
#       getset mset msetnx exec sort
#
# The default is:
#
# maxmemory-policy volatile-lru

# LRU and minimal TTL algorithms are not precise algorithms but approximated
# algorithms (in order to save memory), so you can select as well the sample
# size to check. For instance for default Redis will check three keys and
# pick the one that was used less recently, you can change the sample size
# using the following configuration directive.
#
# maxmemory-samples 3

############################## APPEND ONLY MODE ###############################

# By default Redis asynchronously dumps the dataset on disk. If you can live
# with the idea that the latest records will be lost if something like a crash
# happens this is the preferred way to run Redis. If instead you care a lot
# about your data and don't want to that a single record can get lost you should
# enable the append only mode: when this mode is enabled Redis will append
# every write operation received in the file appendonly.aof. This file will
# be read on startup in order to rebuild the full dataset in memory.
#
# Note that you can have both the async dumps and the append only file if you
# like (you have to comment the "save" statements above to disable the dumps).
# Still if append only mode is enabled Redis will load the data from the
# log file at startup ignoring the dump.rdb file.
#
# IMPORTANT: Check the BGREWRITEAOF to check how to rewrite the append
# log file in background when it gets too big.
#redis 默认每次更新操作后会在后台异步的把数据库镜像备份到磁盘,但该备份非常耗时,且备份不宜太频繁
#redis 同步数据文件是按上面save条件来同步的
#如果发生诸如拉闸限电、拔插头等状况,那么将造成比较大范围的数据丢失
#所以redis提供了另外一种更加高效的数据库备份及灾难恢复方式
#开启append only 模式后,redis 将每一次写操作请求都追加到appendonly.aof 文件中
#redis重新启动时,会从该文件恢复出之前的状态。
#但可能会造成 appendonly.aof 文件过大,所以redis支持BGREWRITEAOF 指令,对appendonly.aof重新整理
#设置成yes之后就会执行appendfsync 的策略
appendonly no

# The name of the append only file (default: "appendonly.aof")
#更新日志文件名,默认值为appendonly.aof
# appendfilename appendonly.aof

# The fsync() call tells the Operating System to actually write data on disk
# instead to wait for more data in the output buffer. Some OS will really flush
# data on disk, some other OS will just try to do it ASAP.
#
# Redis supports three different modes:
#
# no: don't fsync, just let the OS flush the data when it wants. Faster.
# always: fsync after every write to the append only log . Slow, Safest.
# everysec: fsync only if one second passed since the last fsync. Compromise.
#
# The default is "everysec" that's usually the right compromise between
# speed and data safety. It's up to you to understand if you can relax this to
# "no" that will will let the operating system flush the output buffer when
# it wants, for better performances (but if you can live with the idea of
# some data loss consider the default persistence mode that's snapshotting),
# or on the contrary, use "always" that's very slow but a bit safer than
# everysec.
#
# If unsure, use "everysec".
#设置对 appendonly.aof 文件进行同步的频率
#always 表示每次有写操作都进行同步,everysec 表示对写操作进行累积,每秒同步一次。
#no表示等操作系统进行数据缓存同步到磁盘,都进行同步,everysec 表示对写操作进行累积,每秒同步一次
# appendfsync always
appendfsync everysec
# appendfsync no

# When the AOF fsync policy is set to always or everysec, and a background
# saving process (a background save or AOF log background rewriting) is
# performing a lot of I/O against the disk, in some Linux configurations
# Redis may block too long on the fsync() call. Note that there is no fix for
# this currently, as even performing fsync in a different thread will block
# our synchronous write(2) call.
#
# In order to mitigate this problem it's possible to use the following option
# that will prevent fsync() from being called in the main process while a
# BGSAVE or BGREWRITEAOF is in progress.
#
# This means that while another child is saving the durability of Redis is
# the same as "appendfsync none", that in pratical terms means that it is
# possible to lost up to 30 seconds of log in the worst scenario (with the
# default Linux settings).
#
# If you have latency problems turn this to "yes". Otherwise leave it as
# "no" that is the safest pick from the point of view of durability.
no-appendfsync-on-rewrite no

# Automatic rewrite of the append only file.
# Redis is able to automatically rewrite the log file implicitly calling
# BGREWRITEAOF when the AOF log size will growth by the specified percentage.
#
# This is how it works: Redis remembers the size of the AOF file after the
# latest rewrite (or if no rewrite happened since the restart, the size of
# the AOF at startup is used).
#
# This base size is compared to the current size. If the current size is
# bigger than the specified percentage, the rewrite is triggered. Also
# you need to specify a minimal size for the AOF file to be rewritten, this
# is useful to avoid rewriting the AOF file even if the percentage increase
# is reached but it is still pretty small.
#
# Specify a precentage of zero in order to disable the automatic AOF
# rewrite feature.

auto-aof-rewrite-percentage 100
auto-aof-rewrite-min-size 64mb

################################## SLOW LOG ###################################

# The Redis Slow Log is a system to log queries that exceeded a specified
# execution time. The execution time does not include the I/O operations
# like talking with the client, sending the reply and so forth,
# but just the time needed to actually execute the command (this is the only
# stage of command execution where the thread is blocked and can not serve
# other requests in the meantime).
#
# You can configure the slow log with two parameters: one tells Redis
# what is the execution time, in microseconds, to exceed in order for the
# command to get logged, and the other parameter is the length of the
# slow log. When a new command is logged the oldest one is removed from the
# queue of logged commands.

# The following time is expressed in microseconds, so 1000000 is equivalent
# to one second. Note that a negative number disables the slow log, while
# a value of zero forces the logging of every command.
slowlog-log-slower-than 10000

# There is no limit to this length. Just be aware that it will consume memory.
# You can reclaim memory used by the slow log with SLOWLOG RESET.
slowlog-max-len 1024

################################ VIRTUAL MEMORY ###############################

### WARNING! Virtual Memory is deprecated in Redis 2.4
### The use of Virtual Memory is strongly discouraged.

### WARNING! Virtual Memory is deprecated in Redis 2.4
### The use of Virtual Memory is strongly discouraged.

# Virtual Memory allows Redis to work with datasets bigger than the actual
# amount of RAM needed to hold the whole dataset in memory.
# In order to do so very used keys are taken in memory while the other keys
# are swapped into a swap file, similarly to what operating systems do
# with memory pages.
#
# To enable VM just set 'vm-enabled' to yes, and set the following three
# VM parameters accordingly to your needs.
#是否开启虚拟内存支持。
#redis 是一个内存数据库,当内存满时,无法接收新的写请求,所以在redis2.0后,提供了虚拟内存的支持
#但需要注意的,redis 所有的key都会放在内存中,在内存不够时,只把value 值放入交换区
#虽使用虚拟内存,但性能基本不受影响,需要注意的是要把vm-max-memory设置到足够来放下所有的key
vm-enabled no
# vm-enabled yes

# This is the path of the Redis swap file. As you can guess, swap files
# can't be shared by different Redis instances, so make sure to use a swap
# file for every redis process you are running. Redis will complain if the
# swap file is already in use.
#
# The best kind of storage for the Redis swap file (that's accessed at random)
# is a Solid State Disk (SSD).
#
# *** WARNING *** if you are using a shared hosting the default of putting
# the swap file under /tmp is not secure. Create a dir with access granted
# only to Redis user and configure Redis to create the swap file there.
#设置虚拟内存的交换文件路径,不可多个Redis实例共享
vm-swap-file /tmp/redis.swap

# vm-max-memory configures the VM to use at max the specified amount of
# RAM. Everything that deos not fit will be swapped on disk *if* possible, that
# is, if there is still enough contiguous space in the swap file.
#
# With vm-max-memory 0 the system will swap everything it can. Not a good
# default, just specify the max amount of RAM you can in bytes, but it's
# better to leave some margin. For instance specify an amount of RAM
# that's more or less between 60 and 80% of your free RAM.
#设置开启虚拟内存后,redis将使用的最大物理内存大小。
#默认为0,redis将把他所有能放到交换文件的都放到交换文件中,以尽量少的使用物理内存
#即当vm-max-memory设置为0的时候,其实是所有value都存在于磁盘
#在生产环境下,需要根据实际情况设置该值,最好不要使用默认的 0
vm-max-memory 0

# Redis swap files is split into pages. An object can be saved using multiple
# contiguous pages, but pages can't be shared between different objects.
# So if your page is too big, small objects swapped out on disk will waste
# a lot of space. If you page is too small, there is less space in the swap
# file (assuming you configured the same number of total swap file pages).
#
# If you use a lot of small objects, use a page size of 64 or 32 bytes.
# If you use a lot of big objects, use a bigger page size.
# If unsure, use the default :)
#设置虚拟内存的页大小
#如果 value 值比较大,如要在 value 中放置博客、新闻之类的所有文章内容,就设大一点
vm-page-size 32

# Number of total memory pages in the swap file.
# Given that the page table (a bitmap of free/used pages) is taken in memory,
# every 8 pages on disk will consume 1 byte of RAM.
#
# The total swap size is vm-page-size * vm-pages
#
# With the default of 32-bytes memory pages and 134217728 pages Redis will
# use a 4 GB swap file, that will use 16 MB of RAM for the page table.
#
# It's better to use the smallest acceptable value for your application,
# but the default is large in order to work in most conditions.
#设置交换文件的总的 page 数量
#注意page table信息是放在物理内存中,每8个page 就会占据RAM中的 1 个 byte
#总的虚拟内存大小 = vm-page-size * vm-pages
vm-pages 134217728

# Max number of VM I/O threads running at the same time.
# This threads are used to read/write data from/to swap file, since they
# also encode and decode objects from disk to memory or the reverse, a bigger
# number of threads can help with big objects even if they can't help with
# I/O itself as the physical device may not be able to couple with many
# reads/writes operations at the same time.
#
# The special value of 0 turn off threaded I/O and enables the blocking
# Virtual Memory implementation.
# Virtual Memory implementation.
#设置 VM IO 同时使用的线程数量
vm-max-threads 4

############################### ADVANCED CONFIG ###############################

# Hashes are encoded in a special way (much more memory efficient) when they
# have at max a given numer of elements, and the biggest element does not
# exceed a given threshold. You can configure this limits with the following
# configuration directives.
#redis 2.0后引入了 hash 数据结构。
#hash 中包含超过指定元素个数并且最大的元素当没有超过临界时,hash 将以zipmap来存储
#zipmap又称为 small hash,可大大减少内存的使用
hash-max-zipmap-entries 512
hash-max-zipmap-value 64

# Similarly to hashes, small lists are also encoded in a special way in order
# to save a lot of space. The special representation is only used when
# you are under the following limits:
list-max-ziplist-entries 512
list-max-ziplist-value 64

# Sets have a special encoding in just one case: when a set is composed
# of just strings that happens to be integers in radix 10 in the range
# of 64 bit signed integers.
# The following configuration setting sets the limit in the size of the
# set in order to use this special memory saving encoding.
set-max-intset-entries 512

# Similarly to hashes and lists, sorted sets are also specially encoded in
# order to save a lot of space. This encoding is only used when the length and
# elements of a sorted set are below the following limits:
zset-max-ziplist-entries 128
zset-max-ziplist-value 64

# Active rehashing uses 1 millisecond every 100 milliseconds of CPU time in
# order to help rehashing the main Redis hash table (the one mapping top-level
# keys to values). The hash table implementation redis uses (see dict.c)
# performs a lazy rehashing: the more operation you run into an hash table
# that is rhashing, the more rehashing "steps" are performed, so if the
# server is idle the rehashing is never complete and some more memory is used
# by the hash table.
#
# The default is to use this millisecond 10 times every second in order to
# active rehashing the main dictionaries, freeing memory when possible.
#
# If unsure:
# use "activerehashing no" if you have hard latency requirements and it is
# not a good thing in your environment that Redis can reply form time to time
# to queries with 2 milliseconds delay.
#
# use "activerehashing yes" if you don't have such hard requirements but
# want to free memory asap when possible.
activerehashing yes

################################## INCLUDES ###################################

# Include one or more other config files here.  This is useful if you
# have a standard template that goes to all redis server but also need
# to customize a few per-server settings.  Include files can include
# other files, so use this wisely.
#
# include /path/to/local.conf
# include /path/to/other.conf
Jedis包下载地址:http://central.maven.org/maven2/redis/clients/jedis/2.9.0/jedis-2.9.0.jar
官网下载地址:https://mvnrepository.com/artifact/redis.clients/jedis
编写测试联通redis类:
package cn.com.redis;

import redis.clients.jedis.Jedis;

public class TestPing {
    public static void main(String[] args) {
        Jedis jedis = new Jedis("192.168.248.129",6379);
        //ping通显示PONG
        System.out.println(jedis.ping());//去ping我们redis的主机所在ip和端口
    }
}
执行后: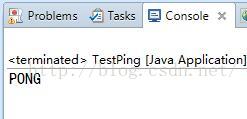
说明我们连接redis服务成功。
注意:如果ping不通,可能会报这种错误: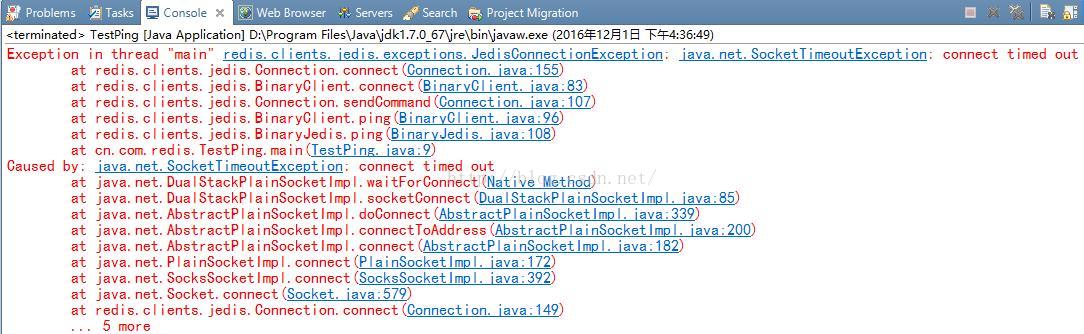
首先检查一下linux的防火墙是不是关闭了。
Jedis的存储:
(1)jedis存储字符串
package cn.com.redis;

import redis.clients.jedis.Jedis;

public class Test1 {
    public static void main(String[] args) {
        Jedis jedis = new Jedis("192.168.248.129",6379);

        //添加数据
        jedis.set("username", "jack");//向key-->name中放入了value-->jack

        System.out.println(jedis.get("username"));//执行结果:jack

        jedis.append("username"," is a Coder");//拼接
        System.out.println(jedis.get("username"));

        jedis.del("username");//删除某个键
        System.out.println(jedis.get("username"));//为null
        //设置多个键值对
        jedis.mset("username","liuling","age","23","qq","412345678");
        jedis.incr("age");//进行加1操作
        System.out.println(jedis.get("name")+"-"+jedis.get("age")+"-"+jedis.get("qq"));
    }
}
效果:
查看一下redis:
说明我们的操作是成功的。
(2)jedis操作Map:
package cn.com.redis;

import java.util.HashMap;
import java.util.Iterator;
import java.util.List;
import java.util.Map;

import redis.clients.jedis.Jedis;

public class Test2 {
    public static void main(String[] args) {
        Jedis jedis = new Jedis("192.168.248.129",6379);

        //添加数据
        Map<String,String> map = new HashMap<String,String>();
        map.put("name", "ZhangSan");
        map.put("age", "35");
        map.put("email", "12345678@126.com");
        jedis.hmset("user",map);
        //第一个参数是存入redis中map对象的key,后面跟的是放入map中的对象的key,
        //后面的key可以跟多个,是可变参数

        List<String> rsmap = jedis.hmget("user", "name","age","email");
        System.out.println(rsmap);

        //删除map中的某个值
        jedis.hdel("user","age");
        System.out.println(jedis.hmget("user", "age"));//因为删除了,所以返回的是null
        System.out.println(jedis.hlen("user"));//返回key为user的键中存放值的个数2
        System.out.println(jedis.exists("user"));//是否存在key为user的记录,返回true
        System.out.println(jedis.hkeys("user"));//返回map对象中的所有key
        System.out.println(jedis.hvals("user"));//返回map对象中的所有val

        Iterator<String> iter=jedis.hkeys("user").iterator();//得到iterator对象进行遍历
        while(iter.hasNext()){
            String key = iter.next();
            System.out.println(key+":"+jedis.hmget("user", key));
        }
    }
}
效果:
查看一下redis:
说明我们的操作是成功的。
(3)jedis操作List :
package cn.com.redis;

import redis.clients.jedis.Jedis;

public class Test3 {
    public static void main(String[] args) {
        Jedis jedis = new Jedis("192.168.248.129",6379);

        //开始前,先移出所有的内容
        jedis.del("java framework");
        System.out.println(jedis.lrange("java framework", 0, -1));

        //先向key java framework中存放三条数据
        //lpush key string  在key对应list的头部添加字符串元素
        jedis.lpush("java framework","spring");
        jedis.lpush("java framework","struts");
        jedis.lpush("java framework","hibernate");

        //取出所有数据,jedis.lrange是按范围取出,
        //第一个是key,第二个是起始位置,第三个是结束位置,-1表示取得所有
        System.out.println(jedis.lrange("java framework", 0, -1));

        //jedis.llen获取长度
        System.out.println(jedis.llen("java framework"));

        //删除数据
        jedis.del("java framework");

        //rpush key string  在key对应list的尾部添加字符串元素
        //插入数据的时候如果List不存在,就创建它再插入
        jedis.rpush("java framework", "spring");
        jedis.rpush("java framework", "struts");
        jedis.rpush("java framework", "hibernate");
        System.out.println(jedis.lrange("java framework", 0, -1));

    }
}
效果:
查看以下redis:
说明我们的操作是成功的。
(4)jedis操作Set :
package cn.com.redis;

import redis.clients.jedis.Jedis;

public class Test4 {
    public static void main(String[] args) {
        Jedis jedis = new Jedis("192.168.248.129",6379);

        //添加
        jedis.sadd("users", "ZhangSan");
        jedis.sadd("users", "LiSi");
        jedis.sadd("users", "WangWu");
        jedis.sadd("users", "ZhangEr");
        jedis.sadd("users", "MaLiu");

        //移出MaLiu
        jedis.srem("users", "MaLiu");
        System.out.println(jedis.smembers("users"));//获取所有加入的value

        System.out.println(jedis.sismember("users", "MaLiu"));//判断MaLiu是否是user结合的元素
        System.out.println(jedis.srandmember("users"));
        System.out.println(jedis.scard("users"));//返回集合的元素个数

    }
}
效果:
查看以下redis:
说明我们的操作是成功的。
(5)jedis排序
package cn.com.redis;

import redis.clients.jedis.Jedis;

public class Test5 {
    public static void main(String[] args) {
        Jedis jedis = new Jedis("192.168.248.129",6379);

        //jedis排序
        //注意,此处的rpush和lpush是List的操作,是一个双向链表
        //rpush是从尾部加入数据,lpush是从头部加入数据

        jedis.del("a");//先清楚数据,再加入数据进行测试
        jedis.rpush("a", "1");
        jedis.rpush("a", "6");
        jedis.rpush("a", "3");
        jedis.rpush("a", "9");
        System.out.println(jedis.lrange("a", 0, -1));//[1,6,3,9]
        System.out.println(jedis.sort("a"));//[1,3,6,9]  输出排序后结果

        jedis.del("a");//先清楚数据,再加入数据进行测试
        jedis.lpush("a", "1");
        jedis.lpush("a", "6");
        jedis.lpush("a", "3");
        jedis.lpush("a", "9");
        System.out.println(jedis.lrange("a", 0, -1));//[9,3,6,1]
        System.out.println(jedis.sort("a"));//[1,3,6,9]  输出排序后结果

    }
}
效果:
查看以下redis:


说明我们的操作是成功的。
(6)Redis连接池
我们每一次使用redis的时候,都要写Jedis jedis = new Jedis("192.168.248.129",6379);
我们要优化连接,不能使用一次就new一个连接对象,我们要创建一个工具类,管理redis的
连接和一些配置参数的设置。
package cn.com.redis;

import redis.clients.jedis.Jedis;
import redis.clients.jedis.JedisPool;
import redis.clients.jedis.JedisPoolConfig;

public class RedisUtil {
    //redis服务器IP
    private static String ADDR = "192.168.248.129";

    //redis的端口号
    private static int PORT = 6379;

    //访问密码
    private static String AUTH = "root";

    //可用连接实例的最大数目,默认为8
    //如果赋值为-1,则表示不限制;如果pool已经分配了maxActive个jedis实例,则此
    //时pool的状态为exhausted(耗尽)。
    private static int MAX_ACTIVE = 1024;

    //控制一个pool最多有多少个状态为idle(空闲)的jedis实例,默认也是8
    private static int MAX_IDLE = 200;

    //等待可用连接的最大时间,单位毫秒,默认值为-1,表示永不超时。
    //如果超过等待时间,则直接抛出JedisConnectionException
    private static int MAX_WAIT = 10000;

    private static int TIMEOUT = 10000;

    //在borrow一个redis实例时,是否提前进行validate操作;
    //如果为true,则得到的jedis实例均是可用的
    private static boolean TEST_ON_BORROW = true;

    private static JedisPool jedisPool = null;

    /**
     * 初始化Redis连接池
     * Jedis的连接池配置需要用到org.apache.commons.pool.impl.GenericObjectPool.Config.class
     * 所以要引入commons-pool.jar
     * */
    static{
        try {
            JedisPoolConfig config = new JedisPoolConfig();
            config.setMaxTotal(MAX_ACTIVE);//老版本是setMaxActive
            config.setMaxIdle(MAX_IDLE);
            config.setMaxWaitMillis(MAX_WAIT);//老版本是maxMaxWait
            config.setTestOnBorrow(TEST_ON_BORROW);
            jedisPool = new JedisPool(config,ADDR,PORT,TIMEOUT);//有密码的时候传入AUTH

        } catch (Exception e) {
            e.printStackTrace();
        }
    }

    /**
     * 获取Jedis实例
     * */
    public synchronized static Jedis getJedis(){
        try {
            if(jedisPool != null){
                Jedis resource = jedisPool.getResource();
                return resource;
            }else{
                return null;
            }
        } catch (Exception e) {
            e.printStackTrace();
            return null;
        }
    }

    /**
     * 释放jedis资源
     * */
    public static void returnResource(final Jedis jedis){
        if(jedis != null){
            jedisPool.returnResourceObject(jedis);
        }
    }

}
不要忘记引入commons-pool.jar:
测试:
package cn.com.redis;

import redis.clients.jedis.Jedis;

public class Test6 {
    public static void main(String[] args) {
        RedisUtil redisUtil = new RedisUtil();
        Jedis jedis = redisUtil.getJedis();

        try {
            System.out.println(jedis.lrange("a", 0, -1));
            System.out.println(jedis.smembers("users"));
        } catch (Exception e) {
            e.printStackTrace();
        }finally{
            redisUtil.returnResource(jedis);
        }

    }
}
结果:
使用连接池获取jedis对象会更符合开发规范。
Jedis事务:
我们的Redis也有事务管理对象,其位于redis.clients.jedis.Transaction下。
Jedis事务的相关代码:
package cn.com.redis;

import redis.clients.jedis.Jedis;
import redis.clients.jedis.Transaction;

public class Test7 {
    public static void main(String[] args) {
        Jedis jedis = new Jedis("192.168.248.129",6379);

        Transaction transaction=jedis.multi();//返回一个事务控制对象

        //预先在事务对象中装入要执行的操作
        transaction.set("k4", "v4");
        transaction.set("k5", "v5");

        transaction.exec();//执行
    }
}
我们查看一下redis: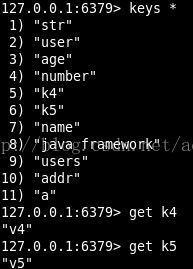
发现数据已经加入进去
我们把k4的value和k5的value改为“v44”和“v55”,
然后在transaction.exec()语句后加入transaction.discard()语句:
package cn.com.redis;

import redis.clients.jedis.Jedis;
import redis.clients.jedis.Transaction;

public class Test7 {
    public static void main(String[] args) {
        Jedis jedis = new Jedis("192.168.248.129",6379);

        Transaction transaction=jedis.multi();//返回一个事务控制对象

        //预先在事务对象中装入要执行的操作
        transaction.set("k4", "v44");
        transaction.set("k5", "v55");

        transaction.discard();//回滚
    }
}
会发现数据插入操作被回滚,redis中那两个值未被改变: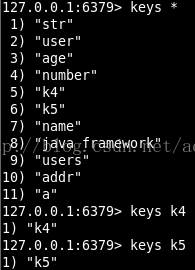
我们模拟一个刷一次信用卡的交易,使用redis的事务来处理一些逻辑:
package cn.com.redis;

import redis.clients.jedis.Jedis;
import redis.clients.jedis.Transaction;

public class TestTransaction {
    //模拟信用卡消费和还款
    public static void main(String[] args) {
        TestTransaction t = new TestTransaction();
        boolean retValue = t.transMethod(100);
        if(retValue){
            System.out.println("使用信用卡消费成功!");
        }else{
            System.out.println("使用信用卡消费失败!");
        }

    }

    /**
     * 通俗点讲,watch命令就是标记一个键,如果标记了一个键,
     * 在提交事务前如果该键被别人修改过,那事务就会失败,这种情况通常可以在程序中
     * 重新再尝试一次。
     *
     * 首先标记了balance,然后检查余额是否足够,不足就取消标记,并不做扣减;
     * 足够的话,就启动事务进行更新操作。
     * 如果在此期间键balance被其他人修改,拿在提交事务(执行exec)时就会报错,
     * 程序中通常可以捕获这类错误再重新执行一次,直到成功。
     * */
    private boolean transMethod(int amount) {

        System.out.println("您使用信用卡预付款"+amount+"元");

        Jedis jedis = new Jedis("192.168.248.129",6379);

        int balance = 1000;//可用余额
        int debt;//欠额
        int amtToSubtract = amount;//实刷额度

        jedis.set("balance", String.valueOf(balance));
        jedis.watch("balance");
        //jedis.set("balance", "1100");//此句不该出现,为了模拟其他程序已经修改了该条目
        balance = Integer.parseInt(jedis.get("balance"));
        if(balance < amtToSubtract){//可用余额小于实刷金额,拒绝交易
            jedis.unwatch();
            System.out.println("可用余额不足!");
            return false;
        }else{//可用余额够用的时候再去执行扣费操作
            System.out.println("扣费transaction事务开始执行...");
            Transaction transaction = jedis.multi();
            transaction.decrBy("balance",amtToSubtract);//余额减去amtToSubtract的钱数
            transaction.incrBy("debt", amtToSubtract);//信用卡欠款增加amtToSubtract的钱数
            transaction.exec();//执行事务
            balance = Integer.parseInt(jedis.get("balance"));
            debt = Integer.parseInt(jedis.get("debt"));
            System.out.println("扣费transaction事务执行结束...");

            System.out.println("您的可用余额:"+balance);
            System.out.println("您目前欠款:"+debt);
            return true;
        }
    }

}
此代码就是模拟用户使用信用卡刷了100元的东西,此时应该减去信用卡的可用余额100元,
增加100元的欠款。
运行结果: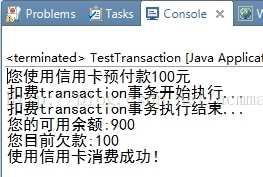
redis的结果: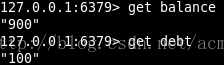
证明我们的操作是成功的。
加watch命令是为了在事务执行的过程中,防止其它的操作打断事务,或者是影响事务的计算结果,
导致“幻读”、“脏数据”等异常情况的发生。watch命令建立了一个键,一旦发现执行过程中该
键被别人修改过,那事务就会失败,程序中通常可以捕获这类错误再重新执行一次,直到成功。
所以watch命令可以保证数据的同步安全。
为了证明watch命令的用途,我们把上面代码里面的jedis.set("balance", "1100");注释释放,
然后transMethod方法抛出打断异常:throws InterruptedException,main方法捕获打断异常,
然后弹出相应警告框。
package cn.com.redis;

import java.util.List;

import redis.clients.jedis.Jedis;
import redis.clients.jedis.Transaction;

public class TestTransaction {
    //模拟信用卡消费和还款
    public static void main(String[] args) {
        TestTransaction t = new TestTransaction();
        boolean retValue=false;
        boolean Interrupted = false;

        try {
            retValue = t.transMethod(100);
        } catch (InterruptedException e) {
            Interrupted = true;
            System.out.println("事务被打断,请重新执行!");
        }finally{
            if(retValue){
                System.out.println("使用信用卡消费成功!");
            }else{
                if(!Interrupted){
                    System.out.println("使用信用卡消费失败!余额不足!");
                }
            }
        }
    }

    /**
     * 通俗点讲,watch命令就是标记一个键,如果标记了一个键,
     * 在提交事务前如果该键被别人修改过,那事务就会失败,这种情况通常可以在程序中
     * 重新再尝试一次。
     *
     * 首先标记了balance,然后检查余额是否足够,不足就取消标记,并不做扣减;
     * 足够的话,就启动事务进行更新操作。
     * 如果在此期间键balance被其他人修改,拿在提交事务(执行exec)时就会报错,
     * 程序中通常可以捕获这类错误再重新执行一次,直到成功。
     * */
    private boolean transMethod(int amount) throws InterruptedException{

        System.out.println("您使用信用卡预付款"+amount+"元");

        Jedis jedis = new Jedis("192.168.248.129",6379);

        int balance = 1000;//可用余额
        int debt;//欠额
        int amtToSubtract = amount;//实刷额度

        jedis.set("balance", String.valueOf(balance));
        jedis.watch("balance");
        jedis.set("balance", "1100");//此句不该出现,为了模拟其他程序已经修改了该条目
        balance = Integer.parseInt(jedis.get("balance"));
        if(balance < amtToSubtract){//可用余额小于实刷金额,拒绝交易
            jedis.unwatch();
            System.out.println("可用余额不足!");
            return false;
        }else{//可用余额够用的时候再去执行扣费操作
            System.out.println("扣费transaction事务开始执行...");
            Transaction transaction = jedis.multi();
            transaction.decrBy("balance",amtToSubtract);//余额减去amtToSubtract的钱数
            transaction.incrBy("debt", amtToSubtract);//信用卡欠款增加amtToSubtract的钱数
            List<Object> result = transaction.exec();//执行事务

            if(result==null){//事务提交失败,说明在执行期间数据被修改过

                System.out.println("扣费transaction事务执行中断...");
                throw new InterruptedException();

            }else{//事务提交成功
                balance = Integer.parseInt(jedis.get("balance"));
                debt = Integer.parseInt(jedis.get("debt"));
                System.out.println("扣费transaction事务执行结束...");

                System.out.println("您的可用余额:"+balance);
                System.out.println("您目前欠款:"+debt);

                return true;
            }
        }
    }

}
再运行一下,看一下效果: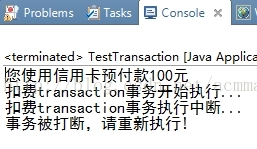
这就说明了,如果在watch命令执行后和事务提交之前,如果数据发生了修改操作,事务执行就不会成功,
此举保证了数据的安全性。
使用jedis实现主从模式(别忘记把两个终端全部执行slaveof no one,使两机各自独立):
package cn.com.redis;

import redis.clients.jedis.Jedis;

public class MasterAndSlaveTest {
    public static void main(String[] args) throws InterruptedException {
        Jedis jedis_M = new Jedis("192.168.248.129",6379);//主机
        Jedis jedis_S = new Jedis("192.168.248.129",6380);//从机

        //遵循“配从不配主”的模式
        jedis_S.slaveof("192.168.248.129",6379);

        jedis_M.set("class", "8888");//主机去写

        //内存中读写太快,防止读在写之前先完成而出现null的情况,这里做一下延迟
        Thread.sleep(2000);

        String result = jedis_S.get("class");//从机去读
        System.out.println(result);
    }
}
最终会输出8888,可以看到从机已经读取到了主机的信息,说明我们通过jedis设置主从模式成功。


 128
128

 被折叠的 条评论
为什么被折叠?
被折叠的 条评论
为什么被折叠?
 到【灌水乐园】发言


