推荐官方文档: https://www.zabbix.com/download?zabbix=7.0&os_distribution=alma_linux&os_version=9&components=proxy&db=mysql&ws=

Zabbix 7.0 LTS  proxy 配置_sql

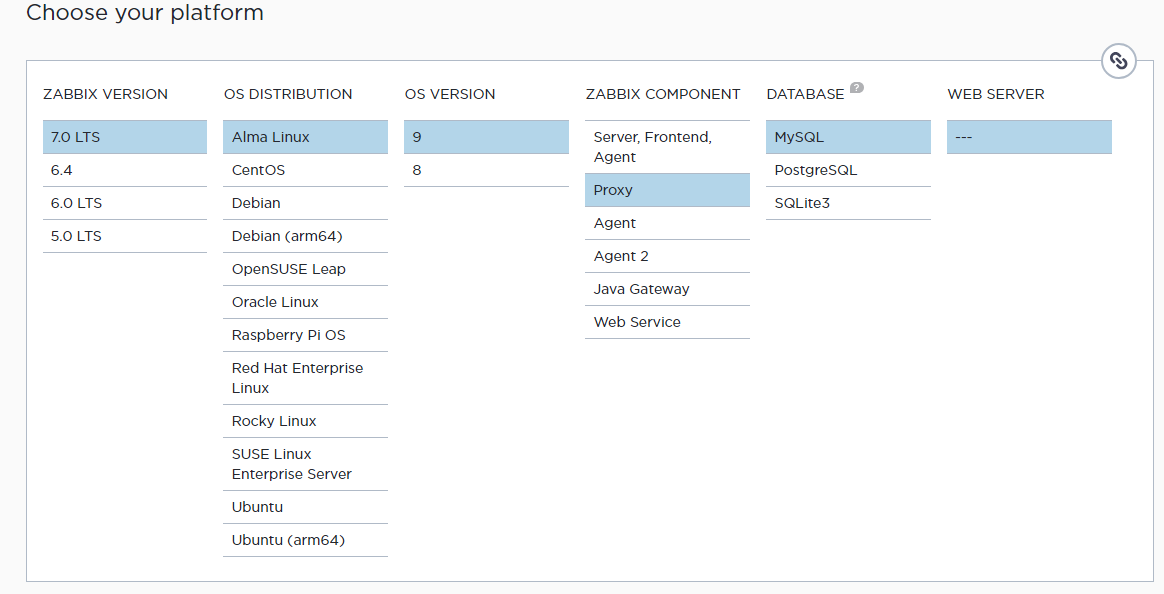
Alma Linux 9+Marridb 为例

1.Install and configure Zabbix Proxy for your platform
a.Proceed with installing zabbix repository. 安装zabbix源
rpm -Uvh https://repo.zabbix.com/zabbix/7.0/alma/9/x86_64/zabbix-release-7.0-5.el9.noarch.rpm
dnf clean all
  • 1.
  • 2.


b. Install Zabbix proxy 安装zabbix proxy
dnf install zabbix-proxy-mysql zabbix-sql-scripts zabbix-selinux-policy
  • 1.
c. 安装 Marridb或MySQL

vim /etc/yum.repos.d/mariadb.repo

# MariaDB 10.6 RedHatEnterpriseLinux repository list - created 2024-07-18 00:28 UTC
# https://mariadb.org/download/
[mariadb]
name = MariaDB
# rpm.mariadb.org is a dynamic mirror if your preferred mirror goes offline. See https://mariadb.org/mirrorbits/ for details.
# baseurl = https://rpm.mariadb.org/10.6/rhel/$releasever/$basearch
baseurl = https://mirrors.aliyun.com/mariadb/yum/10.6/rhel/$releasever/$basearch
# gpgkey = https://rpm.mariadb.org/RPM-GPG-KEY-MariaDB
gpgkey = https://mirrors.aliyun.com/mariadb/yum/RPM-GPG-KEY-MariaDB
gpgcheck = 1
  • 1.
  • 2.
  • 3.
  • 4.
  • 5.
  • 6.
  • 7.
  • 8.
  • 9.
  • 10.
dnf makecache
  • 1.
yum -y install mariadb-server mariadb 
#yum remove mariadb-server mariadb 
systemctl start mariadb.service
systemctl enable mariadb.service
netstat -natp | grep 3306
或   ss -natp | grep 3306
  • 1.
  • 2.
  • 3.
  • 4.
  • 5.
  • 6.
d. Create initial database

Make sure you have database server up and running.

Run the following on your database host.

# mysql -uroot -p
password
mysql> create database zabbix_proxy character set utf8mb4 collate utf8mb4_bin;
mysql> create user zabbix@localhost identified by 'password';
mysql> grant all privileges on zabbix_proxy.* to zabbix@localhost;
mysql> set global log_bin_trust_function_creators = 1;
mysql> quit;
  • 1.
  • 2.
  • 3.
  • 4.
  • 5.
  • 6.
  • 7.

On Zabbix server host import initial schema and data. You will be prompted to enter your newly created password.

# cat /usr/share/zabbix-sql-scripts/mysql/proxy.sql | mysql --default-character-set=utf8mb4 -uzabbix -p zabbix_proxy
  • 1.

Disable log_bin_trust_function_creators option after importing database schema.

# mysql -uroot -p
password
mysql> set global log_bin_trust_function_creators = 0;
mysql> quit;
  • 1.
  • 2.
  • 3.
  • 4.
e. Configure the database for Zabbix proxy

Edit file /etc/zabbix/zabbix_proxy.conf

DBPassword=password
Server=X.X.X.X
  • 1.
  • 2.
f. Start Zabbix proxy process

Start Zabbix proxy process and make it start at system boot.
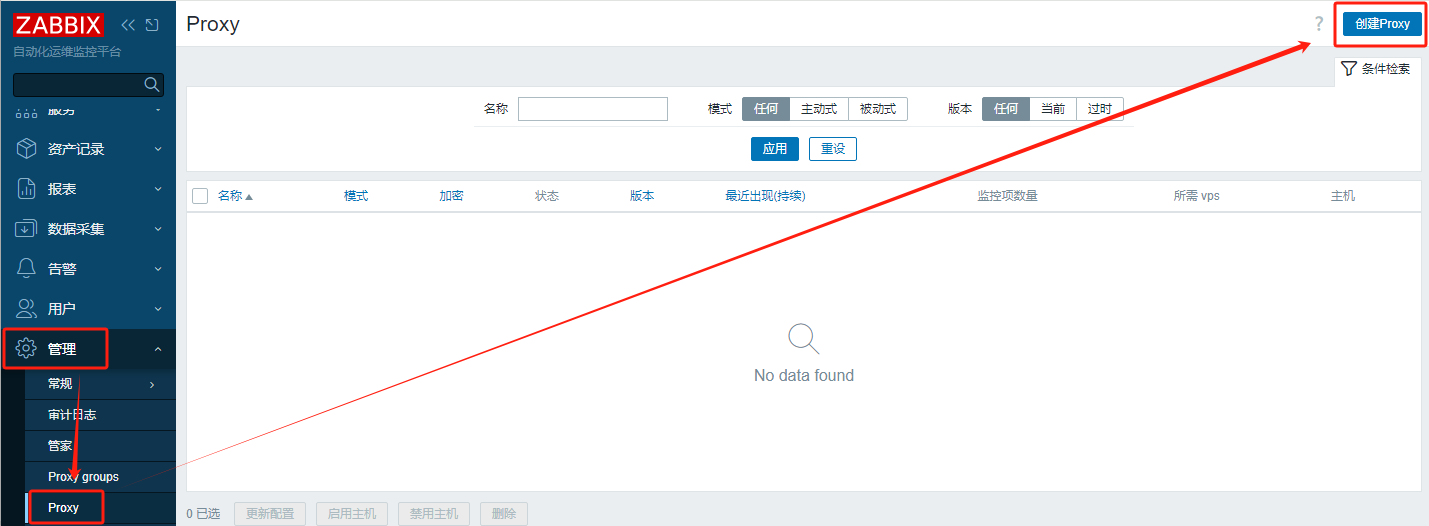
systemctl restart zabbix-proxy
systemctl enable zabbix-proxy
  • 1.
  • 2.


2.在Server上创建proxy

Zabbix 7.0 LTS  proxy 配置_Server_02

Zabbix 7.0 LTS  proxy 配置_Server_03

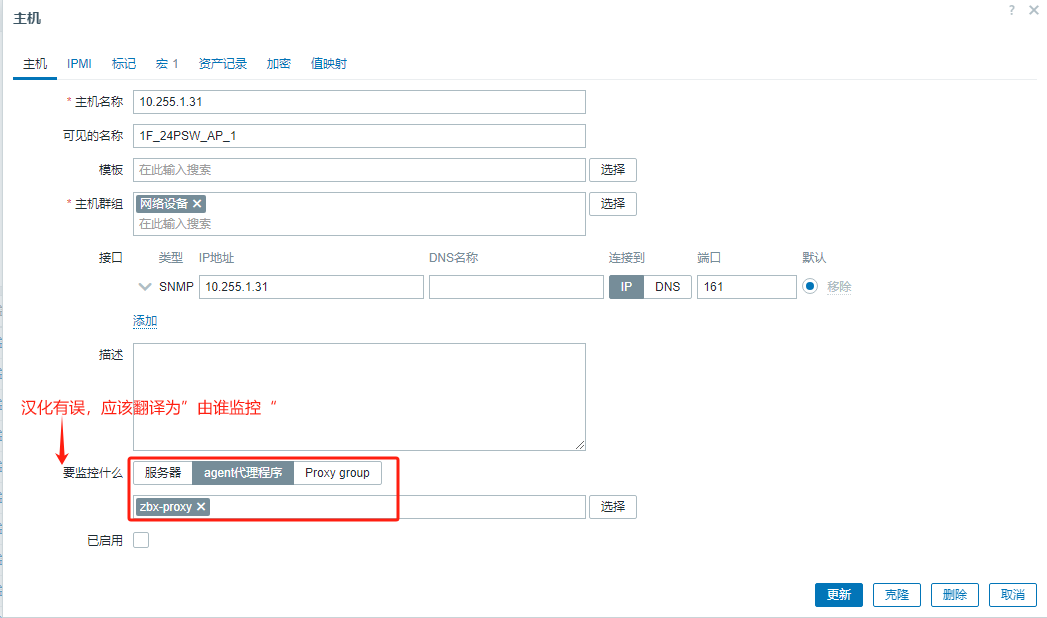
3.web界面设置主机从proxy获取数据

Zabbix 7.0 LTS  proxy 配置_sql_04

4、Agent端的server指向 proxy