


下载php5.6.9包并解压
[root@localhost ~]# tar xf php-5.6.9.tar.bz2编译安装
我的编译选项如下
--prefix=/usr/local/php:定义安装的路径
--with-mysql=/usr/local/mysql :指定mysql安装目录
--with-mysqli=/usr/local/mysql/bin/mysql_config
--with-openssl:Include OpenSSL support (requires OpenSSL >= 0.9.6)
--enable-mbstring :允许多字节的字符串支持,这样可支持中文等字体
--with-freetype-dir: Set the path to FreeType 2 install prefix
--with-jpeg-dir :GD: Set the path to libjpeg install prefix
--with-png-dir :GD: Set the path to libpng install prefix
--with-zlib :--with-zlib=DIR Include ZLIB support (requires zlib >= 1.0.9)
--with-libxml-dir=/usr :得先安装libxml2
--enable-xml :支持扩展标记语言
--enable-sockets :支持sockets
--with-apxs2=/usr/local/apache/bin/apxs :构建动态模块2.0支持支持,这里意味着在你的/etc/httpd/httpd.conf中.,如果希望使用fastcgi那么请替换为enable-fpm
--with-mcrypt :提供加密支持
--with-config-file-path=/etc :在/etc目录下生成配置文件/etc/php.ini
--with-config-file-scan-dir=/etc/php.d :在/etc/php.d目录下有分配置文件
--with-bz2 :支持bz2压缩
--enable-maintainer-zts:支持线程的模块,如果使用prefork请不要加入该选项,可通过命令httpd V显示当前加载的模块
[root@localhost php-5.6.9]#./configure --prefix=/usr/local/php --with-mysql=/usr/local/mysql --with-openssl --with-mysqli=/usr/local/mysql/bin/mysql_config --enable-mbstring --with-freetype-dir --with-jpeg-dir --with-png-dir --with-zlib --with-libxml-dir=/usr --enable-xml --enable-sockets --with-apxs2=/usr/local/apache/bin/apxs --with-mcrypt --with-config-file-path=/etc --with-config-file-scan-dir=/etc/php.d --with-bz2 --enable-maintainer-zts
由于软件太多,所以先编译一下试试
configure: error: mcrypt.h not found. Please reinstall libmcrypt.
下载libmcrypt,yum初始源里面并没有,所以去别处下载
下载这四个包并安装,如果不想下载,请自己更新163或其他源,亲测http://jingyan.baidu.com/article/d2b1d1027b76c75c7e37d4d0.html可以,更新挺久的,2h左右,最后我的可以yum找到这几个包了,如果不想更新源,请按照下面步骤
[root@localhost ~]# wget {ftp://rpmfind.net/linux/epel/6/x86_64/libmcrypt-2.5.8-9.el6.x86_64.rpm,ftp://rpmfind.net/linux/epel/6/x86_64/libmcrypt-devel-2.5.8-9.el6.x86_64.rpm}
[root@localhost ~]# wget {ftp://rpmfind.net/linux/epel/6/x86_64/mhash-devel-0.9.9.9-3.el6.x86_64.rpm,ftp://rpmfind.net/linux/epel/6/x86_64/mhash-0.9.9.9-3.el6.x86_64.rpm}
中间可能会有说NOKEY,被我忽略了
再重新编译下试试,如果最后几行是create….就是成功了
[root@localhost php-5.6.9]# make&&make install
[root@localhost php-5.6.9]# cp php.ini-production /etc/php.ini解决与httpd的联系,如果启动不了,请把自己的防火墙和selinux关掉哦
a)在指定行添加 AddType application/x-httpd-php .php .phtml
b)在指定行修改 DirectoryIndex index.html index.php
测试php是否正常运行
修改网页主页为Index.php,把之前的index.html备份或者删除
[root@localhost htdocs]# cat index.php
it works!
phpinfo();
?>
具体我不截图了,很多之前编译加载的模块被enabled,可以使用
测试与mysql的连接
[root@localhost htdocs]# cat index.php
if ($conn)
echo "success!";
else
echo "failure!";
?>
安装php的xcache3.0(负责加速解析php代码)扩展
下载安装包,编译安装
下面这部分,针对php5.4可用
[root@localhost ~]# tar xf xcache-3.0.1.tar.gz
[root@localhost ~]# cd xcache-3.0.1
[root@localhost xcache-3.0.1]# /usr/local/php/bin/phpize #phpize是准备一个php扩展准备编译,第一层次的检查
Configuring for:
PHP Api Version: 20131106
Zend Module Api No: 20131226
Zend Extension Api No: 220131226
编译指定哪个扩展(xcache),php-config是负责解析这个扩展并编译的,相当于检阅吧
[root@localhost xcache-3.0.1]# ./configure --enable-xcache --with-php-config=/usr/local/php/bin/php-config
[root@localhost xcache-3.0.1]# make&&make install
/root/xcache-3.0.1/xcache.c: In function 'zif_xcache_get_special_value':
/root/xcache-3.0.1/xcache.c:324: error: 'IS_CONSTANT_ARRAY' undeclared (first use in this function)
/root/xcache-3.0.1/xcache.c:324: error: (Each undeclared identifier is reported only once
/root/xcache-3.0.1/xcache.c:324: error: for each function it appears in.)
make: *** [xcache.lo] Error 1
上面的内容会报错,原因是php5.6 xcache3.0并不支持,所以官网下载最新版,所以还是多去官网或权威网站比较好
[root@localhost~]# tar xzf xcache-3.2.0.tar.gz
[root@localhost~]# cd xcache-3.2.0
[root@localhostxcache-3.2.0]# /usr/local/php/bin/phpize
Configuringfor:
PHPApi Version: 20131106
ZendModule Api No: 20131226
ZendExtension Api No: 220131226
[root@localhostxcache-3.2.0]# ./configure --enable-xcache--with-php-config=/usr/local/php/bin/php-config
[root@localhostxcache-3.2.0]#make&&make install
Installingshared extensions: /usr/local/php/lib/php/extensions/no-debug-zts-20131226/
终于安装好了,看来编译环境和软件版本等都需要考虑
把主配置文件放到php的碎片配置小分队
[root@localhostxcache-3.2.0]# mkdir /etc/php.d
[root@localhostxcache-3.2.0]# cp xcache.ini /etc/php.d/
修改/etc/php.d/xcache.ini文件中的指定地方
extension= /usr/local/php/lib/php/extensions/no-debug-zts-20131226/xcache.so
重启服务
[root@localhostxcache-3.2.0]# service httpd restart
Stoppinghttpd: [ OK ]
Startinghttpd: [ OK ]
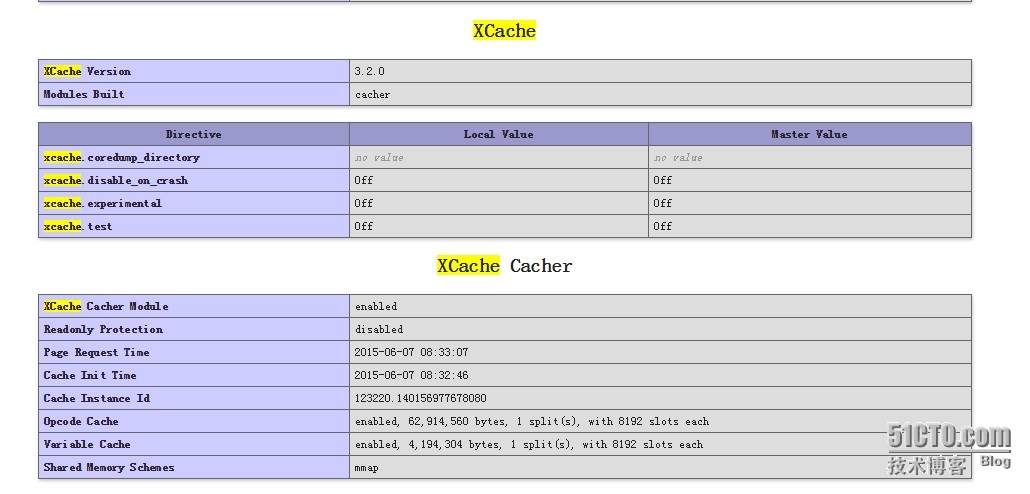
再次打开网页发现有了这个模块支持


 768
768


 被折叠的 条评论
为什么被折叠?
被折叠的 条评论
为什么被折叠?
 到【灌水乐园】发言


