


在assets文件夹里面,可找到基本的应用程序模板资源包-
namespace app\assets;
use yii\web\AssetBundle;
/**
* @author Qiang Xue
* @since 2.0
*/
class AppAsset extends AssetBundle {
public $basePath = '@webroot';
public $baseUrl = '@web';
public $css = [
'css/site.css',
];
public $js = [];
public $depends = [
'yii\web\YiiAsset',
'yii\bootstrap\BootstrapAsset',
];
}
?>
上述类指定资源文件位于 @webroot 文件夹中,其对应于URL @web 。 此资源包不包含 JS 文件和 CSS 文件。该包依赖于其他包-
yii\web\YiiAsset 和 yii\bootstrap\BootstrapAsset
AssetBundle的属性
以下是资源包的属性。
basePath− 定义在此捆绑包包含资源文件的Web访问目录。
baseUrl− 指定对应于根路径属性的URL
js − 定义包含在此捆绑包的JS文件数组
css − 定义包含在这个捆绑包的CSS文件数组
depends − 定义了该包依赖于资源包数组。这意味着,当前资源包的CSS和JS文件将被包括在资源包,这是取决于属性声明之后。
sourcePath− 定义包含资源文件的根目录。如果根目录不是通过Web访问,应该要设置这个属性。
否则应该设置basePath和baseUrl属性。
cssOptions − 定义选项将传递到 yii\web\View∷registerCssFile 函数
jsOptions− 定义的选项被传递到 yii\web\View::registerJsFile 函数
publishOptions: 指定选项将被传递到yii\web\AssetManager::publish 函数
资源的分类
根据位置,assets 可以被归类为-
Source Assets− assets是位于无法通过网络直接访问的目录。在页面使用源资源应该被复制到网站目录。
这个过程被称为资源发布。
PublishedAssets − 该 assets 为位于一个Web访问的目录
External Assets− 该 assets 位于另一台Web服务器上。
使用资源包
第1步 - 在 assets 文件夹里面创建一个名为 DemoAsset.php 的新文件包含以下内容。
namespace app\assets;
use yii\web\AssetBundle;
class DemoAsset extends AssetBundle {
public $basePath = '@webroot';
public $baseUrl = '@web';
public $js = ['js/demo.js'];
}
?>
第2步 - 声明一个demo.js文件的新资源包。现在,在 web/js 文件夹中,创建一个名为 demo.js 文件并使用以下代码。
console.log("hello from Demo asset");
第3步 - 要注册新创建的资源包,转到 views/layouts 目录,并在 main.php 文件的顶部,添加以下行。
\app\assets\DemoAsset::register($this);
第4步 - 如果在Web浏览器中打开URL:http://localhost:8080/index.php,你应该看到下面的 chrome 控制台输出。

还可以定义jsOptions和cssOptions属性来定制该CSS和JS文件包含在一页面。 默认情况下,JS文件包括在结束标记之前。
步骤5 - 在JS文件包函在头部分,使用以下列方式修改 DemoAsset.php 文件。
namespace app\assets;
use yii\web\AssetBundle;
use yii\web\View;
class DemoAsset extends AssetBundle {
public $basePath = '@webroot';
public $baseUrl = '@web';
public $js = ['js/demo.js'];
public $jsOptions = ['position' => View::POS_HEAD];
}
?>
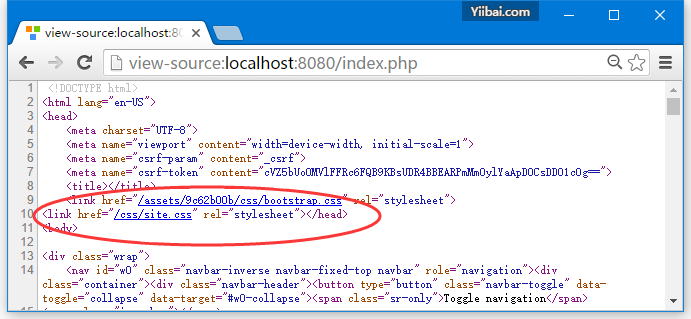
第6步 - 现在进入到 http://localhost:8080/index.php,应该看到 demo.js 脚本包含在页面的 head 部分。
这是一个Web应用程序的普遍做法,在生产模式下运行,以使HTTP缓存 assets 资源。通过这样做,最近修改的时间戳将被附加到所有已发布的 assets 资源。
第7步 - 转到 config/web.php 并修改文件web.php,如下面的代码。
$params = require(__DIR__ . '/params.php');
$config = [
'id' => 'basic',
'basePath' => dirname(__DIR__),
'bootstrap' => ['log'],
'components' => [
'assetManager' => [
'appendTimestamp' => true,
],
'request' => [
// !!! insert a secret key in the following (if it is empty) - this is
//required by cookie validation
'cookieValidationKey' => 'yiibai.com',
],
'cache' => [
'class' => 'yii\caching\FileCache',
],
'user' => [
'identityClass' => 'app\models\User',
'enableAutoLogin' => true,
],
'errorHandler' => [
'errorAction' => 'site/error',
],
'mailer' => [
'class' => 'yii\swiftmailer\Mailer',
// send all mails to a file by default. You have to set
// 'useFileTransport' to false and configure a transport
// for the mailer to send real emails.
'useFileTransport' => true,
],
'log' => [
'traceLevel' => YII_DEBUG ? 3 : 0,
'targets' => [
[
'class' => 'yii\log\FileTarget',
'levels' => ['error', 'warning'],
],
],
],
'db' => require(__DIR__ . '/db.php'),
],
'modules' => [
'admin' => [
'class' => 'app\modules\admin\Admin',
],
],
'params' => $params,
];
if (YII_ENV_DEV) {
// configuration adjustments for 'dev' environment
$config['bootstrap'][] = 'debug';
$config['modules']['debug'] = [
'class' => 'yii\debug\Module',
];
$config['bootstrap'][] = 'gii';
$config['modules']['gii'] = [
'class' => 'yii\gii\Module',
];
}
return $config;
?>
我们已经增加了AssetManager 组件,并设置 appendTimestamp 属性。
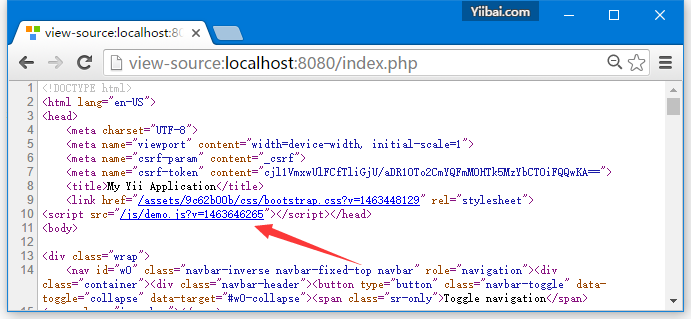
第8步,在Web浏览器的地址栏中输入: http://localhost:8080/index.php 。你会发现,所有的 assets 资源现在有一个时间戳,如下面的图片所示。
Yii的核心Assetbundles
以下是 Yii 核心Assetbundles
yii\web\JqueryAsset − 包含 jquery.js 文件
yii\web\YiiAsset − 包含yii.js文件,它实现在模块组织JS代码的机制
yii\bootstrap\BootstrapAsset − 包含yii.js文件,它在模块组织实现JS代码的机制
yii\bootstrap\BootstrapPluginAsset − 包函来自Twitter Bootstrap 框架JS文件
yii\jui\JuiAsset − 包括 jQuery UI库中的CSS和JS文件


 380
380


 被折叠的 条评论
为什么被折叠?
被折叠的 条评论
为什么被折叠?
 到【灌水乐园】发言


