


简单记录工具的一个模块
后端
Api调用
登录 腾讯元器 后创建智能体,按自己的需求来创建,发布后要等等审核。
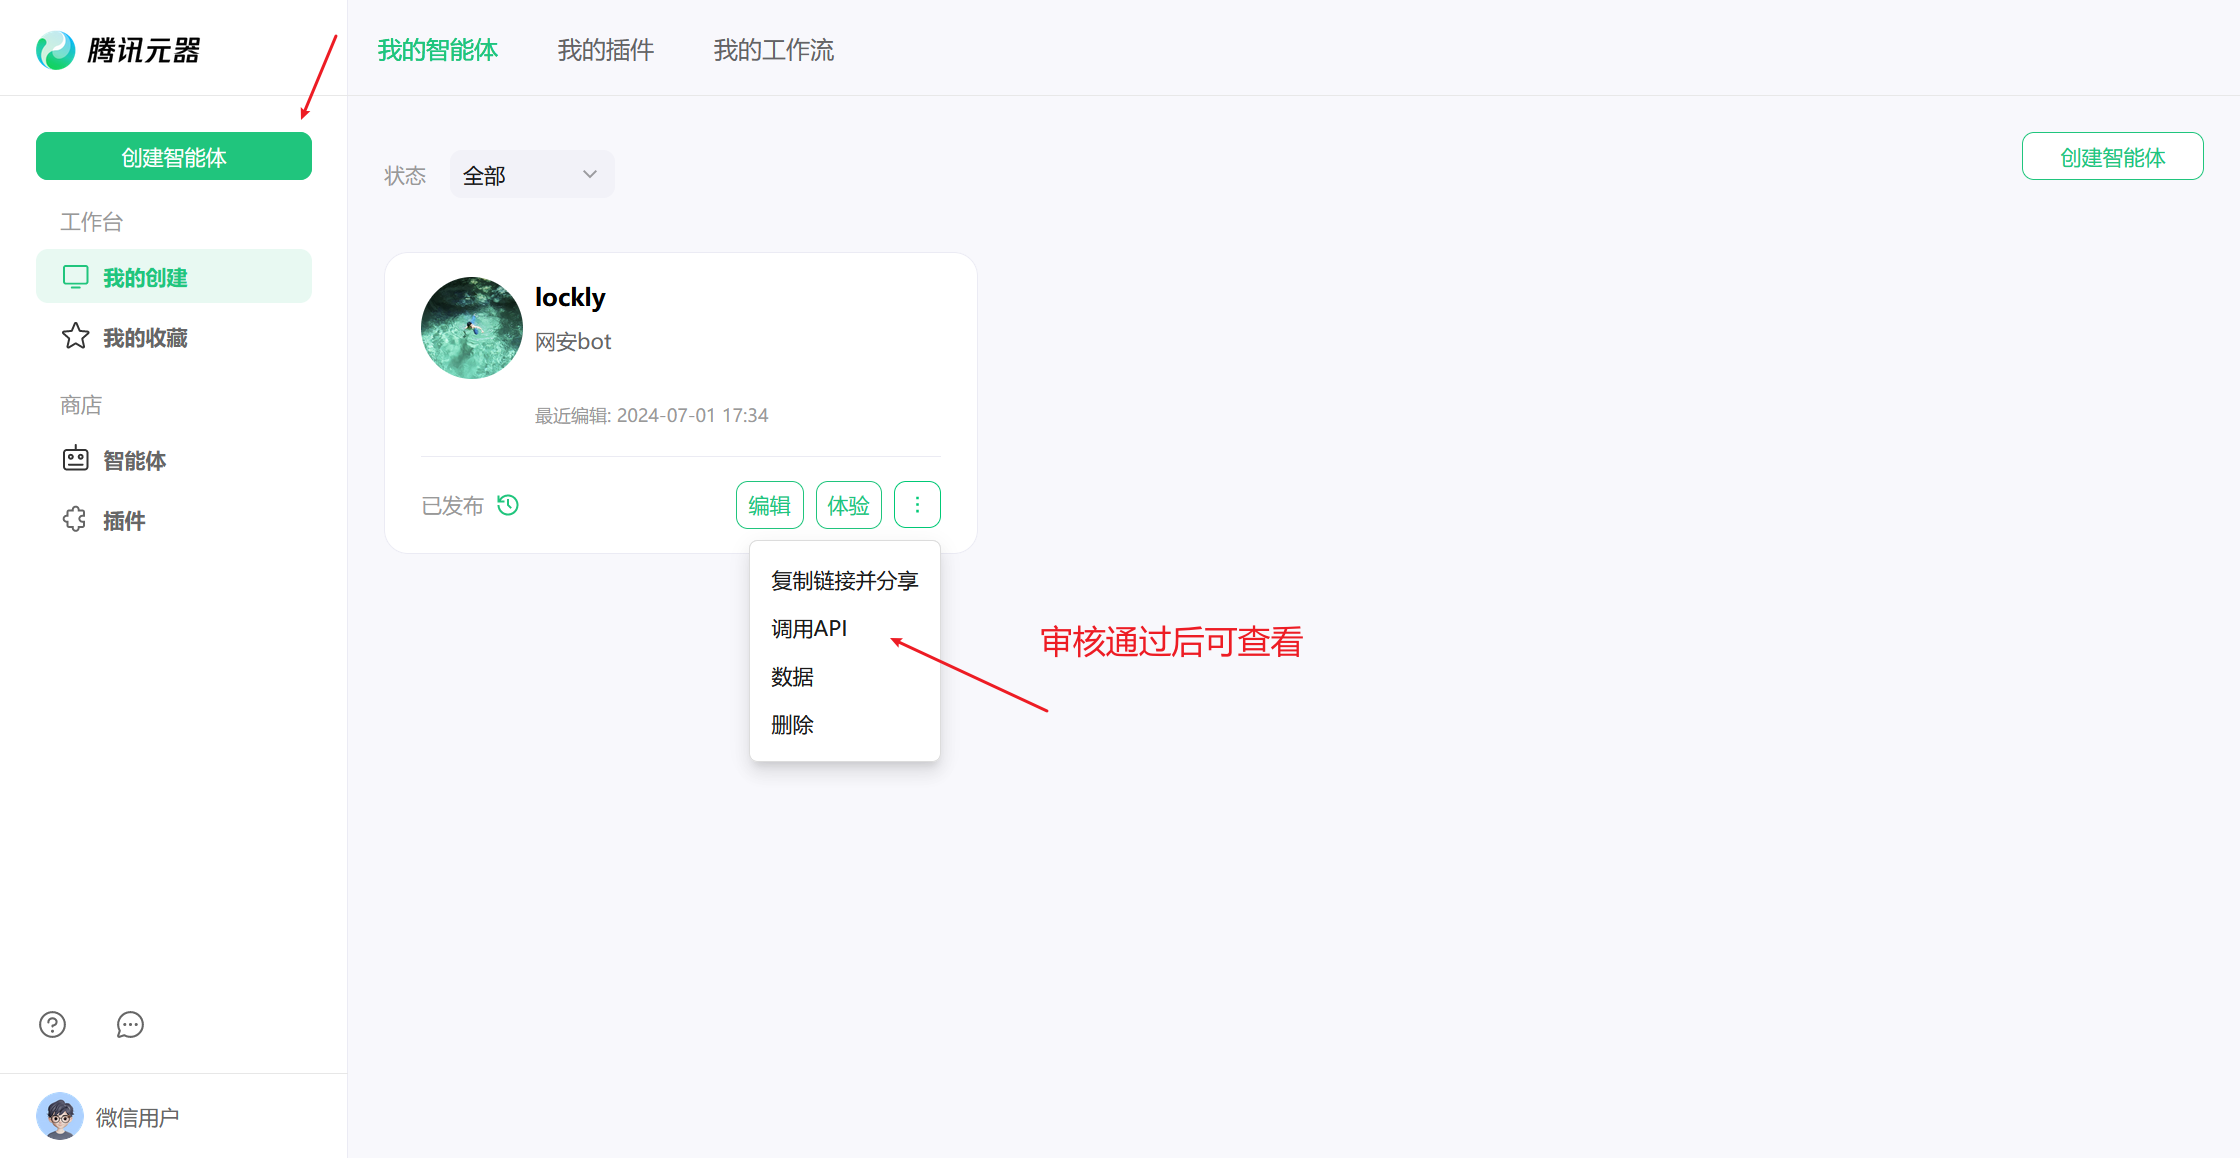
等发布完成后点击调用api即可,这里可以看到user_id, assistant_id,token参数
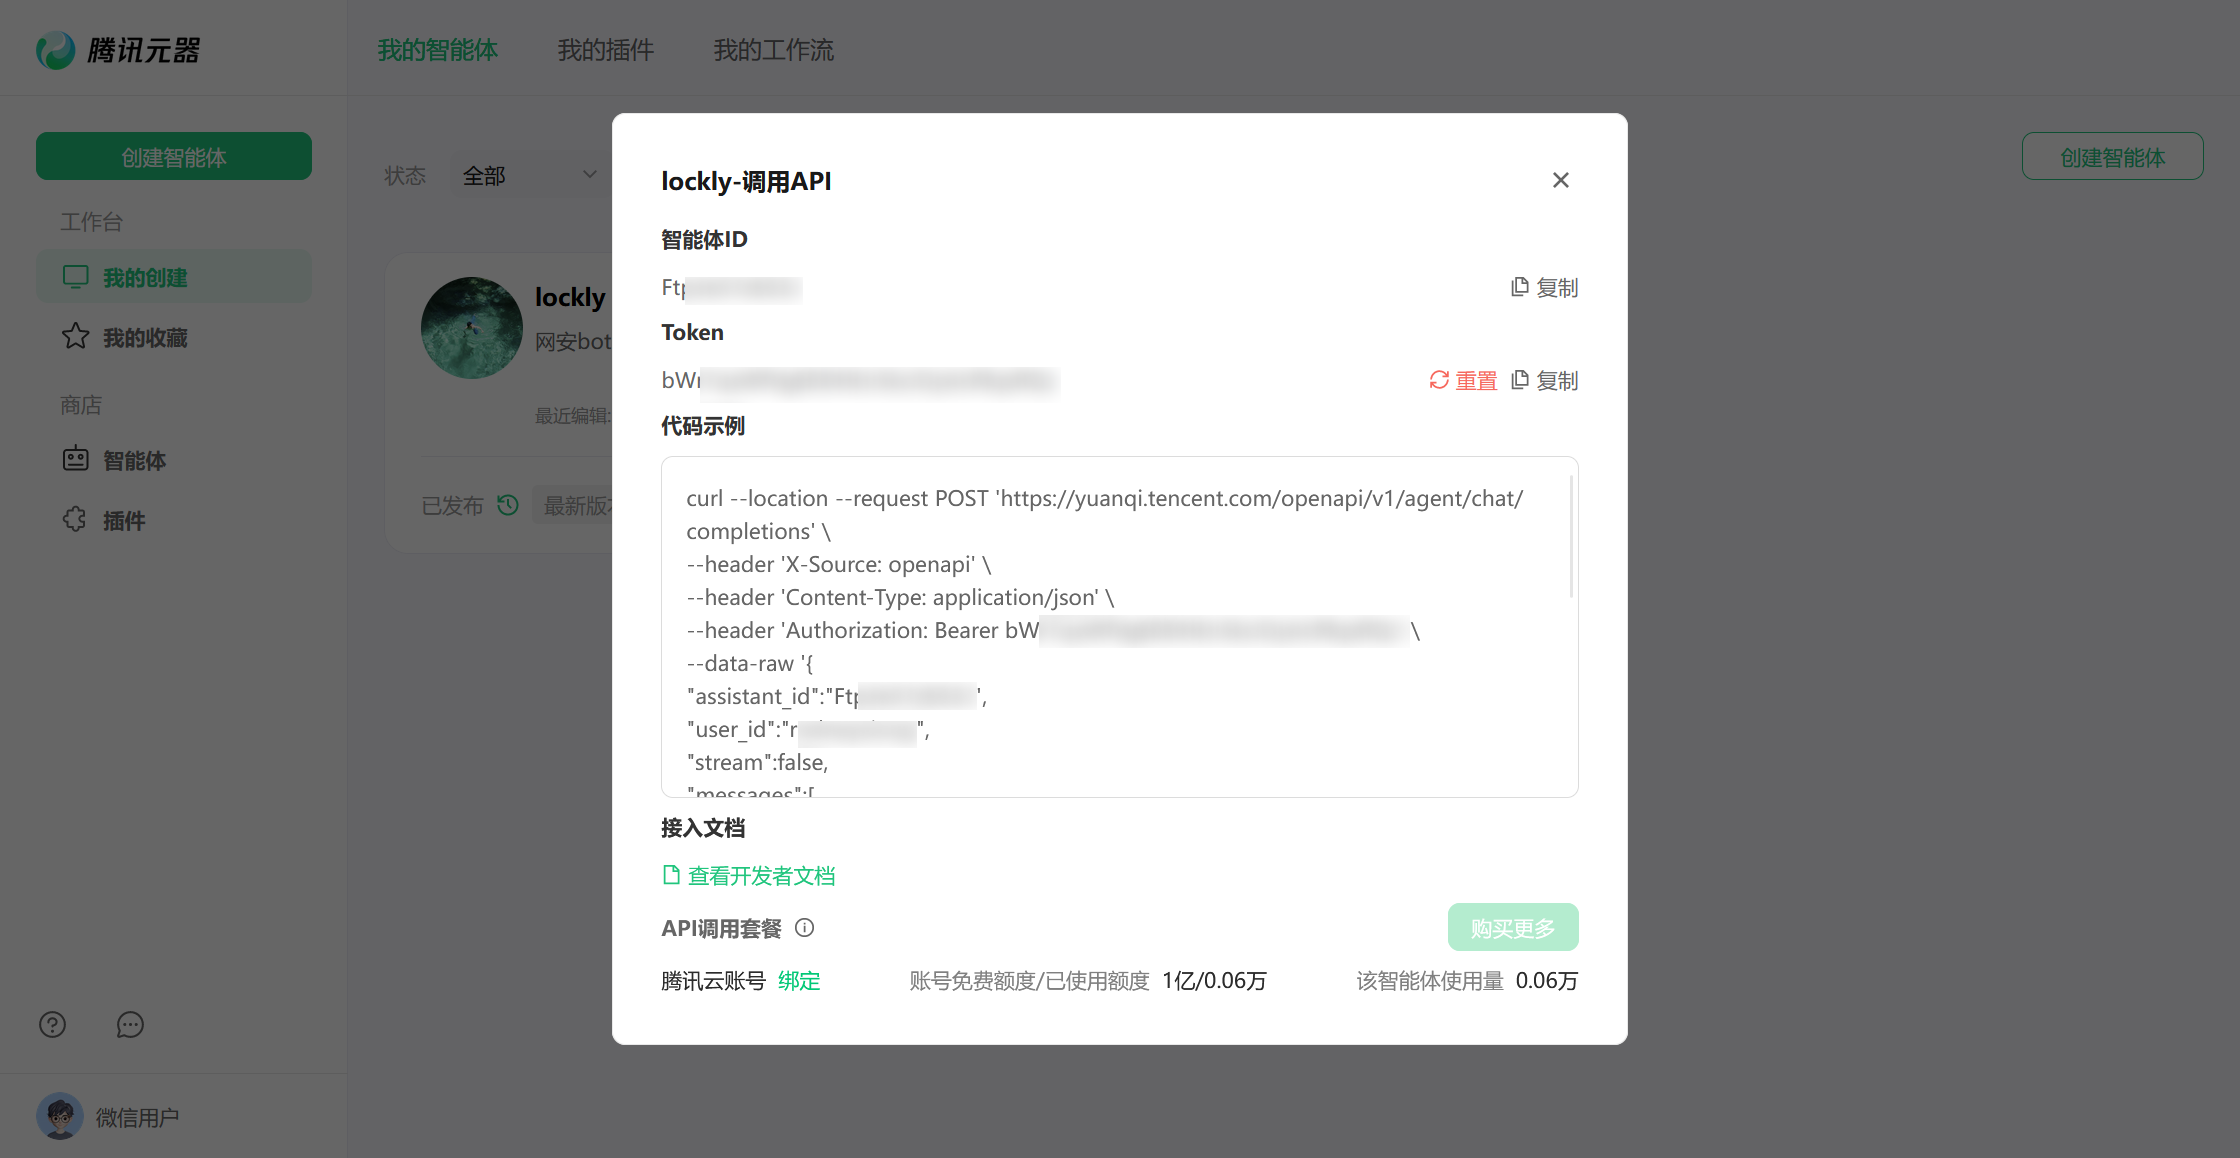
使用github.com/chenmingyong0423/go-yuanqi这个封装好了的库来调用api,根据demo的使用(这里以非流式 API 交互为例子),要注意更改一处,原先的chat.Chat()改为chat.Session()(作者的demo中没有及时更新使用),如下:
       package main


       import (

       	"context"

       	"fmt"

       	"github.com/chenmingyong0423/go-yuanqi"

       	"log"

       	"time"

       )


       /**

        * @Author Lockly

        * @Description

        * @Date 2024/7/1

        **/


       func main() {

       	chat := yuanqi.NewChat("assistant_id", "user_id", "token", yuanqi.WithAssistantVersion(""), yuanqi.WithTimeOut(10*time.Second))

       	// 上面的参数依次填入

       	session := chat.Session().WithStream(false).WithChatType("published")


       	textContent := yuanqi.NewContentBuilder().Text("hi").Build()


       	// 图片消息要启用插件故没有使用

       	message := yuanqi.NewMessageBuilder().

       		Role("user").

       		Content(textContent).Build()


       	resp, err := session.AddMessages(message).Request(context.Background())

       	if err != nil {

       		log.Fatal(err)

       	}


       	// 如果只想要获得ai的回答

       	fmt.Println(resp.Choices[0].Message.Content)

       }
简单封装一下即可,传入问题获取回复,上面的三个参数从配置中获取。简单说一下在wails的app.go(其他注册了的一样)中定义方法,命令行wails dev启动之后会自动加入wailsjs供前端调用:
简单定义一下:
       func (a *App) ChatWithAI(content string, config *share.Config) string {

       	resp, err := service.Chat(content, a.config)

       	if err != nil {

       		log.Logger.Error("ERR 获取AI回复失败")

       		return err.Error()

       	}

       	return resp

       }
前端
界面
前端要调用先引入import {ChatWithAI} from "../../../wailsjs/go/cli/App";,然后显示用的naive ui的组件, 针对于配置,可以增加一个页面(模态框,抽屉都可以的)进行修改,其他有必要的可以看着添加。
           <n-modal v-model:show="showModal">

             <n-card

                 style="width: 600px"

                 title="AI Assistant"

                 :bordered="false"

                 size="huge"

                 role="dialog"

                 aria-modal="true"

             >

               <template #header-extra>

                 配置

               </template>

                 <n-form style="margin: 1px">

                   <n-form-item-row label="AssistantID">

                     <n-input v-model:value="data.AssistantID" placeholder="智能体ID"/>

                   </n-form-item-row>


                   <n-form-item-row label="Assistant Name">

                     <n-input v-model:value="data.AssistantName" placeholder="智能体名称,自定义"/>

                   </n-form-item-row>


                   <n-form-item-row label="UserID">

                     <n-input v-model:value="data.UserID" placeholder="UserID"/>

                   </n-form-item-row>


                   <n-form-item-row label="Token">

                     <n-input v-model:value="data.Token" placeholder="Token"/>

                   </n-form-item-row>

                 </n-form>

               <n-flex justify="space-between">

                 <n-button strong secondary type="primary" @click="submit">保存</n-button>

                 <n-button strong secondary type="info" @click="reset">清空</n-button>

               </n-flex>

               <template #footer>

                 ❗目前仅支持腾讯元器

               </template>

             </n-card>

           </n-modal>

聊天的显示用的是n-log组件,用于显示日志的,将问题和回复push进去,关键是支持高亮,
           <n-log

               language="naive-log"

               font-size="14"

               :log="chatData"

               :loading="waiting"

               line-height="1.5"

               rows="27.5"

               style="padding: 10px"

           />
这里定义const msg: string[] = []; const chatData = ref(showMsg('', false))其中showMsg函数只要做到将content push进msg然后加上\n换行就可以简单实现消息显示,接着处理高亮。
高亮
naive ui中不内置highlight.js,所以在使用前要引入import hljs from 'highlight.js/lib/core'并提前设定:
         <n-config-provider :hljs="hljs">

           <my-app />

         </n-config-provider>
hljs里面内置了一些语言,但是我尝试了他并不会生效,比如注册markdown然后再n-log中也使用markdown,当ai回复的代码用markdown语法```来装载代码时并不会高亮,同样用相应的语言也不奏效。
       import markdown from 'highlight.js/lib/languages/markdown'


       hljs.registerLanguage('markdown ', markdown )
但是官网中提供的例子是自定义的语言来实现相应的功能,比如他们的高亮全部数字:
         import hljs from 'highlight.js/lib/core'


         hljs.registerLanguage('naive-log', () => ({

           contains: [

             {

               className: 'number',

               begin: /\d+/

             }

           ]

         }))
同样的可以像他这样用正则匹配到字符去设置类目来调整样式,比如对中英文,以及我这里想标记对话的符号 »:
       hljs.registerLanguage('naive-log', () => ({

         contains: [

           {

             className: 'number',

             begin: /\d+/

           },

           {

             className: 'chinese',

             begin: /[\u4e00-\u9fa5]/, // 中文字符范围(Unicode 编码范围)

             relevance: 10

           },

           {

             className: 'english',

             begin: /[A-Za-z]/,

             relevance: 0

           },

           {

             className: 'bot',

             begin: /[\w\s]+»\s*/, // 匹配任何单词、空格直到遇到 » 后跟空格

             relevance: 1,

           },

         ]

       }))
这里的className随便定义,好区分就行,然后对其进行定义,wails中在style.css中定义:(其他新增的在下面添加即可)
       .n-code,

       .n-layout-content,

       .n-layout-header,

       .n-layout,

       .terminal .t-window {

           font-family: "Microsoft YaHei UI", system-ui;

       }


       .n-code .hljs-attr,

       .n-code .hljs-variable,

       .n-code .hljs-template-variable,

       .n-code .hljs-type,

       .n-code .hljs-selector-class,

       .n-code .hljs-selector-attr,

       .n-code .hljs-selector-pseudo,

       .n-code .hljs-number {

           color: #078585;

           font-family: "Microsoft YaHei UI", system-ui;

       }


       .n-code .hljs-log-info {color: #25c9ab;}

       .n-code .hljs-log-debug {color: #13778a;}

       .n-code .hljs-log-error {color: #931023;}

       .n-code .hljs-log-warn {color: #0d705e;}


       .n-code .hljs-chinese {color: rgba(19, 19, 19, 0.89);}

       .n-code .hljs-english {color: rgba(31, 32, 33, 0.89);}

       .n-code .hljs-bot {color: #11c5a4;}
最后增加一个输入框和两个按钮,输入框设置属性@keydown.enter="send"回车就触发方法send,这个方法用于调用前面的ChatWithAI,由于回复需要时间,可以在输入框和日志显示都设置:loading属性来等待加载,同时输入框在等待期间要禁用。
           <n-log

               language="naive-log"

               font-size="14"

               :log="chatData"

               :loading="waiting"

               line-height="1.5"

               rows="27.5"

               style="padding: 10px"

           />


           <n-flex justify="space-around" size="large" style="margin-top: 20px">

             <n-input

                 v-model:value="data.Message"

                 placeholder="回车搜索"

                 :loading=waiting

                 :disabled=disable

                 style="width: 80%;"

                 @keydown.enter="send"

                 clearable

             >

               <template #prefix>

                 <n-icon :component="FlashOutline" />

               </template>

             </n-input>

             <n-button strong secondary type="primary" @click="clearMsg">清空</n-button>

             <n-button strong secondary type="info" @click="showModal = true">设置</n-button>

           </n-flex>
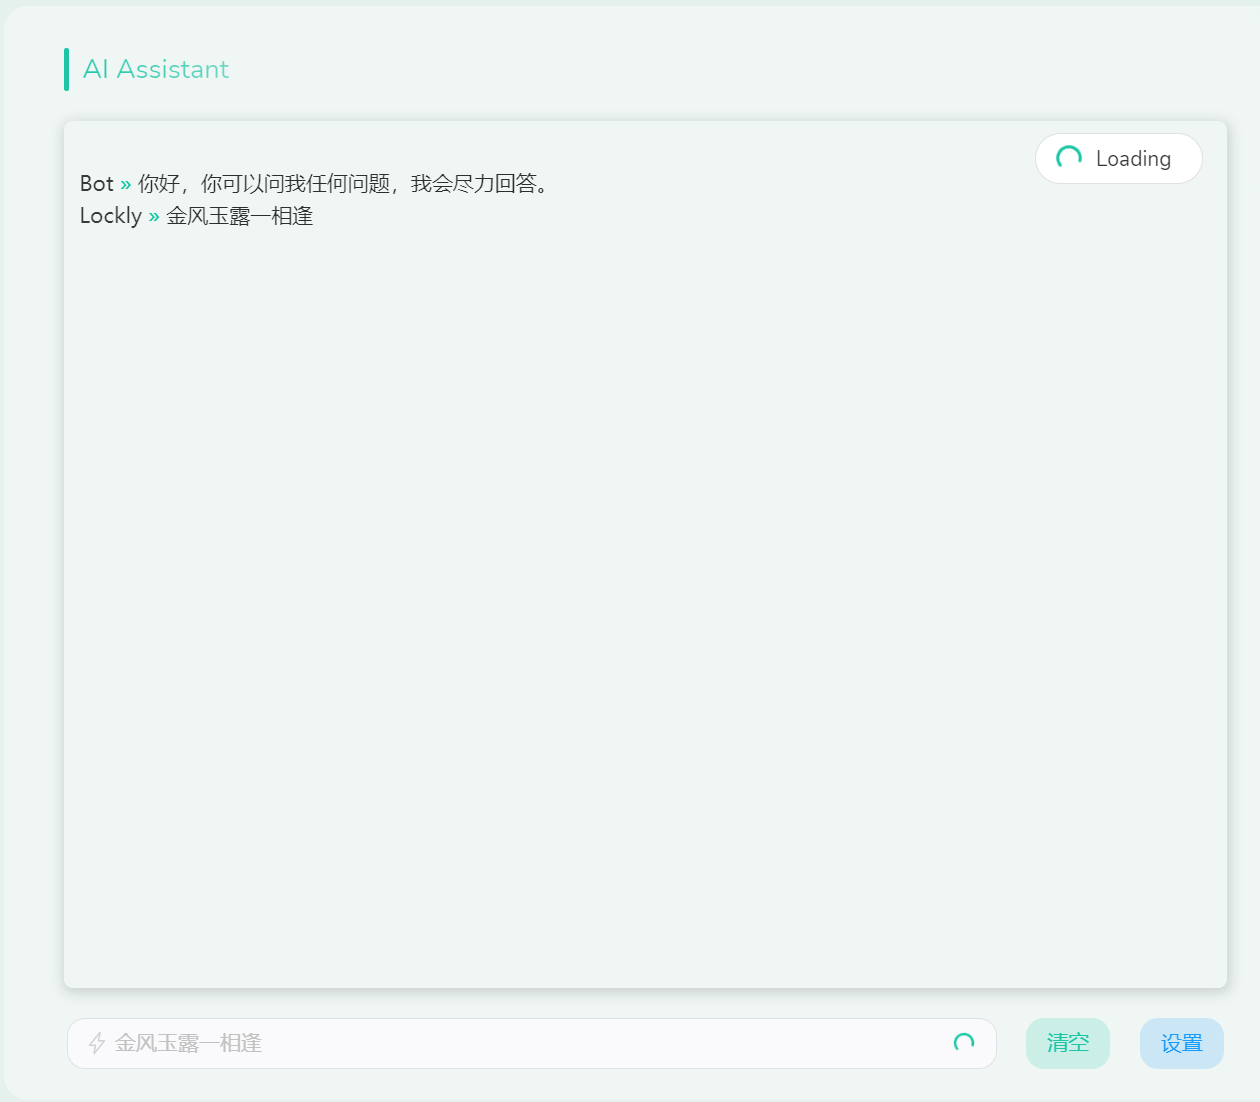
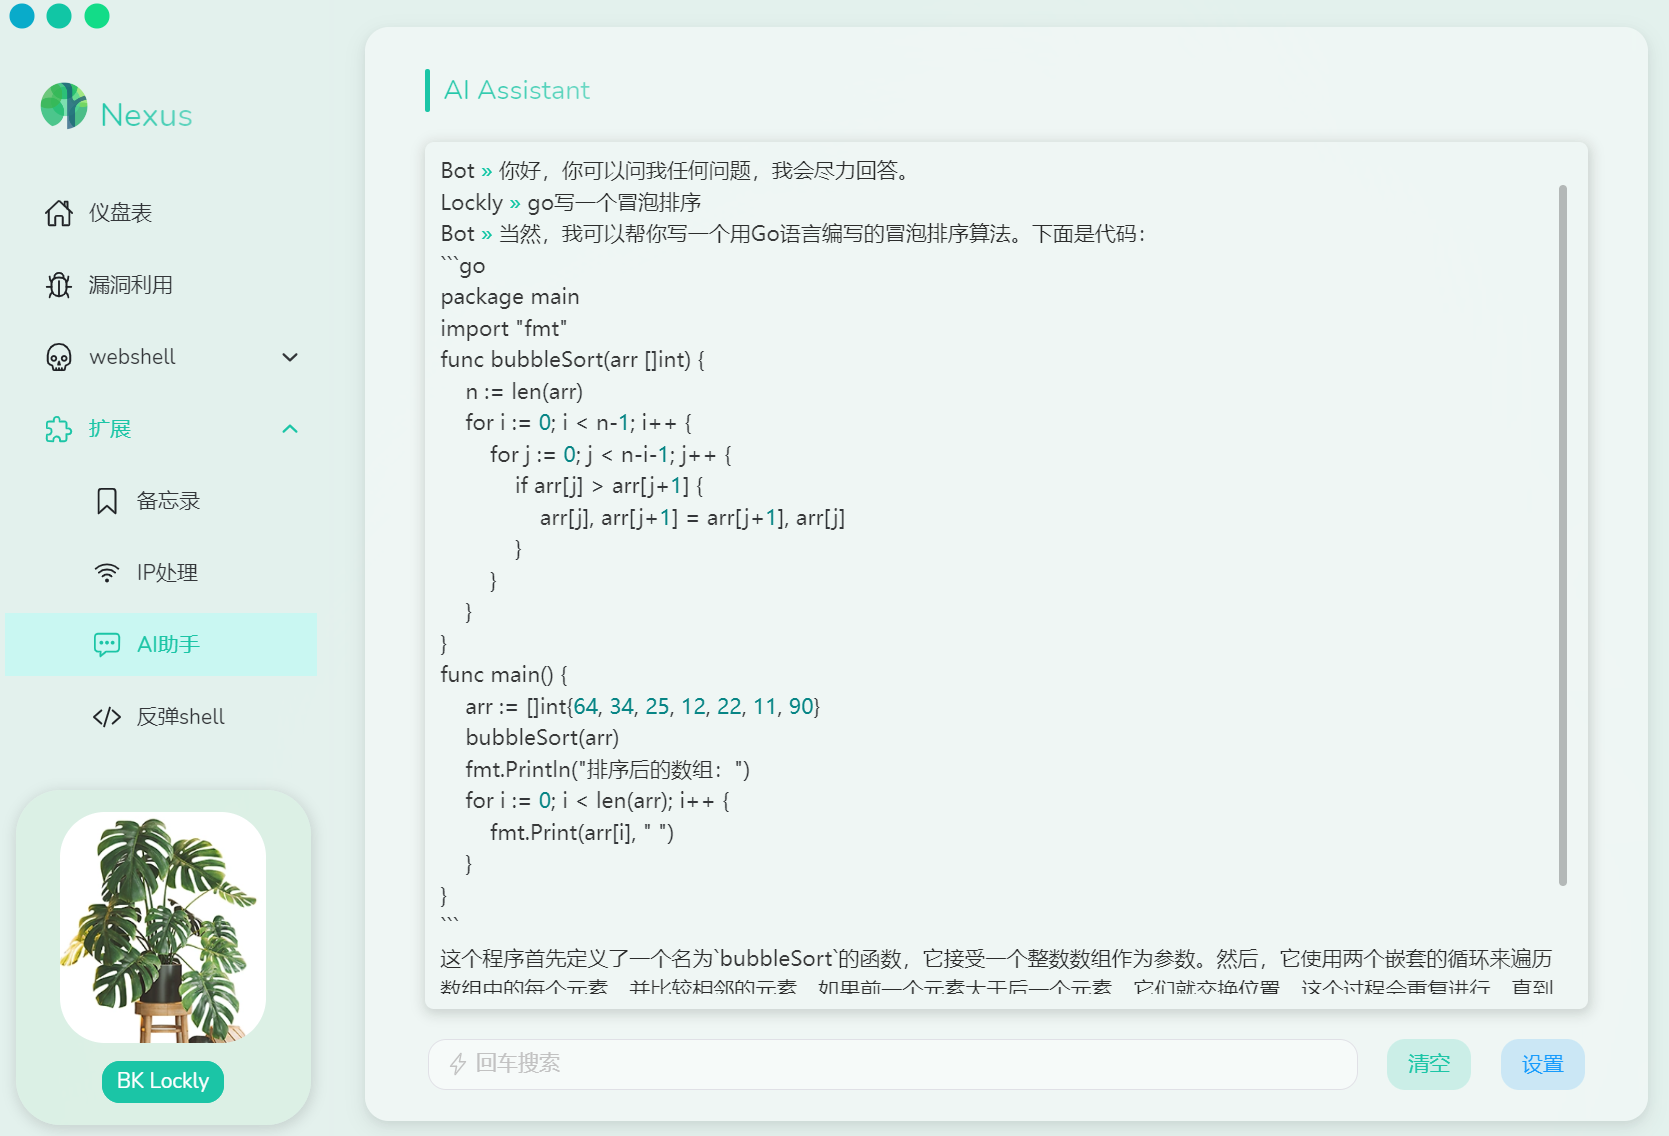
最后效果如下(完整代码后续会开源):
原创作者: bktown 转载于: https://www.cnblogs.com/bktown/p/18312794/wails-implements-tencent-component-bot-2lh7w3


 1万+
1万+

 被折叠的 条评论
为什么被折叠?
被折叠的 条评论
为什么被折叠?
 到【灌水乐园】发言


