


版权声明:本文为博主原创文章,遵循 CC 4.0 BY-SA 版权协议,转载请附上原文出处链接和本声明。
一、前言
Thymeleaf 是一个优秀的、面向Java 的XML庆HTML/HTML5 页面模板,具有丰
富的标签语言和函数。因此,在使用Spring Boot 框架进行页面设计时, 一般都会选择Thymeleaf 模板。
1.1 Thymeleaf 常用的表达式、标签和函数
1.常用表达式
• ${...}变量表达式。
•* { .. . } 选择表达式。
• #{...}消息文字表达式。
• @ {} 链接url 表达式。
• #maps 工具对象表达式。
- 1
- 2
- 3
- 4
- 5
2.常用标签
• th:action 定义后台控制器路径。
• th:each 1,盾环语-句。
• th:field 表单字段绑定。
• th:href 定义超链接。
• th:id div 标签中的ID 声明,类似HTML 标签中的归属性。
• th:if 条件判断语句。
• th:include 布局标签,替换内容到引入文件。
• th :企agment 布局标签,定义一个代码片段,方便其他地方引用。
• th:object 替换对象。
• th:src 图片类地址引入。
• th:text 显示文本。
• th:value 属性赋值。
- 1
- 2
- 3
- 4
- 5
- 6
- 7
- 8
- 9
- 10
- 11
- 12
3.常用函数
• #dates 日期函数。
• #lists 列表函数。
• #arrays 数组函数。
• #strings 字符串函数。
• #numbers 幸生字函捷生。
• #ca lendars 日历函数。
• #objects 对象函数。
• #bools 逻辑函数。
- 1
- 2
- 3
- 4
- 5
- 6
- 7
- 8
更详细的学习和用法请大家到官方网站学习。网站链接
二、SpringBoot整合ThymeLeaf
1.引入依赖
        <!-- ThymeLeaf 依赖 -->
        <dependency>
            <groupId>org.springframework.boot</groupId>
            <artifactId>spring-boot-starter-thymeleaf</artifactId>
        </dependency>
- 1
- 2
- 3
- 4
- 5
2.添加配置
代码如下:
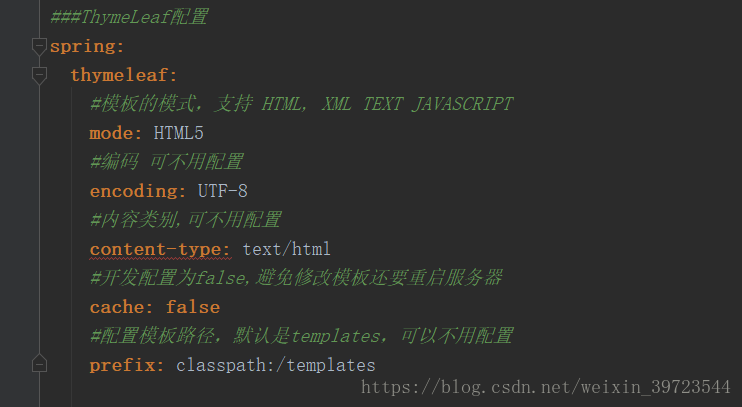
###ThymeLeaf配置
spring:
  thymeleaf:
    #模板的模式,支持 HTML, XML TEXT JAVASCRIPT
    mode: HTML5
    #编码 可不用配置
    encoding: UTF-8
    #内容类别,可不用配置
    content-type: text/html
    #开发配置为false,避免修改模板还要重启服务器
    cache: false
    #配置模板路径,默认是templates,可以不用配置
    prefix: classpath:/templates
- 1
- 2
- 3
- 4
- 5
- 6
- 7
- 8
- 9
- 10
- 11
- 12
- 13
3.代码开发和页面效果测试
- controller层
    @GetMapping(value = "/test")
	    public ModelAndView test(HttpServletRequest req) {
	        // UserEntity userEntity = getCurrentUser(req);
	        UserEntity user = new UserEntity();
	        user.setLoginName("tom");
	        user.setId(234);
	        user.setBindType(1);
	        ModelAndView mv = new ModelAndView();
	        mv.addObject("user", user);
	        mv.setViewName("/user/show.html");
	        return mv;
	    }
- 1
- 2
- 3
- 4
- 5
- 6
- 7
- 8
- 9
- 10
- 11
- 12
-
页面
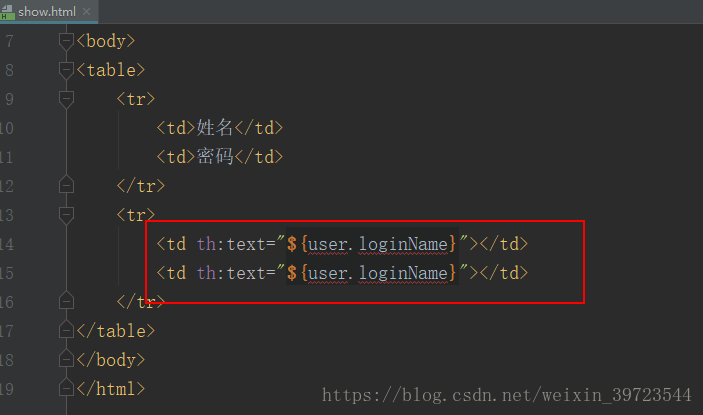
在template下的user文件夹建show.html测试页面,内容如下:
<!DOCTYPE html>
// 是Thyme leaf 命名空间,通过引入该
// 命名空间就可以在HTML 文件中使用Thymeleaf 标签语言,用关键字“ th ” 来标注。
<html xmlns:th="http://www.thymeleaf.org">
<head>
    <meta charset="UTF-8">
    <title>Show User</title>
</head>
<body>
<table>
    <tr>
        <td>姓名</td>
        <td>密码</td>
    </tr>
    <tr>
        <td th:text="${user.loginName}"></td>
        <td th:text="${user.loginName}"></td>
    </tr>
</table>
</body>
</html>
- 1
- 2
- 3
- 4
- 5
- 6
- 7
- 8
- 9
- 10
- 11
- 12
- 13
- 14
- 15
- 16
- 17
- 18
- 19
- 20
- 21
- 22
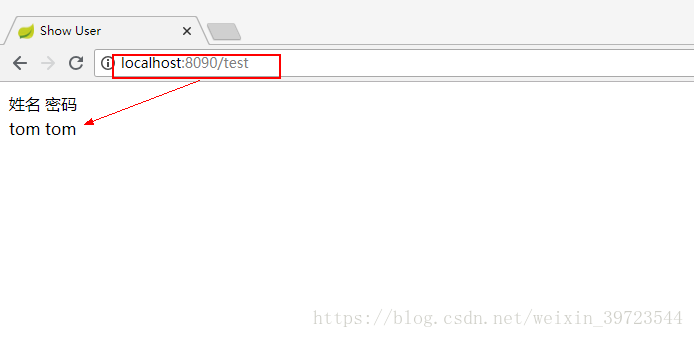
- 效果:如下图
三、总结
- Spring Boot整合thymeleaf过程还是很简单的,重点在于 学习下Thymeleaf的语法和用法
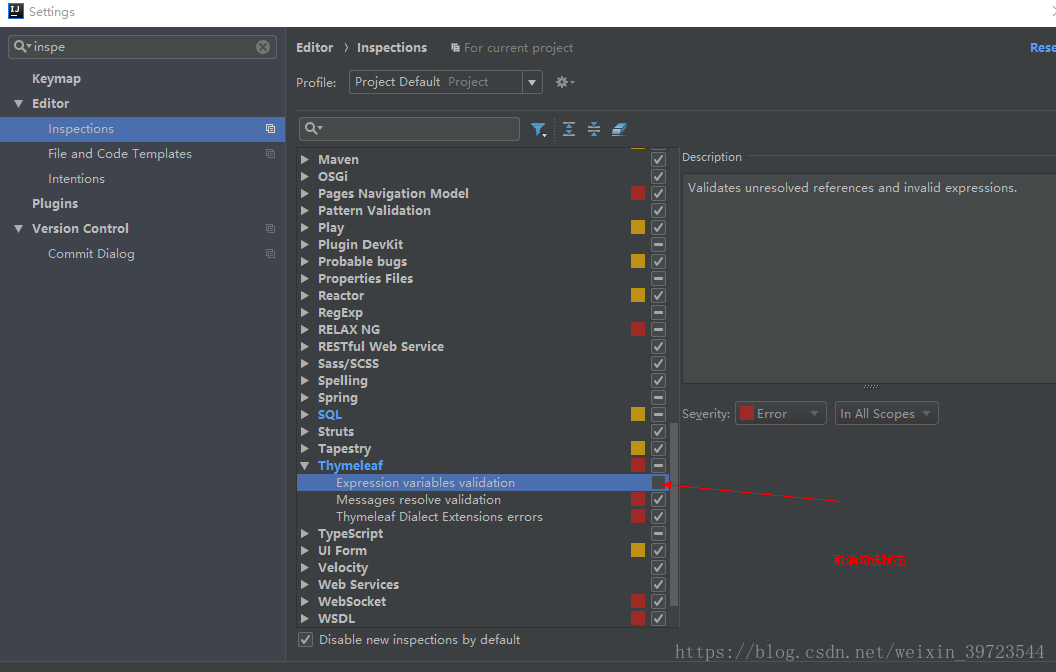
- thymeLeaf在idea中报红线的解决方法:
settings->inspectioins->ThymeLeaf
                                </div>
            <link href="https://csdnimg.cn/release/phoenix/mdeditor/markdown_views-e9f16cbbc2.css" rel="stylesheet">
                </div>


 1868
1868


 被折叠的 条评论
为什么被折叠?
被折叠的 条评论
为什么被折叠?
 到【灌水乐园】发言


