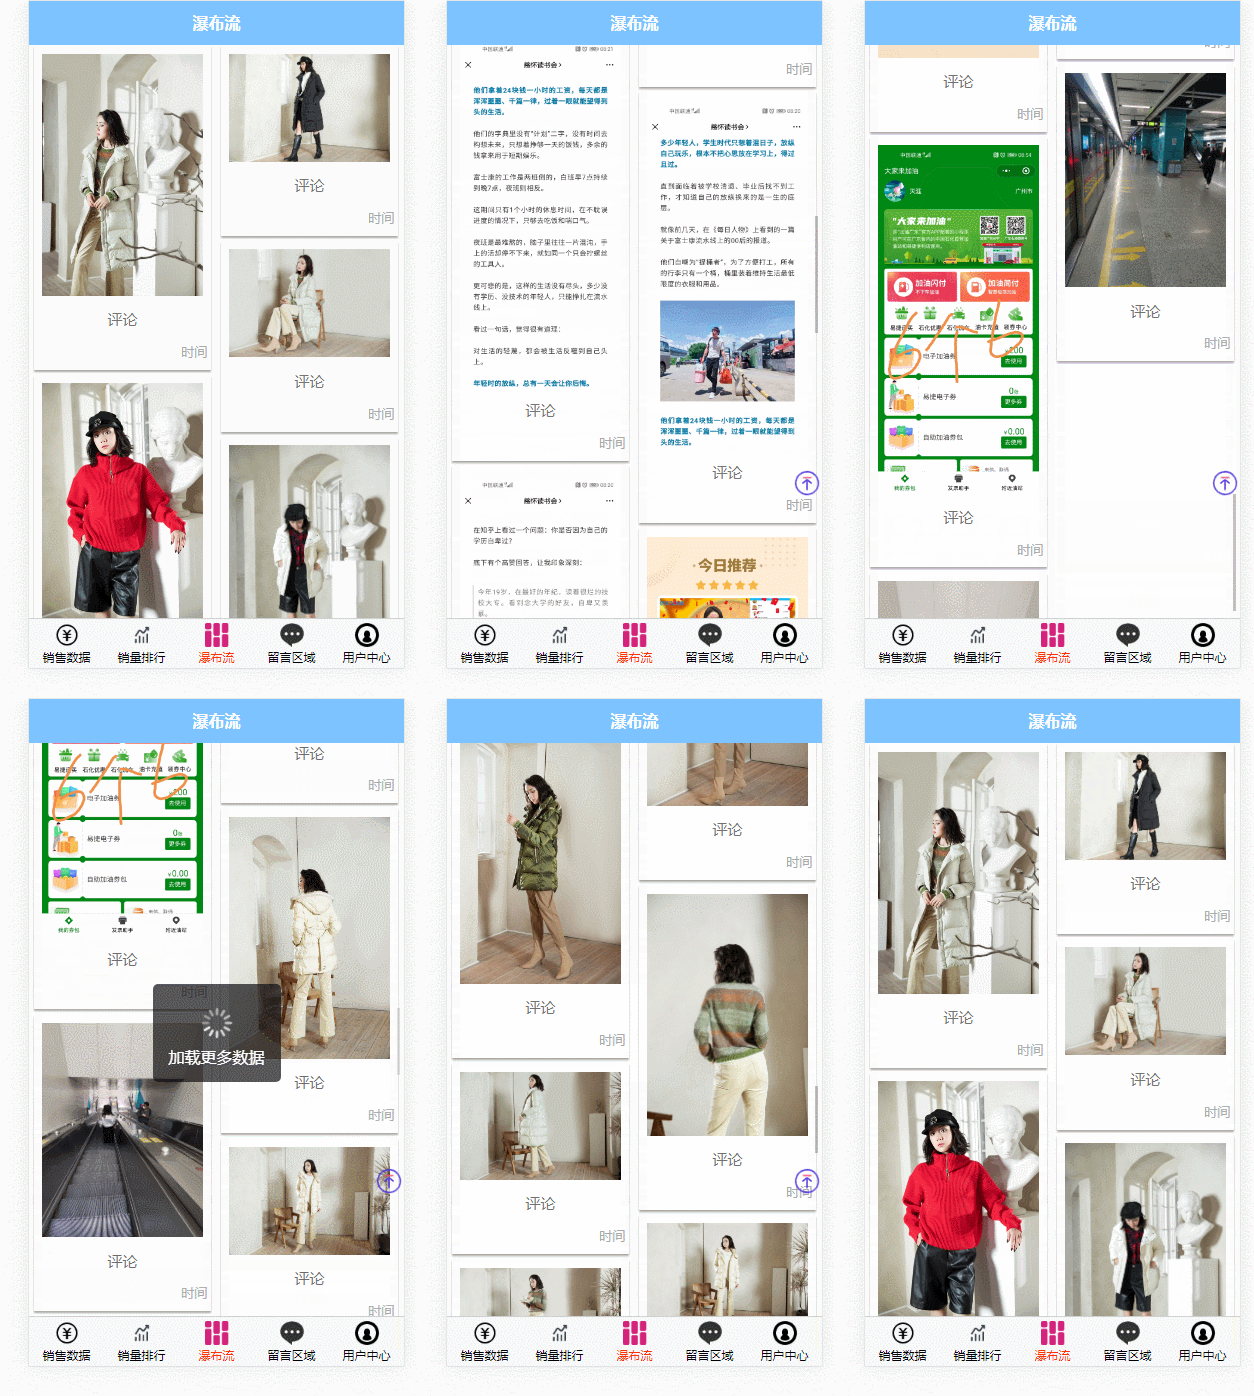
效果图:

全部代码:
<template>
	<view class="free-panel-title">
		<view class="free-WaterfallFlow">
		  <block>
			<view class="flex-wrap" v-for="(item,index) in imgList" :key="index" v-if="index % 2 != 0">
				<image mode="widthFix" :src="srcurl + item.imgname" :data-src="srcurl + item.imgname" @click="clickimg" ></image>
				<view>评论</view>
				<view>时间</view>
			</view>
		  </block>
		  <block>
			<view class="flex-wrap" v-for="(item,index) in imgList" :key="'2-'+index" v-if="index % 2 == 0">
				<image mode="widthFix" :src="srcurl + item.imgname" :data-src="srcurl + item.imgname" @click="clickimg" ></image>
				<view>评论</view>
				<view>时间</view>
			</view>
		  </block>
		</view>
		<!--返回顶部-->
		<view class="top" :style="{'display':(flag===true? 'block':'none')}">
			<image class="topc" @click="top" src="../../static/top.png" ></image>
		</view>
	</view>
</template>

<script>

	export default {
		data() {
			return {
				imgList: [],
				num : 1,
				srcurl:'',
				flag: false
			}
		},

		onLoad() {
			let url = uni.getStorageSync('url')  //从缓存读取
			this.srcurl = url + '/imgup/'  //图片的网址,用于页面渲染 :src="srcurl + name"
			this.getInfo('正在加载数据...')
		},

		/* 下拉刷新 */
		onPullDownRefresh() {
			this.num = 1
			this.getInfo('正在加载数据...')
			setTimeout(function () {
				uni.stopPullDownRefresh();
			}, 1000);
		},

		/* 上拉触底事件 */
		onReachBottom: function() {
			if (this.hasMoreData) {
				this.getInfo('加载更多数据')
			} else {
				uni.showToast({
				  title: '没有更多数据',
				  icon:'none'
				})
			}
		},

		methods: {

			// 分页加载数据
			getInfo: function (message) {
				var that = this
				var url = uni.getStorageSync('url') //从缓存读取
				var userid = uni.getStorageSync('userid') //从缓存读取
				uni.showLoading({	//显示 loading 提示框
				  title: message,
				})
				uni.request({
					url: url + '/waterfall',
					data: {
						pagenum : that.num ,   //赋值并传到后端
						userid : userid
					},
					method: 'GET',
					header: { 'content-type': 'application/json' },
					success: function (res) {  //请求成功
						var imgurlTemp = that.imgList
						var imgurl = res.data
						console.log(imgurl)

						if (imgurl.length >= 0) {
							if (that.num == 1) {
								imgurlTemp = []
							}
							if (imgurl.length < 10) {  //对应后端接口分页查询的记录条数
								that.imgList = imgurlTemp.concat(imgurl)
								that.hasMoreData = false
							} else {
								that.imgList = imgurlTemp.concat(imgurl)
								that.hasMoreData = true
								that.num = that.num + 1
							}
							setTimeout(function() {
								uni.hideLoading()		//隐藏 loading 提示框
							}, 1000)
						}
					}
				})
			},

			// 图片预览
			clickimg(event) {
				var imgurl = event.currentTarget.dataset.src
				var currentUrl = event.currentTarget.dataset.src   //获取点击图片的地址, **对应<template>里面的 :data-src="item.src"
				uni.previewImage({
					urls: [imgurl],    //这里是单图 . 需要预览的全部图片地址,这个数组是必须的,要用[]
					current: currentUrl, //当前显示图片的地址
				})
			},

			//回到顶部
			top() {
				uni.pageScrollTo({
					scrollTop: 0,
					duration: 300
				});
			},
			onPageScroll(e) { //根据距离顶部距离是否显示回到顶部按钮
				if(e.scrollTop>600){ //当距离大于600时显示回到顶部按钮
					this.flag=true
				}else{ //当距离小于600时隐藏回到顶部按钮
					this.flag=false
				}
			}

		}
	}
</script>

<style>
	.free-WaterfallFlow{
		width:96%;
		column-count:2; /* 分隔的列数 */
	}
	.free-WaterfallFlow .flex-wrap{
		display: inline-block;
		width:98%;
		margin-left:3%;
		margin-bottom:3%;
		padding:2%;
		padding-top:5%;
		border:0px solid #cc22b0; /* 边框 */
		box-shadow: 0 2px 2px rgba(34, 25, 25, 0.4); /* 框阴影 */
		text-align: center; /* 框内元素居中对齐 */
	}
	.flex-wrap image{
		width:95%;
		margin:0 auto;
	}
	.flex-wrap view:nth-child(2){
		font-size:15px;
		padding:2% 0;
		color:#717171;
	}
	.flex-wrap view:nth-child(3){
		font-size:13px;
		padding:2% 0;
		color:#aaa;
		text-align: right;
	}

	/* 回到顶部 */
	.top {
		position: relative;
		display: none; /* 先将元素隐藏 */
	}
	.topc {
		height: 30px;
		width: 30px;
		position: fixed;
		right: 0;
		top: 70%;
	}
</style>


 912
912


 被折叠的 条评论
为什么被折叠?


