


3d游戏设计 Homework10
总结
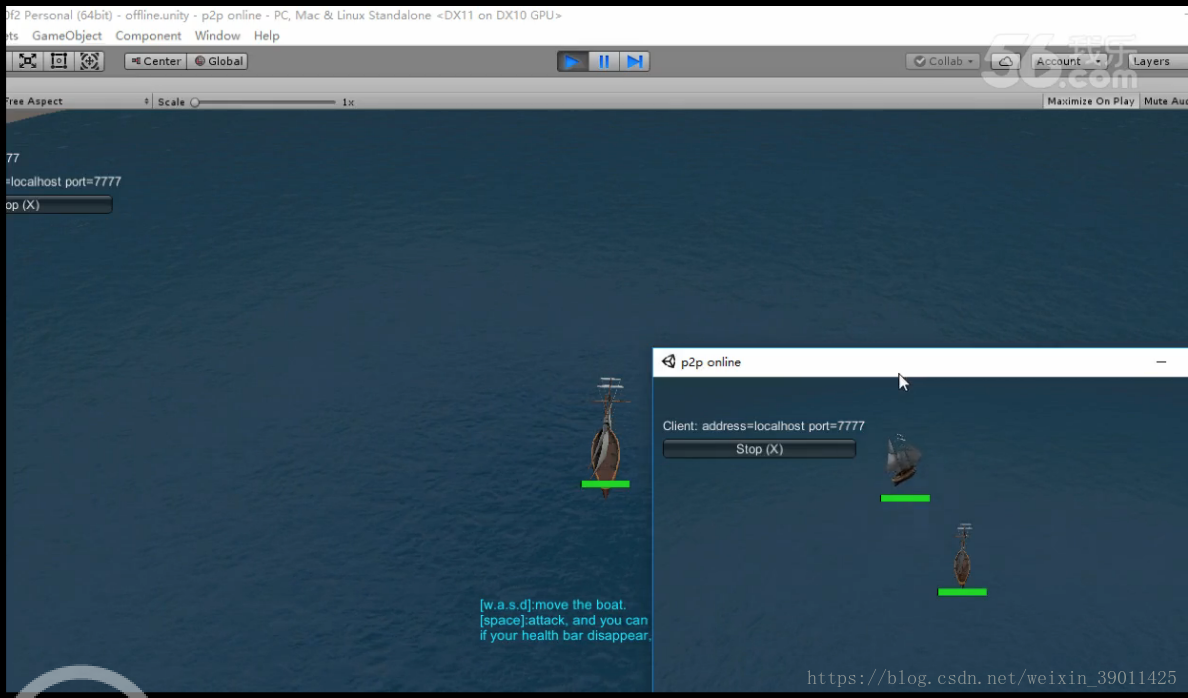
这次的作业是使用Unet完成一个p2p的联网游戏。主要难点不在于代码上,而在于搞清楚Unet的p2p简单原理,知道代码运行在哪里,执行在哪里,下面就来捋下知识点。
首先要明白服务端和客户端的概念,其中一台主机作为服务端,但同时他也是客户端(因为他也要玩游戏),明白什么是运行在本地的,什么是运行在服务端上的,通过if(!isLocalPlayer)orif(!isServer)进行运行。但是有的时候客户端产生的行为效果想让其他客户端知道,这个时候就需要将客户端运行的代码交给服务端执行,就需要使用到c#特性【command】,命令服务端执行。由于一些具有本地权限的网络对象,服务端想对客户端的网络对象进行修改的时候,修改之后会被本地权限覆盖,因此就需要用特性【clientRPC】标识在服务端运行的代码,要在客户端执行,下面上代码。
代码修改自unity官方的network tutorial,这次代码的质量不是太高(耦合度太高),也没有使用设计风格。
PlayerMove
PlayerMove完成了摄像头跟踪,船舶移动,蓄力攻击。要提到的是,蓄力攻击的加速度是在客户端运行的,要放到服务端执行,其中accelation是在本地进行执行的,但是服务端的accelation一直为0,所以我们还需要在完成CmdPrepareAccelation()在服务端进行蓄力,这里应该创建一个clientAccelation,但是我没有这样做,这样就会出现其他客户端玩家会帮助服务端玩家蓄力,也是我留的一个小坑,房主就会像开挂一样蓄力超快。
using UnityEngine;
using UnityEngine.Networking;

public class PlayerMove : NetworkBehaviour
{
    [Header("Movement Variables")]
    [SerializeField] float turnSpeed = 45.0f;
    [SerializeField] float movementSpeed = 5.0f;
    [Header("Camera Position Variables")]
    [SerializeField] float cameraDistance = 5f;
    [SerializeField] float cameraHeight = 2f;


    public GameObject bulletPrefab;
    public Rigidbody localRigidBody;
    private Transform mainCamera;
    private Vector3 cameraOffset;
    private float accelation;

    public override void OnStartLocalPlayer()
    {
        GetComponent<MeshRenderer>().material.color = Color.blue;
    }

    private void Start()
    {
        if (!isLocalPlayer)
        {
            return;
        }

        localRigidBody = this.GetComponent<Rigidbody>();

        Debug.Log(transform.position);

        cameraOffset = new Vector3(0f, cameraHeight, -cameraDistance);

        mainCamera = Camera.main.transform;

        MoveCamera();
    }

    private void FixedUpdate()
    {
        if (!isLocalPlayer)
            return;

        /*var turnAmount = Input.GetAxis("Horizontal") * 0.1f;
        var moveAmount = Input.GetAxis("Vertical") * 0.1f;
        transform.Translate(x, 0, z);*/

        var turnAmount = Input.GetAxis("Horizontal") * 0.1f;
        var moveAmount = Input.GetAxis("Vertical") * 0.1f;

        Vector3 deltaTranslation = transform.position + transform.forward * movementSpeed * moveAmount * Time.deltaTime;
        localRigidBody.MovePosition(deltaTranslation);

        Quaternion deltaRotation = Quaternion.Euler(turnSpeed * new Vector3(0, turnAmount, 0) * Time.deltaTime);
        localRigidBody.MoveRotation(deltaRotation * localRigidBody.rotation);

        if (Input.GetKey(KeyCode.Space))
        {
            accelation += Time.deltaTime * 2;
            CmdPrepareAccelation();
        }

        if (Input.GetKeyDown(KeyCode.Space))
        {
            accelation = 0;
            CmdZeroAccelation();
        }

        if (Input.GetKeyUp(KeyCode.Space))
        {
            CmdFire();
        }
        MoveCamera();
    }

    [Command]
    private void CmdPrepareAccelation()
    {
        accelation += Time.deltaTime * 2;
    }

    [Command]
    private void CmdZeroAccelation()
    {
        accelation = 0;
    }

    private void MoveCamera()
    {
        mainCamera.position = transform.position;
        mainCamera.rotation = transform.rotation;
        mainCamera.Translate(cameraOffset);
        mainCamera.LookAt(transform);
    }

    [Command]
    void CmdFire()
    {
        // This [Command] code is run on the server!

        // create the bullet object locally
        Transform emitTransform = transform.GetChild(1);
        var bullet = (GameObject)Instantiate(
             bulletPrefab,
             emitTransform.position,
             Quaternion.identity);
        Debug.Log(accelation);
        bullet.GetComponent<Rigidbody>().velocity = transform.forward * 5 * accelation;

        // spawn the bullet on the clients
        NetworkServer.Spawn(bullet);

        // when the bullet is destroyed on the server it will automaticaly be destroyed on clients
        Destroy(bullet, 4.0f);
    }

    private void OnGUI()
    {
        if (!isLocalPlayer) return;
        GUIStyle gUIStyle = new GUIStyle();
        gUIStyle.fontSize = 14;
        gUIStyle.normal.textColor = Color.cyan;
        GUI.Label(new Rect(Screen.width / 2 - 130, Screen.height / 2 + 140, 200, 100), "[w.a.s.d]:move " +
            "the boat.\n[space]:attack, and you can accumulate attacking distance by holding [space].\n" +
            "if your health bar disappear, you will move to another place to play again.", gUIStyle);
    }
}
HealthBar
将本地的血量显示成血条。
using UnityEngine;
using System.Collections;

public class HealthBar : MonoBehaviour
{
    GUIStyle healthStyle;
    GUIStyle backStyle;
    Combat combat;

    void Awake()
    {
        combat = GetComponent<Combat>();
    }

    void OnGUI()
    {
        InitStyles();

        // Draw a Health Bar

        Vector3 pos = Camera.main.WorldToScreenPoint(transform.position);

        // draw health bar background
        GUI.color = Color.grey;
        GUI.backgroundColor = Color.grey;
        GUI.Box(new Rect(pos.x - 26, Screen.height - pos.y + 20, Combat.maxHealth / 2, 7), ".", backStyle);

        // draw health bar amount
        GUI.color = Color.green;
        GUI.backgroundColor = Color.green;
        GUI.Box(new Rect(pos.x - 25, Screen.height - pos.y + 21, combat.health / 2, 5), ".", healthStyle);
    }

    void InitStyles()
    {
        if (healthStyle == null)
        {
            healthStyle = new GUIStyle(GUI.skin.box);
            healthStyle.normal.background = MakeTex(2, 2, new Color(0f, 1f, 0f, 1.0f));
        }

        if (backStyle == null)
        {
            backStyle = new GUIStyle(GUI.skin.box);
            backStyle.normal.background = MakeTex(2, 2, new Color(0f, 0f, 0f, 1.0f));
        }
    }

    Texture2D MakeTex(int width, int height, Color col)
    {
        Color[] pix = new Color[width * height];
        for (int i = 0; i < pix.Length; ++i)
        {
            pix[i] = col;
        }
        Texture2D result = new Texture2D(width, height);
        result.SetPixels(pix);
        result.Apply();
        return result;
    }
}
Combat
Combat完成了血量减少,和血量低于0是移动到原地。
using UnityEngine;
using UnityEngine.Networking;

public class Combat : NetworkBehaviour
{
    public const int maxHealth = 100;

    [SyncVar]
    public int health = maxHealth;

    public void TakeDamage(int amount)
    {
        if (!isServer)
            return;

        health -= amount;
        if (health <= 0)
        {
            health = maxHealth;

            // called on the server, will be invoked on the clients
            RpcRespawn();
        }
    }

    [ClientRpc]
    void RpcRespawn()
    {
        if (isLocalPlayer)
        {
            // move back to zero location
            transform.position = new Vector3(0,1,0);
        }
    }
}
Bullet
完成了碰撞检测,碰撞时减少血量。
using UnityEngine;

public class Bullet : MonoBehaviour
{
    void OnCollisionEnter(Collision collision)
    {
        var hit = collision.gameObject;
        var hitPlayer = hit.GetComponent<PlayerMove>();
        if (hitPlayer != null)
        {
            // Subscribe and Publish model may be good here!
            Debug.Log("test");
            var combat = hit.GetComponent<Combat>();
            combat.TakeDamage(30);

            //Destroy(gameObject);
        }
    }
}


 585
585


 被折叠的 条评论
为什么被折叠?
被折叠的 条评论
为什么被折叠?
 到【灌水乐园】发言


