


今年的天气特别的冷,于是,继续缓慢更新。
Django 其实有自己的权限认证组件,可以拿来用,其实本身代码量也不多,还是自己写吧。
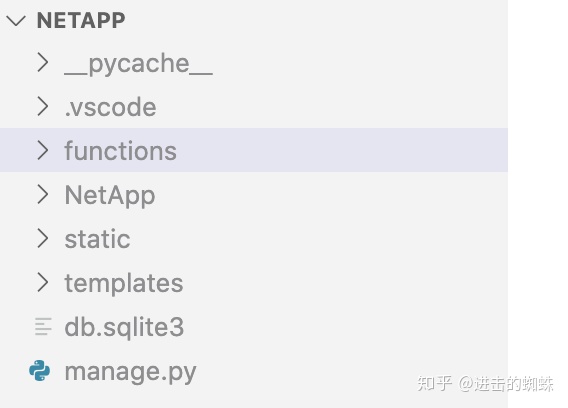
新建了一个functions文件夹用于存放各种功能文件:
说说登录的原理吧,企业中一般使用AD作为认证源,微软域服务本身只有Windows系统可用,但非Windows可以使用ldap协议来进行认证,这里需要用到的库ladp3,在functions文件夹中新建publicldaplogin.py文件。功能代码如下:
from ldap3 import Server,Connection,SIMPLE,SYNC,ALL,SASL,NTLM,SUBTREE,ALL_ATTRIBUTES,ALL_OPERATIONAL_ATTRIBUTES
import time

s = Server('10.210.12.17',get_info=ALL)

def login(username,password):
    c = Connection(s, user='head.yst%s'%username, password=password, authentication=NTLM)
    if not c.bind():
        result = {'result':'False'}
        return result
    else:
        c.search(search_base='dc=head,dc=yst',
                 search_filter='(anr={})'.format(username),
                 search_scope=SUBTREE,
                 attributes=['displayName','title'],
                #  attributes=ALL_ATTRIBUTES
                 )
        result = {
            'result':'Success',
            'username':username,
            'fullname':str(c.entries[0]).split('n')[1].split(':')[1].lstrip(),
            'logintime':time.strftime('%Y-%m-%d %H:%M:%S',time.localtime(time.time()))}
        return result
代码末尾加上print(login('xcwang','password123'))我们来运行脚本,xcwang和password123对应的正是ad的用户名密码,得到以下结果:
{'result': 'Success', 'username': 'xcwang', 'fullname': '王小川', 'logintime': '2020-10-30 10:00:08'}功能测试正常,删除最后一行,登录功能组件就写完了,
但是需要在平台中使用起来,还需要一些工作,登录脚本只是满足了去验证用户身份的功能,用户成功登录后,我们应该设置一个令牌给到用户,拿到令牌的用户,可以在系统中进行各种被允许的操作。
所以,我们需要一个给用户发令牌的功能,functions中新建public_token_auth.py
import time
import jwt

#用户通过此脚本获取到token
def get_token(username, key):
    token_dict={
        'time':time.time(),
        'name':username
    }
    headers ={
        'alg':"HS256"
    }
    jwt_token=jwt.encode(token_dict,
    key,
    algorithm="HS256",
    headers=headers).decode()
    return jwt_token

#对用户的token进行认证,确保是我们之前发出去的
def dec_token(token_key,key):
    try:
        data = jwt.decode(token_key, key , algorithms=['HS256'])['name']
        return data
    except Exception as e:
        return e
验证token功能呢,如下:
末尾加上print(get_token('abc','123')),然后运行
eyJ0eXAiOiJKV1QiLCJhbGciOiJIUzI1NiJ9.eyJ0aW1lIjoxNjA0MDI0NjkzLjQzNDE2NiwibmFtZSI6ImFiYyJ9.0GSfXloR9Y7O9OD3wD-33ErotX58U13_dCOJ7BcMe_8

将末尾的print改成print(dec_token('eyJ0eXAiOiJKV1QiLCJhbGciOiJIUzI1NiJ9.eyJ0aW1lIjoxNjA0MDI0NjkzLjQzNDE2NiwibmFtZSI6ImFiYyJ9.0GSfXloR9Y7O9OD3wD-33ErotX58U13_dCOJ7BcMe_8','123'))
再次运行,得到的结果为abc即可
验证完成后记得删除多余代码,接着回到views.py,
from django.shortcuts import render,redirect
from functions import public_ldap_login,public_token_auth


def login(request):
    #token的获取使用key'abcd.com.cn'
    if request.method == 'POST':
        #获取用户POST上来的用户名和密码
        un = request.POST.get('username')
        pd = request.POST.get('password')

        #判断用户名密码为非空,如果为空,则返回消息和login页面
        if un == '' or pd == '':
            res = render(request, 'login.html', context={'result':'用户名密码不能为空!'})
            return res

        #获取登录结果
        login_result = public_ldap_login.login(un,pd)

        #如果登录结果为false则返回页面和登录失败消息。
        if login_result['result'] == 'False':
            res = render(request, 'login.html', context={'result':'登陆失败,用户名密码错误,请检查!'})
            return res

        #如果登录成功则执行以下操作
        else:
            #如果session key中包含'login_from‘字段,则表示用户是从其它页面跳转到login的
            if 'login_from' in request.session.keys():
                #则为用户准备以下资源:1、跳转到login_from定义的页面,设置token,username,fullname,logintime的cookie
                res = redirect(request.session['login_from'])
                res.set_cookie('token',public_token_auth.get_token(un,'abcd.com.cn'),max_age=36000)
                res.set_cookie('username', un,max_age=36000)
                res.set_cookie('fullname',login_result['fullname'],max_age=36000)
                res.set_cookie('logintime',login_result['logintime'],max_age=36000)
                res.set_cookie('result','Success',max_age=36000)
                return res
            #如果session ky中不包含login_from字段,则直接返回login.html,并要求重新登录
            else:
                return render(request,'login.html')

    #如果使用非POST非GET的请求方法,则直接返回login页面,要求强制登录
    else:
        return render(request,'login.html')


#下面定义个装饰器函数,一方面,实现登录逻辑,另外其它页面函数也方便调用。
def login_auth(fouc):
    def wrapper(request,*args,**kwargs):
        cookie_get = request.COOKIES #获取用户cookie
        user_path = request.path #获取用户访问的path,非常重要!!

        #如果未曾认证,或cookie不完整,则直接重定向到login页面
        if 'token' not in cookie_get or 'username' not in cookie_get or cookie_get['username'] != public_token_auth.dec_token(cookie_get['token'],'abcd.com.cn') and user_path != '/login/':
            #设置request.session['login_from']为user_path!!
            request.session['login_from'] = user_path
            return redirect('/login/')
            # 此时用户的request.session中已经包含了user_path,登录成功后,可直接跳转至登录之前的页面
        #如果用户跳转到login页面之前的页面就是/login/,则直接返回login.html
        elif user_path == '/login/':
            request.session['login_from'] = '/'
            return render(request,'login.html')
        else:
            return fouc(request,*args,**kwargs)
    return wrapper


@login_auth
def index(request):
    return render(request,'index.html')


@login_auth
def infosearch(request):
    return render(request,'infosearch.html')
结果验证:
打开http://127.0.0.1,将会被重定向至login页面,输入正确的ad用户名密码后,将直接跳转至主页,输入错误的用户名密码或不输入直接点击登录,会有相应的错误提示。
删除cookie直接尝试访问http://127.0.0.1/infosearch 会被重定向至登录页面,输入正确的用户名密码后,自动跳转至infosearch页面。
再来梳理一下,登录组件逻辑:
1、尝试获取用户cookie和访问路径;
2、如果用户未认证,则重定向到login函数进行处理(处理步骤在下面);
3、如果用户的访问路径为‘/login’,则直接返回login.html页面
4、如果2、3都没有匹配到,则正常执行用户的请求。
login函数处理用户请求逻辑:
如果用户是通过POST发送登录信息,则处理用户登录,并将结果写入到用户cookie;
其它情况一律返回login.html,要求登录。
今天先到这里,后面将继续更新。


 3893
3893


 被折叠的 条评论
为什么被折叠?
被折叠的 条评论
为什么被折叠?
 到【灌水乐园】发言


