


接上一篇:Linux系统集群架构线上项目配置实战(一)
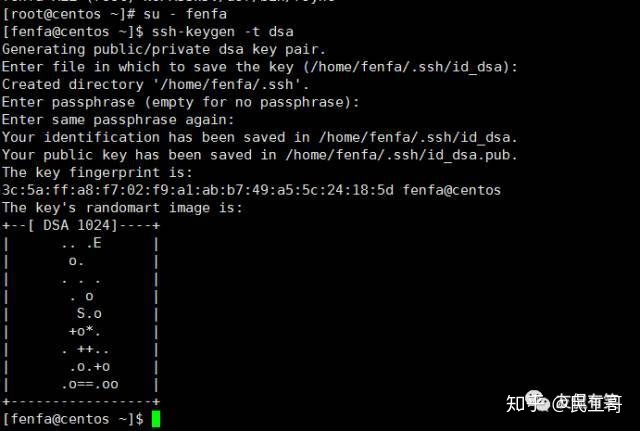
1、配置SSH免密登录
分发服务器使用全网备份服务器
首先创建分发用户
[root@centos ~]# useradd fenfa -u 999

[root@centos ~]# echo "123456"|passwd --stdin fenfa

Changing password for user fenfa.

passwd: all authentication tokens updated successfully.

[root@centos ~]# /bin/cp /etc/sudoers /etc/sudoers.bak

[root@centos ~]# echo "fenfa ALL=(root) NOPASSWD:/usr/bin/rsync" >>/etc/sudoers

[root@centos ~]# tail -1 /etc/sudoers

fenfa ALL=(root) NOPASSWD:/usr/bin/rsync
切换到fenfa用户创建密钥
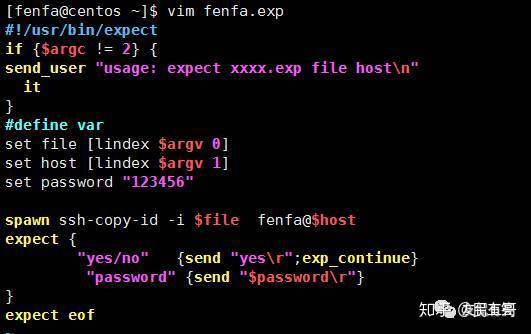
2、配置expect批量分发工具
安装配置expect服务
[root@centos ~]$ yum install expect* -y编写脚本
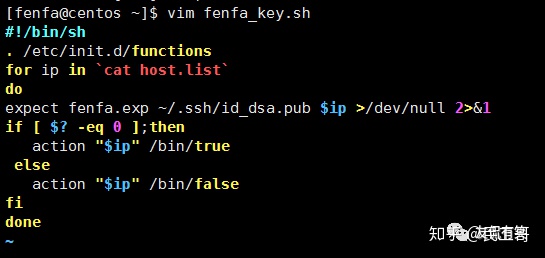
执行脚本结果如下
[fenfa@centos ~]$ sh fenfa_key.sh

10.0.0.1    [  OK  ]

10.0.0.2   [  OK  ]

10.0.0.3   [  OK  ]

10.0.0.4    [  OK  ]

10.0.0.5    [  OK  ]

10.0.0.6   [  OK  ]

10.0.0.7   [  OK  ]

10.0.0.8   [  OK  ]

10.0.0.9   [  OK  ]

10.0.0.10  [  OK  ]

10.0.0.11  [  OK ]

10.0.0.12  [  OK  ]

10.0.0.13   [  OK  ]

10.0.0.14  [  OK  ]
切换到分发用户下查看是否分发成功
[root@centos ~]# su - fenfa

[fenfa@centos ~]$ ll /home/fenfa/.ssh/

total 4

-rw------- 1 fenfa fenfa 602 Sep 21 12:14 authorized_keys
根据上面的脚本编写分以hosts文件脚本

脚本执行结果如下
sh fenfa_file.sh host.list /etc/

[fenfa@centos ~]$ ll /etc/host.list

-rw-rw-r-- 1 fenfa fenfa 131 Sep 16 12:45 /etc/host.list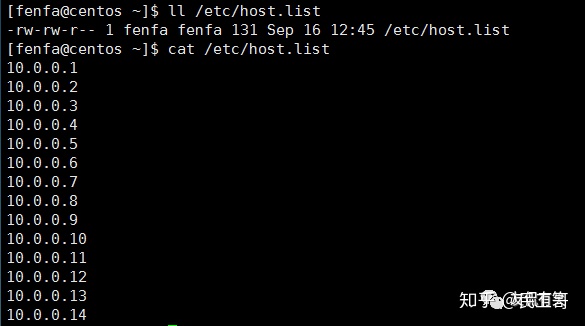
只需要将host.list文件替换成你所需要分发的文件就OK了,
3、前端反向代理及管理后台服务器的配置
前端nginx反向代理服务器配置
安装所需的依赖包
[root@centos ~]# yum install pcre-devel zlib-devle openssl-devel gcc-c++ –y编译安装nginx
cd /download/tools/

wget http://nginx.org/download/nginx-1.12.1.tar.gz

tar zxf nginx-1.12.1.tar.gz

cd nginx-1.12.1

./configure --prefix=/app/nginx-1.12.1

make && make install

[root@centos ~]# cd /app/

[root@centos app]# ln -s nginx-1.12.1 nginx

[root@centos ~]# cd /app/nginx/conf/

[root@centos conf]# mkdir extra

[root@centos conf# cp nginx.conf nginx.conf.bak
在nginx.conf文件后增加下面的配置
include extra/*.conf;

[root@centos ~]# cd /app/nginx/conf/extra/

[root@centos extra]# vim admin.mingongge.conf

#
# HTTPS server configuration
#

server {

    listen       80;

    server_name admin.mingongge.com;

    location / {

        proxy_pass http://10.0.0.6:8080;

        proxy_connect_timeout 600;

        proxy_read_timeout 600;

        proxy_send_timeout 600;

    }

}
[root@centos extra]# vim shangjia.mingongge.conf

#

# HTTPS server configuration

#

server {

    listen       80;

    server_name shangjia.mingongge.com;

    location / {

        proxy_pass http://10.0.0.7:8080;

        proxy_connect_timeout 600;

        proxy_read_timeout 600;

        proxy_send_timeout 600;

    }

}
业务平台管理后台http://admin.mingongge.com
JDK Tomcat环境安装
tar zxf apache-tomcat-8.5.9.tar.gz

mv apache-tomcat-8.5.9 /usr/local/tomcat

tar zxf jdk-8u111-linux-x64.tar.gz -C /usr/local/

cd /usr/local/

ln -s jdk1.8.0_111 jdk

cat >>/etc/profile <<EOF

export JAVA_HOME=/usr/local/jdk1.8.0_111

export CLASSPATH=.:$JAVA_HOME/lib/dt.jar:$JAVA_HOME/lib/tools.jar

export PATH=$JAVA_HOME/bin:$PATH

export CATALINA_HOME=/usr/local/apache-tomcat-8.5.9

EOF

[root@centos local]# source /etc/profile

[root@centos local]# java -version

java version "1.8.0_111"

Java(TM) SE Runtime Environment (build 1.8.0_111-b14)

Java HotSpot(TM) 64-Bit Server VM (build 25.111-b14, mixed mode)
JDK Tomcat环境配置
<Context path="" docBase="/www/admin" debug="0" reloadable="true" crossContext="true" />

echo "this is the admin.mingongge.com" >/www/admin/index.html

/usr/local/tomcat/bin/startup.sh
商家管理后台 http://shangjia.mingongge.com
JDK Tomcat环境安装请参考前面的步骤
<Context path="" docBase="/www/shangjia" debug="0" reloadable="true" crossContext="true" />

echo "this is the shangjia.mingongge.com" >/www/shangjia/index.html

/usr/local/tomcat/bin/startup.sh
测试反向代理
[root@centos ~]# curl http://admin.mingongge.com

this is the admin.mingongge.com

[root@centos ~]# curl http://shangjia.mingongge.com

this is the shangjia.mingongge.com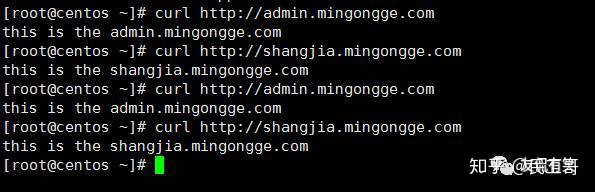
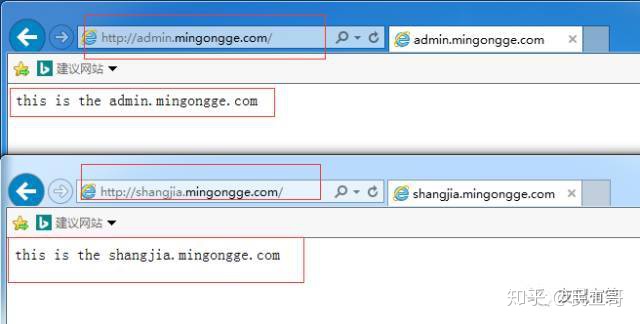
模拟用户访问
如有错误或其它问题,欢迎小伙伴留言评论、指正。如有帮助,欢迎点赞+转发分享。
更多相关开源技术文章,请持续关注民工哥知乎技术专栏。
我是民工哥,一个爱折腾的IT技术老司机,欢迎关注我,我们一起学习,共同成长!!


 654
654


 被折叠的 条评论
为什么被折叠?
被折叠的 条评论
为什么被折叠?
 到【灌水乐园】发言


