


系列文章(更新ing):
「 从0到1学习微服务SpringCloud 」06 统一配置中心Spring Cloud Config 「 从0到1学习微服务SpringCloud 」07 RabbitMq的基本使用 「 从0到1学习微服务SpringCloud 」08 构建消息驱动微服务的框架 Spring Cloud Stream
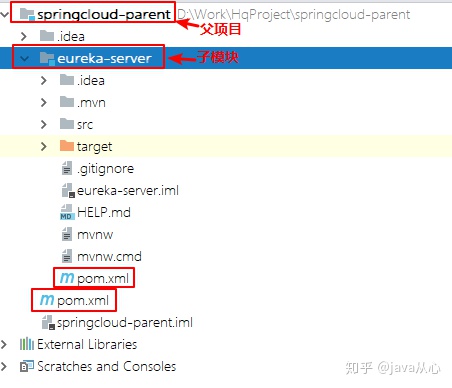
作为微服务的项目,如果将每个项目都拆成一个完整的项目,很难开发,那得打开多少个idea。应该将它们归到一个项目里,使用maven父子模块项目的形式,如下图
之前我们项目的拆成单个是错误,不过问题不大,可以将它们再合起来。
maven父子模块项目
1.新建一个maven项目,作为父项目,把多余的东西删掉,只留下.idea和pom.xml
2.将现有的项目作为子模块加到项目里
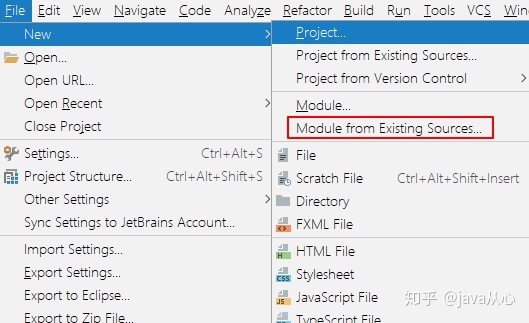
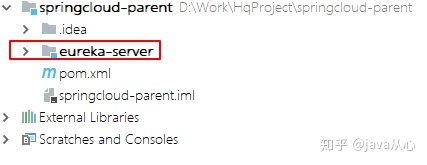
3.刚加进来的项目会与父项目处于同级,将子模块拖到父项目里
4.构建父子模块 主要是通过modules和parent标签实现的 1.在父项目的pom中添加modules标签,将子模块加进来
<modules>
        <module>eureka-server</module>
 </modules>
2.在子模块的pom中添加parent标签,并加入父项目的坐标
<parent>
        <!-- 以下这些东西被称为 坐标 -->
        <groupId>com.zhangwk</groupId>
        <artifactId>springcloud-parent</artifactId>
        <version>0.0.1-SNAPSHOT</version>
</parent>
3.一些共用的东西可以放在父项目的pom文件中,因为子项目的pom会继承父项目的pom
(1)将子项目中的properties标签移到父项目中,从而做到jar包的统一版本管理
<properties>
        <java.version>1.8</java.version>
        <spring-cloud.version>Greenwich.RELEASE</spring-cloud.version>
</properties>
(2)添加以下标签,用于管理springcloud相关依赖的版本管理
<!-- 子模块只继承版本,需要声明依赖 -->
<dependencyManagement>
        <dependencies>
            <dependency>
                <groupId>org.springframework.cloud</groupId>
                <artifactId>spring-cloud-dependencies</artifactId>
                <version>${spring-cloud.version}</version>
                <type>pom</type>
                <scope>import</scope>
            </dependency>
        </dependencies>
    </dependencyManagement>

<!-- 子模块可以完全继承 -->
<dependencies>
        <dependency>
            <groupId>org.springframework.boot</groupId>
            <artifactId>spring-boot-starter-web</artifactId>
        </dependency>

        <dependency>
            <groupId>org.projectlombok</groupId>
            <artifactId>lombok</artifactId>
            <version>1.16.20</version>
            <scope>provided</scope>
        </dependency>

        <dependency>
            <groupId>org.springframework.boot</groupId>
            <artifactId>spring-boot-starter-test</artifactId>
            <scope>test</scope>
        </dependency>
</dependencies>
这里需要注意的是,如果使用了dependencyManagement标签,里面的依赖只能用于声明jar的版本,在子模块中需要再声明一次该依赖,无需声明版本。
若只存在dependencies标签,子模块可以继承里面的依赖,无需再次声明。
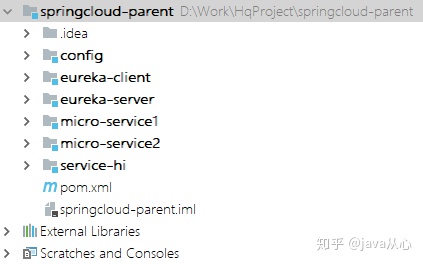
4.第一个子模块就加进来了,重复以上1,2,3步,将我们之前的项目都加进来吧
已将代码上传到github
https://github.com/zhangwenkang0/springcloud-learning-from-0-to-1
如果觉得不错,分享给你的朋友!


THANDKS
- End -
一个立志成大腿而每天努力奋斗的年轻人
伴学习伴成长,成长之路你并不孤单!


 被折叠的 条评论
为什么被折叠?
被折叠的 条评论
为什么被折叠?
 到【灌水乐园】发言


