


编者按:本文转载自chenhongdong的掘金专栏,来一起学习吧!

最近,由于接触了React的项目,所以开始慢慢去学习关于React全家桶的一些内容,其中有一块内容用到的较为频繁,于是也开始恶补这方面的知识
如标题所示,这篇文章就是关于redux & react-redux在实际工作中是如何使用的
那么,闲言少叙,还是从头开始讲起吧
它们是谁?
个人认为它是一个专门用来创建仓库的东东,你可以叫它为store
通过redux库里的createStore方法来创建仓库
值得傲娇的是redux并不像vuex那样,必须依赖vue而使用,单独拿出来也是出类拔萃的
那么,问题来了?
react-redux又是做甚的?
首先,从名字上来看,就应该能了解,这是结合react与redux一起来使用的
其次,是重点,它是用来连接react组件和store仓库的桥梁
OK,大致知道它们的作用了,那么直接开始搞起
无安装不建仓
// 安装 redux 和 react-redux
npm i redux react-redux --save
再常规不过的结构

如何用之
我们先以最简单的组件为例,看看组件和仓库是如何通过react-redux建立连接的
在components文件夹下创建一个Counter.js组件,就是为了做个加减的组件
// components/Counter.js文件
import React, { Component } from 'react';
export default class Counter extends Component {
constructor() {
super(); // 继承者们
this.state = { number: 0 };
}
render() {
return (<div>
<button>-</button>
{this.state.number}
<button>+</button>
</div>)
}
}
草草完事,就这样写完了Counter组件了,下面在index主入口文件里引入一下
// index.js入口文件
import React from 'react';
import { render } from 'react-dom';
import Counter from './components/Counter';
// 开始渲染了
// render方法第一个参数是要渲染的组件,第二个是目标节点
render(
<Counter />,
document.getElementById('root')
);
忘记说了,为了方便,我是用create-react-app脚手架创建的项目,所以先全局安装一下,然后再创建项目并启动该项目
npm i -g create-react-app
// 创建项目
create-react-app 项目名
// 启动
npm run start
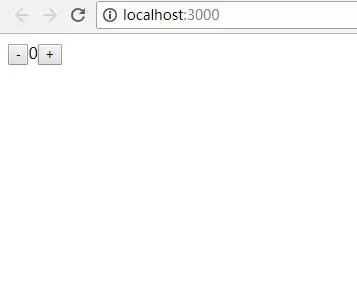
项目跑起来后看到的应该是这个样子的
下面就针对这个Counter组件来亲身使用一下redux & react-redux在项目里的使用情况吧
使用redux和react-redux
store目录下的结构就如最开始看到的,下面我再分析一下里面的内容都分别是有何用处的
actions目录
这里是放一些方法,就是在组件里方便调用的方法(更多的是请求数据的情况)
你也可以把这里当成是存数据用的地方也OK
reducers目录
这里就是用来取数据的地方了
action-types.js
定义各种组件需要的类型(如: INIT_DATA,GET_DATA,CHANGE_TYPE啊)
index.js
这里是真正用来创建仓库的地方
好了,那就赶紧写起来吧
The first, 先来定义action-types
// store/action-types.js
// Counter组件用到的types
export const ADD = 'ADD';
export const MINUS = 'MINUS';
action-types里定义的都是根据各组件的需要才定义的类型常量,属于一一对应的一种关系
The second, 再写一下关于actions动作的(就是应该做什么事)
// store/actions/counter.js
// 也是有固定套路的
import * as types from '../action-types';
// 返回一个包含不同类型的对象
export default {
add(count) { // 加数字
return {type: types.ADD, count};
},
minus(count) { // 减数字
return {type: types.MINUS, count};
}
}
由于Counter组件需要处理加减操作,所以在actions里的counter.js文件里来写下对应的执行方法来
Finnally,修改reducer并处理此动作
// store/reducers/counter.js
// 常规写法, reducer是个函数
// 引入你组件需要的type
import * as types from '../action-types';
// 初始化状态
const initState = { number: 0 };
function counter(state = initState, action) {
switch(action.type) {
case types.ADD:
return { number: state.number + action.count };
case types.MINUS:
return { number: state.number - action.count };
default:
return state;
}
return state;
}
export default counter;
reducer为什么这样写?
initState状态是为了在组件加载的时候第一次仓库里并没有state,所以为了防止undefined的报错情况,先给一个初始化状态的
initState虽然是个初始化状态,但这其实就是你组件所需要的数据结构,所以需要好好设计设计
action就是在actions目录里对应文件传递过来的状态,它长这个样子 {type: 'ADD', count}
counter里两个参数,state代表着过去的状态,action代表的是新的状态
之所以叫做reducer也是借鉴了数组的reduce方法,里面的两个参数和现在有异曲同工之妙
当然最重要的是,这个函数做的第一步就是把state状态返回出去
说最后有点为时过早了,我们还没有创建仓库呢
而且在创建之前还要整合一下reducer,因为这才一个counter,真实项目里还会根据不同的组件写出来不同的reducer呢
所以为了不冲突,我们利用redux提供的combineReducers方法来合并它们
合并reducer
在reducers里创建一个index.js文件,用来合并reducer
// combineReducers方法就是专门用来合并不同的reducer的
import { combineReducers } from 'redux';
// 引入关于Counter组件的reducer
import counter from './counter';
// 引入其他的reducer
import list from './list';
// 合并开始
export default combineReducers({
counter,
list // 其他的reducer
});
Let's Go 建仓吧
来到store目录下面的index.js中
// 引入redux提供的createStore方法来创建仓库
import { createStore } from 'redux';
// 引入所有用到的reducer
import reducer from './reducers';
const store = createStore(reducer);
export default store;
准备起飞
好了,这样就把仓库创建完毕了,下面是最后的连接过程了,回到Counter组件里去修改一下
// components/Counter.js
import React, { Component } from 'react';
+++
// react-redux提供了connect方法,它是个高阶函数
import { connect } from 'react-redux';
import actions from '../store/actions/counter';
+++
// export default不再直接默认导出Counter而是要写到下面,通过connect来实现高阶组件了(HOC)
class Counter extends Component {
render() {
// 通过mapStateToProps和mapDispatchToProps
// 将number状态还有add和minus方法都转化到了props属性上了
const { add, minus, number } = this.props;
return (<div>
<button onClick={() => minus(1)}>-</button>
{number}
<button onClick={() => add(2)}>+</button>
</div>)
}
};
+++
const mapStateToProps = state => {
console.log(state); // 长这样就是存的所有reducer:{counter: {number: 0}, list: {data: []}}
return {
number: state.counter.number
};
};
const mapDispatchToProps = dispatch => {
return {
add: (n) => dispatch(actions.add(n)),
minus: (n) => dispatch(actions.minus(n))
};
};
export default connect(
mapStateToProps,
mapDispatchToProps
)(Counter);
+++
写完上面的代码,就实现了把Counter组件与store仓库连接起来的操作了。最后的最后,我们就把index.js入口文件再修改一下,让所有组件都可以连接到store吧
奇迹即将发生
// index.js
import React from 'react';
import { render } from 'react-dom';
import Counter from './components/Counter';
+++
// Provider是个组件,有容乃大包容万物,不过只能有一个子元素
import { Provider } from 'react-redux';
import store from './store';
+++
// 开始渲染了
// render方法第一个参数是要渲染的组件,第二个是目标节点
render(
<Provider store={stroe}>
<React.Fragment>
{/* 如果有多个组件,就必须用React.Fragment组件来包裹,它不会产生多余的标签元素,和vue的template类似 */}
<Counter />
</React.Fragment>
</Provider>,
document.getElementById('root')
);
一切都安静了,看看最终的效果

看到这里我就把项目中使用redux及react-redux的过程叙述完毕了,当然上面的栗子也是比较简单的demo了
实际项目会比这样的操作起来稍微麻烦些,不过大同小异,学会举一反三都是能慢慢熟练运用起来的,下面再给大家看一下最近项目中我是如何书写的,写的不好仅供参考
只是为了让大家,慢慢领会,慢慢熟练,慢慢运用,慢慢越写越好
首先看一下效果图

此为链接地址,点击看看
下面我就跟大家说说我实现的思路(其实不难的,一起来看看吧)
付诸行动
看到上图所示,其实作为一个推荐列表来说,无非就是两个状态要做管理
切换分类(全城热搜、景点、美食、酒店tab的切换)
获取列表数据(根据不同分类获取对应数据)
先来写个action-types
在src目录下会创建一个store的文件夹,这里包含了actions,reducers,actions-types等需要的必备内容
// store/action-types.js
// 获取category列表
export const GET_RECOMMEND_LIST = 'GET_RECOMMEND_LIST';
// 切换category的type
export const CHANGE_CATEGORY = 'CHANGE_CATEGORY';
OK,需要的动作类型写好了,那就继续写actions了
actions对应动作(方法)
// store/actions/recommend.js
// 引入所有的types常量
import * as types from '../action-types';
// 请求列表数据
import { getPoiList } from '../../api';
// 默认导出一个对象
export default {
// 切换类型的方法()
changeCategory(params, data) {
let response;
// 如果当前的数据已经存在仓库中就不再发送请求
if (!data[params.category]) {
// 请求对应类型数据
response = getPoiList({ params });
}
return {
type: types.CHANGE_CATEGORY,
category: params.category,
key: params.keyword,
response
}
},
// 获取列表数据的方法
getRecommendList({params}) {
let data = getPoiList({ params });
return {
type: types.GET_RECOMMEND_LIST,
response: data,
params
}
}
}
好了,写到这里就把actions里的方法都写完了,就这么两个而已
changeCategory不仅仅做了切换tab的处理,还在切换的时候进行了请求上的优化
reducers里的recommend
// store/reducers/recommend.js
// 引入所有的types常量
import * as types from '../action-types';
// 初始化状态数据
const initState = {
pathname: '',
params: {},
loading: false,
data: {
hot: null,
food: null,
hotel: null,
scenic: null,
},
business: {},
category: 'hot',
key: '景点'
};
function recommend(state = initState, action) {
switch(action.type) {
case types.CHANGE_CATEGORY:
// 从action里拿到传递过来的数据
const { category, response, key, params } = action;
let newState = Object.assign({}, state, {
data: {
...state.data,
[action['category']]: response
}
});
return { ...state, ...newState };
case types.GET_RECOMMEND_LIST:
const { pathname, params, response = {}, loading = false } = action;
let newState = Object.assign({}, state, {
data: {
...state.data,
[category]: response // 将不同类型的数据一一对应起来,如food:{response:[]}
}
});
// 省略了一些处理广告数据的代码
return newState;
default:
return state;
}
return state;
}
export default recommend;
这样就写完了reducer了,其实在写多了之后,大家能稍微有点感悟了
其实上面的一顿操作,用三句话来说就是
定义常量类型(actions-types)
存数据(actions)
取数据处理数据(reducers)
好了,最后的时刻到了,直接让我们去看看在组件上是如何使用的吧
recommend组件连接仓库
在和store同级的目录中有一个components文件夹,这里放置一些常用的公共组件,recommend就是其中之一
下面就直接看看recommend是如何写的
// components/recommend/index.js
import React, { Component } from 'react';
import actions from '../../store/actions/recommend';
import { connect } from 'react-redux';
// 下面两个组件是用来下滑加载和loading的
import ScrollLoad from '../../common/ScrollLoad';
import Loading from '../../common/Loading';
// 列表数据渲染的组件
import List from './list';
import { CHANGE_CATEGORY, GET_RECOMMEND_LIST } from '../../store/action-types';
// 定义初始化的参数和tab列表数组方便渲染
const initParams = { keyword: '景点', category: 'hot' };
const navList = [
{ type: 'hot', name: '全城热搜', keyword: '景点' },
{ type: 'scenic', name: '景点', keyword: '风景名胜' },
{ type: 'food', name: '美食', keyword: '餐饮' },
{ type: 'hotel', name: '酒店', keyword: '酒店' }
];
class Recommend extends Component {
// 在willMount生命周期的时候先请求列表数据
componentWillMount() {
const { getRecommendList } = this.props;
// 初始化数据
getRecommendList({ params: initParams });
}
// 处理点击切换tab并回传给父组件修改keyword请求不同数据
handleClick = (event) => {
const { changeCategory, response } = this.props;
const { data } = response;
const category = event.target.dataset.category;
const keyword = event.target.dataset.keyword;
const obj = {
category,
keyword
};
// 修改对应类型
changeCategory(obj, data);
}
// 滑动操作处理
scrollHandle = ({ page, callback }) => {
const { getRecommendList, response } = this.props;
const { params, category, key, data } = response;
let batch = data[category] && data[category].page + 1;
const newParams = Object.assign({}, params, {
batch
});
newParams.category = category;
newParams.keyword = key;
// 加载数据
getRecommendList({ params: newParams }).then(() => {
callback();
});
}
render() {
const { response } = this.props;
const { params, data, category } = response;
const categoryData = data[category]; // 分类数据
let totalcount = categoryData && categoryData.totalcount;
// 列表项
const navItem = navList.map((item, i) =>
<li className={category === item.type ? 'active' : ''}
data-category={item.type}
data-keyword={item.keyword}
onClick={this.handleClick}
key={i}>{item.name}
</li>
);
return (
<div className='recommend'>
<ul className='recommend-nav'>{navItem}</ul>
{totalcount ? <ScrollLoad totalCount={totalcount} scrollHandle={this.scrollHandle}>
<List response={response} />
</ScrollLoad> : <Loading />}
</div>
);
}
}
const mapStateToProps = state => {
return {
response: state.recommend
}
};
const mapDispatchToProps = dispatch => {
return {
changeCategory: (params, data) => dispatch(actions.changeCategory(params, data)),
getRecommendList: ({params}) => dispatch(actions.getRecommendList({params})
}
};
export default connect(
mapStateToProps,
mapDispatchToProps
)(RecommendList);
以上就是大致完成了recommend推荐组件加上连接仓库的过程了,下面再看两张图来给大家说明一下

上图是刚进入页面的时候,初始化阶段
下图为切换分类的操作对应仓库里数据上的变化

好了,好了,写了这么多,大家看的也累了,感谢大家耐心的观看了。
对于学习,我们都要永不止步,感谢大家了,再见
关于奇舞周刊
《奇舞周刊》是360公司专业前端团队「奇舞团」运营的前端技术社区。关注公众号后,直接发送链接到后台即可给我们投稿。


 296
296


 被折叠的 条评论
为什么被折叠?
被折叠的 条评论
为什么被折叠?
 到【灌水乐园】发言


