


1.1、centos7
1.1.1、zabbix-server安装配置
l 环境说明:
防火墙:systemctl stop firewalld.service (临时关闭)
systemctl disable firewalld.service(永久关闭)
selinux:setenforce 0 (临时关闭)
sed -i 's/SELINUX=enforcing/SELINUX=disabled/g' /etc/selinux/config(重启生效)
环境要求:mysql5.0.3 or later
Apache1.3.2 or later
Php5.4.0 or later
l 安装
mysql-server
下载mysqlrepo源:
wget http://dev.mysql.com/get/mysql-community-release-el7-5.noarch.rpm
添加Yum Repository源:
rpm -ivh mysql-community-release-el7-5.noarch.rpm
验证是否添加成功:yum repolist enabled | grep "mysql"

安装mysql:yum install mysql-community-server -y
启动mysql:systemctl start mysql
设置密码:mysql_secure_installation
Zabbix3.2源:
rpm -ivh http://repo.zabbix.com/zabbix/3.2/rhel/7/x86_64/zabbix-release-3.2-1.el7.noarch.rpm
安装zabbix:yum install zabbix-server-mysql zabbix-web-mysql -y
创建zabbix数据库:mysql -uroot -p123456
create database zabbix character set utf8 collate utf8_bin;
grant all privileges on zabbix.* to zabbix@localhost identified by '123456';
flush privileges;
初始化zabbix数据库:
zcat /usr/share/doc/zabbix-server-mysql-3.2.8/create.sql.gz | mysql -uzabbix -p zabbix
zabbix-server数据库配置:vim /etc/zabbix/zabbix_server.conf
DBHost=localhost
DBName=zabbix
DBUser=zabbix
DBPassword=123456 #数据库密码
启动zabbix-server
systemctl start zabbix-server
启动报错:
Job for zabbix-server.service failed. See 'systemctl status zabbix-server.service' and 'journalctl -xn' for details.
原因: 缺少系统库文件trousers
解决方法:yum install trousers -y
systemctl enable zabbix-server
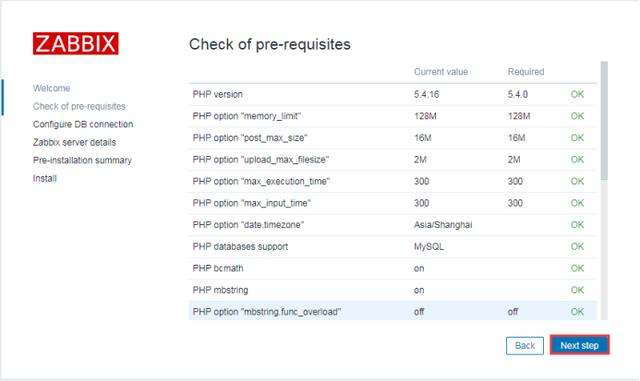
Php配置:vim /etc/php.ini
max_execution_time 300
memory_limit 128M
post_max_size 16M
upload_max_filesize 2M
max_input_time 300
always_populate_raw_post_data -1
date.timezone Asia/Shanghai
http配置:vim vim /etc/httpd/conf/httpd.conf
放开:ServerName www.example.com:80
启动: systemctl start httpd
开机启动:systemctl enable httpd
Web安装:http://192.168.6.10/zabbix/ (http://ip/zabbix)
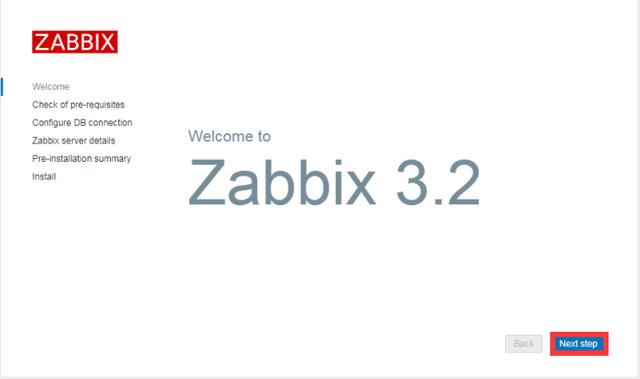
第一步:安装界面
第二步:PHP配置检查
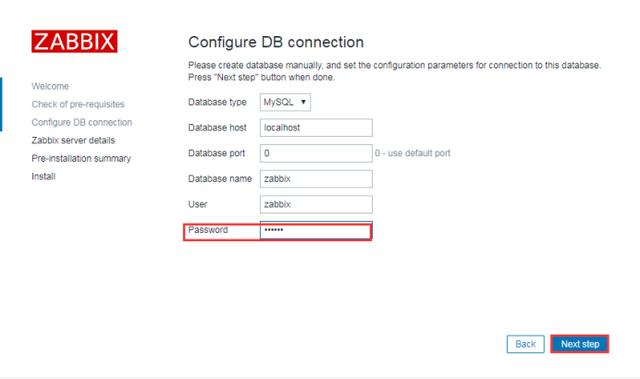
第三步:数据库配置
数据数据库地址、账号、密码
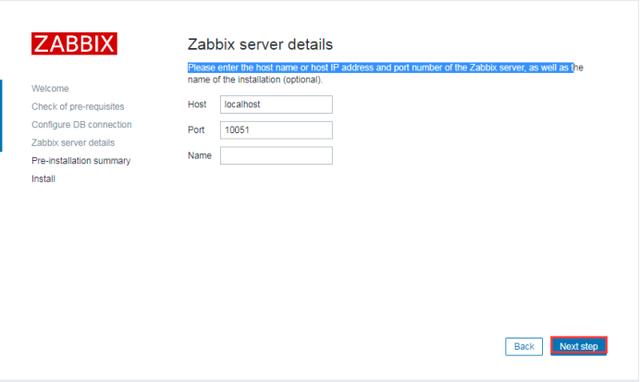
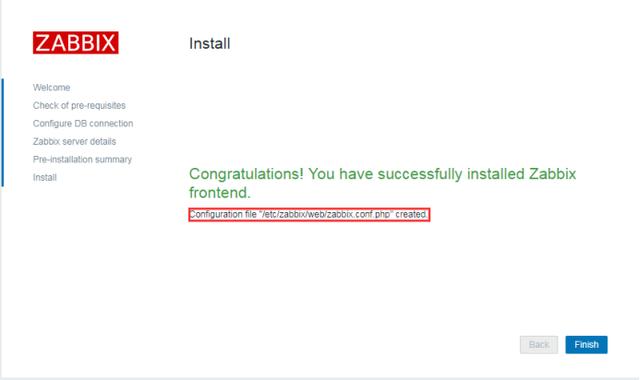
第四步:安装
第五步:注意web配置文件路径:/etc/zabbix/web/zabbix.conf.php
第六步:安装完成后,登录账号:Admin 密码:zabbix(默认)
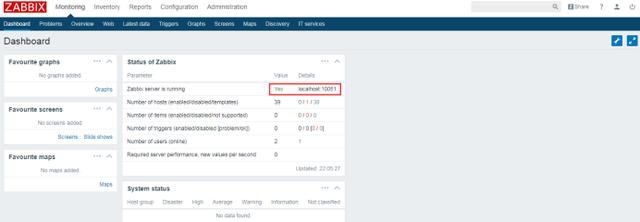
至此zabbix-server安装完成
1.1.2、zabbix-agent安装
centos7系统:
rpm -ivh http://repo.zabbix.com/zabbix/3.2/rhel/7/x86_64/zabbix-release-3.2-1.el7.noarch.rpm
yum install -y zabbix-agent
配置:vim /etc/zabbix/zabbix_agentd.conf
Server=127.0.0.1 #服务器ip地址
ServerActive=127.0.0.1 #主动模式服务器IP地址
Hostname=centos7.1 #注意主机名和zabbix-server的web平台配置名称相同
启动:systemctl start zabbix-agent
Systemctl enable zabbix-agent
Zabbix-server的web端配置:
注意hostname要和配置文件中相同
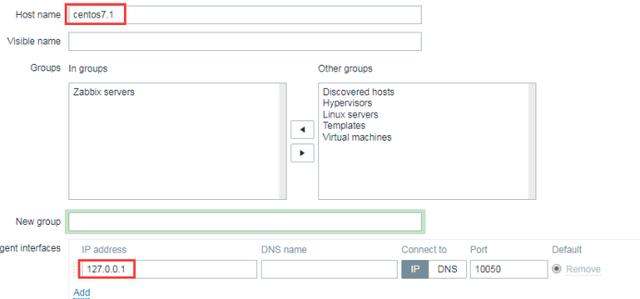
默认是disable的,点击“启用”即可,如下:

Centos6系统上面安装配置zabbix-agent:
说明:zabbix-server是3.2.8,agent版本是3的都可以,不过最好还是下载相同版本的
第一步:下载安装zabbix3.2.8 agent
wget http://repo.zabbix.com/zabbix/3.2/rhel/6/x86_64/zabbix-agent-3.2.8-1.el6.x86_64.rpm
rpm -ivh zabbix-agent-3.2.8-1.el6.x86_64.rpm
第二步:配置vim /etc/zabbix/zabbix_agentd.conf
Server=192.168.6.10 #服务器ip地址
ServerActive=192.168.6.10 #主动模式服务器IP地址
Hostname=centos6.8 #注意主机名和zabbix-server的web平台配置名称相同
第三步:启动zabbix-agent
/etc/init.d/zabbix-agent start
chkconfig zabbix-agent on
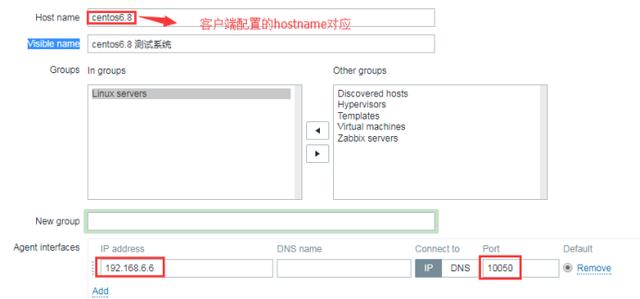
Zabbix-server的web端增加这台agent:Configuration->Hosts->create host,
Host name:centos6.8 #和配置文件hostname对应
Visible name:自定义容易区分的名字
Group:Linux servers
Ip address:agent IP地址
Port:10050 #客户端端口
Templates:选择Template OS Linux,完成后添加
等待一会,可以看到这台agent显示的状态,

总结:zabbix-server部署需要lamp或者lnmp环境,server端口是10051,agent端口是10050,注意防火墙和selinux开放对应的端口。


 2168
2168


 被折叠的 条评论
为什么被折叠?
被折叠的 条评论
为什么被折叠?
 到【灌水乐园】发言


