


 本文详细介绍了在Mac上安装Homebrew的过程,包括解决安装时的网络问题,更换国内镜像源以提高速度,以及后续安装依赖环境如pkg-config、SDL2、Qt5、CMake等。最后,通过Git克隆citra-emu/citra源代码,并使用CMake编译,完成citra模拟器的安装。
一、安装Homebrew
终端输入
/usr/bin/ruby -e "$(curl -fsSL https://raw.githubusercontent.com/Homebrew/install/master/install)"若报错
curl: (7) Failed to connect to http:// raw.githubusercontent.com port 443: Connection refused
直接下载文件brew_install.rb
链接: https://pan.baidu.com/s/1BONMlbkwWcuBqy3BHgWvyg 提取码: uvxn
终端运行
ruby [把brew_install.rb拖入]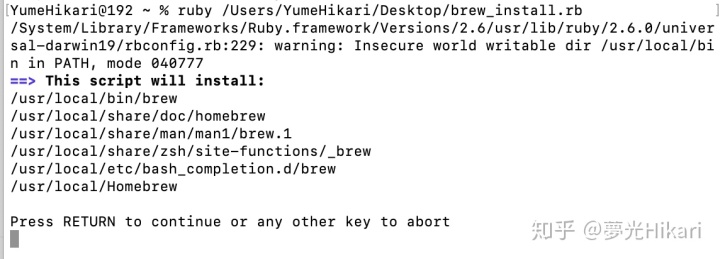
回车继续之后输入密码,密码是隐藏起来的,输入之后回车就好。
二、Homebrew更换国内镜像源
替换brew.git:
$ cd "$(brew --repo)"
中科大:
$ git remote set-url origin https://mirrors.ustc.edu.cn/brew.git
清华:
$ git remote set-url origin https://mirrors.tuna.tsinghua.edu.cn/git/homebrew/brew.git

替换homebrew-core.git:
$ cd "$(brew --repo)/Library/Taps/homebrew/homebrew-core"

中科大:
$ git remote set-url origin https://mirrors.ustc.edu.cn/homebrew-core.git

清华:
$ git remote set-url origin https://mirrors.tuna.tsinghua.edu.cn/git/homebrew/homebrew-core.git


替换homebrew-bottles:

中科大:
$ echo 'export HOMEBREW_BOTTLE_DOMAIN=https://mirrors.ustc.edu.cn/homebrew-bottles' >> ~/.bash_profile
$ source ~/.bash_profile

清华:
$ echo 'export HOMEBREW_BOTTLE_DOMAIN=https://mirrors.tuna.tsinghua.edu.cn/homebrew-bottles' >> ~/.bash_profile

$ source ~/.bash_profile

应用:
$ brew update
————————————————
版权声明:本文为CSDN博主「膨胀权」的原创文章,遵循CC 4.0 BY-SA版权协议,转载请附上原文出处链接及本声明。
原文链接:https://blog.csdn.net/d940319760/java/article/details/94446136
三、安装依赖环境
1.pkg-config
brew install pkgconfig2.SDL2
brew install sdl23.Qt5
brew install qt54.CMak
brew install cmake5.最新版本的Xcode和Xcode命令行工具
Xcode从App Store直接安装
Xcode命令行工具终端运行命令行:
xcode-select --install(若显示xcode-select: error: command line tools are already installed, use "Software Update" to install updates,这说明已经安装过)
四、安装citra
1.从Github上clone下源代码
git clone --recursive https://github.com/citra-emu/citra
cd citra
2.让CMake识别Qt5的安装路径
export Qt5_DIR=$(brew --prefix)/opt/qt53.创建需要的项目文件
mkdir build
cd build
cmake .. -DCMAKE_OSX_ARCHITECTURES="x86_64;x86_64h" -DCMAKE_BUILD_TYPE=Release
4.大功告成
make -j4运行完毕之后citra-qt.app 就会在build/bin下。
参考
[1]如何在Mac上(编译)运行3DS模拟器_无聊P_新浪博客
[2]Mac安装homebrew报错curl: (7) Failed to connect to raw.githubusercontent.com port 443: Operation
[3]Mac Homebrew 如何更换国内镜像源
[4]Xcode中Command Line Tools安装方法
[5]Building for macOS · citra-emu/citra Wiki · GitHub


 1325
1325

 被折叠的 条评论
为什么被折叠?
被折叠的 条评论
为什么被折叠?
 到【灌水乐园】发言


